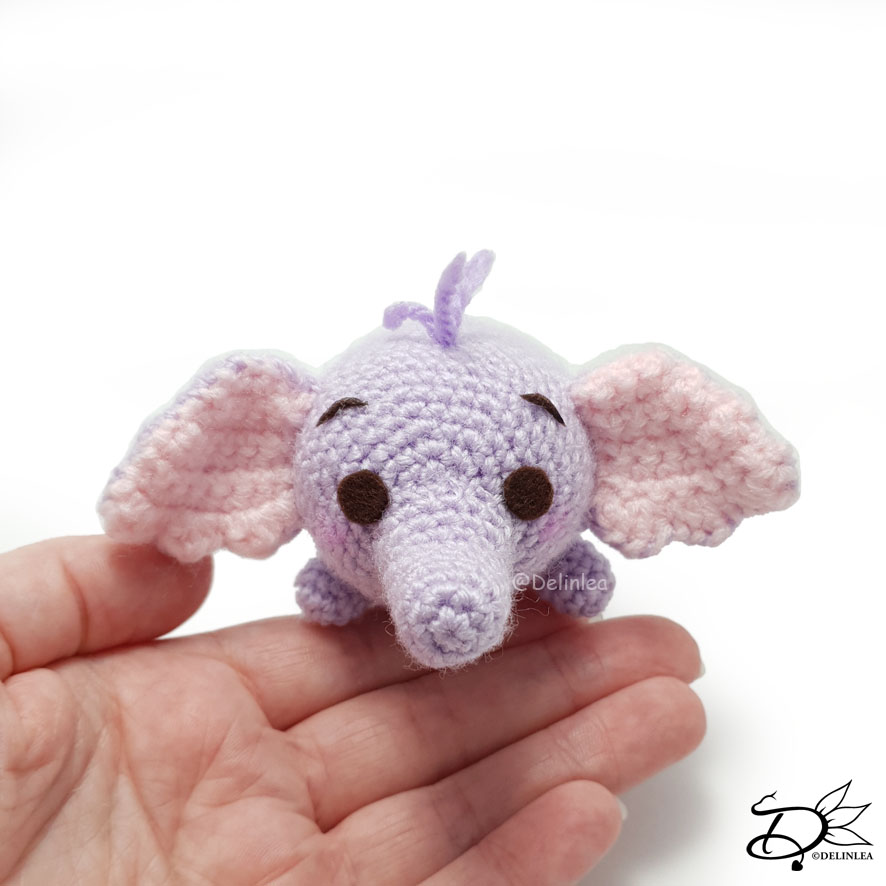
♥ Lumpy Tsum Tsum Amigurumi
Hey Lovelies! How are you doing today, I hope you are well! Since yesterday we can go to a store without appointment, and it was weird. And then I was like, since when it’s weird to just walk into a store?! It’s ridiculous how fast we get used to some restrictions. But, Yeah, I guess that’s what 4,5month of lockdown does. Anyway, let’s go to the fun part of this blog, are you ready to make a Lumpy Tsum Tsum. He’s from Winnie the Pooh and so cute. I hope you will like this amigurumi pattern.
For this Pattern you’ll need:
♥ Yarn in the colors Light Purple, Purple and Light Pink. (I used Zeeman Supersoft)
♥ Crochet Hook (I used a 2 mm hook).
♥ Stuffing.
♥ Scissors.
♥ Stitch Markers.
♥ Sewing Pins.
♥ Yarn Needle.
♥ Felt for the facial details.
♥ (Fabric) Glue.
Stitches used (US Terms):
Magic Ring.
CH = Chain.
SLST = Slip Stitch.
SC = Single Crochet.
HDC = Half Double Crochet.
DC = Double Crochet.
ST = Stitch.
Inc = Increase.
Dec = Decrease.
(…) = Repeat the space in brackets the given number of times.
[…] = Total number of stitches.

Pattern Lumpy
This pattern is made using continues rounds, unless stated otherwise. Use a stitch marker to mark the first stitch.
Body
Use the color Light Purple.
1: 6SC in a Magic Ring. [6]
2: 2SC in each st around. [12]
3: (1SC, inc) 6 times. [18]
4: (2SC, inc) 6 times. [24]
5: (3SC, inc) 6 times. [30]
6: (4SC, inc) 6 times. [36]
7: (5SC, inc) 6 times. [42]
8-29: 42SC. [42]
30: (5SC, dec) 6 times. [36]
31: (4SC, dec) 6 times. [30]
32: (3SC, dec) 6 times. [24]
33: (2SC, dec) 6 times. [18]
Stuff the body here.
34: (1SC, dec) 6 times. [12]
25: Dec around. [6]
Fasten off and weave in tail.
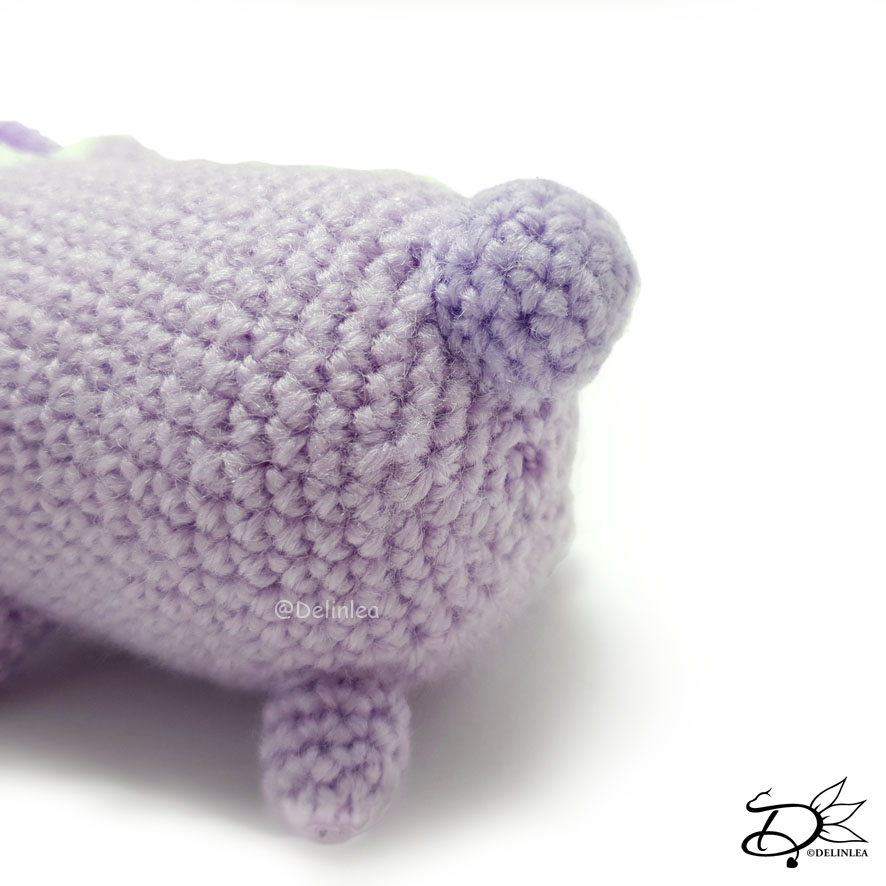
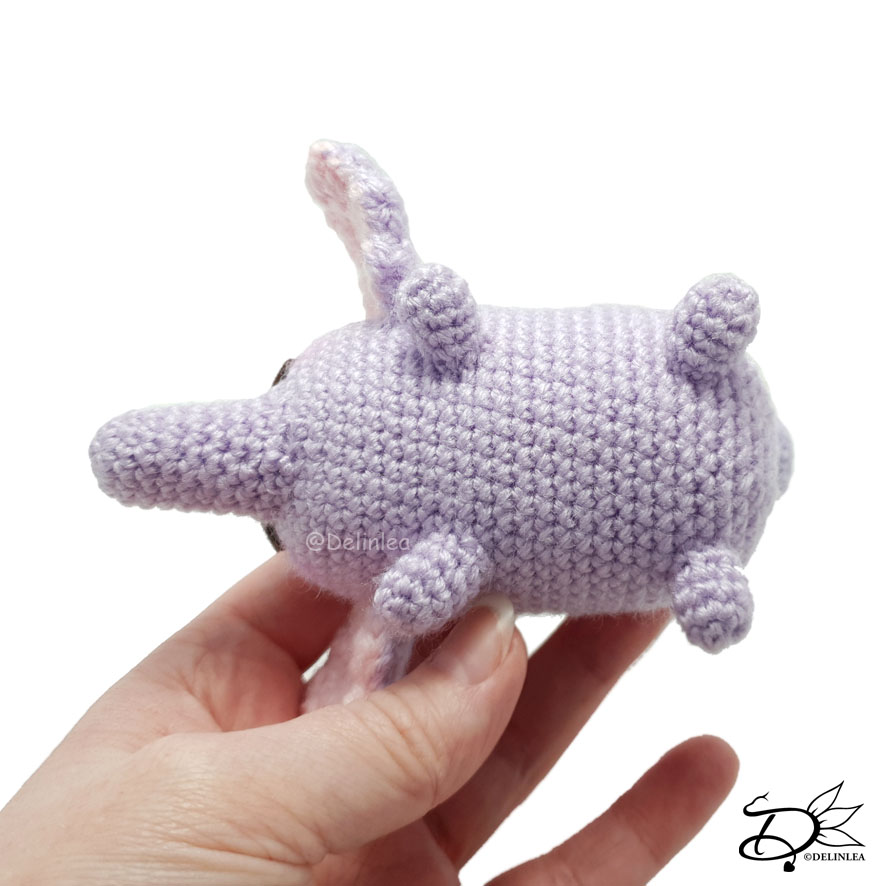
Legs (Make 4)
Use the color Light Purple.
1: 4SC in a Magic Ring. [4]
2: 2SC in each st around. [8]
3-5: 8SC. [8]
Fasten off and leave a long tail for sewing.
Tail
Use the color (Light) Purple. Depends on what color you like it to give.
1: 6SC in a Magic Ring. [6]
2: 2SC in each st around. [12]
3: 12SC. [12]
4: 12SC. [12]
5: (4SC, dec) 2 times. [10]
Fasten off and leave a long tail for sewing. Stuff lightly.
Trunk
Use the color Light Purple.
1: 6SC in a Magic Ring. [6]
2: 2SC in each st around. [12]
3-8: 12SC. [12]
9: (3SC, inc) 3 times. [15]
10: 15SC. [15]
Fasten off and leave a long tail for sewing. Stuff lightly.
Ears (Make 4)
Make 2 in the color Light Purple and 2 in the color Light Pink.
This part won’t be made with continues rounds.
1: Ch5, insert in second ch from hook, 4SC, turn. [4]
2: 3SC, inc, turn. [5]
3: Inc, 4SC, turn. [6]
4: 5SC, inc, turn. [7]
5-7: 7SC, turn. [7]
8: (1SC, HDC+DC+HDC in the next st) 3 times, 1 sc. [13]
Fasten off and leave a long tail for sewing.
Assembling
Whenever I start assembling an Amigurumi, I use sewing pins first to put everything together. This way I can move all parts around easily until I am happy with how it looks. Then I will sew it on. I recommend you do so as well.
Before you start, sew the 2 parts, 1 Light Purple and 1 Pink, of the ears together, along the edge. Keep in mind that you make 2 mirrored ears, so the pink is able to face forward when you sew them to the body.
Start with sewing on Lumpy his trunk, just under the middle of his face. Next, position his ears and attach those well. Then sew on his legs and tail. With a few pieces of purple yarn you create some hair on top of his head.
And that’s it for this adorable Lumpy Tsum Tsum, I hope you had fun making it! If you did, make sure to show me on Twitter of Instagram with #DelinleaDIY, I’d love to see what you created with my patterns!
Have a wonderful day!
Love
Danielle
PS. if you love those Tsum Tsum patterns, maybe you’d like to support me on Ko-Fi?! So I can keep making content like this!
// ©2021 Delinlea / Danielle Kaal // Items made with this pattern may be sold in a limited number. Credit to ‘Delinlea’ is appreciated. Not allowed for mass production or commercial purposes. You may not reproduce, translate, share, freely distribute or sell this pattern as your own in digital or printed from.