Delinlea - My little fantasy world
  • ♥ Home
  • ♥ About Me
  • ♥ Blogmas 2018
  • ♥ Free Patterns
    • ♥ Amigurumi Tsum Tsum
    • ♥ Amigurumi Ufufy
    • ♥ Amigurumi Pokemon
    • ♥ Amigurumi Others
    • ♥ Christmas Countdown 2017
  • ♥ Tutorials
    • ♥ Easter
    • ♥ Home Deco
    • ♥ Others
  • ♥ Gallery
    • ♥ Crafts
    • ♥ Drawings
    • ♥ Poseable Art Dolls
  • ♥ Links
  • ♥ Contact

Free Pattern

♥ Day 13; Jirachi Felt Ornament

13 december 2018 by Delinlea Leave a Comment

Hey Lovelies! It’s day 13 of Blogmas! Having fun so far?! Have you made anything yet?! For today I planned another felt ornament! It’s time for Jirachi! I kept him as he is, why cause he is already a star haha xD. Let’s do this.

For this DIY you’ll need:
♥  Felt in the colors Yellow, White and Blue.
♥  Sewing thread in matching colors to the felt.
♥  Sewing Needle.
♥  Trick Marker or anything else where you can copy the pattern with on to your felt.
♥  Pattern.
♥  Scissors.
♥  Stuffing.
♥  Fabric Glue. (optional)
♥  Acryllic Paint in Black, Red, White and Blue.(optional, you can use felt instead if you like)

DIY

First off all, download the pattern HERE! And print it out (or draw it from your screen). The good thing is, you can make it as big as you want! Then cut out all the pieces. On every piece is stated how many times you need to cut it out of felt.

Now cut out all the parts from felt. Part A, B, C, F and G out of Yellow. Part D and E from white felt and Part H out of Blue felt.

Place parts D on part A and B. Just like the pic has shown, you can either glue this on like I did, or sew it on.

Put these 2 parts on top of each other and sew them together with a blanket stitch. Start sewing the yellow part, stuff this. And then do the white part and before entirly closing, stuff the body as well.

Attach part C to the head now with either glue or sew it on. Do the same for parts H, F and G.

Don’t forget to give him a face! I used paint as usual, but you can use felt if you prefer! Do what feels right for you!

And he is finished already! Much easier as you would think right?! I hope you had fun and will make him too~. If you did, share it with me, #DelinleaBlogmas2018DIY or #DelinleaDIY.

Have a lovely day and I’ll see you tomorrow!

Love
Danielle

Posted in: Blogmas 2018, Christmas, Pokemon Tagged: blogmad 2018, DIY, felt ornament, Free Pattern, jirachi, Pokemon

♥ Day 9; Chikorita Felt Ornament

9 december 2018 by Delinlea Leave a Comment

Hey Lovelies! It’s day 9 of Blogmas 2018! I love making those cute felt ornaments so I planned another one for today! It’s Chikorita’s turn! He needed some warmth so he’s wearing a scarf! ^_^

For this DIY you’ll need:
♥  Felt in the colors Light Green, Green and Red(white optional).
♥  Sewing thread in matching colors to the felt.
♥  Sewing Needle.
♥  Trick Marker or anything else where you cancopy the pattern with onto your felt.
♥  Pattern.
♥  Scissors.
♥  Stuffing.
♥  Fabric Glue. (optional)
♥  Acryllic Paint in white and Red (optional)

DIY

First off all, download the pattern HERE! And print it out(or draw it from your screen). The good thing is, you can make it as big as you want! Then cut out all the pieces. On every piece is stated how many times youneed to cut it out of felt.

Cut all the pieces out of felt. Part A out of Light Green,Part B out of Green Felt, Part C, D and E out of Red felt. The eyes and mouthyou can either choose to make them out of Felt or paint them on like I did.Depends on what you want.

Sew parts A together with a Blanket stitch. There are some lines in the body that continue, use a running stitch to make those lines, and go back the same way.

With a running stitch you’ll make the details in the leave (part B). After that, you’ll glue or sew it to Chikorita’s head.

Then it’s time to put on his scarf, I glued all pieces on, only on the sides of parts C I used a blanket stitch.

Last but not least, paint on his eyes and Mouth. Or if you chose to make them out of felt, do that now.

And another ornament is done! This one we can add to our collection! And if you made one, don’t forget to share with #DelinleaBlogmas2018DIY or #DelinleaDIY on Twitter or Instagram, so I can see^^

Love
Danielle

Posted in: Blogmas 2018, Christmas, Pokemon Tagged: blogmas 2018, chikorita, Christmas, felt, Free Pattern, ornament, Pokemon

♥ Day 7; Ditto Felt Ornament

7 december 2018 by Delinlea Leave a Comment

Hey Lovelies! It’s day 7 of Blogmas! What do you think of blogmas so far, with all those Pokémon?! It’s time for a new ornament! Today we will make a Ditto who has gotten in trouble with the lights. Instead of decorating the tree, he decorated himself xD. So cute!

For this DIY you’ll need:
♥  Felt in the colors Pink, Red and Green.
♥  Sewing thread in matching colors to the felt.
♥  Sewing Needle.
♥  Trick Marker or anything else where you can copy the pattern with onto your felt.
♥  Pattern.
♥  Scissors.
♥  Stuffing.
♥  Fabric Glue. (optional)
♥  Acryllic Paint in Black.
♥ about 50 cm of black yarn.

DIY

First off all, download the pattern HERE! And print it out (or draw it from your screen). The good thing is, you can make it as big as you want! Then cut out all the pieces. On every piece is stated how many times you need to cut it out of felt.

Copy all te pieces to felt, part A you’ll cut out of Pink felt. Part B you’ll cut out of green and red felt. About 14 times total. You can do more or less, or use other colors for the light. But red and green always gives me that Christmassy feeling.

When you’ve done that it’s time to sew both parts A to each other. Use a Blanket stitch to do so. Before almost completely closing it up, make sure you stuff the body.
After finishing sewing the body, paint on the face of ditto with some black paint.

Now the fun part, wrap ditto in the black yarn. You can do this however you like, and how much yarn you use is up to you, 50 cm is probably too much. You can glue the yarn to ditto if you like, or just in some places, or even just the start and ending point.

Time for the lights! glue this here and there to the black yarn. Just do this random, to spots you like.

And you are already done! This is a pretty quick one, but I love it so much! I hope you do to, and make him as well. And if you do so, don’t forget to show me with #DelinleaBlogmas2018DIY on twitter or Instagram.

Have a lovely day, and I’ll see you tomorrow again!

Love
Danielle


Posted in: Blogmas 2018, Christmas, Pokemon Tagged: blogmas 2018, Christmas, ditto, DIY, Free Pattern, Pokemon

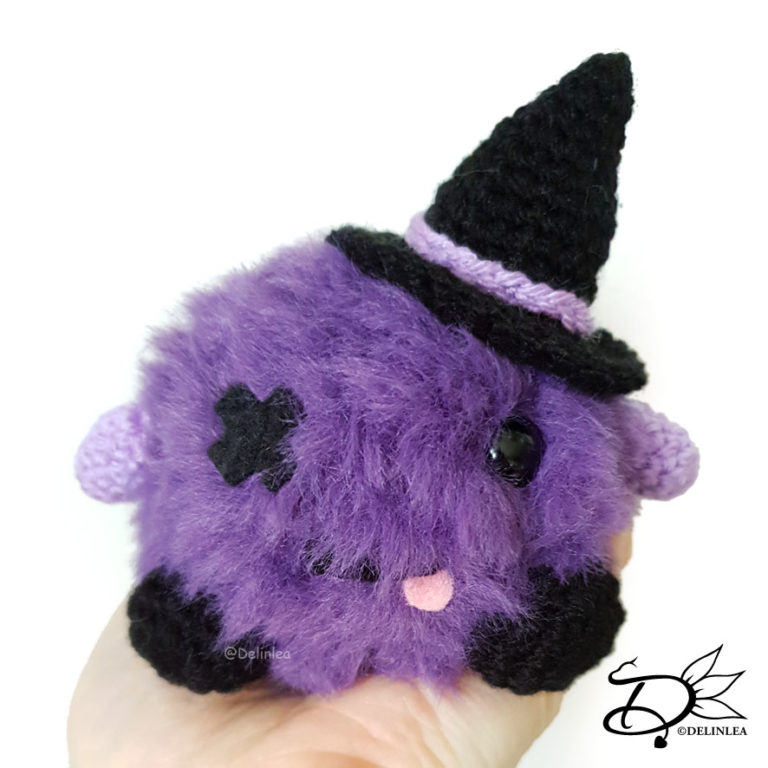
♥ Amigurumi Witch Ghost

11 oktober 2018 by Delinlea Leave a Comment

Hey Lovelies! I’m a bit late with today’s post, I know, I’m Sorry! But here it is finally~~. Today we are gonna make a Witch Ghost, the last one in the series together with the Pumpkin Ghost en the Ghost. I made it cute, obvisiously, but I think if you change up de face, it can be a scary one as well. Have fun!

For this DIY you will need:
♥  Yarn, in Beige, Orange, Purple and Black.
♥  Crochet hook.
♥  Stitch marker.
♥  Yarn Needle.
♥  Sewing Pins. (optional)
♥  Fiber fill.
♥  Felt in Black.
♥  Scissors.
♥  Glue.

Stitches used (US):
CH = Chain.
SC = Single Crochet.
DC = Double Crochet.
ST = Stitch.
Inc = Increase.
Dec = Decrease.
Slst = Slip Stitch.
FL = Front Loop.
(…) = Repeat the space in brackets the given number of times.
[…] = Total number of stitches.

Pattern

Head
Use the color Beige.

1: 6SC in Magic Ring. [6]
2: 2SC in each st around. [12]
3: (1SC, inc) 6 times. [18]
4: (2SC, inc) 6 times. [24]
5: (3SC, inc) 6 times. [30]
6: 30SC. [30]
|
11: 30SC. [30]
12: (3SC, dec) 6 times. [24]
13: (2SC, dec) 6 times. [18]
14: (1SC, dec) 6 times. [12]
15: dec all around. [6]
Fasten off and weave in tail.

Granny Square
Start with the color Black. You start each row with 2CH, this counts as the first DC. Use SlSt after every row to go to the next ch space.

1: (3DC, CH2) 4 times in Magic Ring. [4ch space, 12DC]
2: (3DC, CH2, 3DC, CH1) 4 times. [8ch space, 24DC]
3: (3DC, CH2, (3DC, CH1) 2 times.) 4 times. [12ch space, 36DC]
4: (3DC, CH2, (3DC, CH1) 3 times.) 4 times. [16ch space, 48DC]
5: (3DC, CH2, (3DC, CH1) 4 times.) 4 times. [20ch space, 60DC]
6: (3DC, CH2, (3DC, CH1) 5 times.) 4 times. [24ch space, 72DC]
7: (3DC, CH2, (3DC, CH1) 6 times.) 4 times. [28ch space, 84DC]
8: (3DC, CH2, (3DC, CH1) 7 times.) 4 times. [32ch space, 96DC]
Change to the color Purple.
9: (3DC, CH2, (3DC, CH1) 8 times.) 4 times. [36ch space, 108DC]
Fasten off and weave in tail.

Witch hat
Start with the color Black.

1: 4SC in Magic Ring. [4]
2: (1SC, inc) 2 times. [6]
3: (1SC, inc) 3 times. [9]
4: (2SC, inc) 3 times. [12]
5: (3SC, inc) 3 times. [15]
6: (4SC, inc) 3 times. [18]
7: (5SC, inc) 3 times. [21]
8: 21SC. [21]
9: (6SC, inc) 3 times. [24]
Change to the color Black.
10: (7SC, inc) 3 times. [27]
11: (8SC, inc) 3 times. [30]
Change back to the color Purple.
12: Work in front loops only, (2SC, inc) 10 times. [40]
13: 40SC. [40]
14: 40SC. [40]
Fasten off and weave in tail.

Assembling

Sew the granny square to the head. With orange yarn, create ‘hair’ between row 5 and 6 of the head. I did just one row, and not a full circle, but you can make it however you like.
Make a loop on the witch hat and place the hat on the head, if you are happy with the look, sew it on.
Cut some eyes and mouth out of black felt en glue this on the face.

And you are done!! I hope you enjoyed this pattern. This is the last one of these series! I hope you enjoyed all 3 of them. And don’t forget to show me yours if you made it, use the #DelinleaDIY on instagram or twitter!

Love
Danielle


Posted in: Crafting, Crochet Tagged: Amigurumi, Autumn, Crochet, fall, Free Pattern, ghost, haken, Halloween, Witch

♥ Amigurumi Pumpkin Ghost

27 september 2018 by Delinlea Leave a Comment

Hey Lovelies! It’s Thursday again and that means time for a new DIY. Is it too early to make Halloween decorations already?! Oh well, you can never start early enough xD. But you can use this one as fall decoration as well, so who cares xD. Today we are going to make a pumpkin ghost. It’s cute, believe me.

For this DIY you will need:
♥  Yarn, in Orange, Black and Green.
♥  Crochet hook.
♥  Stitch marker.
♥  Yarn Needle.
♥  Sewing Pins. (optional)
♥  Fiber fill.
♥  Felt in Black.
♥  Scissors.
♥  Glue.

Stitches used (US):
CH = Chain.
SC = Single Crochet.
DC = Double Crochet.
ST = Stitch.
Inc = Increase.
Dec = Decrease.
Slst = Slip Stitch.
FL = Front Loop.
(…) = Repeat the space in brackets the given number of times.
[…] = Total number of stitches.

Pattern

Pumpkin
Use the color Orange.

1: 8SC in Magic Ring. [8]
2: 2SC in each st around. [16]
3: (1SC, inc) 8 times. [24]
4: (2SC, inc) 8 times. [32]
5: (3SC, inc) 8 times. [40]
6: 40SC. [40]
|
13: 40SC. [40]
14: (3SC, dec) 8 times. [32]
15: (2SC, dec) 8 times. [24]
16: (1SC, dec) 8 times. [16] Stuff the Pumpkin here.
17: dec all around. [8]
Fasten off and leave a very long tail. Use this tail to go through the middle and around, and pull tight to get those parts of the typical Pumpkin look. you can do this as many times as you want, I did about 8 times.

Granny Square
Start with the color Orange. You start each row with 2CH, this counts as the first DC. Use SlSt after every row to go to the next ch space.

1: (3DC, CH2) 4 times in Magic Ring. [4ch space, 12DC]
2: (3DC, CH2, 3DC, CH1) 4 times. [8ch space, 24DC]
3: (3DC, CH2, (3DC, CH1) 2 times.) 4 times. [12ch space, 36DC]
4: (3DC, CH2, (3DC, CH1) 3 times.) 4 times. [16ch space, 48DC]
5: (3DC, CH2, (3DC, CH1) 4 times.) 4 times. [20ch space, 60DC]
6: (3DC, CH2, (3DC, CH1) 5 times.) 4 times. [24ch space, 72DC]
7: (3DC, CH2, (3DC, CH1) 6 times.) 4 times. [28ch space, 84DC]
8: (3DC, CH2, (3DC, CH1) 7 times.) 4 times. [32ch space, 96DC]
Change to the color Green.
9: (3DC, CH2, (3DC, CH1) 8 times.) 4 times. [36ch space, 108DC]
Fasten off and weave in tail.

Witch hat
Start with the color Green.

1: 4SC in Magic Ring. [4]
2: (1SC, inc) 2 times. [6]
3: (1SC, inc) 3 times. [9]
4: (2SC, inc) 3 times. [12]
5: (3SC, inc) 3 times. [15]
6: (4SC, inc) 3 times. [18]
7: (5SC, inc) 3 times. [21]
8: 21SC. [21]
9: (6SC, inc) 3 times. [24]
Change to the color Black.
10: (7SC, inc) 3 times. [27]
11: (8SC, inc) 3 times. [30]
Change back to the color Green.
12: Work in front loops only, (2SC, inc) 10 times. [40]
13: 40SC. [40]
14: 40SC. [40]
Fasten off and weave in tail.

Assembling.

Sew the granny square to the bottom on the pumpkin.
Make a loop on the witch hat and place the hat on the pumpkin, if you are happy with the look, sew it on.
Cut some eyes and mouth out of black felt en glue this on the pumpkin.

And you are done!! I hope you enjoyed this pattern. This will be a series of 3, so, look forward for the other 2. And don’t forget to show me yours if you made it, use the #DelinleaDIY on instagram or twitter!

Love
Danielle

Posted in: Crafting, Crochet Tagged: Amigurumi, Autumn, Crochet, cute, decoration, DIY, fall, Free Pattern, ghost, haken, kawaii, pumpkin
1 2 3 4 5 6 7 Volgende »

Ko-Fi

I love making all these free things for you, tho it would be very helpfull if you can support me on here. (You don’t have to tho, totally up to you!)

Get Notified by E-mail

Enter your email address to follow this blog and receive notifications of new posts by email.

Load More...Follow on Instagram

Meest recente berichten

  • ♥ Free Pattern; Succulent Heart
  • ♥ Happy New Year!
  • ♥ Blogmas 2018 Stops
  • ♥ Day 15; Popplio Felt Ornament
  • ♥ Day 14; Pokeball Snowglobe Terrarium

Recente reacties

  • Naomi Besselsen op ♥ Sea Wave Mosiac Triangular Scarf
  • Marleen op ♥ Blogmas 2018 Stops
  • Domi op ♥ Pua Tsum Tsum Amigurumi
  • Delinlea op ♥ Amigurumi Ghost
  • Sandra op ♥ Amigurumi Ghost

Archief

  • februari 2019
  • december 2018
  • november 2018
  • oktober 2018
  • september 2018
  • augustus 2018
  • juli 2018
  • juni 2018
  • mei 2018
  • april 2018
  • maart 2018
  • februari 2018
  • januari 2018
  • december 2017
  • november 2017
  • september 2017
  • juli 2017
  • juni 2017
  • januari 2017
  • februari 2016
  • december 2015
  • september 2015
  • juni 2015

Categorieën

  • Beadwork
  • Blogmas 2018
  • Bujo
  • Christmas
  • Christmas Countdown 2017
  • Contest
  • Crafting
  • Crochet
  • Drawing
  • Easter
  • Geen categorie
  • Miniature
  • Paper
  • plush
  • Pokemon
  • Poseable Art Doll
  • Recipe
  • Social Media
  • Tsum Tsum
  • Ufufy

Copyright © 2019 Delinlea - My little fantasy world.

Family WordPress Theme by themehall.com