Delinlea - My little fantasy world
  • ♥ Home
  • ♥ About Me
  • ♥ Blogmas 2021
  • ♥ Free Patterns
    • ♥ Amigurumi; Spring/Easter
    • ♥ Amigurumi; Fall/Halloween
    • ♥ Amigurumi; Winter
    • ♥ Amigurumi Tsum Tsum
    • ♥ Amigurumi Ufufy
    • ♥ Amigurumi Others
    • ♥ Christmas Countdown 2017
    • ♥ Blogmas 2018
    • ♥ Blogmas 2020
  • ♥ Tutorials
    • ♥ Easter
    • ♥ Home Deco
    • ♥ Others
  • ♥ Drawing Lessons
  • ♥ FanFic
    • ♥ Chapter 1
    • ♥ Chapter 2
    • ♥ Chapter 3
    • ♥ Chapter 4
    • ♥ Chapter 5
    • ♥ Chapter 6
    • ♥ Chapter 7
  • ♥ Gallery
    • ♥ Crafts
    • ♥ Drawings
    • ♥ Poseable Art Dolls
  • ♥ Links
  • ♥ Contact

Drawing Lesson

♥ Drawing Lesson 5; Colored Pencils

12 september 2019 by Delinlea Leave a Comment

Hey Lovelies! Today I wanted to write the last drawing lesson of the year, since my favorite season is approaching fast now. I have so much stuff I wanna blog about so I will set this one as the last drawing lesson. I am not sure if I will pick it up next year, depends also if people wanna see more lessons/tips. Let me know down below!
Today I wanted to cover colored pencils. It’s like the next step after graphite. Just like myself, I was scared of using them when just starting out.

Faber Castell Polychromos!

Scary

Most people who start drawing, start with graphite. At a certain point you want more, experiment with other materials. Often artists choose colored pencil next, just like me. But, when I just wanted to start with colors, I got scared of using them. I mean, they look really intimidating, so many colors to choose from. Where the heck do you start?!

What to do

What I did, to overcome my fear. Just limit your amount of colors you wanna use, just to get used to draw with them. Pick basic colors, like for skin, a light color, medium and dark color. This way you can give yourself some space and not get stressed of which color to use next, just focus on shadows and highlights. Just like you would with graphite. When you get used to them you can add more colors and play around to see what works best for the subject you are drawing. It can sometimes surprise you what colors you would use in a certain subject.

Practice

Practice is the only way to get better. Just keep going and it’s okay if you mess up, because from your mistakes you can learn. Sometimes it is better to practice with colored pencils, to play around with them, in some easier shapes, draw some circles on paper and try to make them look 3D, as if they will pop off the paper.

New colored pencils

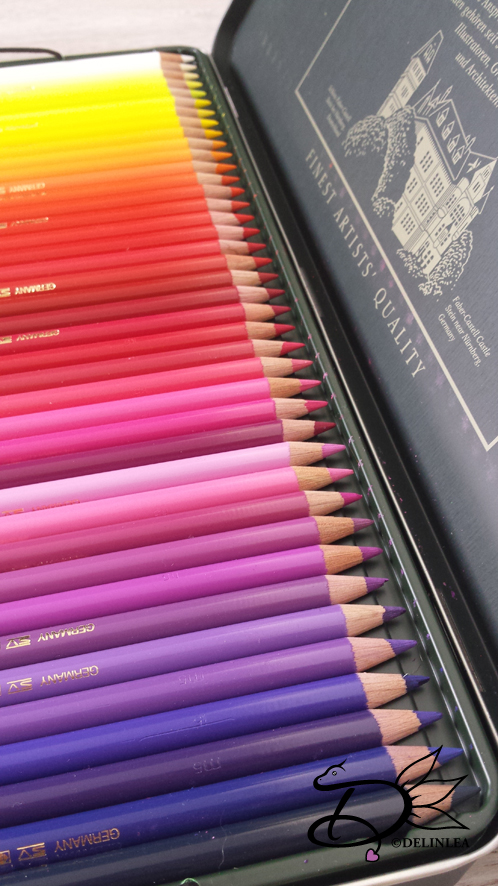
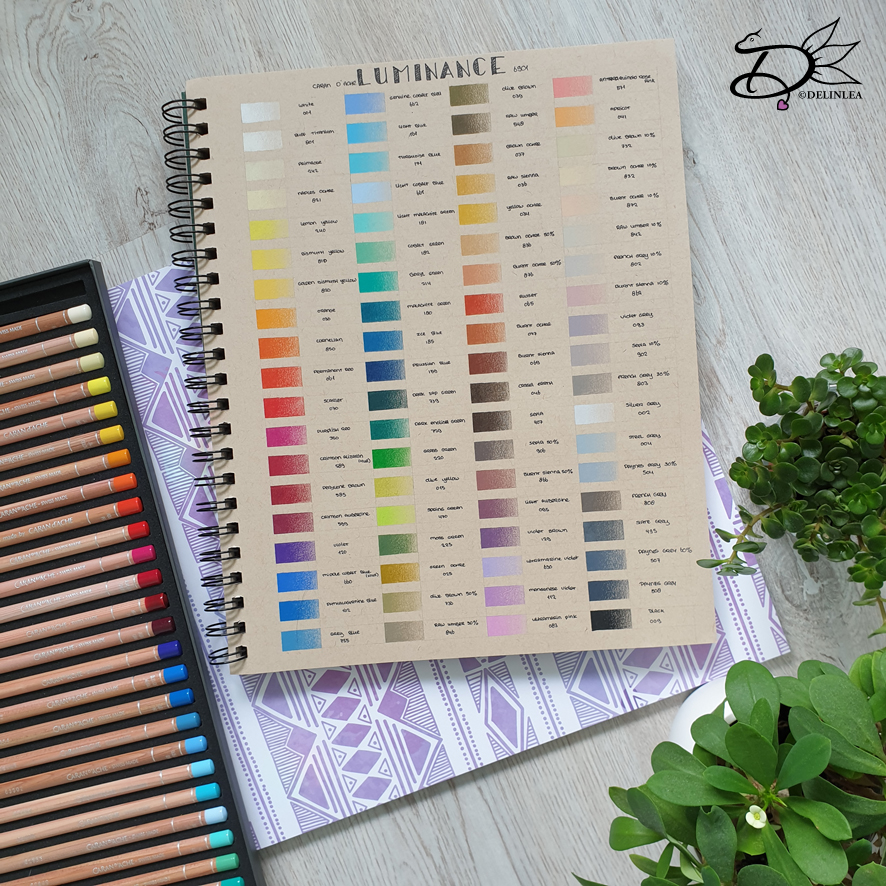
When you have a perfectly new box of pretty colored pencils, I never wanna use them haha. But that’s not where you got them for. I often try to swatch my colors on the paper I wanna use them for. This way you get an idea how the pigments grab to the paper, how hard/soft they are and how the coverage is. Specially if you wanna worked on toned or black paper, it’s important to see how opaque the are.

These are some swatches I made of Caran D’Ache Luminance 6901 Colored pencils on Strathmore toned tan.

Wax or Oil

I have no clue if I need to tell more about colored pencils, well, yeah, maybe that there are oil and wax based colored pencils. Prismacolors for example are wax based. Faber Castell Polychormos are oil based. It’s just way they make them. It is up to you what type you love, again, I have said this many times, it’s up to you what you love and what fits in your budget. But If you start out with colored pencils, don’t buy those very cheap ones you can get at any toy store. Those are usually very hard and barely pigmented. You won’t enjoy drawing with them. 

There are a lot brands out there that have good quality pencils. But whatever you are able to buy, what fits into your budget, it’s always good to start with. The more expensive doesn’t immediatly make you better or someting. It comes down to your technque!

Lightfastness

This is something that’s usually stated on the pencils in some way. When you are just starting out it’s not something that’s very important. When you start selling your work it get’s important. Why? Because you don’t wanna sell an artwork that will fade in a few years.

I am not going deep now into lightfastness, I feel like that is something for another time.

I hope this drawing lesson is a bit helpful again! Like I said, this is the last one of this year. I will see if I will be back next year with more!

Love
Danielle

Posted in: Drawing, Drawing Lesson Tagged: caran d'ache, colored, drawing, faber castell, Lesson, luminance, pencil, polychromos

♥ Drawing Lesson 4; Paper

15 augustus 2019 by Delinlea Leave a Comment

Hey Lovelies! It’s drawing lesson time! Today, I wanted to talk about paper. Some people say it’s not important and use printer paper. But in fact it is very important. Maybe not when you’re just starting out, but when you’re gonna start drawing more professional, you might consider using better quality paper.

Acid Free

Acid free?! Why?! I hear you thinking, but it is one of the most important things to check if you buy paper. It has to do with the life time of your paper, how long it will last. If there is Acid in your paper, it’s most likely gonna affect the paper itself, it can turn yellow over time and becomes brittle. This goes even faster when it is exposed to light and or heat.
When your paper is acid free, you or others are able to preserve it longer. This makes the risk of damage to your artwork less. And if you are a professional artist, this is one of the things you want!

Texture

There’s a lot of paper to choose from. It’s very personal to what the outcome of the final artwork will be.
Texture is also often called the tooth of the paper. It can be very smooth with almost no tooth. This will hold less layers of, for example, colored pencil. But smooth paper also gives a smooth result.
You’ve also heafy textured paper, you can feel all the bumps in there. This is usually considered that it will hold a lot of layers.
Ofcourse there are many variations in between. It all comes down to taste, what is the result of your artwork that you are aiming for? Do you like to layer a lot? Or not at all? Also, what medium works well on those papers?! It’s totally up to you, what one artist likes, doesn’t mean you have to like it as well. Often, over time, your preference change. That’s good, that means you are growing, wanna try other things.

Below some close up’s of Paper I use.

What type of paper

There are so many papers to choose from, it’s sometimes hard to make a decision. But it already helps if you know what you wanna do with the paper before buying, do you wanna use if for graphite or colored pencil, for soft pastel or mixed media, watercolors maybe. On all papers it is stated where you can use it for, this makes you range already smaller.
It’s also helpfull to check what other artists use and how their result is on that particulair paper. This gives you an idea of how the paper acts. Though, keep in mind that your technic may be different so your result might be different as well. It all comes down to testing. Often at stores you can get test sheets of the paper, so you can feel it, draw on it. See if it is something for you.

Personal

In the end, paper is a very personal preference. For example, when I just started out with pastel, I bought canson mi teintes paper, since a lot of people I followed were using that as well. It was so frustrating for me to work on that and stopped trying with pastel. Even tho I did invest in a lot of materials. After some time I came around some different paper for pastel and tried that one, but that wasn’t my thing either. After a lot of time past I got my hands on pastelmat. This was the solution to my problems, it wasn’t my technic, it was the paper. I am able to have fun with pastel now.

This shows, what works for someone else, doesn’t have to work for you. Just keep trying and not giving up. You will find what fits your style!

I hope this blog is a bit helpful, and helps you with your art journey! It’s fun, give everything a try, and ask your supplier for sample’s, you don’t always have to buy to try paper out! If you have more questions, I am always willing to help you out!

Love
Danielle

Posted in: Drawing, Drawing Lesson Tagged: drawing, Lesson, paper

♥ Drawing Lesson 3; Graphite

11 juli 2019 by Delinlea Leave a Comment

Hey Lovelies! It’s time for a new drawing lesson. Today I wanted to talk about Graphite. Since there’s more to it as you think when you are just starting out. It’s one of the easiest mediums to start with, but when you get used to it, you kinda want more, and that’s where this post is about.

Background

Graphite is a very soft material that can be found in nature. But to make a pencil of it that’s usuable, they mix clay into it. To adjust the softness of the pencil, they adjust the clay/graphite ratio.

H to B

You might have seen HB stated on your pencil. This is the most common used pencil out there. This states the hardness of your pencil. HB is kinda the middle, I know there’s F as well but I have never used this one.

Besides HB theres also H’s and B’s, and often combined with a numer ranging from 1 to 9. If you find those with H, it means the higher the number, the harder the lead is. Usually those are used for sketches, since you get very light lines. I am not a big fan of them tho, to hard for me.

When you find pencils with a B on it, the higher the number, the softer the lead is. It’s easier to apply to the paper and you get darker shades, the higher the number. This is because there’s more Graphite in them. It’s great for blending.

This is an image by Koh-I-Noor

Drawing with them

To play around with all those different types of hard leads you can create a lot of depth in your drawings. I have no complete set of those. I always made sure to have a HB, B, 3B, 6B and a 9B. With this range I could archive what I wanted.

Make sure you’d buy pencils from a good brand. I often see people use those very cheap ones you can buy a a toy store or something, but those are nothing compared to the real deal. You can struggle a lot more when using cheap stuff. I won’t tell you that you need to use the most expensive ones out there! There’s also no magic in the more expensive ones that makes you a pro in no time. But with a bit a quality it can make a huge difference, you can use steadler for example, affordable, but decent quality!

You have also woodless graphite pencils and mechnical pencils. The way you can use them are not very different, it all depends on what you are comfortable with. Back in the days I only used the normal pencils to draw with, but these days I often draw completely with mechanical pencils. yeah, preference change over time xD.

Messy

Graphite can be very messy when you draw with them. I always had a lot of graphite on my hands because I rest my hand on the paper, and graphite smudges XD. To prevent that, put a piece of paper under the hand you are drawing with, your hand stays clean and your drawing won’t have smudges anymore.

Fixtative

Because of the smudging part, you can use Spray fixtative. This fixes the graphite to the paper. you can use it in between layers or only at the end, when you are finished. You drawing stays nice way longer. As for fixtative as well, make sure you use decent stuff. You don’t wanna ruin your work you spend hours on working. Try new fixtative always on a try out piece with some scribbles,this way you know what it does with your work.

I usually use thise one by Talens

I hope this information is helpfull! I’ll be back with a new lesson next month!

Love
Danielle

Posted in: Drawing, Drawing Lesson Tagged: drawing, graphite, Lesson

♥ Drawing Lesson 2; Shading

13 juni 2019 by Delinlea Leave a Comment

Hey Lovelies! It’s the 2nd Thursday of the month and I decided to keep that day for our drawing lessons. I hope you are fine with that. Today I wanted to talk a bit about shading, because last time I talked how you can start drawing, as in the outlines for any subject. Shading is important to get a 3D effect in your drawing.

Shading you can do in many ways, I’ll try to cover most of them. A lot of techniques are avaible, you should just try them all and then figure out with what technique you are comfortable with and, maybe most important, what the outcome must look like. Sometimes it takes a while to get comfortable with a certain technique. Practice will pay off in the end. Don’t give up after one try. Drawing takes time to learn.

Shading
For all techniques I used a HB pencil except for bleding, there I use a 3B pencil.

Hatching

By drawing short or longer lines you can create depth. You usually draw them in one direction/parallel with this technic. The more lines you draw in one area, the dark the shade will be.

Cross hatching

Is almost the same as hatching, only here, you will draw the lines in different directions. They cross each other in many ways. The same here, more lines in one place is a darker shade.

Circular motion

You basicly draw in small cicles to create depth. By drawing in small circles you won’t have a stop and ending point of your pencil while drawing, so no extra pressure on your pencil. The pressure with circles is usually continues, this will create a smoother outcome. Add more layers to create darker areas.

Stippling/Pointlism

By adding a lot of dots to your drawing, you can also create shades. This is often done with markers. but you can do it with pencil as well, just becareful not to damage either your paper or your pencils. The more dots you add to one spot, the darker the area. This will take a lot of time to do tho, but sometimes the outcome can be very interresting. For example if you need to draw something sparkly.

Smudging/blending

Most of the times this will be used in combination of blending stumps/tissues/qtips/etc. You apply some graphite (or else) lightly to an area you wanna shade, with, for example a blending stump you blend it out for a smooth finish. Repeat until you have the darkness you want.  
(Just a side note, don’t use your fingers. On your fingers are always oils from your skin, this will affect the blending, it won’t be smooth and after some years in can affect your drawing.)

Burnishing

Usually used with colored pencil, not really with graphite. You basicly apply a lot of pressure to your pencil, this way you can get a smooth/darker result. But, there’s a but in this, you damage the tooth of your paper. When there is no tooth left, you can’t apply more layers. If you use thin paper, you can even rip it. Please be careful if you use this technique.

For me, personally, I love to use the circular motion technique. I have never been a fan of anything else. I did smudging with my fingers in the beginning, when I just started out. I just didn’t had the knowledge. Since I am a self-taught artist, I always had to learn things the hard way haha. I wouldn’t have liked to learn it another way tho. Just let me play around with the things around me and I’ll be happy.

I hope you will play around as well, remember, there’s no right or wrong in art. Whatever people will say. All ‘Rules’ are made by humans, why follow them all the time?

Have a wonderful day!

Love
Danielle

Posted in: Drawing Lesson Tagged: drawing, Lesson, shading, technique

♥ Drawing Lesson 1; How to start

9 mei 2019 by Delinlea Leave a Comment

Hey Lovelies! Most of you probably know I love to draw and I often get questions like how I learned it? How do you start? and most often of all, Can you teach me? So I decided to start this series of drawing lessons! Every now and then I will post a blog with drawing tips and or information. I hope you will enjoy!

Please take note that those tips are from my own experience and may be not the best out there. I just want to help you out! And how you can start drawing yourself. But, there’s always a but, drawing takes practice, a lot of practice. You can’t magically draw a portrait perfectly.

How to get started?! Well, get yourself a piece of paper and a pencil. And just start. It doesn’t matter in the beginning what kind of paper/pencil you use. Those can be very cheap, just what you have around. It’s all about the basics first. In this blog I will cover how you can ‘copy’ a photo reference to a sheet of paper. I give several options, it’s up to you what fits you best. There’s no right or wrong in art.

Traditional way

I have no idea how this is called for real, I’m sorry. But what I mean by this one is that you start with drawing and oval/circle and go from there. There are certain rules how to devide the oval and on which lines you draw the eyes, nose, mouth etc. In my eyes this is the most traditional way that is been used the longest. But I am not sure about that. I am not gonna teach you on how to this. Why? Because every face is different, and no face is symmetrical. If you still wanna know how this works, simple google ‘how to draw a face’ and a lot tutorials will come up.

Grid

Using a grid for drawing, is quit populair. I personally never use it, well I did when I was a kid in school, that’s like forever ago haha. But I always see a lot people use it, and I can kinda understand why, it’s just not my thing. That’s the beauty of art, it’s a journey to find your own way and style, where you are comfortable. Gridding for me results in overthinking and making it way to complicated for myself haha.

A grid is usually excisting out of squares. Some people make triangles. Basicly it are lines to help you draw whatever your subject is. You draw them on your reference and on your paper. Most important is that if you use squares on your reference, make sure they are on your paper as well. And the same amount for the part you decide to draw. You can draw your squares on your paper bigger, same size, or smaller, this way you can control how big you want to be your final outcome.

You can draw your grid on the reference by hand, but then you need to print out your picture or use one from a magazine/anything else you don’t mind to draw on. You can also do it in a photo editing program. Try to find what works for you. I did it in Photoshop myself for this tutorial.

Tip 1: Number your squares along the edge of your paper and reference. This will make it easier to find the right square to draw in.
Tip 2: If your paper you wanna draw on isn’t too thick. You can also draw your grid on another sheet of paper with a black marker or so. Put this behind your paper you wanna draw on (eventually with a lightbox). This will save you time to draw the grid over and over.
Tip 3: Draw your grid lightly so you can erase it easily.

Measuring/Lines

After a grid there are also certain lines you can draw on your reference and draw your subject using those lines. It takes less time then drawing a grid all the time. But it’s also something you need to get a feeling for. With lines you can create shapes and measure your drawing points. Those drawing points you copy on your paper and draw the subject with those. You notice, when you draw a portrait, there are certain lines that are almost always the same. It’s not that hard to do, you can draw as many lines as you wanna use and work from there.

Tracing

Here’s a lot of discussion about, a lot people say it’s cheating. But these days even people say you already cheat when you use a reference. I don’t know what going on in the art community. But try to make up your own opinion. That’s why I include this option too.

Tracing is litterally tracing your subject onto your paper. Nothing more, nothing less. Maybe this sounds weird if you wanna learn how to draw. But I see it this way, If you draw your subject, that you wanna learn over and over with tracing. You get the feel how the shapes work. This will be saved into your mind/movements and you can draw it neatly without tracing after a while. While, if you keep drawing a shape wrong over and over, it will frustrate in the end.

Free Hand

Free hand a drawing is by far most, the most tricky to do. Why? Because you have no guidelines or what so ever. You just draw what you see. Copy the drawing with your own eyes and hands. For some people this is easy and do it all the time, other people need guidelines to draw well. Whatever it is for you, do it. Don’t let people tell you what’s right or wrong in art. Art = freedom, use it!

About me

For me I learned drawing by free hand. I just did that, some people call that talent. But when you have seen my first drawings, you barely can recognize who it is (pictures below). We all have to start somewhere, don’t give up after the first few tries. Later on I also started to use lines/measuring to get proportions right. Now, I still combine these 2 most of the time, just how I feel, or how complicated the reference is. (For recent works check my Instagram).
I always loved drawing from when I was very young. But drawing portraits, I believe I was 17, I had a dream I could draw portraits, and the next day, was the day I started drawing portraits.
As for Age, it doesn’t matter when you start learning something. It’s never too later or too early to start something. Just do it.

I hope this lesson was helpful to you! And I hope you will start drawing as well! It’s something beautiful to do, to create and control what’s going on that blank sheet of paper. Create and have a wonderful day!

Love
Danielle

Posted in: Drawing Lesson Tagged: drawing, how to start, Lesson

What are you looking for?!

My Socials

Ko-Fi

I love making all these free things for you, tho it would be very helpfull if you can support me on Ko-Fi! (You don’t have to tho, totally up to you!)

Ko-Fi Shop!!

In my Ko-Fi shop you can find PDF Amigurumi Patterns!! You can pay easily with PayPal.
Go to the shop here!!

Recent Blog Posts

  • ♥ Happy 2022!
  • ♥ Day 12; Lights
  • ♥ Day 11; Flower Deco
  • ♥ Day 10; Snowman
  • ♥ Day 9; Gingerbread Houses

Recent Comments

  • Liane Van der Donck op ♥ Amigurumi Ghost
  • Kimberly Spear op ♥ Free Pattern; Amigurumi Shiber
  • Delinlea op ♥ Pua Tsum Tsum Amigurumi
  • Marfermar op ♥ Free Pattern; Easter Bunny
  • mary op ♥ Pua Tsum Tsum Amigurumi

Categories

  • animation
  • Beadwork
  • Blogmas 2018
  • Blogmas 2020
  • Blogmas 2021
  • Books
  • Bujo
  • Christmas
  • Christmas CAL 2019
  • Christmas Countdown 2017
  • Contest
  • Crafting
  • Crochet
  • Drawing
  • Drawing Lesson
  • Easter
  • Geen categorie
  • Life
  • Miniature
  • Nail Art
  • New Year
  • Paper
  • plush
  • Pokemon
  • Poseable Art Doll
  • Recipe
  • Sewing
  • Shop Pattern
  • Sinterklaas
  • Social Media
  • Tsum Tsum
  • Ufufy

Copyright © 2023 Delinlea - My little fantasy world.

Family WordPress Theme by themehall.com