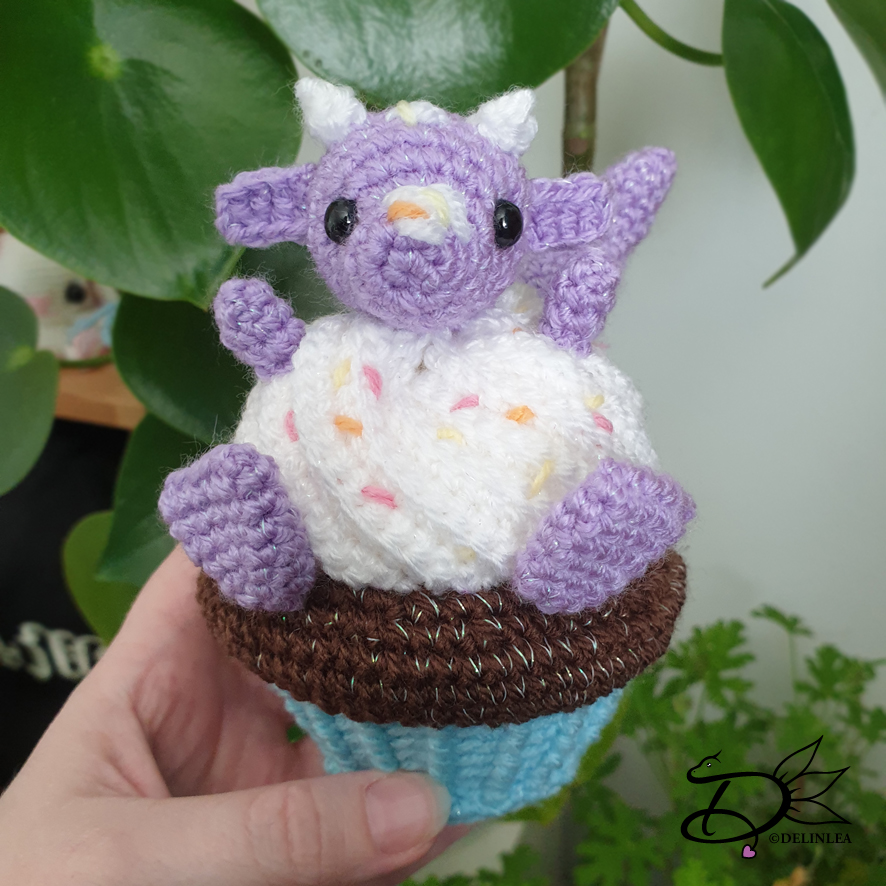
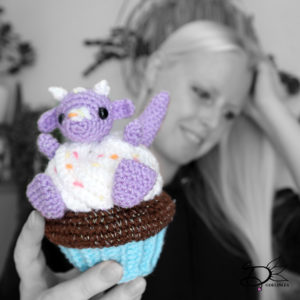
Hey Lovelies! Guess what it is today?! It’s my Birthday! That’s why I am a day late with uploading, because I really wanted to upload on my day xD. And to celebrate I wanted to give you this adorable cupcake pattern, with a very naughty dragon. I guess it likes cupcakes as much as I do! Are you ready to celebrate with me and enjoy this pattern for now?
What you’ll need:
♥ Yarn, StyleCraft Special: in the colors Cloud Blue, White, Walnut and Wisteria (+ some extra scrap pieces in colors of choise for sprinkles.)
♥ Crochet hook. (I used a 2,5mm hook)
♥ Stitch marker.
♥ Stuffing
♥ Yarn needle.
♥ Sewing Pins.
♥ Safety Eyes, 8mm
♥ Scissors.
♥ Sparkly Thread. (optional)
Stitches used (US Terms):
Magic Ring.
CH = Chain.
SC = Single Crochet.
ST = Stitch.
FSC = Foundation Single Crochet. (Optional)
FPSC = Front Post Single Crochet.
BL = Back Loops.
FL = Front Loops.
Inc = Increase.
Dec = Decrease.
Slst = Slip Stitch.
(…) = Repeat the space in brackets the given number of times.
[…] = Total number of stitches.
Pattern Cupcake
Cup of the Cupcake + Cake
Start with the color Cloud Blue.
1: 6SC in Magic Ring. [6]
2: Inc all around. [12]
3: (1SC, inc) 6 times. [18]
4: (2SC, inc) 6 times. [24]
5: (3SC, inc) 6 times. [30]
6: (4SC, inc) 6 times. [36]
7: BL! 36SC. [36]
8: (FPSC, BL 1SC) 18 times. [36]
9: (FPSC, BL inc) 18 times. [54]
10: (FPSC, BL 2SC) 18 times. [54]
|
14: (FPSC, BL 2SC) 18 times. [54]
Change to the color Walnut
15: FL! 54SC. [54]
16: (2SC, inc) 18 times. [72]
17: 72SC. [72]
18: 72SC. [72]
19: (2SC, dec) 18 times. [54]
20: (7SC, dec) 6 times. [48]
21: (6SC, dec) 6 times. [42]
22: (5SC, dec) 6 times. [36]
23: (4SC, dec) 6 times. [30]
24: (3SC, dec) 6 times. [24] Stuff the cupcake around here.
25: (2SC, dec) 6 times. [18]
26: (1SC, dec) 6 times. [12]
27: Dec all around. [6]
Fasten off and weave in tail.
Frosting
Use the color white.
1: Ch 16, insert in second ch from hook, 15SC, turn. [15]
2: Inc, 12SC, dec, turn. [15]
3: Dec, 12SC, inc, turn. [15]
Repeat row 2 and 3 until you have 36 rows!
Note, you always increase at the same side, and decrease always at the same
side.
Note 2, I don’t use Turning Chains, but you can if you feel more comfortable
doing so.
Sew the first row and the last row together.
Pattern Dragon
Head
Use the color Wisteria
1: 6SC in Magic Ring. [6]
2: Inc all around,=. [12]
3: 12SC. [12]
4: 12SC. [12]
5: 3SC, (inc) 6 times, 3SC. [18]
6: 18SC. [18]
7: (2SC, inc) 6 times. [24]
8: 24SC. [24]
|
10: 24SC. [24]
11: (2SC, dec) 6 times. [18] Add in the eye between row 5 and 6. Stuff the head
around here.
12: (1SC, dec) 6 times. [12]
13: Dec all around. [6]
Fasten off and weave in tail.
Ears (Make 2)
Use the color Wisteria
1: 4FSC. [4]
2: Dec, 2SC. [3]
Fasten off and leave a long tail for sewing.
Horns (Make 2)
Use the color White.
1: 3SC in Magic Ring. [3]
2: Inc, 2SC. [4]
Fasten off and leave a long tail for sewing.
Feet (Make 2)
Use the color Wisteria
1: 6SC in Magic Ring. [6]
2: (1SC, inc) 3 times. [9]
3: 9SC. [9]
4: (2SC, inc) 3 times. [12]
5: 12SC. [12]
|
7: 12SC. [12]
Fasten off, make the foot flat and close the opening.
Arms (Make 2)
Use the color Wisteria
1: 6SC in Magic Ring. [6]
|
4: 6SC. [6]
Fasten off and leave a long tail for sewing.
Tail
Use the color Wisteria
1: 6SC in Magic Ring. [6]
2: 6SC. [6]
3: (1SC, inc) 3 times. [9]
4: 9SC. [9]
|
8: 9SC. [9]
10: (2SC, inc) 3 times. [12]
11: 12SC. [12]
|
14: 12SC. [12]
Fasten off and leave a long tail for sewing, stuff the tail as well.
Assembling
Before I sew anything together I use sewing pins to position all pieces, this way I can easily move around things until I like it. I recomment you doing this as well.
Sew the frosting to the cupcake, mine came around row 20/21.
With a piece of white yarn sew a straight stitch along the top edge of the
frosting. Pull both ends of the yarn and knot it tightly.
Assemble the dragons head, sew on his ears and horns. Also stitch on some
‘frosting’ with some white yarn. Then sew the head on top of the frosting, in
the middle.
Position his feet, arms and tail as well and sew those on if you are happy. You
don’t have to position them evenly to give it a silly look.
Last stitch on some sprinkles with some scrap yarn in colors of choise!
I hope you enjoyed my little birthday gift to you! This won’t be long online. And if you made this little cutie, make sure to show me on social media!
Love
Danielle

