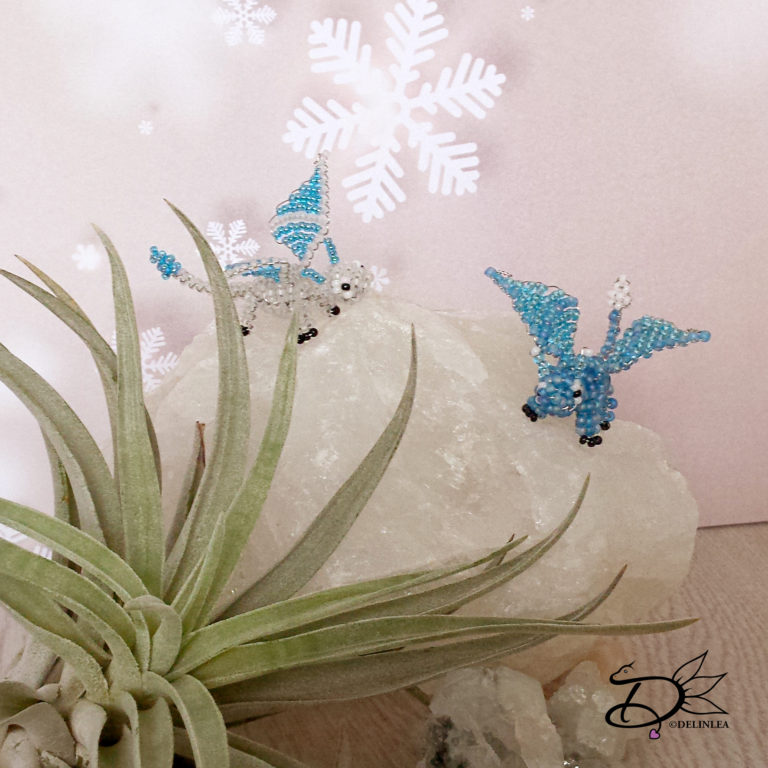
♥ Beaded Baby Dragons
Hey Lovelies!
How’s the new year going so far?! Sticking to your new years resolutions or did you already stopped with them?! haha I’m sticking to them so far. Some are quit challenging to keep doing, but I am trying. And that’s the only thing you can do, right?!
So for today I decided to dust off an old craft I loved to make. Bead work as in Perlentiere as in Gegenfädeltechnik. You probably don’t understand what I mean at all, but if you see what you can make, I’m sure you will get excited! It’s making a 3D figure with seed beads and wire. It looks hard at the beginning, but as soon as you know how to do it, it’s fun!
For this DIY you’ll need:
♥ Wire (o.3mm)
♥ Seedbeads in at least 3 colors.
♥ Ruler.
♥ Something to cut your wire with.
Since I love to make Dragons I’d go with dragons for today. The pattern is not mine! But free for personal use. Here you can find the pattern. (The pattern is by Christiane Brüning – www.perlentiere.com). Perlentiere.com is one of the biggest resouces if it comes to the gegenfädeltechnik, I love that website.
When you open the pattern you will see a flat thingy. How does this work?! Well, you always see two rows of dots and then a line. The first row of dots goes on the up side of your project, in this case a dragon, the second row will go under. Every line makes it easier to see which row goes where, up or under.
Now measure the wire, for the body you need about 1meter. Fold it in half (don’t make a hard fold though, just slightly), so you know where the middle is. For row 1 just put the required number of beads on and let them slide to the middle. Put the number of beads for row 2 on one end of the wire and hold them, put the other end of the wire through the opposite of the beads, so you cross your wire inside the beads. Now pull tight until you reach the beads in the middle. Put on the required number of beads for row 3, hold, cross wires and pull tight again, make sure they are on the upside of your work now. Keep doing this according the pattern. Make sure you add the wires for the legs and wings while you go. They are show with colored lines through the dots. If you try to do this when the body is ready, you’ll be in trouble. (wire for the legs is about 20cm each, and for the wings is about 40cm each).
If you are clueless right now, which I can totally imagine, go check out this link.
For the wings you see a row of dots and then a line etc. This means that the thing you are working on is going to stay flat. No up or under rows. All the rows go nicely after each other.
I hope you kinda understand this project, and that you will have fun making these! If not, let me know and I will try to help you out. ^-^
I decided to try to update my blog every thursday. I have to get used to do that though. But I will try, if there is anything you wanna see me post about let me know in the comments below, suggestions are always welcome!
Love
Danielle

