Delinlea - My little fantasy world
  • ♥ Home
  • ♥ About Me
  • ♥ Blogmas 2021
  • ♥ Free Patterns
    • ♥ Amigurumi; Spring/Easter
    • ♥ Amigurumi; Fall/Halloween
    • ♥ Amigurumi; Winter
    • ♥ Amigurumi Tsum Tsum
    • ♥ Amigurumi Ufufy
    • ♥ Amigurumi Others
    • ♥ Christmas Countdown 2017
    • ♥ Blogmas 2018
    • ♥ Blogmas 2020
  • ♥ Tutorials
    • ♥ Easter
    • ♥ Home Deco
    • ♥ Others
  • ♥ Drawing Lessons
  • ♥ FanFic
    • ♥ Chapter 1
    • ♥ Chapter 2
    • ♥ Chapter 3
    • ♥ Chapter 4
    • ♥ Chapter 5
    • ♥ Chapter 6
    • ♥ Chapter 7
  • ♥ Gallery
    • ♥ Crafts
    • ♥ Drawings
    • ♥ Poseable Art Dolls
  • ♥ Links
  • ♥ Contact
    • Privacy Policy

♥ Amigurumi: Donald And Daisy Ufufy Keychain

5 april 2018 by Delinlea 5 Comments

Hey Lovelies!

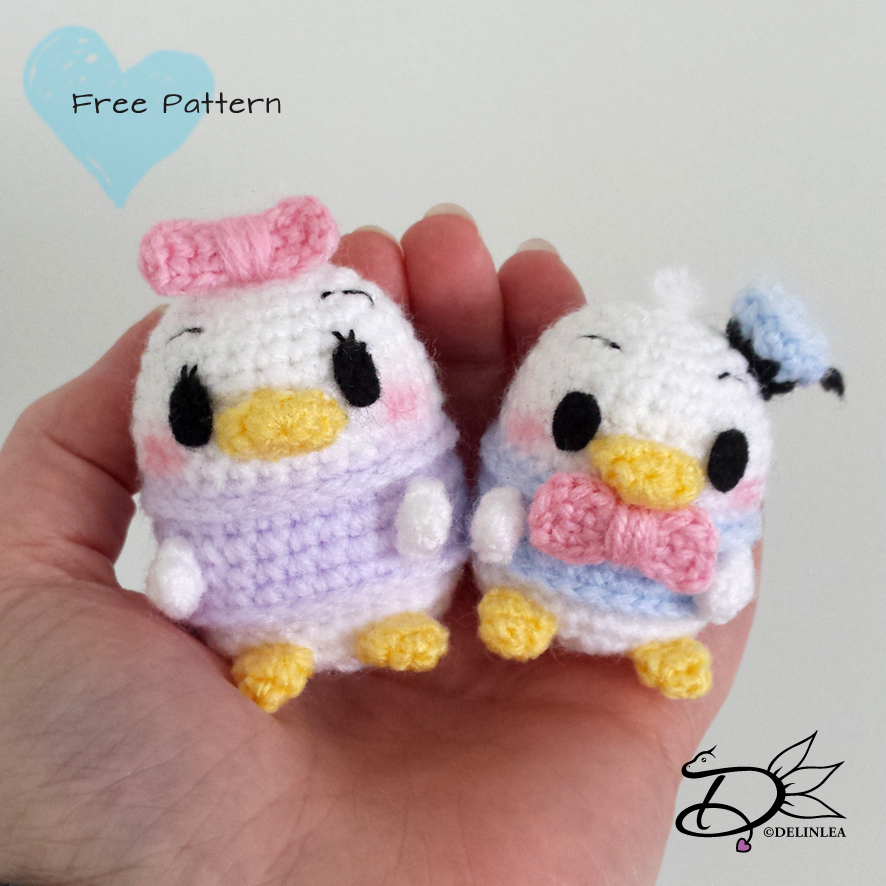
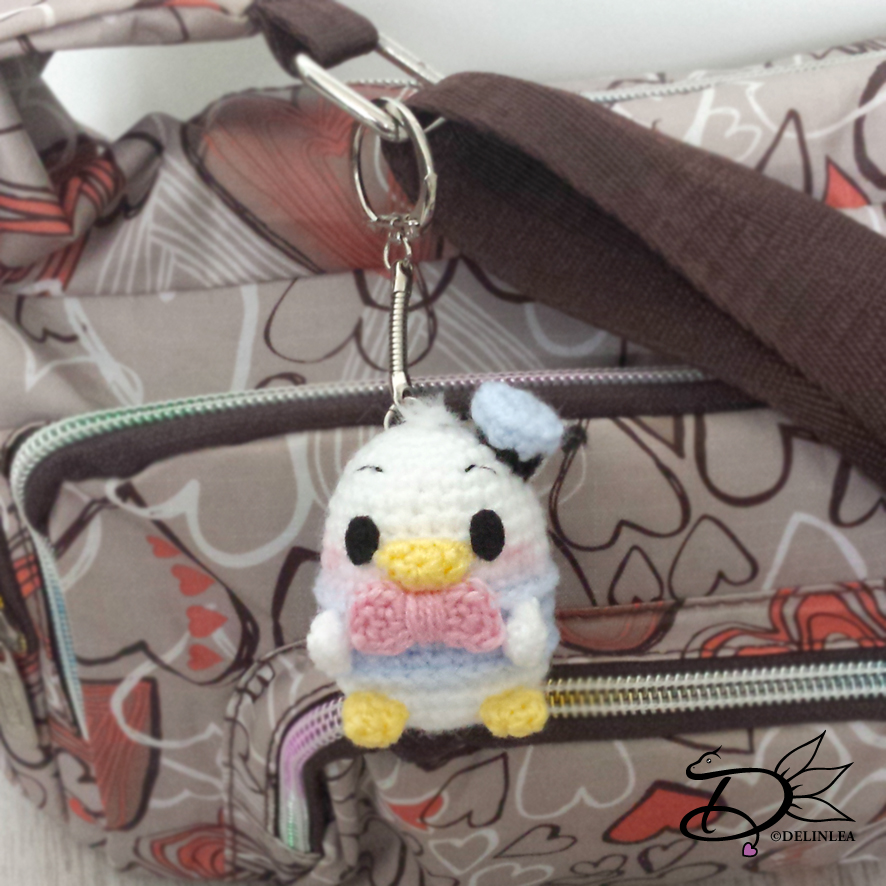
Do you have your crochet hook ready?! I really needed a keychain to go on my bag, it feels so boring! And then I had to the trouble of picking what I want to go on there! Oh well, I can always change it up again. So, I thought of making a Donald and Daisy Duck Ufufy! Hope you will like that as well!

For this DIY you’ll need:
♥  Yarn. I used thin acrylic yarn. White, Pink, Light Yellow, Light purple for Daisy, Light Blue and Black for Donald.
♥  Crochet hook.
♥  Stitch marker.
♥  Yarn needle.
♥  Sewing pins. (optional)
♥  Embroidery Neeldle and Black thread.
♥  Scissors.
♥  Fiber Fill.
♥  Black Felt.
♥  Key Chain.
♥  Glue (optional).

Stitches used:
CH = Chain.
SC = Single Crochet.
ST = Stitch.
BL = Back Loop.
FL = Front Loop.
Inc = Increase.
Dec = Decrease.
Slst = Slip Stitch.
(…) = Repeat the space in brackets the given number of times.
[…] = Total number of stitches.
Pattern

Body
Start with White.

1: 6SC in magic ring. [6]
2: 2SC in each ST around. [12]
3: (1SC, inc), 6 times. [18]
4: (2SC, inc), 6 times. [24]
5: SC in each st around. [24]
6: SC in each st around. [24]
7: (3SC, inc), 6 times. [30]
8: SC in each st around. [30
|
10: SC in each st around. [30]
Change to Light Blue for Donald of Light Purple for Daisy.
11: SC in each st around. [30]
12: Work in Back Loops only, SC in each st around. [30]
13: SC in each st around. [30]
|
15: SC in each st around. [30]
Change back to White.
16: Work in Back loops only, SC in each st around. [30]
17: SC in each st around. [30]
18: (3SC, dec), 6 times. [24]
19: (2SC, dec), 6 times. [18] Stuff the body here.
20: (1SC, dec), 6 times. [12]
21: Dec all around. [6]
Fasten off and  weave in tail.

Working in Back Loops is optional, but this gives a bit more 3D-ish look. So at row 12 and 16 you worked in Back Loops, join now in the Front Loops and SLST around. Fasten off and weave in tail.

Legs (4)
2 in White, 2 in Light Yellow.

1: 4SC in Magic Ring. [4]
2: (1SC, inc), 2 times. [6]
Fasten off and leave long tail for sewing. You don’t have to stuff them, just flatten.

Beak
In Light Yellow.

1: 6SC in Magic Ring. [6]
2: (1SC, inc), 3 times. [9]
Fasten off and leave long tail for sewing. You don’t have to stuff them, just flatten.

Bow
In Pink.

1: Chain 7, insert in 2nd chain from hook, 6SC, turn. [6]
2: Chain 1, 6SC. [6]
3: SLST around the bow for a nice edge.
Fasten off and leave a long tail. Use a Yarn Needle to go to the middle of the bow and wrap the tail tightly around several times and fasten off.

Donalds Hat
Start with Light Blue.

1: 6SC in Magic Ring. [6]
2: 2SC in each st around. [12]
3: Work in Back Loops only, (1SC, dec), 4 times. [8]
Change to Black.
4: Dec all around. [4]
Fasten off and leave long tail for sewing. You don’t have to stuff it.
Assembling

Sew on the beak to the larger part of the white, just above the colored part. Cut some eyes out of black felt and glue those to both sides of the beak.
Now you know where the middle is, you can place the legs easily, use some sewing pins to make sure you potition them first, before sewing on. This way you can easily move them around until you are happy with the look. The white ones go on the colored part and the light yellow ones, go on the white part just under the colored part, sew them on.
If you made Donald, sew his hat slightly to the side of his head. If you are done sewing, pull the left over thread through the hat, so you can make his little tag. Leave it a bit longer and cut it off.
For both Daisy and Donald I gave them some fluff on the head, I just took 3 pieces of white yarn, tied a knot on one side and pulled it though the side, with a yarn needle, to the middle of the head. Make sure the knot dissapears inside the body. Cute the yarn slightly longer as you want and with the yarn needle you can untwist the yarn, so it get’s fluffy. Now you can give them the final hair cut ^^.
Time for the bow. I glued them on, but you can totally sew them on if you prefer. By Donald it goes under his beak. And with Daisy it goes on top of her head.

I hope you enjoyed this Pattern! Would love to see yours if you made it! #DelinleaDIY on Instagram/Twitter/Vero.

Love
Danielle
 

Posted in: Crafting, Crochet, Ufufy Tagged: Amigurumi, Crochet, Daisy Duck, Disney, DIY, Donald Duck, Free Pattern, haken, Ufufy

♥ Recycling: Easter Wreath

29 maart 2018 by Delinlea Leave a Comment

Hey Lovelies!!

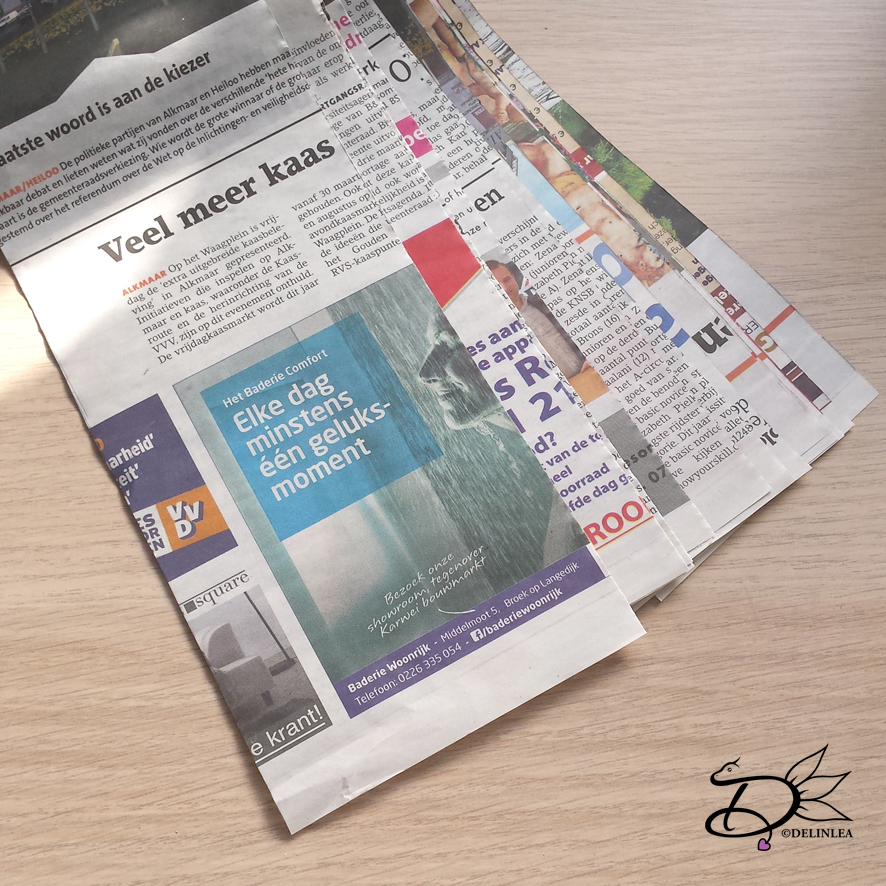
Almost easter and one last easter craft. Well I made it for easter this time around, but the base you can use all year round. I always loved this technic, Paper Wicker. If you don’t know what that means, it’s a recycle craft, using old newspapers. Let’s make a wreath of old newspapers!

For this DIY you’ll need:
♥ A bunch of old newspapers.
♥ (Acryllic) Paint.
♥ School Glue.
♥ Hot Glue Gun.
♥ Brush.
♥ Something slim and round, like a skewer.
♥ Anything to decorate, think of ribbon, easter bunny, eggs, etc.

DIY

Start with the newspapers, Cut them in strokes with a width of about 10cm. It’s totally fine if they are wider of smaller. The length doesn’t matter, just take the length of the newspaper you have.

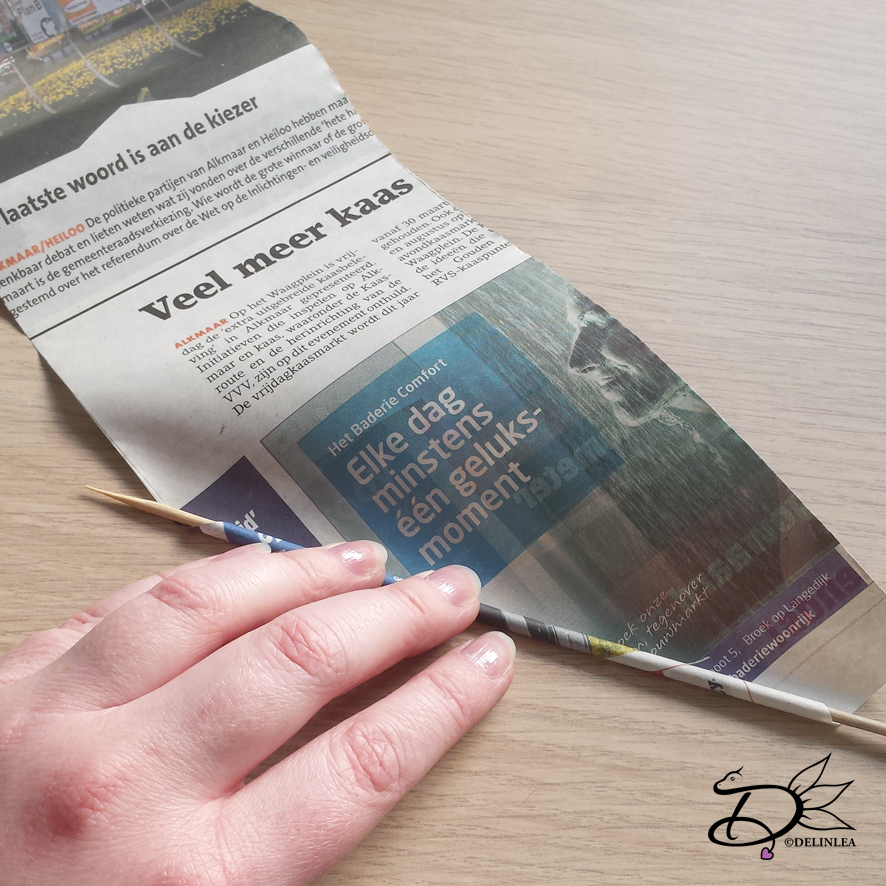
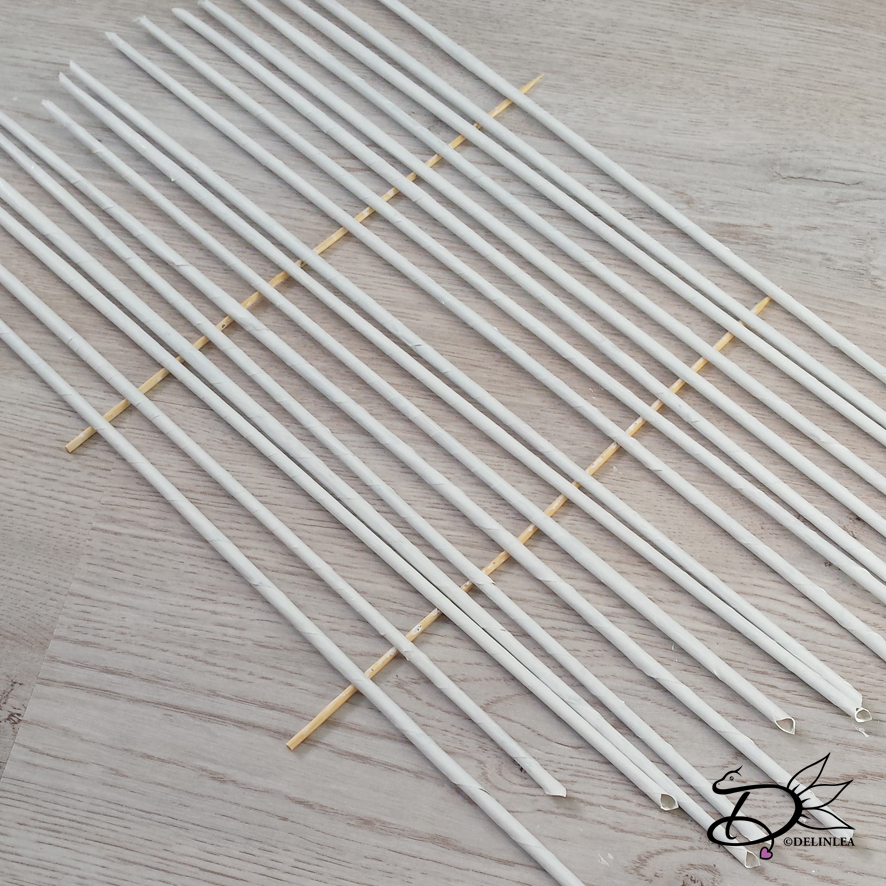
Now take your skewer and start at one of the points of you newspaper strokes. Roll them as tightly as you can and glue the point close with school glue. Let it dry for a bit and go on to the next one. You need a lot of these rolls, I ended up using about 100.

The next step is optional, it really depends on which look you want your wreath to have. But paint all the newspaper rolls in the color you like. I used white acryllic paint and gave it about 2 coats of paint. let everything dry very well now before you move to the next step. (What I figured is that you maybe should skip painting at this point, and spray paint the finished wreath at the end. but I am not sure if that will work out).

Wreath making

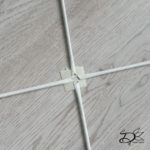
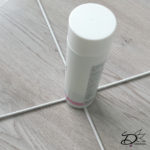
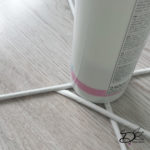
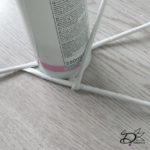
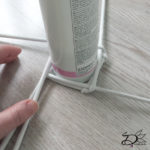
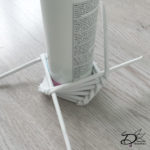
Now it’s time to actually make the wreath, take 4 rolls of newspaper and stick a roll of tape (so it’s double sided) on your floor or desk, wherever you have enough space. Make a cross like the picture below. Set something, a tube, in the middle of the cross, where the tape is, something round, I used my make up remover xD. Add a 5th newspaper roll, glue the point under one of the rolls, and put the rest of the length over the next roll, along your tube in the middle, as shown in the picture. Let this one dry well before you continue.


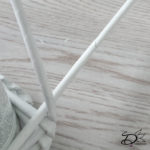
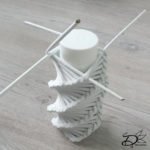
The roll you added last, the 5th you glued on, lays over one of the 4 you started with, fold the one under the 5th one, over the 5th along the tube. The next roll that lays under because you just folded one, fold that one over along the tube. So everytime you fold one over the other, it lays on another roll, the one that’s under you always fold over that one. keep on doing this until you have enough length to make the wreath.
When a roll is finished, add a new one, you can slide them into each other with some glue and simple continue going.


When you finished the lenghth you like, and you are able to make it round as a wreath, glue the ends on both sides, to the inside with some hot glue. Now you can also glue both ends together with hot glue and hold for a bit. When the glue is set and you like the shape, you can go on to the fun part! Decorating time!


Decorating

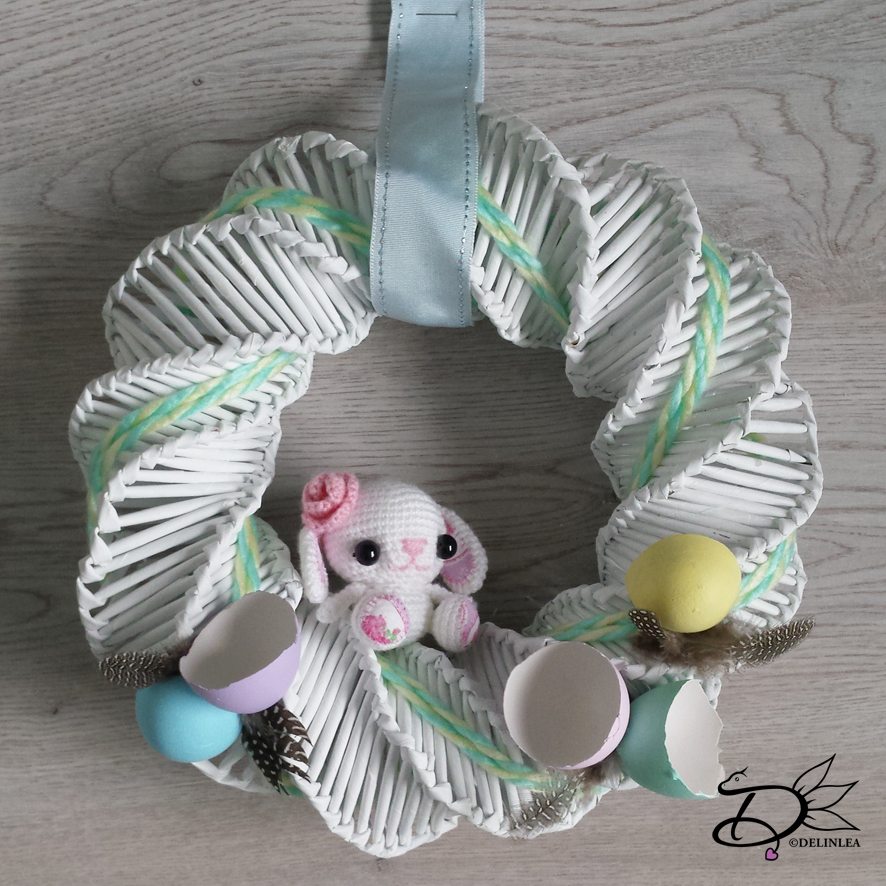
You can decorate your wreath the way you like. I used some yarn and wrapped it around. Had a crochet bunny I made a long time ago, added that to the middle, and some eggshells and feathers to make the easter look complete. I kept it fairly simple, but you can make it as complicated as you like!

I hope you enjoyed this DIY! I would love to see what you created! #DelinleaDIY. And if anything isn’t clear, comment below or send me an email, I’m happy to help you out!

Love Danielle


Posted in: Crafting, Easter Tagged: DIY, Easter, Recycle, Wreath

♥ Ufufy Easter Eggs

22 maart 2018 by Delinlea Leave a Comment

Hey Lovelies!

Time for a new DIY, are you ready?! You know my love for Tsum Tsum’s by now, I believe, but I also love the Ufufy’s they are a bit different but have the same concept. I love them since they used pastel colors for all the Disney characters. Which makes them appear even cuter.
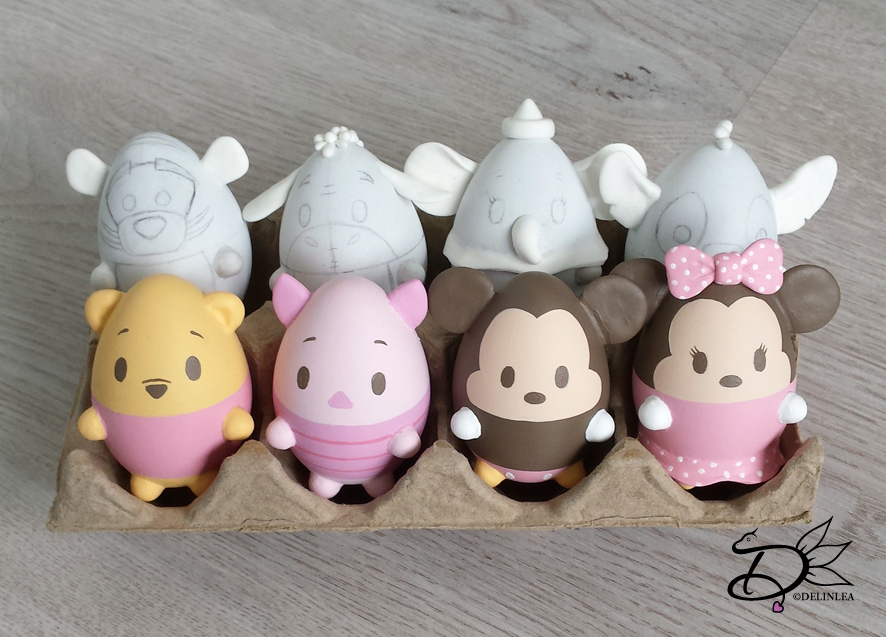
I had those fake eggs around for a while, and needed to use them badly! So why not making something fun with them. Let’s make Ufufy Easter Eggs!

For this DIY you’ll need:
♥ Fake Eggs or cleaned out Eggshells if you prefer.
♥ Light Air Dry Clay.
♥ Pencil.
♥ Acrylic Paint.
♥ Brush.
♥ Glue.
♥ Ribbon. (optional)
♥ Sculpting tools. (optional)

Sketching.

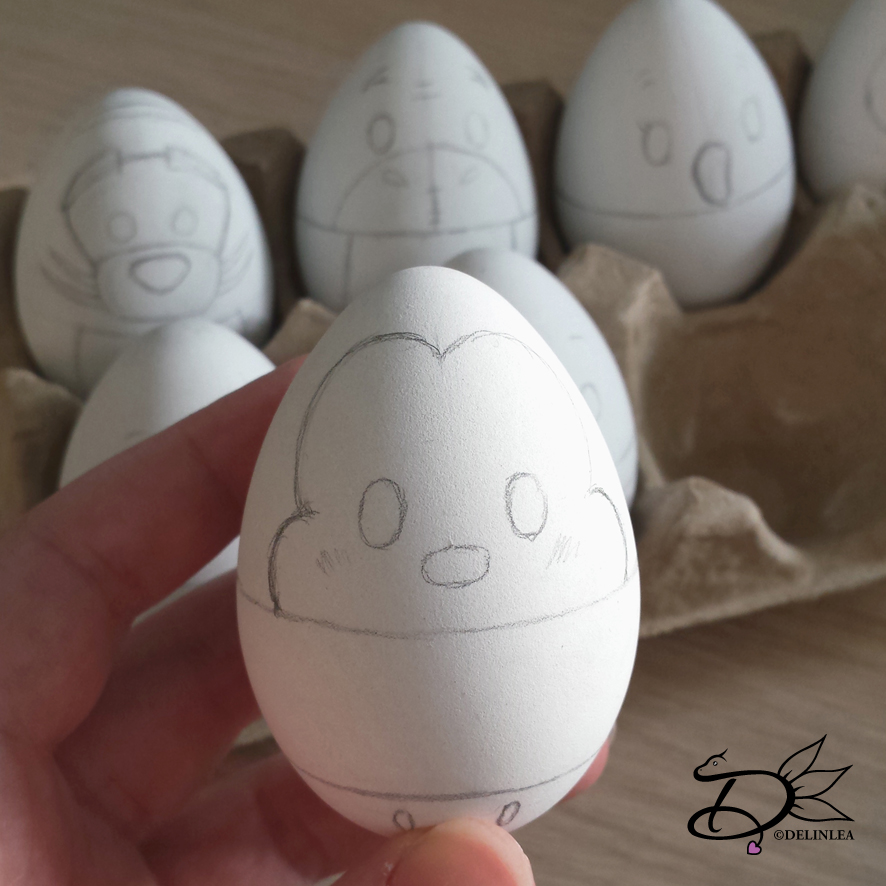
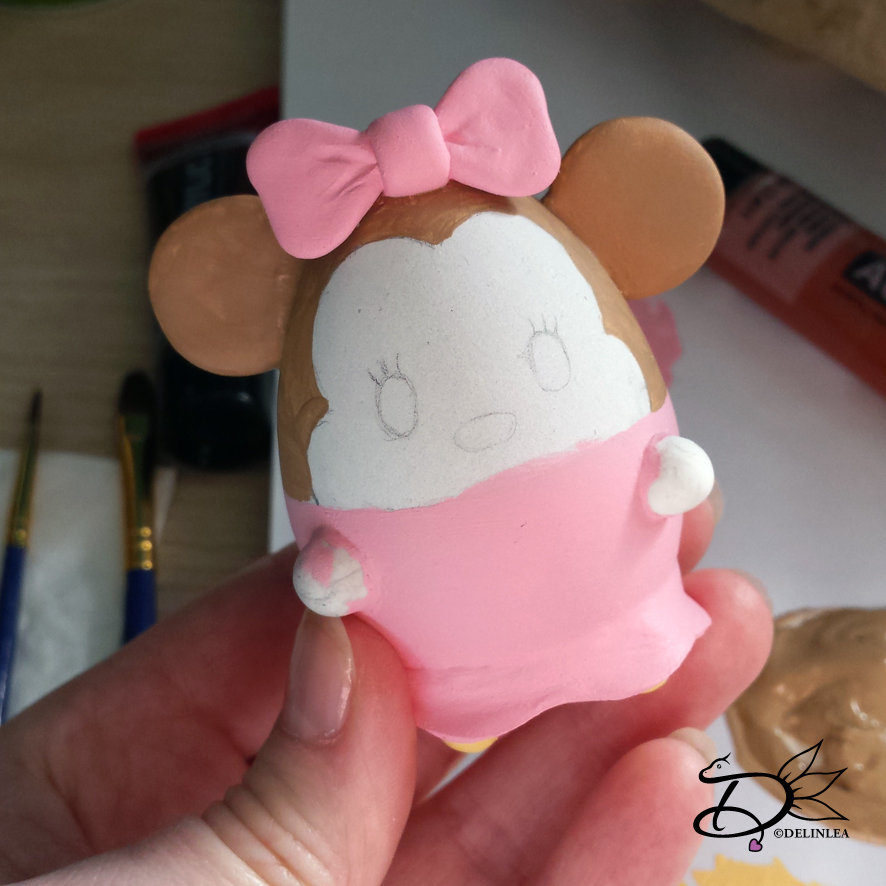
To start, sketch out the design of the Disney character you like with a pencil, I made a few different ones, like Pooh Bear, Mickey, Stitch, Dumbo, etc. I started with sketching the line to ‘devide’ the head and the body, that way it makes it easier to know where all the other lines need to go. I sometimes used a flexible ruler to measure them out, so all head’s and body’s where about the same.

Clay.

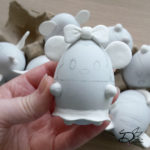
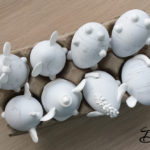
When you are done with all the sketching, continue to claying! This gives you the opportunity to bring them a bit more alive! I used clay to make the limbs, ears and eventually tails or other features. I used air dry clay because the eggs I used are of plastic, don’t ever bake plastic things, it’s not healthy (and they won’t survive anyway). So, don’t use baking clay.
The easiest way to get even features is, for example, make 4 small even balls for the limbs. Shape them how you like and attach them to the body with some glue. You can use a needle tool or pin to make them seemless, but that’s optional.
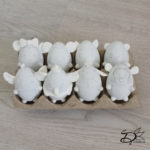
If you made all the features out of clay and attached them to the eggs, Let them dry comepletly. I let them dry over night, but it depends on what brand clay you used.


Painting.

Now it’s time to give these some color! I used basic acryllic paints. And since I don’t own pastel colors I mixed all the colors myself, it’s not that hard. Use references of the Ufufy characters you created to make the right color and paint the areas with a brush. I had to do about 2/3 layers of paint, depending on the color. And ofcourse don’t forget to paint their eyes and noses! I used brown paint for these. Try to avoid the use of black paint, this will make them look appear a bit harsh against the soft pastel tones.
You can choose at this point, after finishing painting, to give them a coat of varnish. I haven’t done that yet, since I ran out of time xD. Just like I haven’t finished all of the Ufufy’s I planned to make. I will update my blog post when I did finish them all.

I hope you like this idea of Ufufy easter eggs. Let’s make a whole army of them, right?! Don’t forget to show them with #DelinleaDIY or tag me on Twitter or Instagram.

Love
Danielle
Posted in: Crafting, Easter, Tsum Tsum, Ufufy Tagged: Disney, DIY, Easter, eggs, Ufufy

♥ Easter Bunny Lucky Charms

15 maart 2018 by Delinlea Leave a Comment

Hey Lovelies!

Easter is approaching faster as we think! So I thought why not make some decoration already?! We all know the easter branches we bring in our homes and decorate them with the cutest things. Today, I wanna make some Easter bunnies of wooden beads. I love how they turned out so why not show you how to make them too.

For this DIY you’ll need:
♥ 14mm Wooden Bead.
♥ 10mm Wooden Bead.
♥ Air Dry Clay or a small Bead for the tail.
♥ Cardstock in any color.
♥ PVA glue.
♥ Acryllic Paint in the colors you like.
♥ Varnish (optional).
♥ Embroidery Floss or Yarn.
♥ Brush.
♥ Scissors.

How To

Glue the large bead to the small bead, make sure the holes line up and let that dry. This will be the body. While that’s drying, draw on the cardstock some ear and foot shapes and cut those out. Glue the ears and foot to the body and let those dry as well. Out of clay, make a small ball, this will be the tail, you can also use a small bead if you have those. Glue the tail to the back of the body.


Painting

When everything is dry. You can start painting! I used pastel tones, I think that fits the whole spring/easter feel best. But ofcourse you can do whatever color you would like. Just paint the whole body in one color first, and later on you’ll paint on the details. It depends on the quality of you paint if the base color of the body need several layers or just one. Keep going until you are happy with the outcome.

Now it is time to paint the details. With white acryl, paint on a round belly shape in between the feet. And don’t forget to make the tail white as well. Mix some light pink paint and use this to color the inside of the ears and a paw print on the foot. Oh! and don’t forget his adorable tiny nose. Now use some brown or black acryl to paint on the face with a tiny brush. If you want add a small dot of white paint in the eye, to give it that little sparkle.

You can use varnish (matt or gloss) to give it that finishing touch and protect the paint, but that’s optional.


Final Step

Make sure everything is completly dry when you go to the next and final step. Cut 2 pieces of yarn with a length of 30cm. Fold those in half and make a knot about 5 cm from the loose ends. With help of a Needle, put the folded side of the yarn through the bottom to the top of the bunny and you are done!

I hope you enjoyed this DIY and make a lot! haha, the more the better. Don’t forget to show me with the #DelinleaDIY

Love
Danielle
 

Posted in: Crafting, Easter Tagged: Bunny, DIY, Easter, Lucky Charm

♥ Amigurumi Gnome Face

8 maart 2018 by Delinlea Leave a Comment

Hey Lovelies!!

So, somewhere at the end of last year, my grandpa asked me if I could make something for him and handed me a scribble at a small piece of paper. I was like, ‘what’s this’. I was a bit confused but stated how I should make it.. sorta xD. It’s supposed to be a Gnome head/face.

Here is his scribble:

Well, okay, I will try to make something out of it. I only need to know what colors he wanted. He said Yellow and Green. Not sure why he wanted those colors. Not something I would choose, but hé, it’s his party!

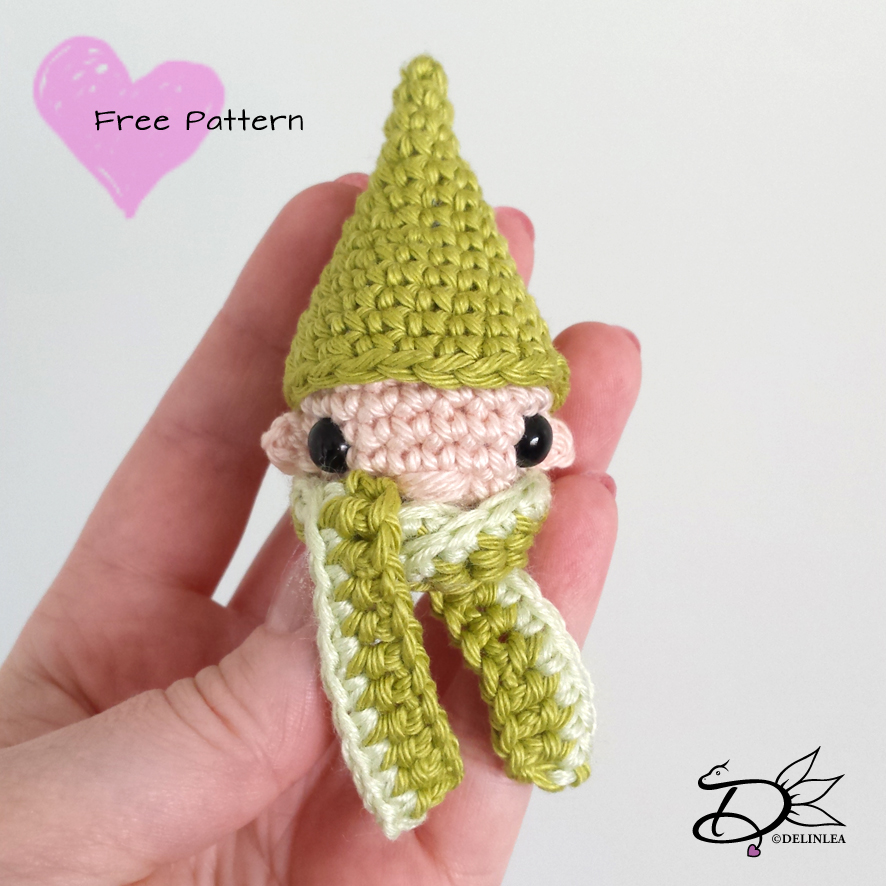
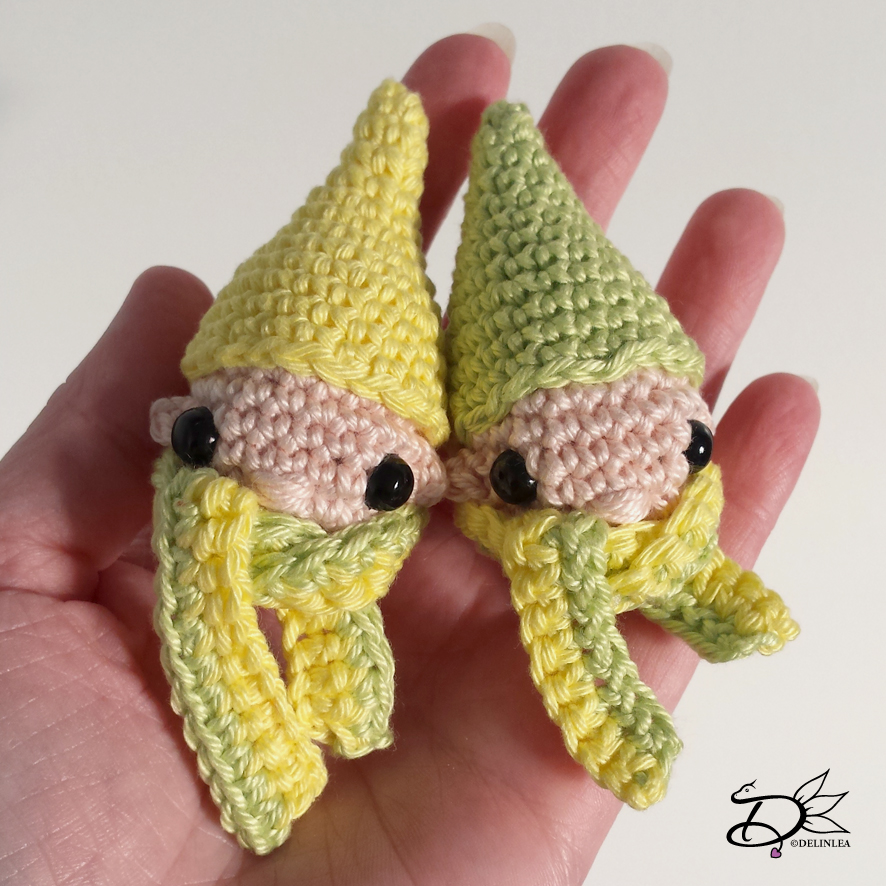
So after having the scribble for a while, I should finally make it, and give it to him. (I had a bunch of other stuff that had priority, so my grandpa had to wait). And when I finished them I loved them more as I thought I would. So, I thought why not share the pattern with you all! Are you ready?!

For this DIY you’ll need.
♥  Yarn in 2 colors of green and beige. (I used cotton thread.)
♥  Crochet hook.
♥  Stitch marker.
♥  Yarn needle.
♥  Scissors.
♥  Fiber Fill
♥  2 Safety eyes. (about 7mm)

Stitches used:
CH = Chain.
SC = Single Crochet.
HDC = Half Double Crochet.
DC = Double Crochet.
Foundation SC.
ST = Stitch.
Inc = Increase.
Dec = Decrease.
Slst = Slip Stitch.
(…) = Repeat the space in brackets the given number of times.
[…] = Total number of stitches.

♥ Pattern

So I made the versions of the hat. By accident. I just didn’t count right. To be honest I like my mistake more as the ‘good’ one haha. So I thought why not give both.

Hat version1 (straight point, ‘good’one)

1: 4SC in magic ring. [4]
2: (1SC, inc), 2 times. [6]
3: (2SC, inc), 2 times. [8]
4: (3SC, inc), 2 times. [10]
5: (4SC, inc), 2 times. [12]
6: (5SC, inc), 2 times. [14]
7: (6SC, inc), 2 times. [16]
8: (7SC, inc), 2 times. [18]
9: (5SC, inc), 3 times. [21]
10: SC in each st around. [21]
11: SC in each st around. [21]
12: 2SC, 1HDC, 7DC, 1HDC, 10 SC. [21]
Fasten off and leave long tail for sewing.

Hat version2 (Curved hat, Mistake one)

1: 4SC in magic ring. [4]
2: (1SC, inc), 2 times. [6]
3: (2SC, inc), 2 times. [8]
4: 7SC, inc. [9]
5: 4SC, inc, 4SC. [10]
6: inc, 5SC, inc, 4SC. [13]
7: 1SC, inc, 6SC, inc, 3SC. [14]
8: 3SC, inc, 7SC, inc, 2SC. [16]
9: (5SC, inc) 2 times, 4SC. [18]
10: (5SC, inc), 3 times. [21]
11: SC in each st around. [21]
12: SC in each st around. [21]
13: 2SC, 1HDC, 7DC, 1HDC, 10 SC. [21]
Fasten off and leave long tail for sewing.

Head:

1: 6SC in magic ring. [6]
2: Inc in each st around. [12]
3: (1SC, inc), 6 times. [18]
4: (5SC, inc), 3 times. [21]
5: SC in each st around. [21]
|
8: SC in each st around. [21]
9: (5SC, dec), 3 times. [18]
10: (1SC, dec), 6 times. [12] Stuff the head lightly.
11: Dec in each st around. [6]
Fasten off and weave in tail.
Note: in between row 5 and 6 you wanna add the safety eyes.

Scarf:

1: Make 40 foundation SC. [40]
2: CH1, turn, 40SC. [40]
Fasten off and weave in tails.

Ears:

Chain2, insert in 2nd chain from hook, 1SC. Fasten off and leave long tail for sewing.

Assembling

Put the head inside the hat, and sew them together. Form the scarf the way you like and sew it to the head as well. Add the ears to both sides of the face and you are done! isn’t it cute?!

I hope you enjoyed making this one! Have a lovely day all!

Love
Danielle
 

Posted in: Crafting, Crochet Tagged: Amigurumi, crafting, Crochet, DIY, Free Pattern, gnome, haken
« Vorige 1 2 3 4 5 … 38 39 40 41 42 43 44 45 46 … 48 49 50 51 52 Volgende »

What are you looking for?!

My Socials

Ko-Fi

I love making all these free things for you, tho it would be very helpfull if you can support me on Ko-Fi! (You don’t have to tho, totally up to you!)

Ko-Fi Shop!!

In my Ko-Fi shop you can find PDF Amigurumi Patterns!! You can pay easily with PayPal.
Go to the shop here!!

Recent Blog Posts

  • ♥ Happy 2022!
  • ♥ Day 12; Lights
  • ♥ Day 11; Flower Deco
  • ♥ Day 10; Snowman
  • ♥ Day 9; Gingerbread Houses

Recent Comments

  • Erzsebet M. Marosvari op ♥ My Entry For a Faber Castell Contest
  • Delinlea op ♥ Pietje Gnome Amigurumi
  • Delinlea op ♥ Toy Story Alien TsumTsum Amigurumi
  • Delinlea op ♥ Pua Tsum Tsum Amigurumi
  • Charli op ♥ Free Pattern; CNY Mouse Amigurumi

Categories

  • animation
  • Beadwork
  • Blogmas 2018
  • Blogmas 2020
  • Blogmas 2021
  • Books
  • Bujo
  • Christmas
  • Christmas CAL 2019
  • Christmas Countdown 2017
  • Contest
  • Crafting
  • Crochet
  • Drawing
  • Drawing Lesson
  • Easter
  • Geen categorie
  • Life
  • Miniature
  • Nail Art
  • New Year
  • Paper
  • plush
  • Pokemon
  • Poseable Art Doll
  • Recipe
  • Sewing
  • Shop Pattern
  • Sinterklaas
  • Social Media
  • Tsum Tsum
  • Ufufy

Copyright © 2026 Delinlea - My little fantasy world.

Family WordPress Theme by themehall.com