
♥ DIY; Tie Dye Bleach Jeans
Hey Lovelies! I always love to change up cloths when I buy basic stuff. But I am usually to lazy to do them or to show it to you xD. For today I thought, why not show you how to bleach some jeans, tie dye style. It’s a quick and easy change you can do yourself. I have done this a few times before. It’s cheap, tho you can buy those type of jeans yourself as wel, but that less fun and you probably spend more money on them. This DIY only involves some patience as well, so just that you know, bleach needs time to do it’s job xD.

For this DIY you’ll need.
♥ (Black) Jeans of your liking.
♥ Rubber Bands.
♥ Bleach.
♥ Water.
♥ Bucket that’s large enough to put your jeans, water and bleach in. Or you can use your sink.
♥ (Large) spoon.
♥ Scissors.
♥ Sink to rince your jeans well, this will be the place to remove the rubber bands.
♥ Washing Machine.
Warning! Bleach can affect your skin, eyes and airway. Make sure you are in a well ventilated area when you start working with bleach. Also wear gloves and some old cloths in case the bleach splatters around.
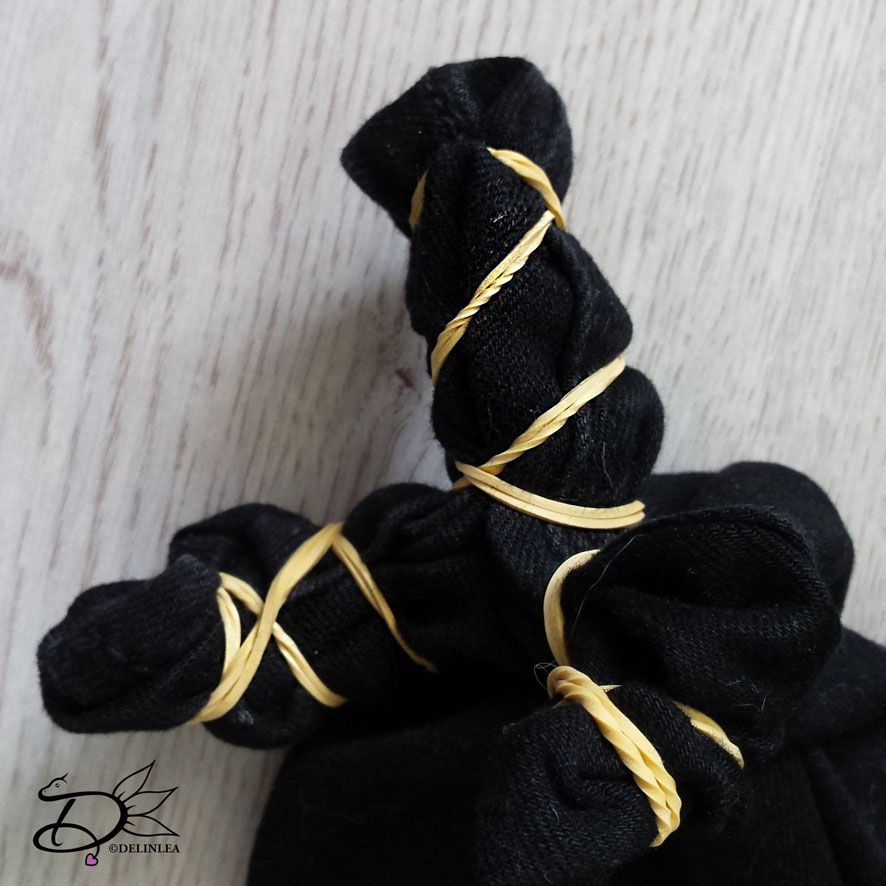
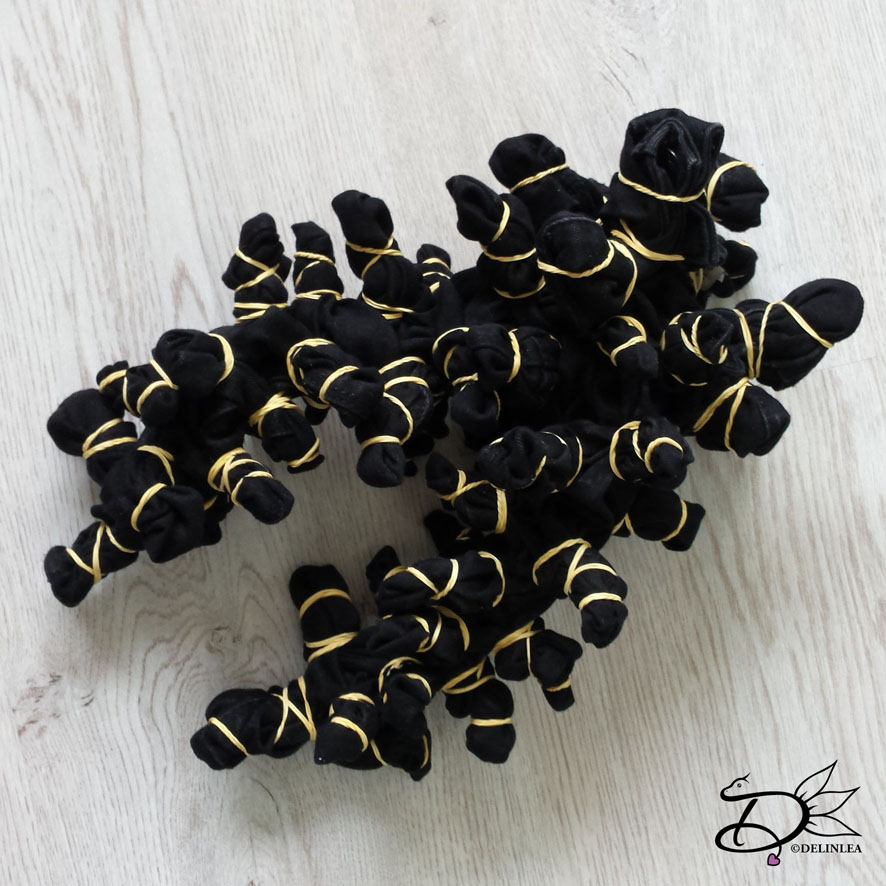
Rubber Bands
The first step is to add the rubber bands to your jeans. You can do this in many ways. But I like to grap a piece of jeans and wrap the band several times around it, but not at one spot. As I show in the pictures. Do this for the whole thing! There’s not a wrong or right way to do this, just go for it.
Bleaching
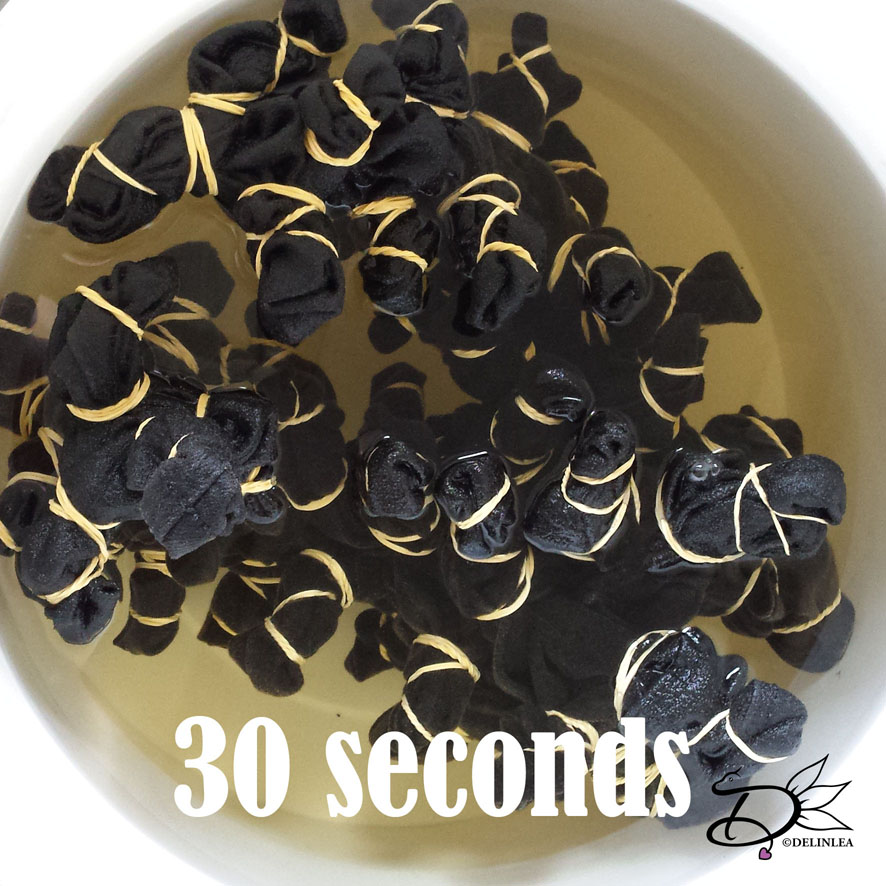
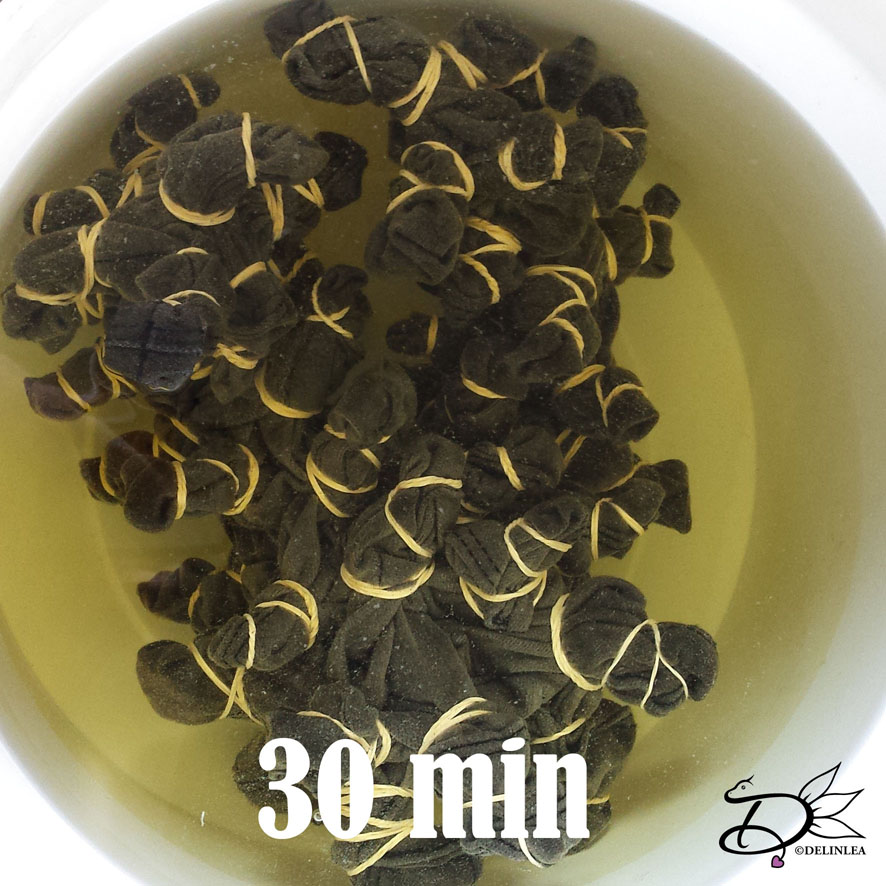
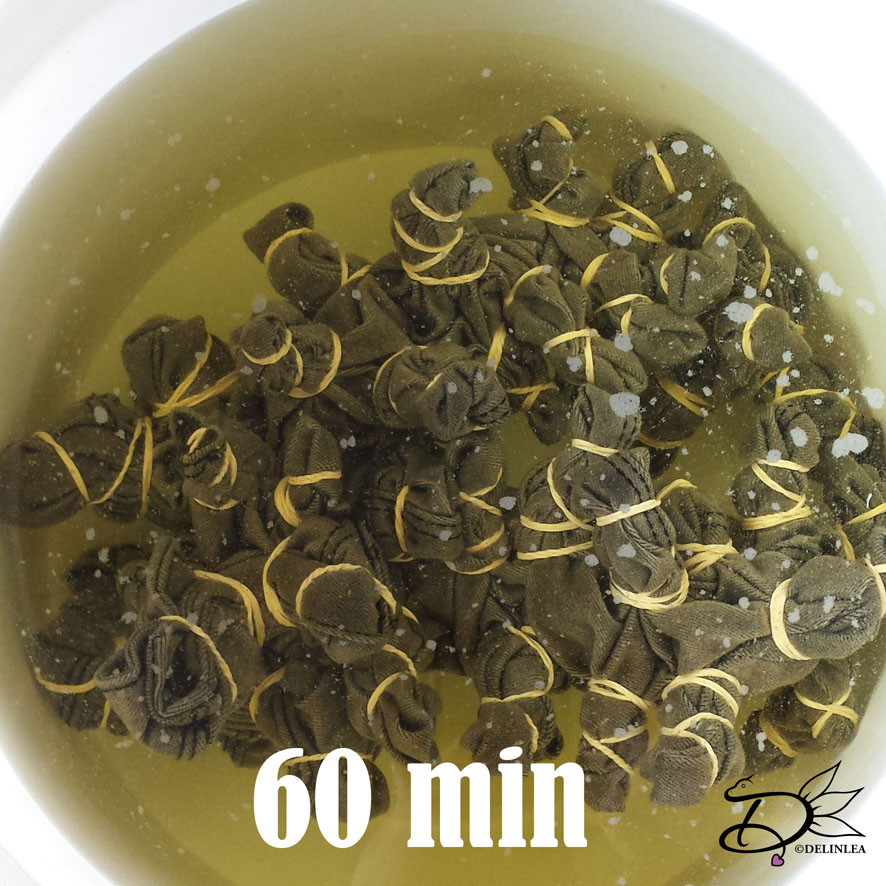
Time for the bleaching part, please make sure to do this carfully! Fill up your bucket or sink with some hot water, then add the bleach (about 2 parts water, 1 part bleach), it doens’t matter if it’s a bit more or less, as long as it does it’s job. Keep in mind that you still have to put your jeans in there as well, so don’t overfill.
If your bleach water is ready, put in your jeans. Let it sit
for about 30min, up to 90min. When the jeans are in there, you wanna make sure
to twist it around every now and then, this is where the spoon comes in. I
would NOT recomment you doing this with bare hands! You can see the water
change color now, this is good, that means the bleach is doing it’s thing! The
jeans should be completely under water, if that’s not the case, because it’s
floating, put something heafy on it.
Note: after washing your jeans, the color will wash out even more, so it will
lighten up after it’s washed and dried.

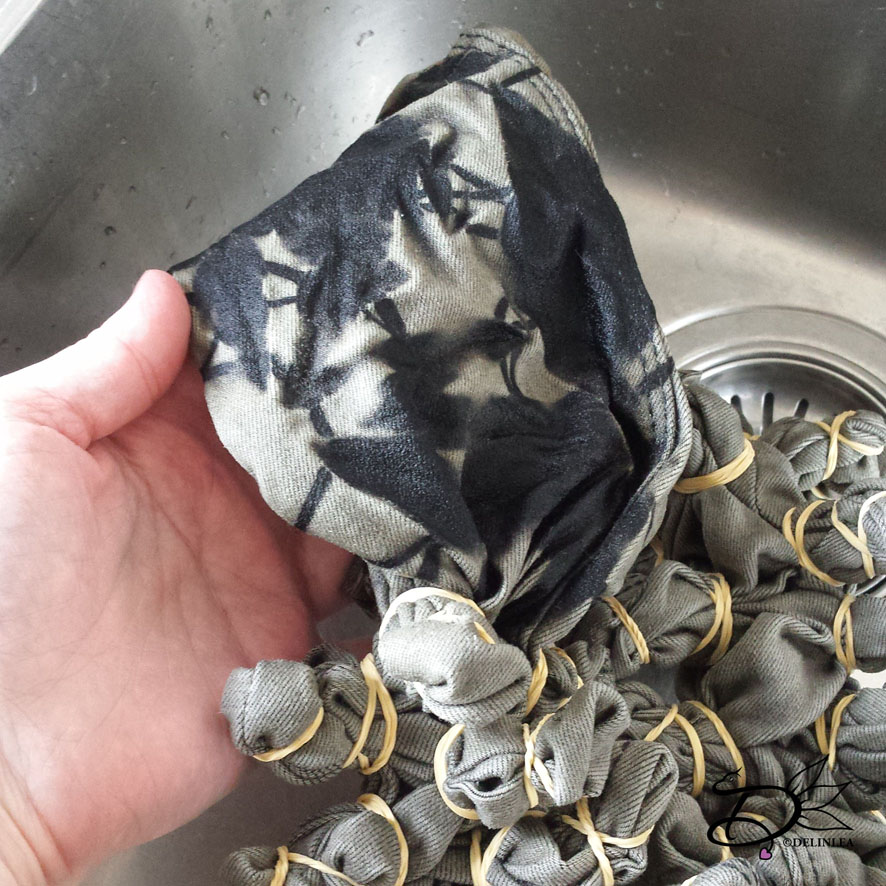
Removing the rubber bands and rinsing.
When the jeans are ready, it’s time to take it out of the bleach water. I usually rinse the whole thing out first (as far as possible) and then remove the rubber bands. Removing the bands can be pretty time consuming and annoying. Scissors will help a lot with this but becareful you won’t cut into your jeans. When all the rubber bands are removed rince out again.
Washing
As soon as all the rubber bands are removed, put your jeans in the washing machine. Just wash it as you would do regularly. BUT don’t put other stuff with it, since there’s still bleach residue left in the jeans, those need to be washed out first. When it’s done, let it dry and enjoy your new, unique pair of jeans!
I hope you enjoyed this DIY and so you will try it yourself! It’s fun! Oh! And a small tip, if you used black jeans like I did, try some color dye to color the white parts! Imagine the white spots to be hot pink or green!
Have a beautiful day!
Love
Danielle