Delinlea - My little fantasy world
  • ♥ Home
  • ♥ About Me
  • ♥ Blogmas 2021
  • ♥ Free Patterns
    • ♥ Amigurumi; Spring/Easter
    • ♥ Amigurumi; Fall/Halloween
    • ♥ Amigurumi; Winter
    • ♥ Amigurumi Tsum Tsum
    • ♥ Amigurumi Ufufy
    • ♥ Amigurumi Others
    • ♥ Christmas Countdown 2017
    • ♥ Blogmas 2018
    • ♥ Blogmas 2020
  • ♥ Tutorials
    • ♥ Easter
    • ♥ Home Deco
    • ♥ Others
  • ♥ Drawing Lessons
  • ♥ FanFic
    • ♥ Chapter 1
    • ♥ Chapter 2
    • ♥ Chapter 3
    • ♥ Chapter 4
    • ♥ Chapter 5
    • ♥ Chapter 6
    • ♥ Chapter 7
  • ♥ Gallery
    • ♥ Crafts
    • ♥ Drawings
    • ♥ Poseable Art Dolls
  • ♥ Links
  • ♥ Contact

bleach

♥ DIY Bleach Shirt

8 juli 2021 by Delinlea Leave a Comment

Hey Lovelies! I love playing around with bleach on clothes. (Yes, I take precautions, don’t worry!). The only thing is I hate the smell of it, so I prefer to do it with all windows open and escape my room after or do it outside. It really depends on the project I’m doing. Have you ever used bleach to alternate clothes?! If you have or not, doesn’t really matter. I’m here to give you a idea what you could do. My brain is already like, I can do this and that and THAT. Yeah, way too many ideas. I really hope I can inspire you as well!

DIY with Bleach on a Shirt, design

For this DIY you’ll need:
♥ Clothing of choice, but make sure it’s of a natural material like cotton.
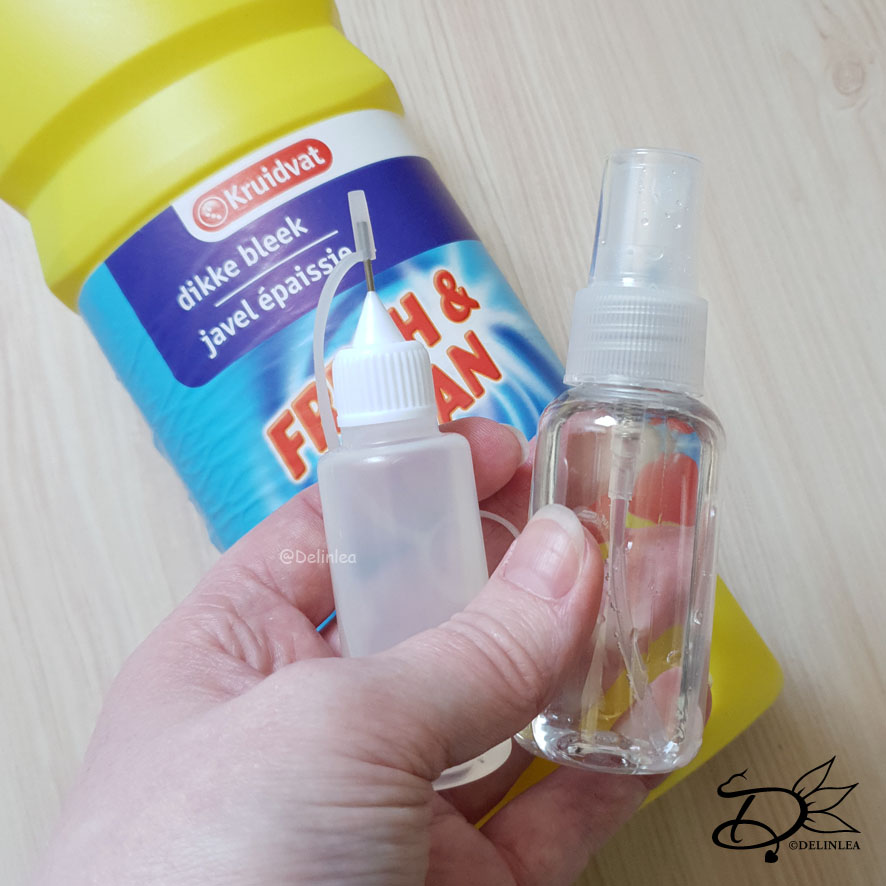
♥  (Thick) Bleach.
♥ Plastic bottle with tiny nozzle or brush with a small cup.
♥ Spray Bottle. (Optional)
♥  (Pastel) pencil.
♥ Paper.
♥ Scissors.
♥ Plastic Sheets/Trash bags.

Warning! Make sure you are allowed to work with Bleach, if you are under age, ask your parents. It’s aggressive stuff. Take all precautions needed, like a well ventilated area, gloves etc. Read the label well.

Tutorial Bleach Shirt

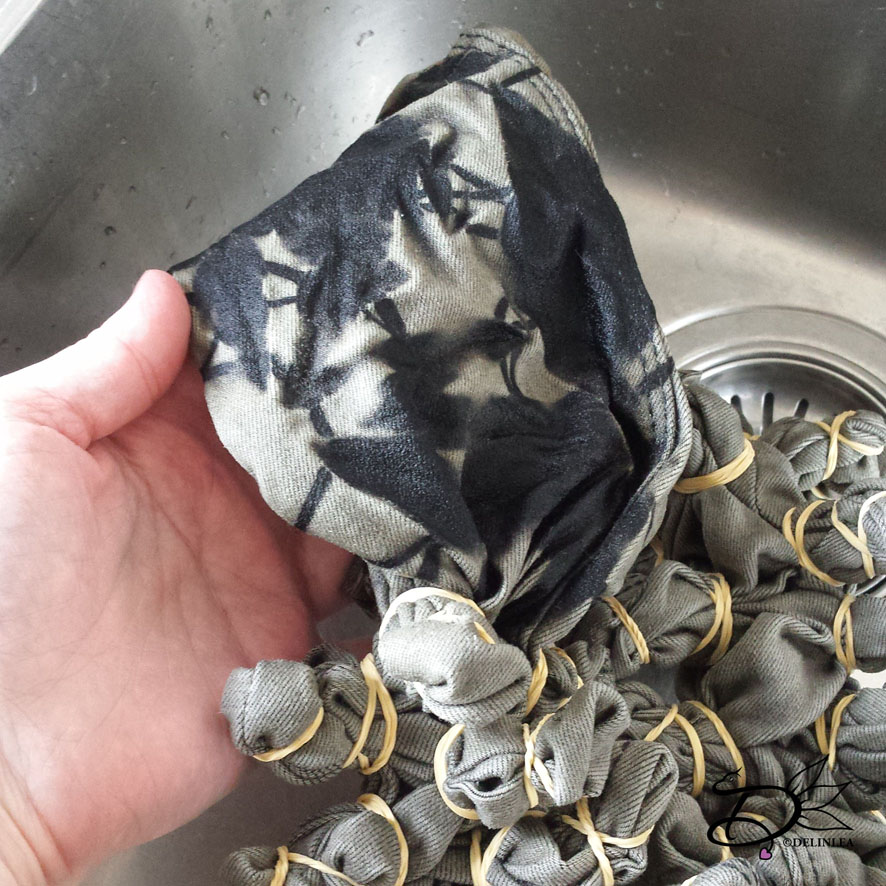
First off, is to prepare your clothes, I used a t-shirt. If you bought it new, wash it. There’s always something on there that makes it sorta water resistant and that will make it a bit harder to work with. Let it dry.
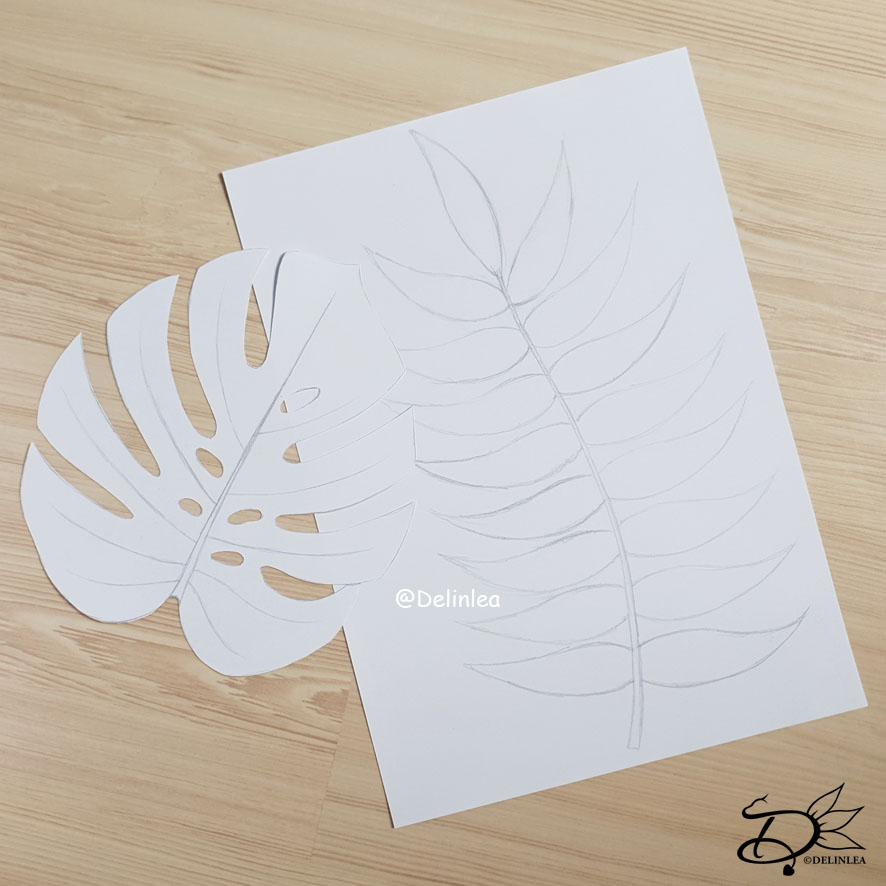
Make your design

While your clothes are drying, think of your design. I chose to do various leaves. I drew the shapes on paper and cut those out. But of course, feel free to make any design.

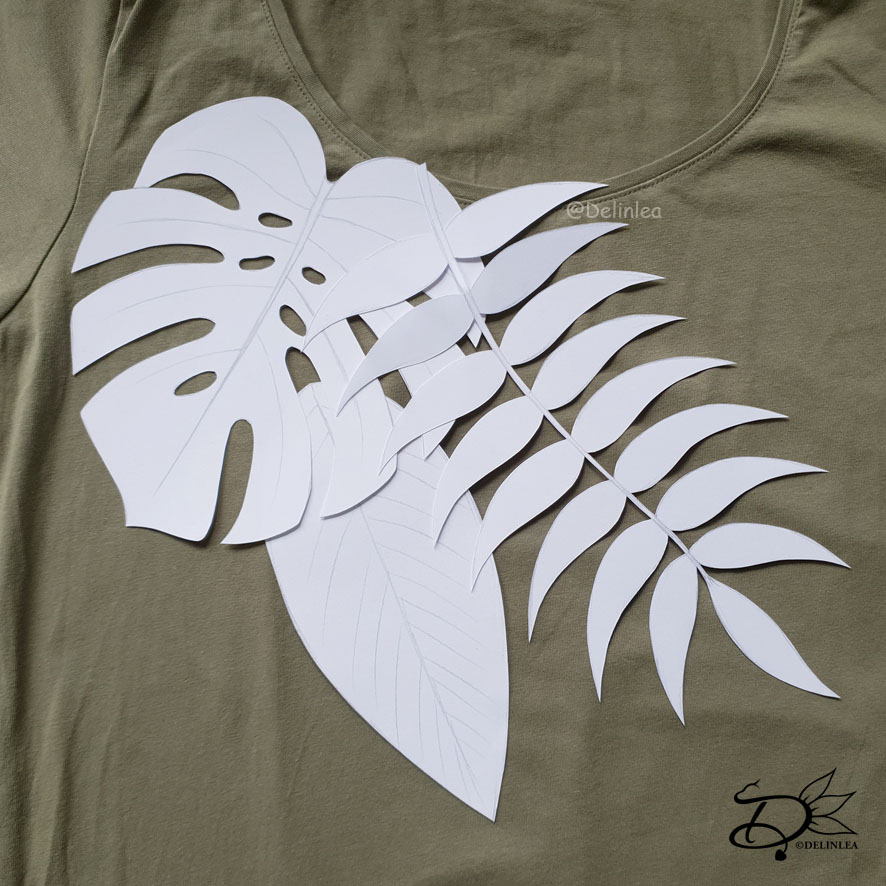
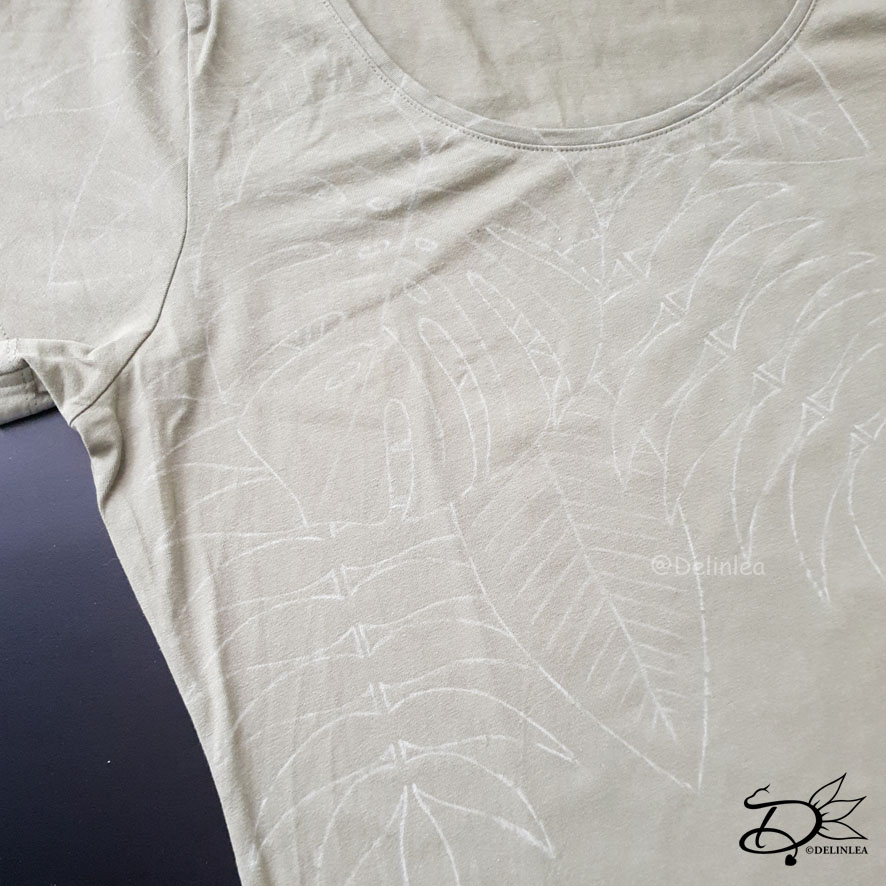
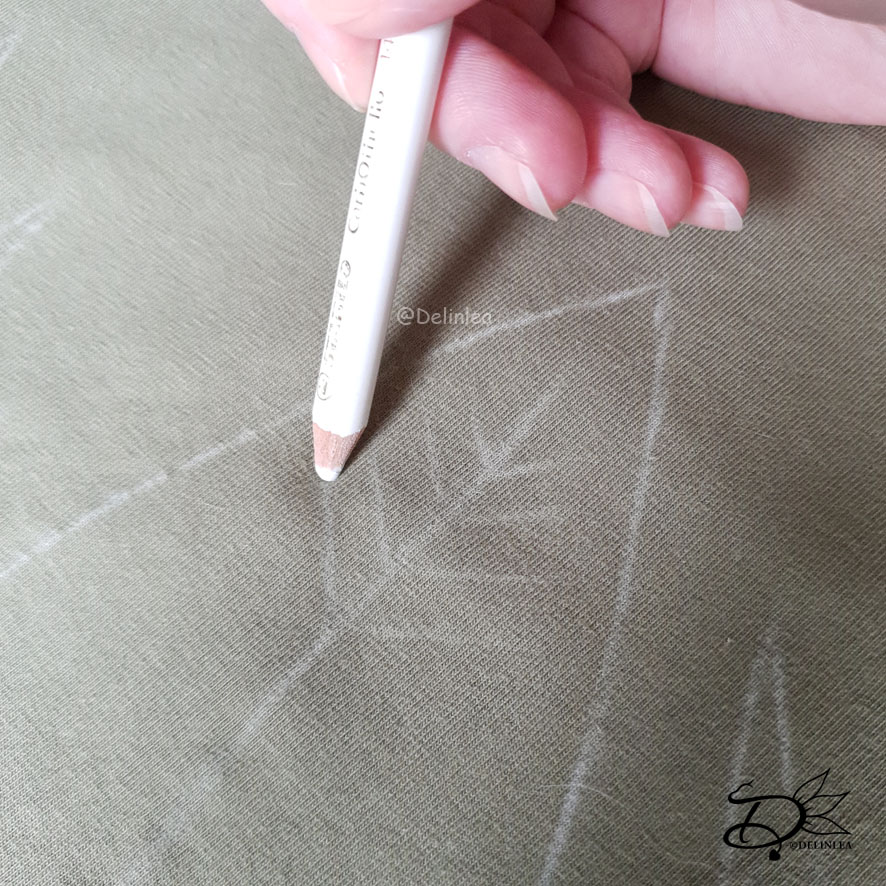
When your shirt is dry, start laying out the paper leaves on your shirt. Make any composition you like and trace these on your shirt with a pastel pencil. I chose pastel since that grabs better on a t-shirt and it will wash out later, I am not sure if graphite will wash out. You can free style your design as well, but for the tutorial it’s easier to explain it this way.

Bleaching

When you are happy with the line art on your shirt. It’s time to start the bleaching process. Make sure to take all the precautions, like wearing gloves, open all windows or work outside etc, protect surfaces and probably most important, put plastic in between the layers of your clothes that you are gonna bleach. You don’t want your design leak through to the other side, right?!

When you’ve done that, fill a small bottle with thick bleach, which has a small nozzle. This makes it easier to make details. Also fill a spray bottle with bleach. Make some test on paper or a scrap piece to see how it comes out the bottle and get the feel of it. If you don’t have any bottles I mentioned, a brush will work as well, just will take a bit longer to trace all the lines.

The bottles I used, Left is the small nozzled bottle, right is the spray bottle.

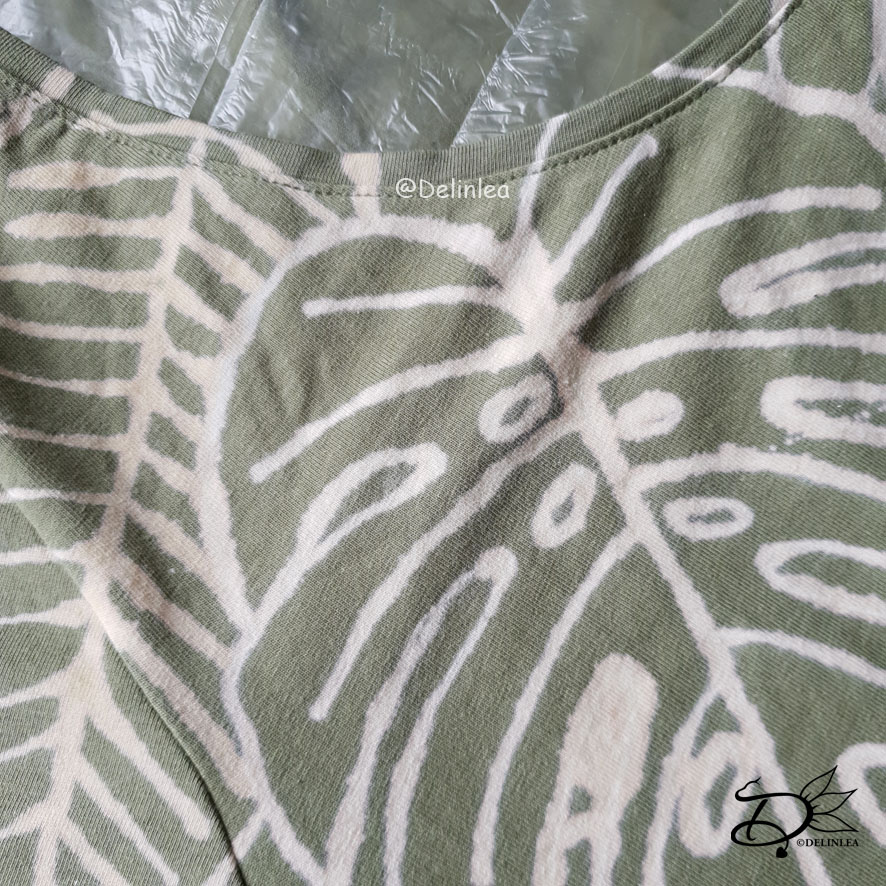
I sprayed the shirt with bleach first, carefully, just to distress the shirt a bit. This part somehow took longer to bleach for me. Then I started tracing the lines I made with the small nozzled bottle. It might take a bit of practice in the beginning. Also try to make the lines as thin as possible with tracing, they most likely will expand a bit while it works in. For me it took just seconds to see it work, especially when you use fresh bought bleach. Sometimes it will get less strong over time.

You kinda wanna work quickly, once the bleach has done its part, there’s no use to keep it on there longer, it will only damage your clothes. So, when you finish tracing all the lines, make sure all lines are bleached the way you want. Just a small note here; when you use a black t-shirt, those won’t bleach white, those will turn out orange-ish.

Washing

When you are happy with how it looks (it will lighten a bit more after washing and drying). Then it’s time to rinse your shirt. Use cold water and rinse it thoroughly. After that, throw it in the washing machine immediately on a full program. Some say to wash it without any soap, but I tested both ways and it doesn’t really matter.

Drying

When the washing machine is done, all you have to do is to wait for it to dry! I know, waiting is annoying, but just be patient, you can soon show of you own one of a kind t-shirt or other clothes you decided to alternate!

I hope you liked this tutorial! I think this is quite fun to do! Just making your own style of clothes! Who doesn’t want that?! I also made some mistakes with this shirt, one of the leaves is not as detailed, that’s where I started, I figured the lines needed to be thinner by then. Oh well, I still love how mine turned out. And if you decide to make one yourself as well, please show me on Twitter of Instagram, I’d love to see what you create!

Have a wonderful day and I’ll see you next week!

Love
Danielle

PS. if you love those kind of blogs, maybe you’d like to support me on Ko-Fi?! So I can keep making content like this!

// ©2021 Delinlea / Danielle Kaal // You may not reproduce, translate, share, freely distribute or sell this tutorial as your own. Credit to ‘Delinlea’ is appreciated, when you share anything made with this tutorial.

Posted in: Crafting Tagged: alternating, bleach, clothing, DIY, leaves, T-shirt, Tutorial

♥ DIY; Tie Dye Bleach Jeans

4 april 2019 by Delinlea 2 Comments

Hey Lovelies! I always love to change up cloths when I buy basic stuff. But I am usually to lazy to do them  or to show it to you xD. For today I thought, why not show you how to bleach some jeans, tie dye style. It’s a quick and easy change you can do yourself. I have done this a few times before. It’s cheap, tho you can buy those type of jeans yourself as wel, but that less fun and you probably spend more money on them. This DIY only involves some patience as well, so just that you know, bleach needs time to do it’s job xD.

For this DIY you’ll need.
♥ (Black) Jeans of your liking.
♥ Rubber Bands.
♥ Bleach.
♥ Water.
♥ Bucket that’s large enough to put your jeans, water and bleach in. Or you can use your sink.
♥ (Large) spoon.
♥ Scissors.
♥ Sink to rince your jeans well, this will be the place to remove the rubber bands.
♥ Washing Machine.

Warning! Bleach can affect your skin, eyes and airway. Make sure you are in a well ventilated area when you start working with bleach. Also wear gloves and some old cloths in case the bleach splatters around.

Rubber Bands

The first step is to add the rubber bands to your jeans.  You can do this in many ways. But I like to grap a piece of jeans and wrap the band several times around it, but not at one spot. As I show in the pictures. Do this for the whole thing! There’s not a wrong or right way to do this, just go for it.

Bleaching

Time for the bleaching part, please make sure to do this carfully! Fill up your bucket or sink with some hot water, then add the bleach (about 2 parts water, 1 part bleach), it doens’t matter if it’s a bit more or less, as long as it does it’s job. Keep in mind that you still have to put your jeans in there as well, so don’t overfill.

If your bleach water is ready, put in your jeans. Let it sit for about 30min, up to 90min. When the jeans are in there, you wanna make sure to twist it around every now and then, this is where the spoon comes in. I would NOT recomment you doing this with bare hands! You can see the water change color now, this is good, that means the bleach is doing it’s thing! The jeans should be completely under water, if that’s not the case, because it’s floating, put something heafy on it.

Note: after washing your jeans, the color will wash out even more, so it will lighten up after it’s washed and dried.

Removing the rubber bands and rinsing.

When the jeans are ready, it’s time to take it out of the bleach water. I usually rinse the whole thing out first (as far as possible) and then remove the rubber bands. Removing the bands can be pretty time consuming and annoying. Scissors will help a lot with this but becareful you won’t cut into your jeans. When all the rubber bands are removed rince out again.

Washing

As soon as all the rubber bands are removed, put your jeans in the washing machine. Just wash it as you would do regularly. BUT don’t put other stuff with it, since there’s still bleach residue left in the jeans, those need to be washed out first. When it’s done, let it dry and enjoy your new, unique pair of jeans!

I hope you enjoyed this DIY and so you will try it yourself! It’s fun! Oh! And a small tip, if you used black jeans like I did, try some color dye to color the white parts! Imagine the white spots to be hot pink or green!

Have a beautiful day!

Love
Danielle

Posted in: Crafting Tagged: alternating, bleach, clothes, DIY, jeans

What are you looking for?!

My Socials

Ko-Fi

I love making all these free things for you, tho it would be very helpfull if you can support me on Ko-Fi! (You don’t have to tho, totally up to you!)

Ko-Fi Shop!!

In my Ko-Fi shop you can find PDF Amigurumi Patterns!! You can pay easily with PayPal.
Go to the shop here!!

Recent Blog Posts

  • ♥ Happy 2022!
  • ♥ Day 12; Lights
  • ♥ Day 11; Flower Deco
  • ♥ Day 10; Snowman
  • ♥ Day 9; Gingerbread Houses

Recent Comments

  • Liane Van der Donck op ♥ Amigurumi Ghost
  • Kimberly Spear op ♥ Free Pattern; Amigurumi Shiber
  • Delinlea op ♥ Pua Tsum Tsum Amigurumi
  • Marfermar op ♥ Free Pattern; Easter Bunny
  • mary op ♥ Pua Tsum Tsum Amigurumi

Categories

  • animation
  • Beadwork
  • Blogmas 2018
  • Blogmas 2020
  • Blogmas 2021
  • Books
  • Bujo
  • Christmas
  • Christmas CAL 2019
  • Christmas Countdown 2017
  • Contest
  • Crafting
  • Crochet
  • Drawing
  • Drawing Lesson
  • Easter
  • Geen categorie
  • Life
  • Miniature
  • Nail Art
  • New Year
  • Paper
  • plush
  • Pokemon
  • Poseable Art Doll
  • Recipe
  • Sewing
  • Shop Pattern
  • Sinterklaas
  • Social Media
  • Tsum Tsum
  • Ufufy

Copyright © 2023 Delinlea - My little fantasy world.

Family WordPress Theme by themehall.com