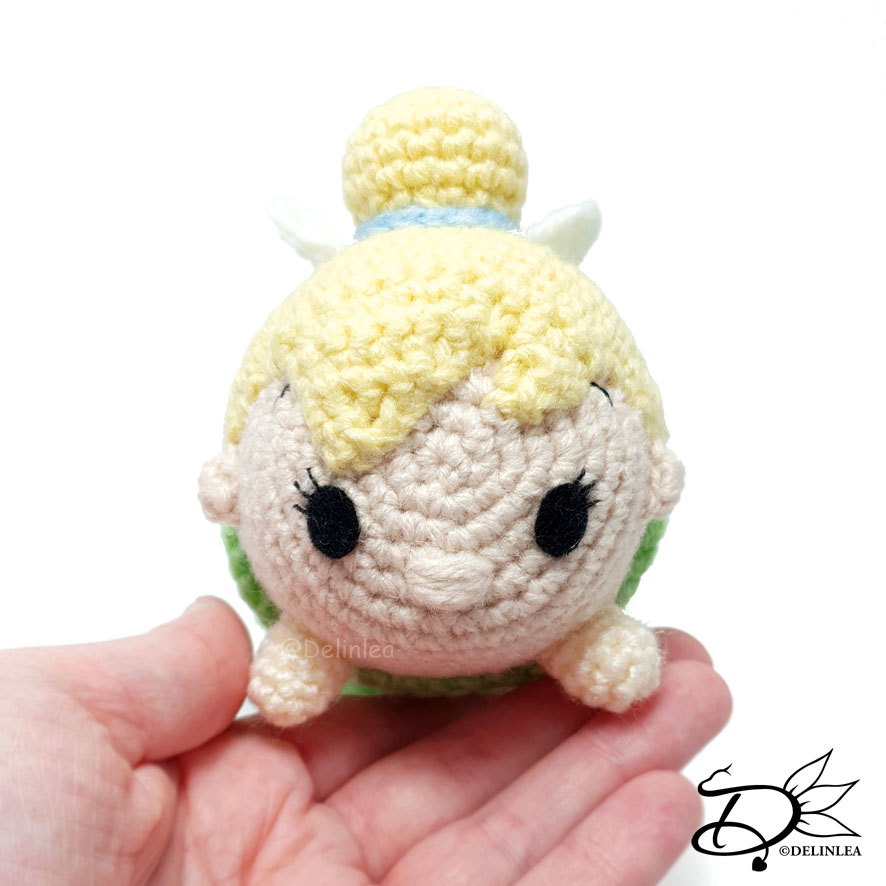
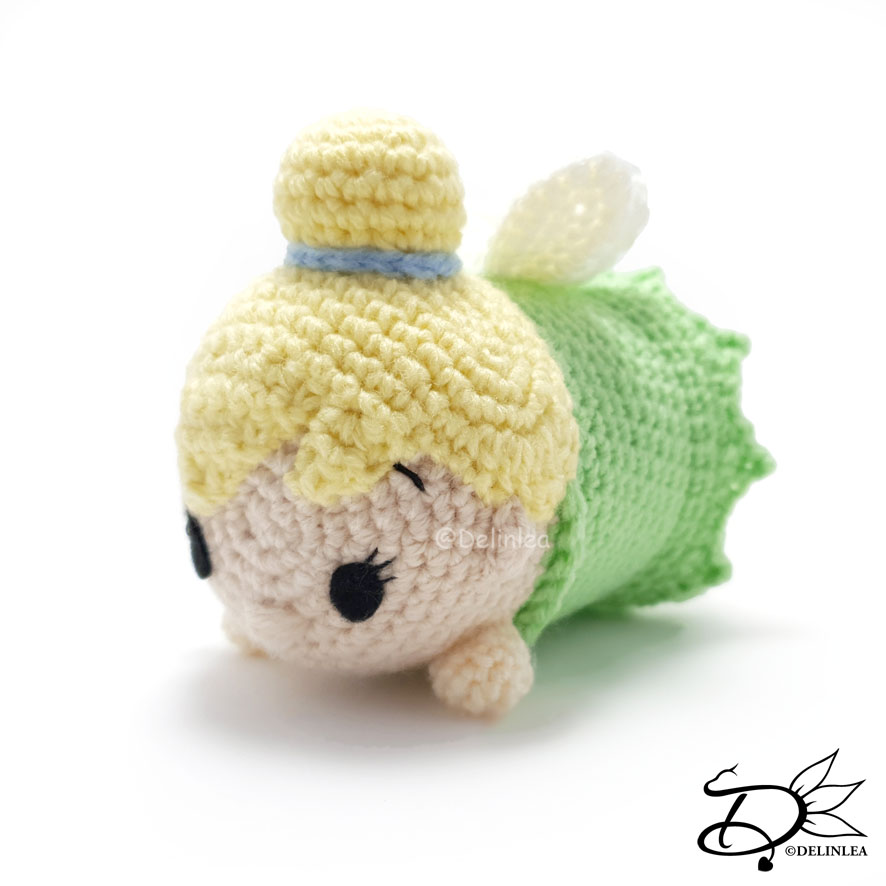
♥ Tinkerbell Tsum Tsum Amigurumi
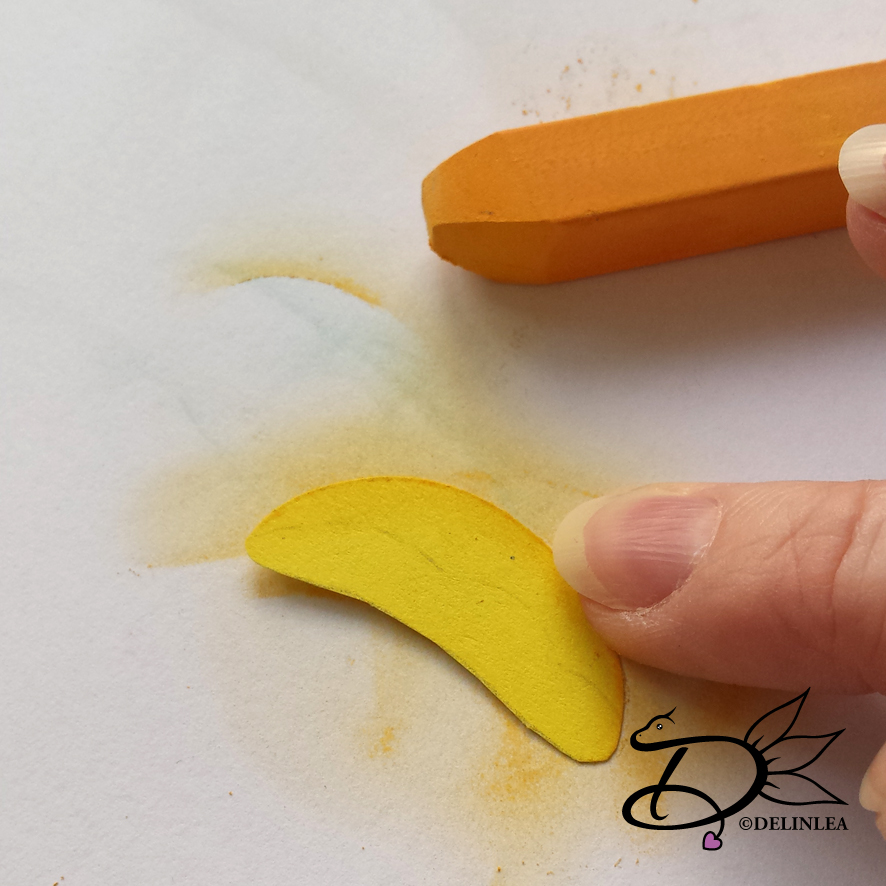
Hey Lovelies! How’s your week going?! I still have to get back in my productive mode. Still, procrastinating a lot, oops. That’s why my blog is also late today. But here it is, finally. I made a Tinkerbell Tsum Tsum this time. I struggled a lot with making her hair, so annoying, not sure what was going on. Usually I make patterns easily. Oh well, enough babbling, let’s go to the pattern.
For this Pattern you’ll need:
♥ DK Yarn in Beige, Light Green, White and Yellow. (I used Budgetyarn.com, not sponsored)
♥ Bit of Blue yarn.
♥ Black felt for details.
♥ Crochet Hook. (I used a 2,5mm hook)
♥ Stuffing.
♥ Stitch Markers.
♥ Yarn Needle.
♥ Sewing Pins.
♥ (Fabric)Glue.
Stitches used (US Terms):
Magic Ring.
CH = Chain.
SLST = Slip Stitch.
SC = Single Crochet.
HDC = Half Double Crochet.
DC = Double Crochet.
TR = Treble.
Picot = Chain 3 and slst in the first st.
ST = Stitch.
Inc = Increase.
Dec = Decrease.
(…) = Repeat the space in brackets the given number of times.
[…] = Total number of stitches.
♥ Pattern Tinkerbell
This pattern is made with continues rounds, unless stated otherwise. Use a stitch marker to mark your first/last stitch of your row.
Body
Start with the color Beige.
1: 6SC in a Magic Ring. [6]
2: 2SC in each st around. [12]
3: (1SC, inc) 6 times. [18]
4: (2SC, inc) 6 times. [24]
5: (3SC, inc) 6 times. [30]
6: (4SC, inc) 6 times. [36]
7: (5SC, inc) 6 times. [42]
8: 42SC. [42]
|
14: 42SC. [42]
Change to the color Light Green.
15: 42SC. [42]
16: BL, 42SC. [42]
17: 42SC. [42]
|
25: 42SC. [42]
Change to the color White.
26: BL, 42SC. [42]
27: 42SC. [42]
|
29: 42SC. [42]
30: (5SC, dec) 6 times. [36]
31: (4SC, dec) 6 times. [30]
32: (3SC, dec) 6 times. [24]
33: (2SC, dec) 6 times. [18] Stuff the body.
34: (1SC, dec) 6 times. [12]
35: dec all around. [6]
Fasten off and weave in tail.
At row 16 of the body you worked in back loops only. Now rejoin your yarn in the front loops, and crochet 42SC around. Fasten off and weave in tail.
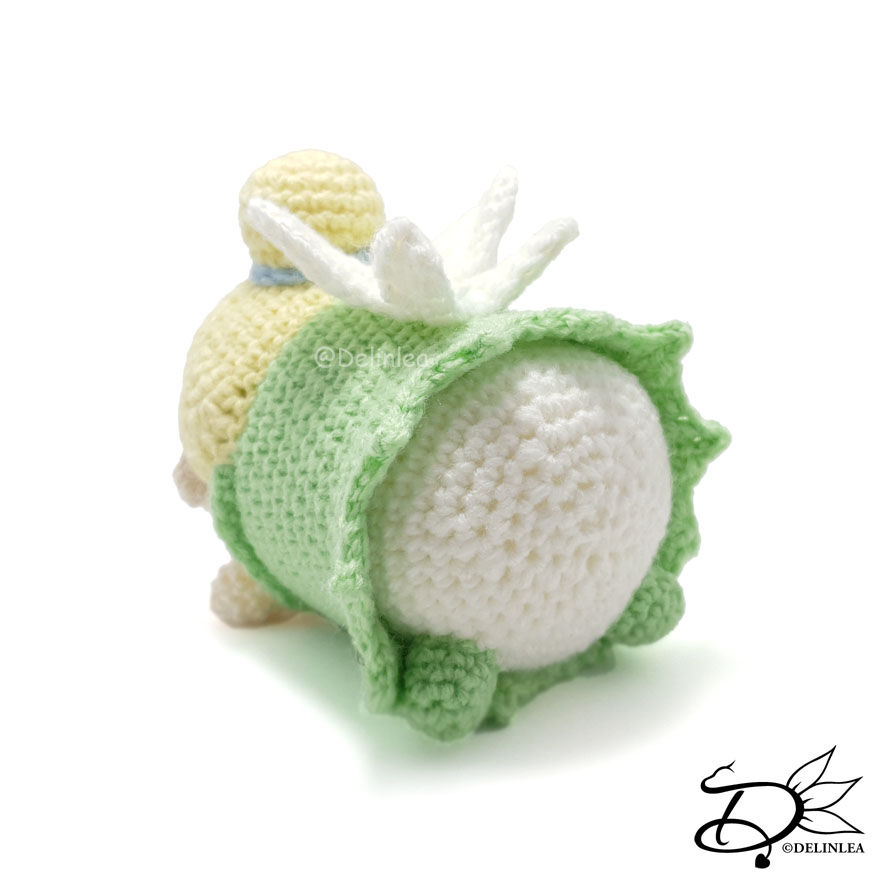
Skirt
Use the color Light Green.
At row 26 of Tinkerbell her body you worked in the back loops only. Rejoin your yarn now in the front loops.
1: 42SC. [42]
2: 42SC. [42]
3: (1SC, 1HDC, 1DC + Picot + 1DC in the next st, 1HDC) 10 times, 1SC, SLST. [62]
Fasten off and weave in tail.
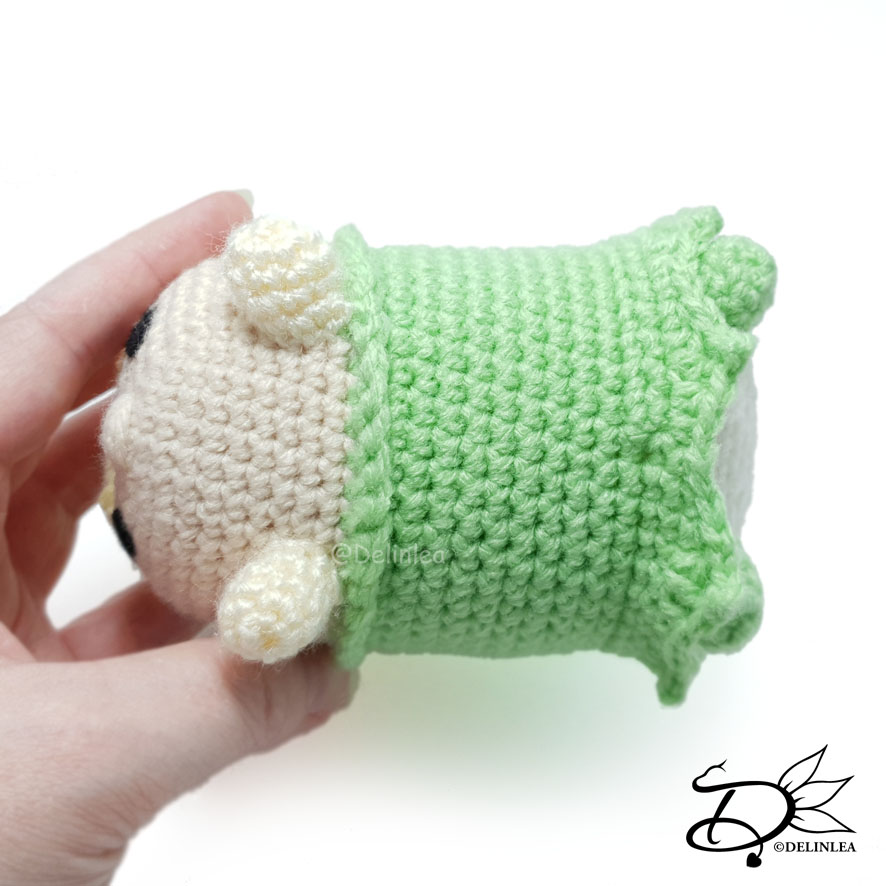
Ears (Make 2)
Use the color Beige.
1: 6SC in a Magic Ring. [6]
Fasten off and leave a long tail for sewing.
Hair
Use the color Yellow.
1: Ch15, insert in second ch from hook, 13SC, 3SC in the next st, work along the other side of the chain now, 12SC, inc. [30]
2: Inc, 12SC, (inc) 3 times, 12SC, (inc) 2 times. [36]
3: 1SC, inc, 12SC, (1SC, inc) 3 times, 12SC, (1SC, inc) 2 times. [42]
4: Ch3, 2DC inc the next st, 1HDC, 16SC, 1HDC, 2DC in the next st, 2TR in the next st, 2DC in the next st, 1HDC, 16SC, 2DC in the next st, 1HDC, 1TR. [48] (the first 3Ch counts as the first TR).
Break the yarn.
5: Skip 5st, rejoin the yarn, 13SC, turn. [13]
6: Dec, 9SC, dec, turn. [11]
7: 7SC, dec, turn. [8] Mark the last 2 remaining stitches from the previous row.
8: Dec, 6SC, turn. [7]
9: Dec, 3SC, dec, turn. [5]
10: Dec, 3SC, turn. [4]
11: (Dec) 2 times, turn. [2]
12: Dec. [1]
Fasten off and leave along tail for sewing.
Go back to the 2 stitches you marked.
1: inc, 1SC, turn. [3] (the 1sc should be at the outside of the hair).
2: Dec, 1SC, turn. [2]
3: Dec. [1]
Fasten off and weave in tail.
Bun
Use the color Yellow.
1: 6SC in a Magic Ring. [6]
2: 2SC in each st around. [12]
3: (1SC, inc) 6 times. [18]
4: 18SC. [18]
|
6: 18SC. [18]
7: (1SC, dec) 6 times. [12]
Fasten off and leave a long tail for sewing. Don’t forget to stuff the bun.
Hairband
Use the color Blue.
Make a chain that can fit around the base of the bun.
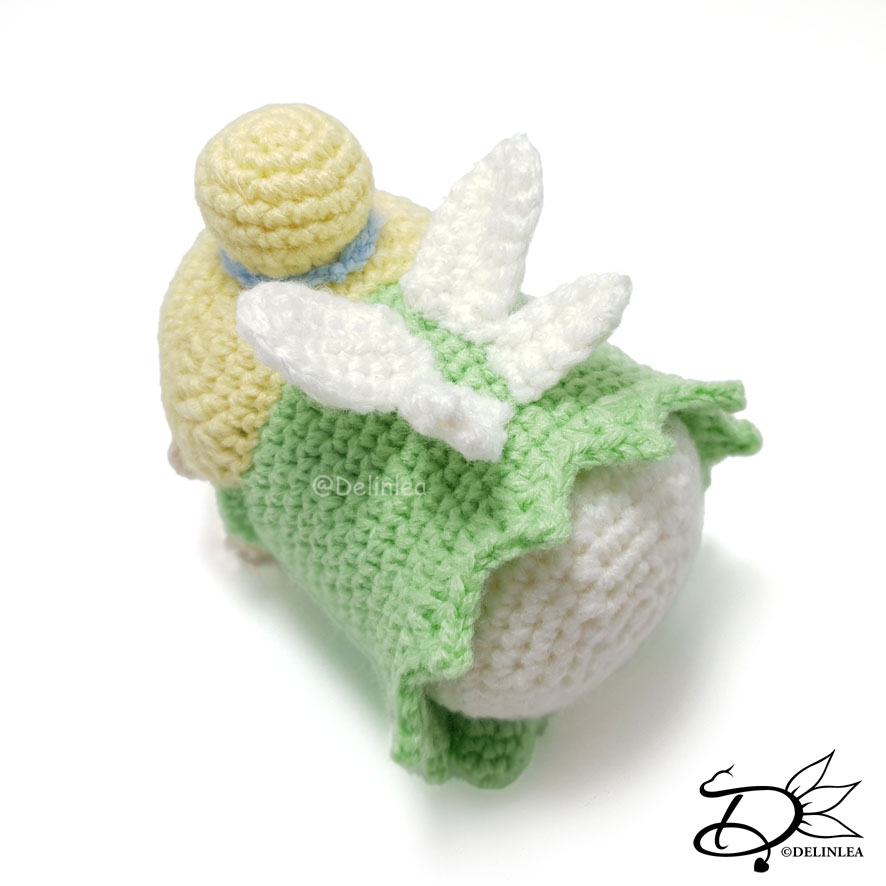
Wings (Make 2)
Use the color White. (Optional, use metallic/glitter thread along with the yarn, to create a sparkle effect).
The wings won’t be worked in continues rounds.
1: Ch7, insert in second ch from hook, 5SC, 3SC in the next st, now work along the other side of the chain, 5SC, turn. [13]
2: 4SC, (inc, 1sc) 2 times, inc, 4SC. [16]
3: Ch6, insert in second ch from hook, 5SC, turn. [5]
4: 5SC, turn. [5]
5: Dec, 3SC. [4]
Fasten off and leave a long tail for sewing.
Legs (Make 4)
Use the color Beige for 2 legs and for the other 2 use the color Light Green.
1: 4SC in Magic Ring. [4]
2: 2SC in each st around. [8]
3: 8SC. [8]
|
4: 8SC. [8]
Fasten off and leave a long tail for sewing.
You don’t have to stuff the legs, but you can if you want.
♥ Assembling
Whenever I start to assemble Amigurumi’s, I use sewing pins first to position all parts. This way you can easily move things around until you are happy and sew it on. I recommend you would do this as well.
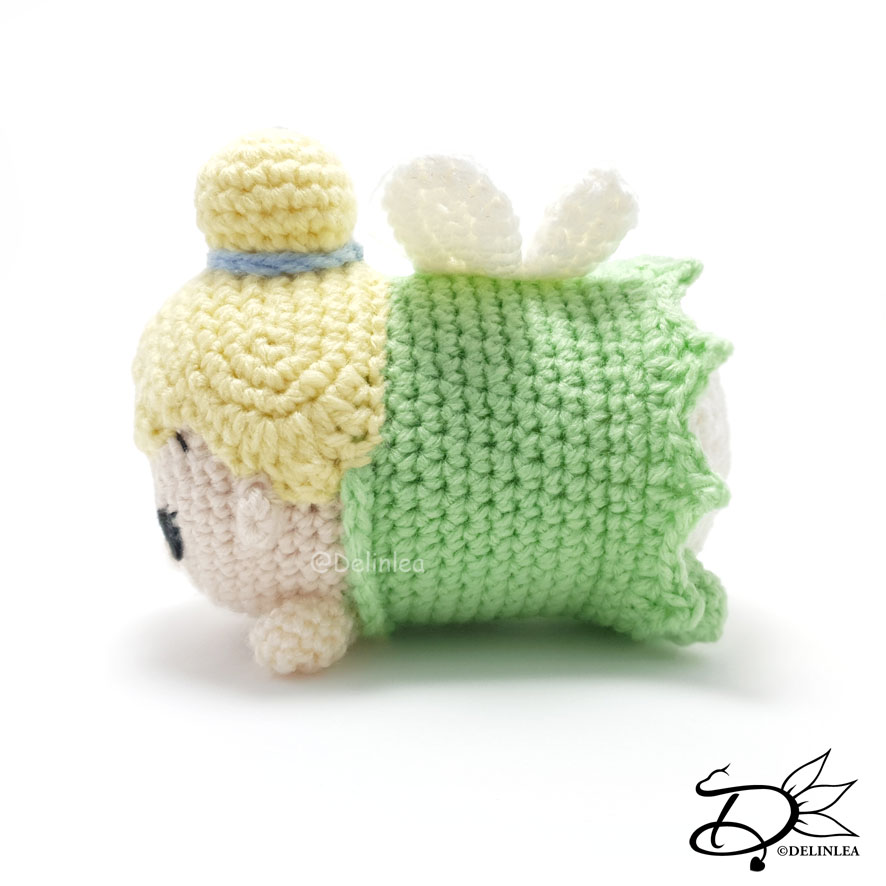
First sew on Tinkerbell her legs, the 2 back legs go under her skirt and the beige ones, near her face. Now you now that the top of her body is, position her hair nicely and sew it on, then add the bun and put the hairband around it. Then sew on her ears as well. Last sew on her wings!
From felt make her eyes and eyebrows (Or use yarn to create her eyebrows). Glue those on and let dry.
Tinkerbell is finished! I hope it wasn’t too hard? I don’t think so. I hope you had fun. If you decided to make her, make sure to show me on Twitter or Instagram with the #DelinleaDIY.
Have a wonderful day and I’ll see you next week!
Love
Danielle