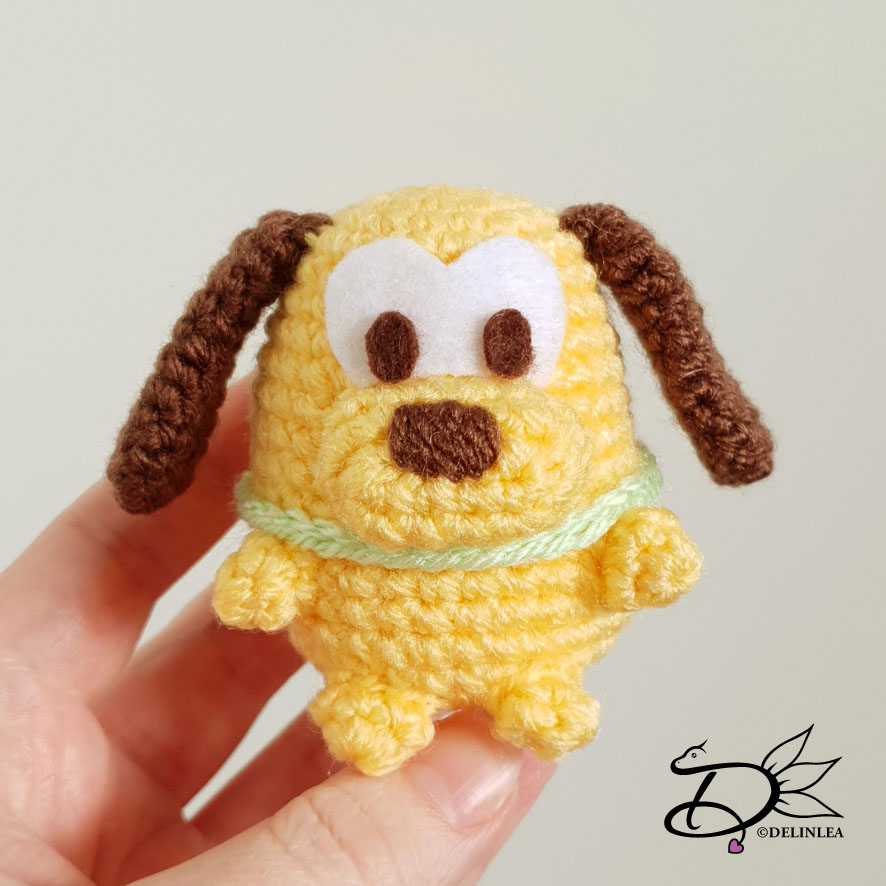
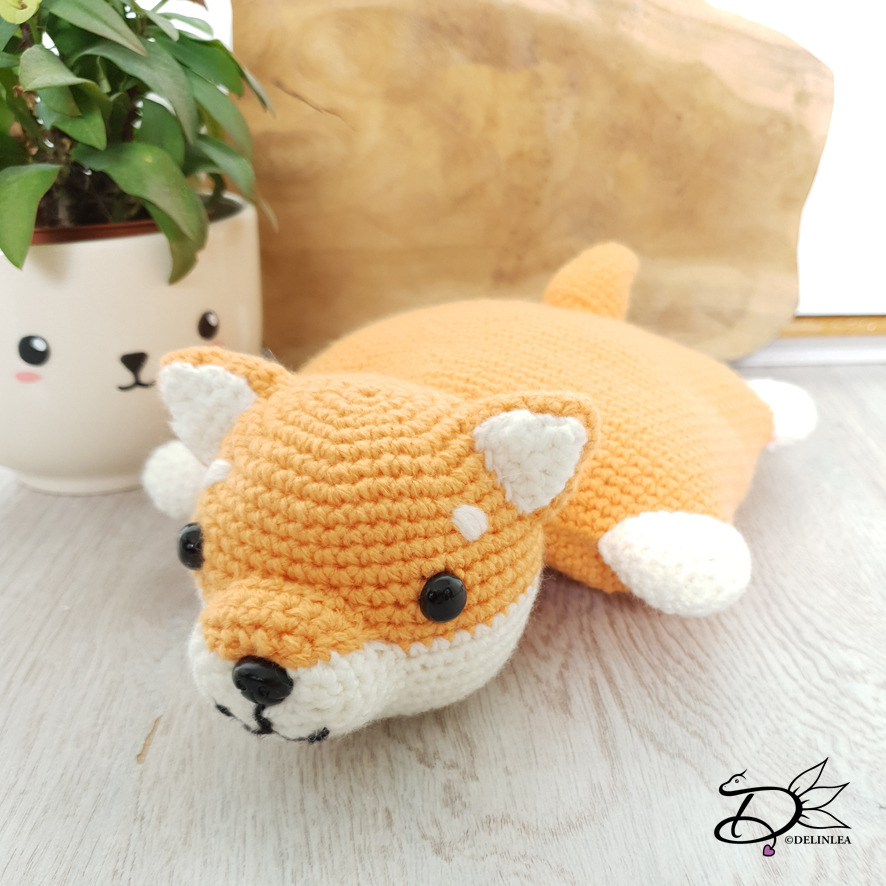
♥ Free Pattern; Amigurumi Shiber
Hey Lovelies! It’s a lovely new day and time for a new crochet pattern. I quite like this one, tho I think I made it a bit big, as you know, I usually work pretty small xD. I struggled a bit to get this done. But I made it! It’s a Shiba Inu Throw Pillow, still tinier as a normal pillow. The reason I made this is because San of ATEEZ (a Korean pop group) has a plush like this, called Shiber. He’s so adorable! I just had to make one myself with my own twist. I hope you will enjoy this cutie as well.

For this DIY you’ll need:
♥ Yarn in the colors; Orange and White. (I used budgetyarn.com)
♥ Crochet Hook (I used a 2,5mm hook).
♥ Stuffing.
♥ Scissors.
♥ Sewing Pins.
♥ Yarn Needle.
♥ Safety eyes, 10mm.
♥ Safety nose. (optional, you can also embroider it on or use felt.)
♥ Piece of black yarn or felt.
Stitches used (US Terms):
Magic Ring.
CH = Chain.
SC = Single Crochet.
ST = Stitch.
Inc = Increase.
Dec = Decrease.
(…) = Repeat the space in brackets the given number of times.
[…] = Total number of stitches.
Pattern
Work in continues rounds, use a stitch marker to mark your first stitch of every row. This is for every part, unless stated otherwise.
Body
In the color Orange.
1: Ch38, insert in second ch from hook, 36SC, 3SC in the
last CH, work along the other side of the chains now, 35SC, inc. [76]
2: 76SC. [76]
|
39: 76SC. [76]
Fasten off and sew on both side of the open part, about 4-5 cm close. So you
have an opening in the middle for the head. Stuff the body lightly.
Belly
Use the color White.
1: Ch10, insert in second ch from hook, 8SC, 3SC in the last
Ch, work along the other side of the Chains now, 7SC, inc. [20]
2: Inc, 7SC, (inc) 3 times, 7SC, (Inc) 2 times. [26]
3: 2SC, inc, 6SC, (inc, 2SC) 2 times, inc, 6SC, inc, 2SC, inc. [32]
4: 3SC, inc, 6SC, inc, 8SC, inc, 6SC, inc, 5SC. [36]
5: (5SC, inc) 6 times. [42]
6: (6SC, inc) 6 times. [48]
7: (7SC, inc) 6 times. [54]
8: 54SC. [54]
Fasten off and leave a long tail for sewing. Sew the belly to the middle of the
‘square’ body.
Head
Start with the color Orange.
1: 7SC in Magic Ring. [7]
2: 2SC in each st around. [14]
3: (1SC, inc) 7 times. [21]
4: (2SC, inc) 7 times. [28]
5: (3SC, inc) 7 times. [35]
6: (4SC, inc) 7 times. [42]
7: (5SC, inc) 7 times. [49]
8: 49SC. [49]
|
14: 49SC. [49]
Change to the color White. Put the safety eyes between row 12 and 13, about
5,5cm apart.
15: 49SC. [49]
|
20: 49SC. [49]
21: (5SC, dec) 7 times. [42]
22: (4SC, dec) 7 times. [35]
23: (3SC, dec) 7 times. [28]
24: (2SC, dec) 7 times. [21] Stuff the head around here.
25: (1SC, dec) 7 times. [14]
16: Dec 7 times. [7]
Fasten off and weave in tail.
Ears (make 2)
Use the color Orange.
1: 6SC in Magic Ring. [6]
2: (1SC, inc) 3 times. [9]
3: 9SC. [9]
4: (2SC, inc) 3 times. [12]
5: (3SC, inc) 3 times. [15]
6: (4SC, inc) 3 times. [18]
7: 18SC. [18]
Fasten of and leave a long tail for sewing. Don’t forget to stuff.
Inner ears (make 2)
Use the color White.
You won’t work in continues rounds.
1: Ch6, insert in second ch from hook, 5SC, turn. [5]
2: Ch1, Dec, 1SC, Dec, turn. [3]
3: Ch1, 1SC, Dec, turn. [2]
4: Ch1, Dec. [1]
Fasten off and leave a long tail for sewing.
Sew the inner ear to the main part of the ear.
Snout
Use the color White.
1: Ch8, insert in second Ch from hook, 6SC, 3SC in the last
Ch, work along the other side of the Chains now, 5SC, inc. [16]
2: Inc, 5SC, (inc) 3 times, 5SC, (inc) 2 times. [22]
3: 4SC, inc, 10SC, inc, 6SC. [24]
4: 24SC. [24]
5: 24SC. [24]
Fasten off and leave a long tail for sewing.
Orange part of the snout
Use the color Orange. (obviously xD)
You won’t work in continues rounds.
1: Ch6, insert in second Ch from hook, 5SC, turn. [5]
2: Ch1, inc, 3SC, inc, turn. [7]
3: Ch1, inc, 5SC, inc. [9]
Fasten off and sew this to the upper part of the snout.
When this is on you can place the safety nose as well.
Feet (make 4)
Use the color White.
1: 6SC in Magic Ring. [6]
2: 2SC in each st around. [12]
3: (1SC, inc) 6 times. [18]
4: 18SC. [18]
|
7: 18SC. [18]
Fasten off and leave a long tail for sewing.
Tail
Use the color Orange.
1: 6SC in Magic Ring. [6]
2: (1SC, inc) 3 times. [9]
3: 9SC. [9]
4: (2SC, inc) 3 times. [12]
5: 12SC. [12]
6: 12SC, [12]
7: (3SC, inc) 3 times. [15]
8: (4SC, inc) 3 times. [18]
9: 18SC. [18]
10: 18SC. [18]
11: 18SC. [18]
12: (1SC, dec) 6 times. [12]
Fasten off and leave a long tail for sewing.
White part of the tail
Use the color White.
You won’t work in continues rounds.
1: Ch4, insert in second Ch from hook, 3SC, turn. [3]
2: Ch1, inc, 1SC, inc, turn. [5]
3: Ch1, 5SC, turn. [5]
4: Ch1, Dec, 1SC, dec, turn. [3]
5: Ch1, 3SC, turn. [3]
6: Ch1, Dec, 1SC, turn. [2]
7: Ch1, dec. [1]
Fasten off and sew this to the tail.

Assembling
With the use of sewing pins you can position all your parts first, to check if you like the outcome. This way you can easily move them around before sewing them on.
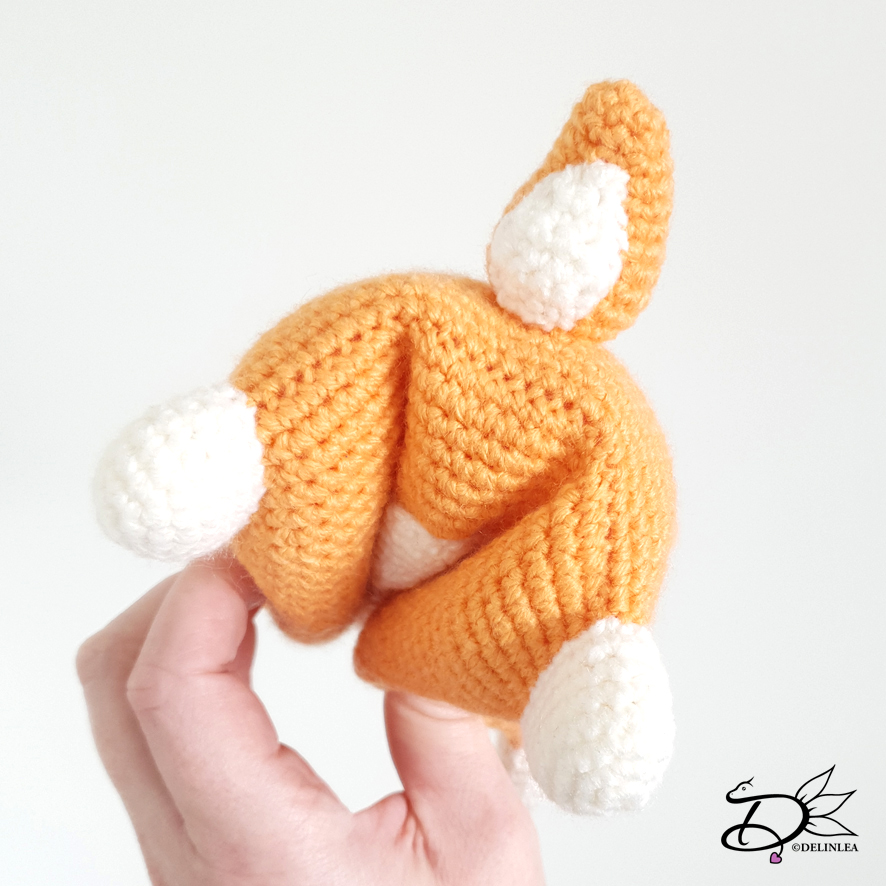
Start with sewing on the feet to each corner of the body.
Make them flat and slide the over the corner. You don’t have to stuff them, but
you can if you want.
Sew on the tail as well, make sure you keep the belly on the down side.
Sew in the Snout and the ear to the head. Shiber has 2 white dots above his
eyes, these you can embroider on with some white yarn or use felt. As for the
nose/mouth if you didn’t use a safety nose, you can do the same as for the
white dots.
Now, Sew the head to the body. This might be tricky, just make sure to use
enough Sewing pins to place it, this will help a lot by sewing it on bit by
bit.
And your Shiber is done as well! Adorable, right?! I hope you had fun with this pattern. And I will see you next week. (I know I was a bit late today, I hope you don’t mind!)
Love
Danielle