Delinlea - My little fantasy world
  • ♥ Home
  • ♥ About Me
  • ♥ Blogmas 2021
  • ♥ Free Patterns
    • ♥ Amigurumi; Spring/Easter
    • ♥ Amigurumi; Fall/Halloween
    • ♥ Amigurumi; Winter
    • ♥ Amigurumi Tsum Tsum
    • ♥ Amigurumi Ufufy
    • ♥ Amigurumi Others
    • ♥ Christmas Countdown 2017
    • ♥ Blogmas 2018
    • ♥ Blogmas 2020
  • ♥ Tutorials
    • ♥ Easter
    • ♥ Home Deco
    • ♥ Others
  • ♥ Drawing Lessons
  • ♥ FanFic
    • ♥ Chapter 1
    • ♥ Chapter 2
    • ♥ Chapter 3
    • ♥ Chapter 4
    • ♥ Chapter 5
    • ♥ Chapter 6
    • ♥ Chapter 7
  • ♥ Gallery
    • ♥ Crafts
    • ♥ Drawings
    • ♥ Poseable Art Dolls
  • ♥ Links
  • ♥ Contact
    • Privacy Policy

Amigurumi

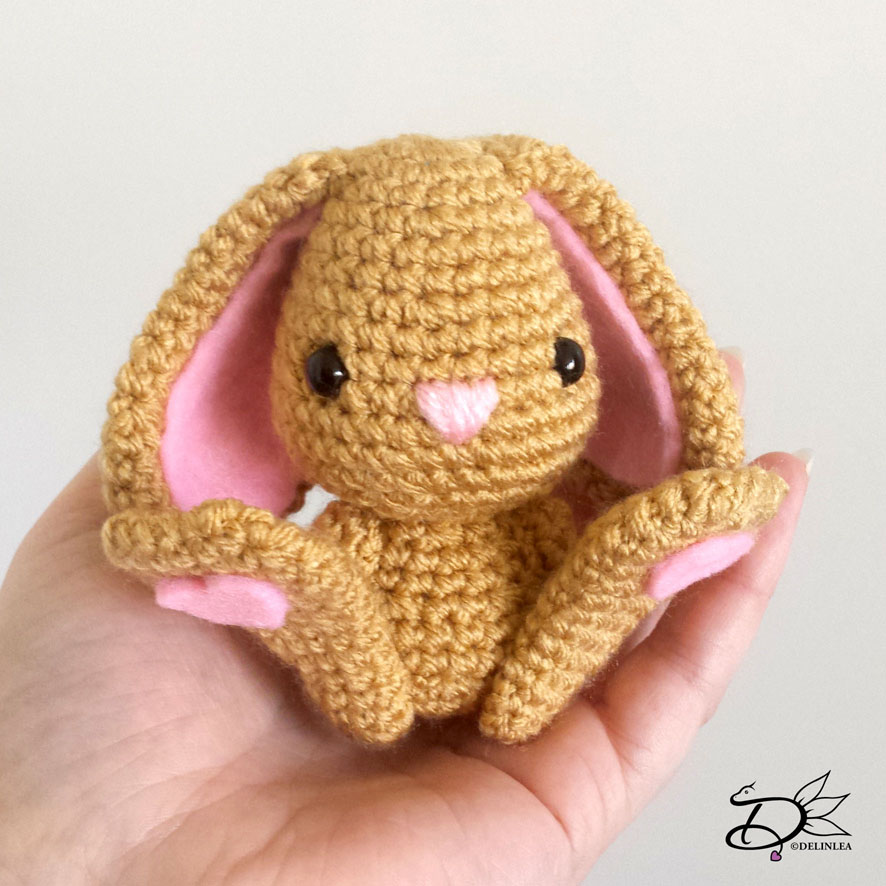
♥ Free Pattern; Easter Bunny

11 april 2019 by Delinlea 1 Comment

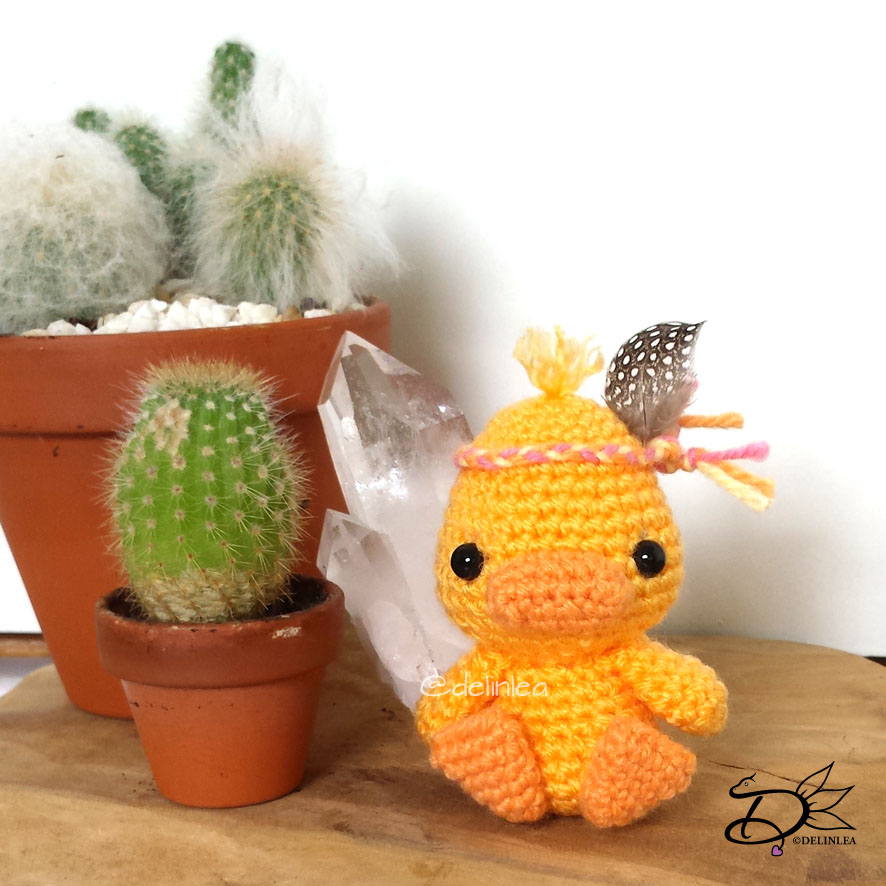
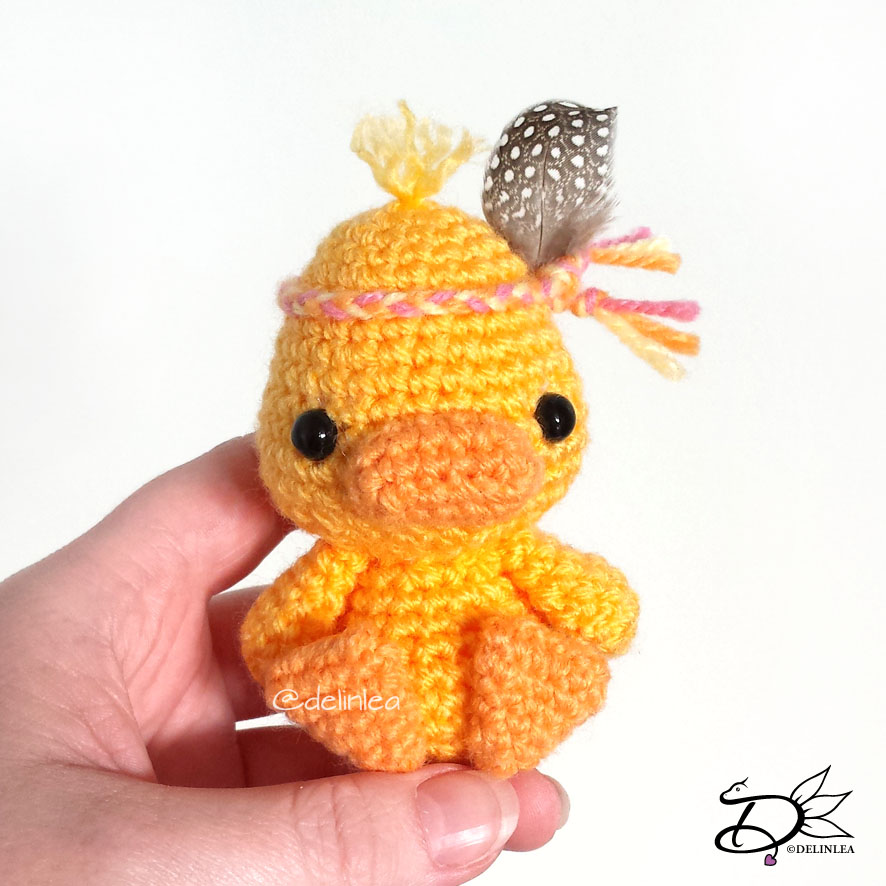
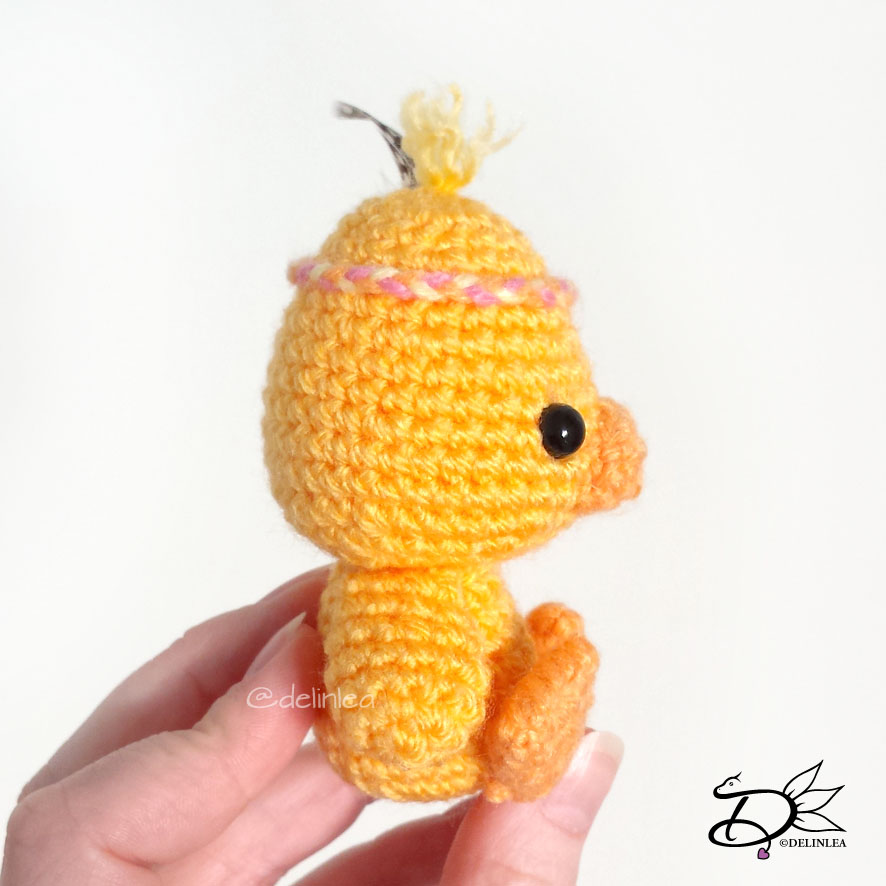
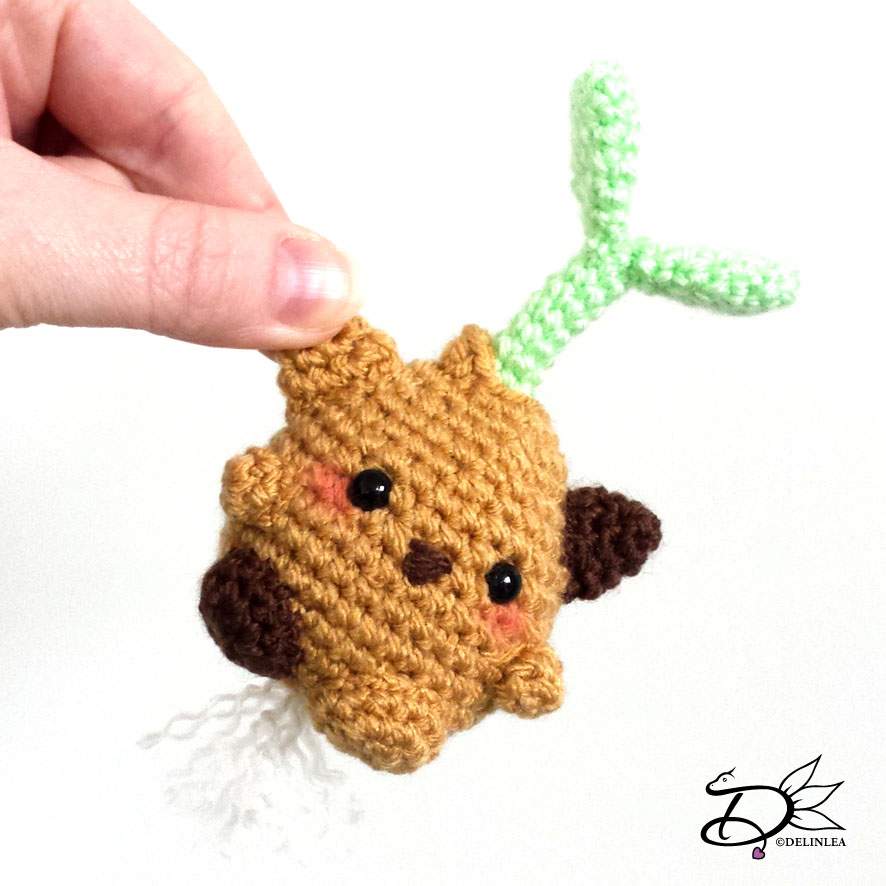
Hey Lovelies! Are you ready for easter yet?! Well, I think I am, but at the same time I am not, I have so many ideas I wanna make and create, but there is not enough time haha. I think I can make easter stuff all year round. Better not do that xD. I’ll just gonna write them down, and if I have time I’ll make them for next year. For today I planned a easter variation on my Boho Duckling. A Easter Bunny! I also wanted to do a little chick, but I couldn’t figure out on time how I wanted the feet to look like, and since my arm hurts a lot, I thought it was better to only upload the easter bunny for you. And hopefully next week upload the little chick.

For this DIY you’ll need:
♥ Yarn in the colors;  Light Brown and Cream. (I used Stylecraft Special DK)
♥ Crochet Hook (I used a 2,5mm hook).
♥ Stuffing.
♥ Scissors.
♥ Sewing Pins.
♥ Yarn Needle.
♥ Safety eyes, 6mm.
♥ Pink Felt.
♥ Fabric Glue.

Stitches used (US Terms):
Magic Ring.
Ch = Chain.
SC = Single Crochet.
ST = Stitch.
Inc = Increase.
Dec = Decrease.
(…) = Repeat the space in brackets the given number of times.
[…] = Total number of stitches.

Pattern

The Body and Head will be the same as the Boho Duckling. Use the Light Brown color for this.
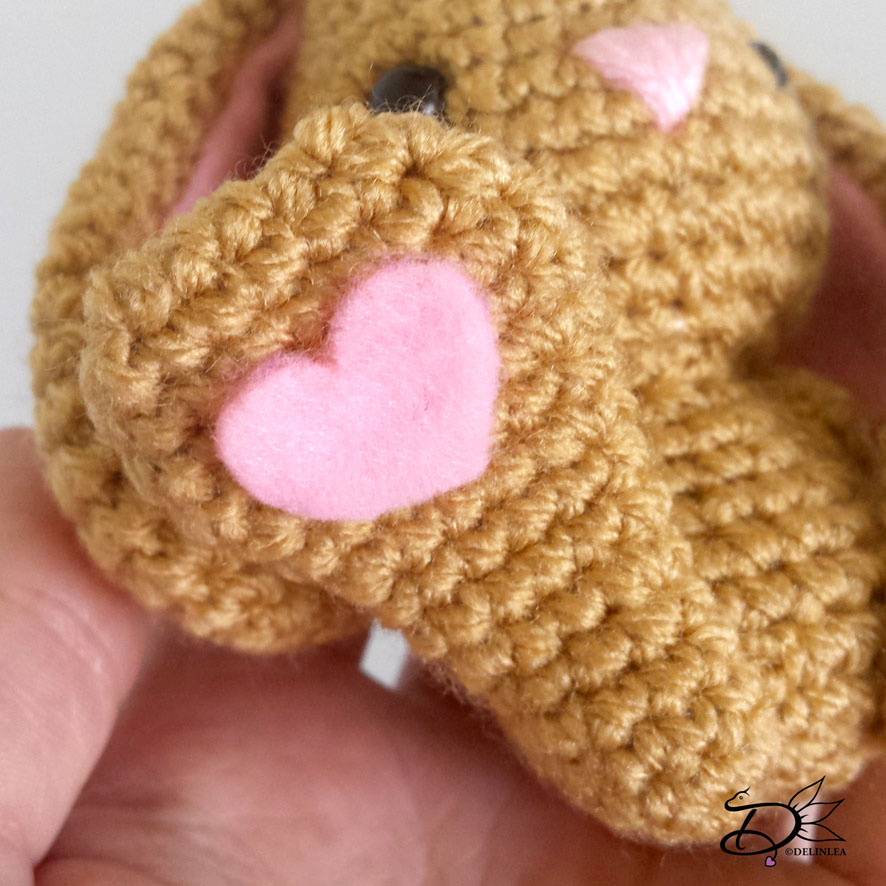
For the nose you can use either pink felt or embroider it on. Just what you think is best.

Ears (Make 2)
Use the color Light brown.

1: 6SC in Magic Ring. [6]
2: 2SC in each st around. [12]
3: (1SC, inc) 6 times. [18]
4: (2SC, inc) 6 times. [24]
5: 24SC. [24]
6: 24SC. [24]
7: 24SC. [24]
8: (6SC, dec) 3 times. [21]
9: 21SC. [21]
10: (5SC, dec) 3 times. [18]
11: 18SC. [18]
12: (4SC, dec) 3 times. [15]
13: 15SC. [15]
14: 15SC. [15]
15: 15SC. [15]
16: (3SC, dec) 3 times. [12]
17: 12SC. [12]
18: 12SC. [12]
19: 12SC. [12]
Fasten off and leave a long tail for sewing. Out of Pink felt, cut the inner ear. This you will glue on with fabric glue.

Feet (make 2)
Use the color Light Brown.

1: 6SC in Magic Ring. [6]
2: (1SC, inc) 3 times. [9]
3: 9SC. [9]
4: 9SC. [9]
5: 9SC. [9]
6: (2SC, inc) 3 times. [12]
7: 12SC. [12]
8: 12SC. [12]
9: (3SC, inc) 3 times. [15]
10: 15SC. [15]
11: (4SC, inc) 3 times. [18]
12: 18SC. [18]
13: 3SC, dec, 7SC, dec, 4SC. [16]
14: 3SC, dec, 6SC, dec, 3SC. [14]
15: 2SC, dec, 5SC, dec, 3SC. [12]
Fasten off and leave a long tail for sewing.
Sew the top part, the opening, close.
Cut a heart out pink felt and glue this to the feet.

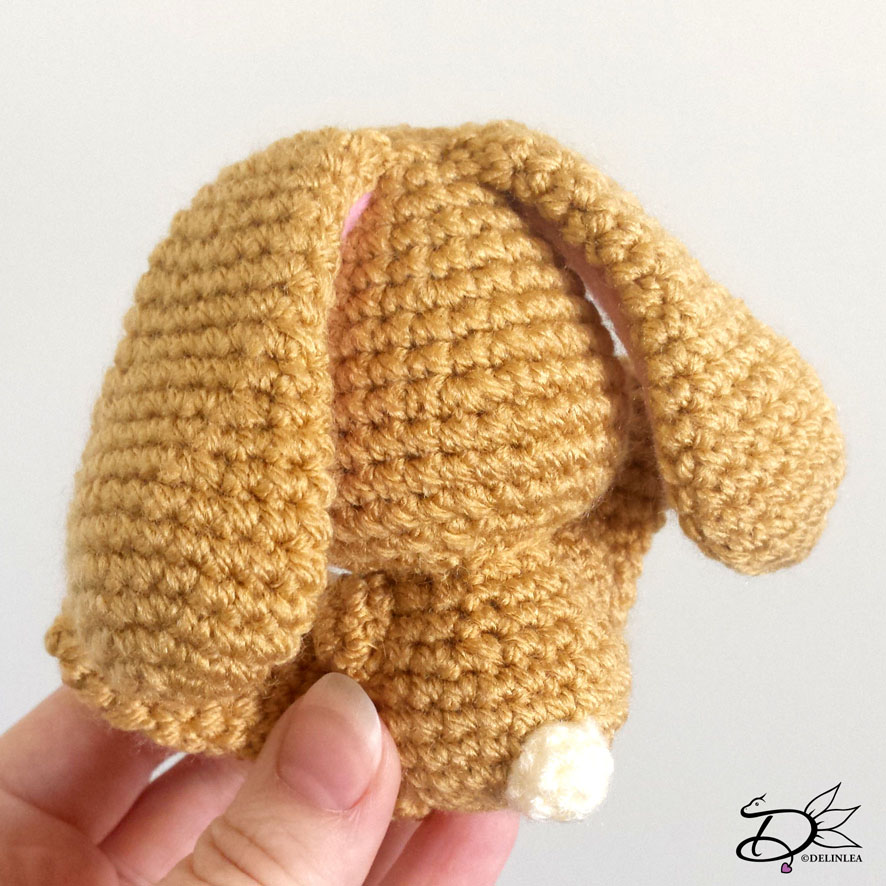
Arms and Tail (Make 3)
Use the color Light Brown for the arms (2). Use the color Cream for the tail.

1: 6SC in Magic Ring. [6]
2: (1SC, inc) 3 times. [9]
Fasten off and leave a long tail for sewing.

Assembling.

I always use sewing pins to place all parts first, before sewing. This way you can easily move all parts around until you are happy with the outcome.

Sew the body to the head. After that sew on the arms. Now you can reach them well.
The order doesn’t really matter, but sew on the ears, feet and tail on as well. And you are already done!

I hope you will love this cute little easter bunny! I definitely love him! Will you show me yours when you made him too? I’d love to see!

Have a wonderful day!

Love
Danielle

Posted in: Crafting, Crochet, Easter Tagged: Amigurumi, Bunny, Crochet, cute, Easter, Free Pattern, haken, kawaii

♥ Free Pattern; Boho Duckling

28 maart 2019 by Delinlea Leave a Comment

Hey Lovelies! It’s a new week, and Spring has begon! Are you enjoying to see nature slowly come alive again? I love to see plants waking up from their sleep, and see all the fresh leaves and flowers, so, so pretty! Though on the other hand, the waether isn’t sure how to act right now, one moment it storms badly with rain, and the next second it’s sunny. How is it in your country?! Kinda the same as here? Anyway, since it’s spring now, that also means the time of baby animals, yay~~. I thought I would make a cute Duckling pattern, with boho touch, for you to make. I hope you will enjoy it!

For this DIY you’ll need:
♥ Yarn in the colors;  Yellow and orange (I used Stylecraft Special DK and Budgetyarn)
♥ Crochet Hook (I used a 2,5mm hook).
♥ Stuffing.
♥ Scissors.
♥ Sewing Pins.
♥ Yarn Needle.
♥ Safety eyes, 6mm.
♥ 3 scrap pieces of yarn in colors of choise. (optional)
♥ Little Feather. (optional)

Stitches used (US Terms):
Magic Ring.
Ch = Chain.
SC = Single Crochet.
ST = Stitch.
Inc = Increase.
Dec = Decrease.
(…) = Repeat the space in brackets the given number of times.
[…] = Total number of stitches.

Pattern

Body
Use the color yellow.

1: 6SC in Magic Ring. [6]
2: 2SC in each st around. [12]
3: (1SC, inc) 6 times. [18]
4: (2SC, inc) 6 times. [24]
5: 24SC. [24]
|
7: 24SC. [24]
8: (2SC, dec) 6 times. [18]
9: 18SC. [18]
10: 18SC. [18]
11: (1SC, dec) 6 times. [12]
Fasten off and leave a long tail for sewing. Don’t forget to stuff the body.

Head
Use the color yellow.

1: 6SC in Magic Ring. [6]
2: 2SC in each st around. [12]
3: (1SC, inc) 6 times. [18]
4: 18SC. [18]
5: (2SC, inc) 6 times. [24]
6: 24SC. [24]
7: 24SC. [24]
8: (3SC, inc) 6 times. [30]
9: 30SC. [30]
10: 30SC. [30]
11: (4SC, inc) 6 times. [36]
Between row 10 and 11 you will place the eyes, about 3 cm apart.
12: 36SC. [36]
13: 36SC. [36]
14: (4SC, dec) 6 times. [30]
15: (3SC, dec) 6 times. [24]
16: (2SC, dec) 6 times. [18]
17: (1SC, dec) 6 times. [12] Stuff the body here.
18: Dec all around. [6]
fasten off and weave in tail. With some 10cm piece of the same yarn you can create some fluff on top of his head. I use 3 strings. and pulled those through the bottom to the top of his head. Make sure you have aknot in the end so they stay in place. Fluff the top parts of the yarn a bit up.

Wings
Use the color yellow.

1: 6SC in Magic Ring. [6]
2: 2SC in each st around. [12]
3: 12SC. [12]
4: 12SC. [12]
5: (2SC, dec) 3 times. [9]
6: 9SC. [9]
7: 9SC. [9]
Fasten off and leave a long tail for sewing. You don’t have to stuff the wings, just flatten them.

Beak
Use the color orange.

1: Ch7, insert in second chain from hook, 5SC, 3SC in the next st, 4SC, inc. [14]
2: 14SC. [14]
Fasten off and leave a long tail for sewing.

Foot
Use the color orange.

1: 6SC in Magic Ring. [6]
2: 6SC. [6]
3: (1SC, inc) 3 times. [9]
4: 9SC. [9]
5: (2SC, inc) 3 times. [12]
6: 12SC. [12]
Fasten off and leave a long tail for sewing. The gap you are left with at the end of row 6 you sew close with some stitches, make sure to flatten it first.

Assembling

I always use sewing pins to place all parts first, before sewing. This way you can easily move all parts around until you are happy with the outcome.

Sew on the body to his head and place the wings at both sides of the body, sew on. His beak will go in between his eyes, but slighly lower. You don’t have to stuff the beak, but you can do if you want, do that when you are almost done sewing it on. Last sew on his feet.
This part is optional, but you can give him a little headband. Braid 3 scrap pieces in a color of choise together until it’s long enough to tie around his head. Add a little feather, and you are done!

Tip, add some pink pastel dust on his cheeks, for an extra cute look.

I hope you liked this pattern, and show me if you made it! Have a lovely day

Love
Danielle

Posted in: Crafting, Crochet, Easter Tagged: Amigurumi, boho, Crochet, cute, duckling, Free Pattern, haken, kawaii

♥ Free Pattern; Baymax TsumTsum

7 maart 2019 by Delinlea Leave a Comment

Hey Lovelies! How are you doing these days?! I had a hard time chosing a DIY for today, I actually didn’t want to crochet, but I couldn’t come up with something else. Lately I’ve been so into drawing, that I wanna draw all day long and do nothing else. Do you have those days from time to time as well?! Now, I am wondering, if you would like to see any drawing related stuff on my blogs as well?! As in, tips or tutorials or anything in general. Let me know in the comments below or through the contact form! I’m actually wondering this for a while, so yeah better ask =P.
Anyway for today I figured to make a new tsum tsum pattern, just a simple one, since I still wanna draw at this point xD. It’s Baymax’s turn! I hope you will enjoy!

For this DIY you’ll need:
♥ Yarn in the colors;  White and Grey. (I used Zeeman Supersoft)
♥ Crochet Hook (I used a 2mm hook).
♥ Stuffing.
♥ Scissors.
♥ Sewing Pins.
♥ Yarn Needle.
♥ Felt in black.
♥ Fabric Glue. (Optional)

Stitches used (US Terms):
Magic Ring.
Ch = Chain.
SC = Single Crochet.
ST = Stitch.
Inc = Increase.
Dec = Decrease.
(…) = Repeat the space in brackets the given number of times.
[…] = Total number of stitches.

Pattern

Body
Use the color White.

1: 6SC in Magic Ring. [6]
2: 2SC in each st around. [12]
3: (1SC, inc) 6 times. [18]
4: (2SC, inc) 6 times. [24]
5: (3SC, inc) 6 times. [30]
6: (4SC, inc) 6 times. [36]
7: (5SC, inc) 6 times. [42]
8: 42SC. [42]
|
29: 42SC. [42]
30: (5SC, dec) 6 times. [36]
31: (4SC, dec) 6 times. [30]
32: (3SC, dec) 6 times. [24]
33: (2SC, dec) 6 times. [18] Make sure to stuff the body around here.
34: (1SC, dec) 6 times. [12]
35: dec all around. [6]
Fasten off and weave in the tail.

Legs (Make 4)
Use for 2 legs the color white and for the other 2 the color grey.

1: 4SC in magic ring. [4]
2: Inc in each st around. [8]
3: SC in each st around. [8]
|
5: SC in each st around. [8]
Fasten off and leave a long tail for sewing.

Sides of the body (Make 2)
Use the color grey.

1: Ch 6, insert in second ch from hook, 4SC, 3SC in the next st, 3SC, inc. [12]
2: inc, 3SC, (inc) 3 times, 3SC, (inc) 2 times. [18]
Fasten off and leave a long tail for sewing.

Assembling

For assembling I always use pins first to place all the parts, this way I can easily move them around until I am happy with how it looks!
First place the legs, the 2 white in front, slightly forward. The greys are at the back, facing outward, sew them on.
Now sew on the sides of the body. Use the pics as reference.
For the face, I used some black felt. Simply cut out the design you want for the face and then glue it on.
There is also this little mark on his chest where his ‘heart’ is, you can choose to cut this out of felt or do some embroidery or leave it out (Like I did). Just what you think is the easiest for you!

And your Baymax is done! Cute and easy, but I love him! And another one to our collection! If you want to see a certain tsum I haven’t made a pattern for yet. Let me know and maybe thay creature will be next!

Have a wonderful day!

Love
Danielle

Posted in: Crafting, Crochet, Tsum Tsum Tagged: Amigurumi, baymax, Crochet, Disney, Free Pattern, haken, Tsum Tsum

♥ Free Pattern; Tulpje

28 februari 2019 by Delinlea 5 Comments

Hey Lovelies! How are you doing?! I’m pretty good because I am going to see ATEEZ in Amsterdam! YAY! I’m so glad I managed to get a VIP ticket, april 12 it’s going to happen! Woop Woop. I’m gonna do a project, hopefully, but I’ll gonna tell you more about that later on. Now back to today’s post! I was clueless what to make for today, so I asked my friend if she had an idea and she instantly replied Tulips! I obvisously, don’t like the make just the thing so my brain made something up with that. Meet Tulpje! Isn’t she adorable?!

For this DIY you’ll need:
♥ Yarn in the colors;  Pink and Green. (I used Zeeman Supersoft)
♥ Crochet Hook (I used a 2mm hook).
♥ Stuffing.
♥ Scissors.
♥ Sewing Pins.
♥ Yarn Needle.
♥ Safety eyes, 6mm.
♥ Tiny piece of black yarn for the mouth.

Stitches used (US Terms):
Magic Ring.
Ch = Chain.
SC = Single Crochet.
HDC = Half Double Crochet.
DC = Double Crochet.
TR = Treble Crochet.
ST = Stitch.
Inc = Increase.
Dec = Decrease.
(…) = Repeat the space in brackets the given number of times.
[…] = Total number of stitches.

Pattern

Base of the Flower.
Use the color Pink.

1: 6SC in Magic Ring. [6]
2: Inc in each st around. [12]
3: 12SC. [12]
4: (1SC, inc) 6 times. [18]
5: 18SC. [18]
6: 18SC. [18]
7: (2SC, inc) 6 times. [24]
8: 24SC. [24]
|
13: 24SC. [24]
14: (2SC, dec) 6 times. [18] Make sure to stuff here.
15: (1SC, dec) 6 times. [12]
16: Dec all around. [6]
Fasten off and weave in tail.

Petals  (make 3)
Use the color Pink.

1: 6SC in Magic Ring. [6]
2: (1SC, inc) 3 times. [9]
3: (2SC, inc) 3 times. [12]
4: 12SC. [12]
5: (3SC, inc) 3 times. [15]
6: (4SC, inc) 3 times. [18]
7: (2SC, inc) 6 times. [24]
8: 24SC. [24]
|
14: 24SC. [24]
15: (2SC, dec) 6 times. [18]
16: (1SC, dec) 6 times. [12]
Fasten off and leave a long tail for sewing. You don’t stuff these, just make them flat.
At 2 petals you have to place a safety eye, between row 11 and 12.

Body
Use the color green.

1: 6SC in Magic Ring. [6]
2: Inc in each st around. [12]
3: (1SC, inc) 6 times. [18]
4: (2SC, inc) 6 times. [24]
5: (3SC, inc) 6 times. [30]
6: 30SC. [30]
|
11: 30SC. [30]
12: (3SC, dec) 6 times. [24]
13: 24SC. [24]
14: 24SC. [24]
15: (2SC, dec) 6 times. [18]
16: 18SC. [18]
Fasten off and leave a long tail for sewing. Stuff the body as well.

Legs (Make 2)
Use the color green.

1: 6SC in Magic Ring. [6]
2: Inc in each st around. [12]
3: 12SC. [12]
Fasten off and leave a long tail for sewing.

Arms (Make 2)
Use the color Green.

Ch10, insert in second ch from hook, 1SC, 1HDC, 3DC, 4TR.
Fasten off and leave a long tail for sewing.

Assembling

To assemble anything in crochet I always use sewing pins to position all parts first, this way you can easily move things around until you are happy. The you can sew it on.
Start with the base part of the flower, around it you will put the petals. Sew them tot he base at the bottom, and along the sides where the petals meet each other.
Then sew the body to the flower. And add his legs and arms.
Last, sew on a mouth and you are done!

I hope you enjoyed this pattern! I can imagine a whole bunch together, how cute would that be in all different colors and such, aww *_*. I deffinitely wanna make some more when I have time! I would love to see yours when you made one or a few!

Have a wonderful day!

Love
Danielle

Posted in: Crafting, Crochet Tagged: Amigurumi, Crochet, cute, Free Pattern, kawaii, tulips, Tulpje

♥ Free Pattern; Amigurumi Cat Bulb

21 februari 2019 by Delinlea Leave a Comment

Hey Lovelies! Was the weather as beautiful as it was here the past few days?! It was so nice and sunny and cold, I love it! I prefer this weather over hot sunny weather. I just love cold weather, don’t judge me haha. Right now, it’s cloudy while I am writing this, but the past few days really got me into spring feelings. So, I thought it’s a good idea to make something springy! I think this cat bulb turned out adorable, I hope you think so as well. Ready to dive into this Amigurumi pattern?!

For this DIY you’ll need:
♥ Yarn in the colors; Light Brown, Brown, Green and Cream. (I used StyleCraft Special DK in the colors; Camel, Walnut, Spring Green and Cream)
♥ Crochet Hook (I used a 2,5mm hook).
♥ Stuffing.
♥ Scissors.
♥ Sewing Pins.
♥ Yarn Needle.
♥ Safety eyes, 5mm. (Optional

Stitches used (US Terms):
Magic Ring.
Ch = Chain.
SLST = Slip Stitch.
SC = Single Crochet.
HDC = Half Double Crochet.
ST = Stitch.
Inc = Increase.
Dec = Decrease.
(…) = Repeat the space in brackets the given number of times.
[…] = Total number of stitches.

Pattern

Leaves (Make 2)
Use the color Green

1: 6SC in Magic Ring. [6]
2: (1SC, inc) 3 times. [9]
3: 9SC. [9]
|
5: 9SC. [9]
6: (1SC, dec) 3 times. [6]
7: 6SC. [6]
Fasten off and leave a long tail for sewing.

Stem
Use the color Green.

1: 6SC in Magic Ring. [6]
2: 6SC. [6]
|
11: 6SC. [6]
Fasten off and weave in tail.

Bulb
Use the color Light Brown.

1: 6SC in Magic Ring. [6]
2: Inc in each st around. [12]
3: (1SC, inc) 6 times. [18]
4: (2SC, inc) 6 times. [24]
5: (3SC, inc) 6 times. [30]
6: (4SC, inc) 6 times. [36]
7: 36SC. [36]
|
10: 36SC. [36]
11: (4SC, dec) 6 times. [30]
12: 30SC. [30]
Between row 11 and 12 you will add the eyes, about 2,5cm apart. It’s also a good time to add the roots with cream to the bottom of the bulb, I attached 4 strands, and peeled those apart, so it looks a bit more like roots.
13: 30SC. [30]
14: (3SC, dec) 6 times. [24]
15: 24SC. [24]
16: (2SC, dec) 6 times. [18]
17: 18SC. [18]
18: (1SC, dec) 6 times. [12]
19: 1SC, 4HDC, 1SC, SLST. [7]
Fasten off and leave a long tail for sewing.

Arms (make 2)
Use the color Light Brown.

1: 6SC in Magic Ring. [6]
2: 6SC. [6]
Fasten off and leave a long tail for sewing.

Legs (make 2)
Use the colors Light Brown and Brown. (one each)

1: 6SC in Magic Ring. [6]
2: Inc in each st around. [12]
3: 12SC. [12]

Ears (make 2)
Use the colors Light Brown and Brown. (one each)

1: 4SC in Magic Ring. [4]
2: (1SC, inc) 2 times. [6]
3: (2SC, inc) 2 times. [8]
4: (3SC, inc) 2 times. [10]
Fasten off and leave a long tail for sewing.

Assembling

Sew the 2 leaves to the stem, at the point you started the stem.
With Sewing pins, it’s easier to see where you wanna place all the parts. With pinning them down to the place you wanna have the legs for example, you can see if it looks good. If not, you can easily replace them. What you can’t do easily when you already sew them on.
If you are happy with how your Cat Bulb looks, you can sew on all parts.
Lastly add the plant to the blub, insert it in the hole of the bulb and sew it on.  I used the yarn tail from the blub, I thought this was easier, but do what feels good for you.
Don’t forget to make a nose, you can embroider it on or use felt. With some soft pastel I added some pink to the cheecks, maybe you wanna do that as well, just apply it with a brush.

I hope you enjoyed this Cat Bulb Pattern! And if so, show me yours on social media, love to see it!
Have a wonderful day everyone!

Love
Danielle

Posted in: Crafting, Crochet Tagged: Amigurumi, bulb, Cat, Crochet, cute, Free Pattern, kawaii, spring
« Vorige 1 2 3 4 5 … 17 18 19 20 21 22 23 24 25 26 27 28 29 Volgende »

What are you looking for?!

My Socials

Ko-Fi

I love making all these free things for you, tho it would be very helpfull if you can support me on Ko-Fi! (You don’t have to tho, totally up to you!)

Ko-Fi Shop!!

In my Ko-Fi shop you can find PDF Amigurumi Patterns!! You can pay easily with PayPal.
Go to the shop here!!

Recent Blog Posts

  • ♥ Happy 2022!
  • ♥ Day 12; Lights
  • ♥ Day 11; Flower Deco
  • ♥ Day 10; Snowman
  • ♥ Day 9; Gingerbread Houses

Recent Comments

  • Delinlea op ♥ Pietje Gnome Amigurumi
  • Delinlea op ♥ Toy Story Alien TsumTsum Amigurumi
  • Delinlea op ♥ Pua Tsum Tsum Amigurumi
  • Charli op ♥ Free Pattern; CNY Mouse Amigurumi
  • Peter Pesch op ♥ Pietje Gnome Amigurumi

Categories

  • animation
  • Beadwork
  • Blogmas 2018
  • Blogmas 2020
  • Blogmas 2021
  • Books
  • Bujo
  • Christmas
  • Christmas CAL 2019
  • Christmas Countdown 2017
  • Contest
  • Crafting
  • Crochet
  • Drawing
  • Drawing Lesson
  • Easter
  • Geen categorie
  • Life
  • Miniature
  • Nail Art
  • New Year
  • Paper
  • plush
  • Pokemon
  • Poseable Art Doll
  • Recipe
  • Sewing
  • Shop Pattern
  • Sinterklaas
  • Social Media
  • Tsum Tsum
  • Ufufy

Copyright © 2025 Delinlea - My little fantasy world.

Family WordPress Theme by themehall.com