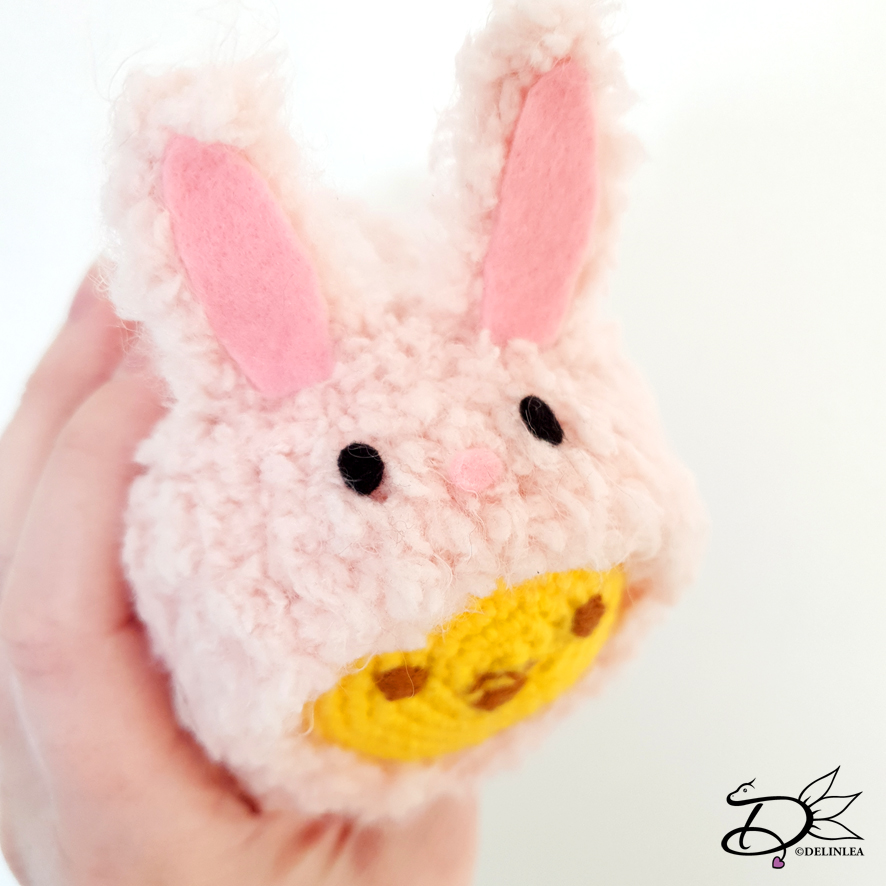
♥ Amigurumi Easter Bunny TsumTsum Suit
Hey Lovelies! These days I am happy I have a blog where I can share tutorials and patterns with you! I hope that brings you some happiness and some time to deal with the whole situation, wherever you are. These days I am obsessed with fluffy yarn, kinda wanna make everything I crochet, fluffy xD. How do you think about fluffy yarn? Like it? or hate it?! Well too bad if you hate it, because for today’s pattern I used fluffy yarn. Don’t mind me xD. I saw those Tsum Tsum’s dressed up as Easter Bunny or chicks, so cute. So I thought of a way to make a suit for your tsum that (s)he can wear during Easter! Let’s go to the pattern~!
For this Pattern you’ll need:
♥ Fluffy yarn in Pink and White, or other colors if you like! (I used ‘Fluffy’ from the Zeeman)
♥ Crochet Hook, I used 4mm. (Check your label to use the right size, since fluffy yarn comes in different lengths of fur)
♥ Stitch Marker.
♥ Yarn Needle.
♥ Felt.
♥ Scissors.
♥ (Fabric) Glue.
♥ A Tsum Tsum you wanna dress up. (Check the available Tsum Tsum patterns here! I used my Winnie The Pooh Tsum)
Stitches used (US terms):
Magic Ring.
CH = Chain.
SlSt = Slip Stitch.
SC = Single Crochet.
HDC = Half Double Crochet.
DC = Double Crochet.
St = Stitch.
Inc = Increase.
Dec = Decrease.
(…) = Repeat the space in brackets the given number of times.
[…] = Total number of stitches.

Pattern Bunny Suit
Before you begin, make sure to have the Tsum you wanna dress up on hand. Because there are different kinds of fluffy yarn, and the way people would crochet. It could affect the size of the suit you need. So, along the way you wanna fit, if your Tsum fits in the suit.
So at row 4 I noticed I had enough stitches around, but it could be possible that yours need to be smaller or bigger. Maybe you need 18 stitches around instead of 24, or if bigger, 30 stitches around. Check if you need more or less. It’s easy to adjust the pattern and if you don’t know how, send me an email here. You always increase by 6, with this pattern.
Also the length of the suit can also differ. I needed to crochet up to row 19 to cover the Tsum nicely. But maybe you need more or less rows, just keep trying on the suit on your Tsum.
Row 20 will stay the same, no matter your stitch count or length!
Body
Use the Pink yarn.
1: 6SC in
Magic Ring. [6]
2: 2SC in each St around. [12]
3: (1SC, inc) 6 times. [18]
4: (2SC, inc) 6 times. [24]
5: 24SC. [24]
|
19: 24SC. [24]
20: 1SC, 1HDC, (2DC, Dec) 2 times, 2DC, 1HDC, 1SC, SlSt. [13]
Fasten off and weave in tail.
Legs and Tail (Total of 5)
Make 4 legs in Pink, and the Tail in White.
1: 4SC in
Magic Ring. [4]
2: 4SC. [4]
Fasten off and leave a long tail for sewing.
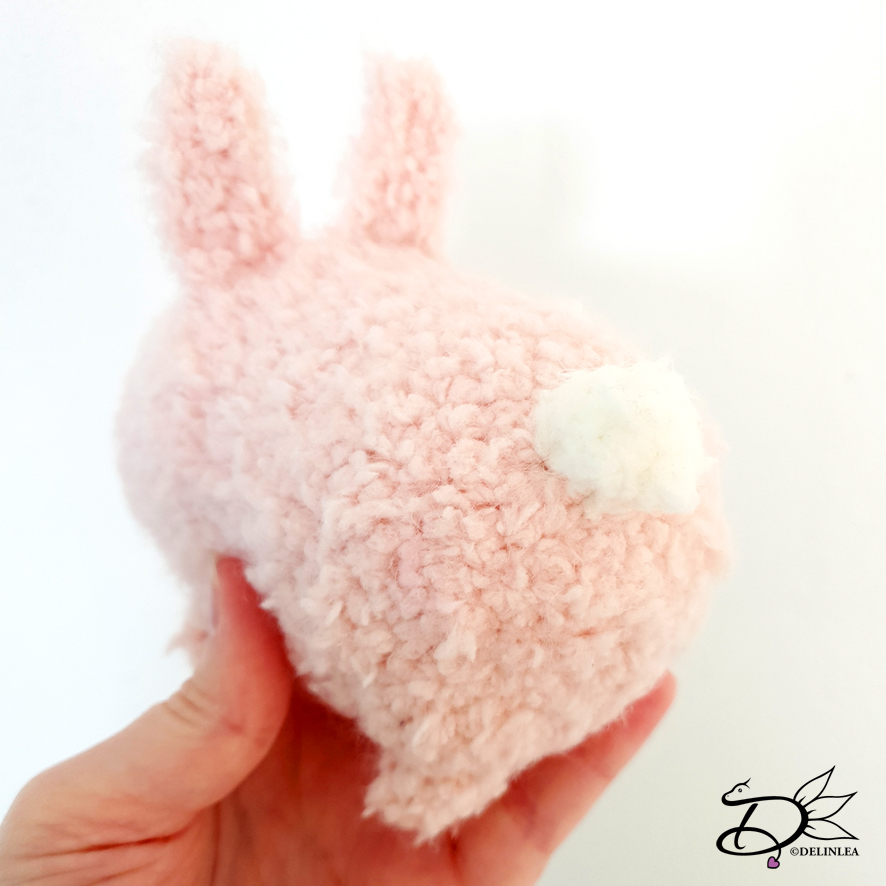
Ears (Make 2)
Use the Pink Yarn.
Ch7, insert
in second Ch from hook, 2SC, 3HDC, 1SC.
Fasten off and leave a long tail for sewing.
Assembling
I usually use sewing pins to map out where I want all the pieces to go, but that’s a bit tricky with a not stuffed suit. You can try, but becareful!
Sew the ears on top of the suit, and his tail to his ‘butt’. Then the legs go around his belly.
From felt make the ‘inside’ of the bunny ears, I used pink, but it depends on what color you used for the body. Make also some eyes and a nose for the suit for that little extra cuteness! If you want you can add some flowers or a bow to the suit as well! Make it fun! Adjust it to you liking!

I hope you enjoyed this Bunny Suit pattern, I think it’s an adorable idea and give me ideas for future patterns haha xD
Have a wonderful day, stay healthy and crafty!
Love
Danielle