Delinlea - My little fantasy world
  • ♥ Home
  • ♥ About Me
  • ♥ Blogmas 2021
  • ♥ Free Patterns
    • ♥ Amigurumi; Spring/Easter
    • ♥ Amigurumi; Fall/Halloween
    • ♥ Amigurumi; Winter
    • ♥ Amigurumi Tsum Tsum
    • ♥ Amigurumi Ufufy
    • ♥ Amigurumi Others
    • ♥ Christmas Countdown 2017
    • ♥ Blogmas 2018
    • ♥ Blogmas 2020
  • ♥ Tutorials
    • ♥ Easter
    • ♥ Home Deco
    • ♥ Others
  • ♥ Drawing Lessons
  • ♥ FanFic
    • ♥ Chapter 1
    • ♥ Chapter 2
    • ♥ Chapter 3
    • ♥ Chapter 4
    • ♥ Chapter 5
    • ♥ Chapter 6
    • ♥ Chapter 7
  • ♥ Gallery
    • ♥ Crafts
    • ♥ Drawings
    • ♥ Poseable Art Dolls
  • ♥ Links
  • ♥ Contact
    • Privacy Policy

clay

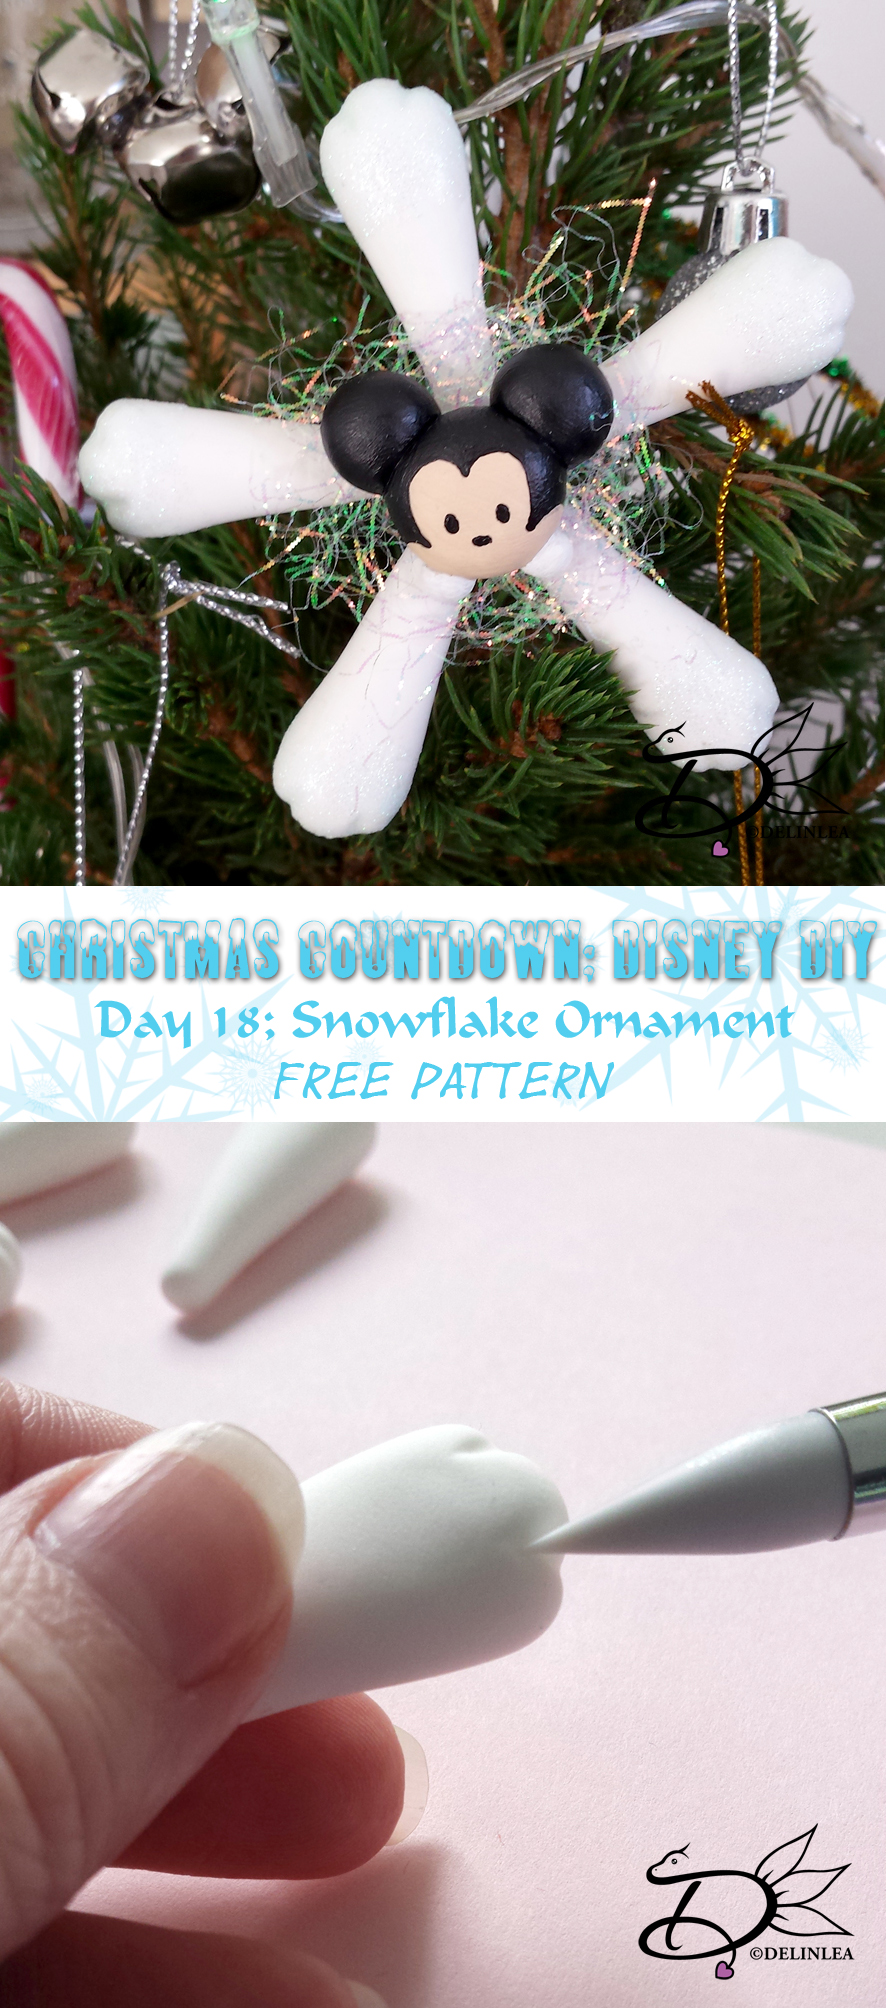
♥ Day 18: Snowflake Clay Ornament

18 december 2017 by Delinlea Leave a Comment

Hey Lovelies!

It’s time for a new DIY, let’s make some clay snowflakes with a little Tsum Tsum in the middle. I originally planned to make those with a dragon, but there’s no way I have time for that right now! haha But I will make them after Christmas. I just can’t abandon my dragons.

For this DIY you’ll need:
♥ Air Dry Clay. (Colored is optional)
♥ Acrylic Paint.
♥ Sculpting Tools.
♥ Glitter. (Optional)
♥ Glue. (Optional)

♥ How to make the Ornament

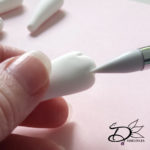
Start with 5 even balls of clay and roll those out into a long, tear drop shape. Flatten widest part a bit and make 2 notches, I used a silicone brush for it. This way you make you snowflake a little bit more interesting! Ofcourse you can make your snowflake however you want.
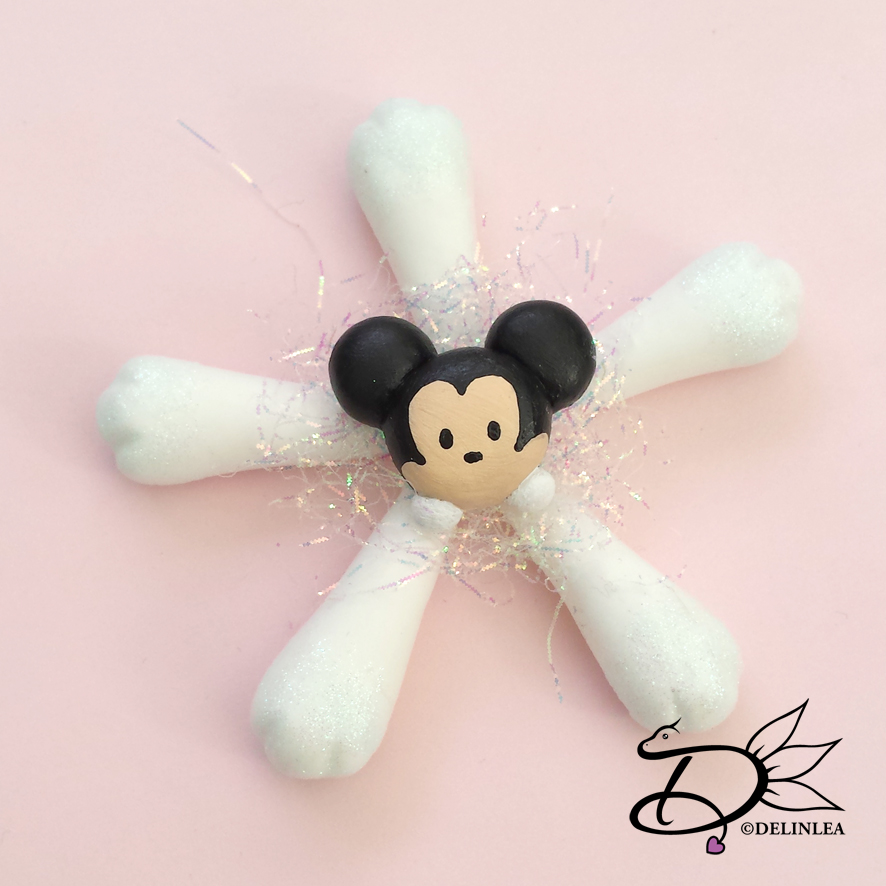
Now attach the small ends of the tear drop shapes together, evenly spread.


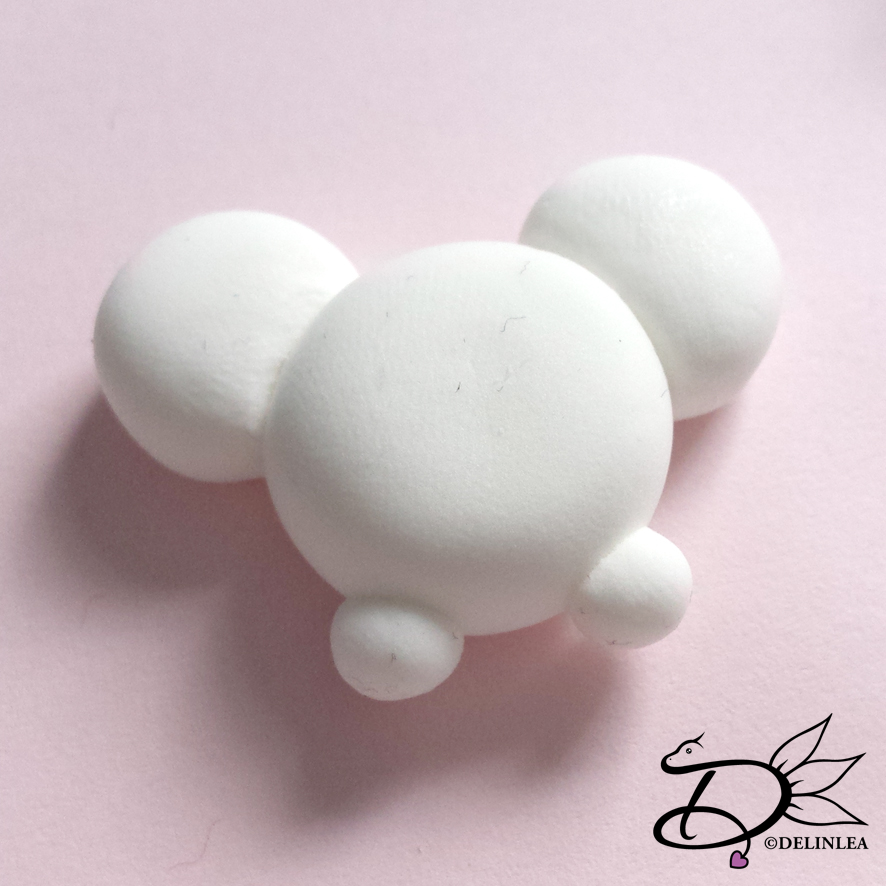
Then make the Tsum Tsum out of clay. I’m not gonna explane how to do that exactly. Tho you make a round shape and add legs. You can add other features too. depends on what Tsum Tsum you wanna make, that’s totally up to you. I chose to make Mickey so I added ears as well.

I made it in white clay, so I will paint it with Acrylics. So I let the clay dry first, painted it and glued it to the middle of the snowflake. But if you don’t have to paint anything or just the eyes, you can stick your Tsum straight to the middle and let it dry that way.

Now it’s time for a bit of decorating. This is totally optional, but fun to do. I added some glitter to the ends of the Snowflake. And added some angel hair behind my Tsum Tsum. it’s give just that little extra sparkle that makes it look finished!

I hope you enjoyed this little DIY and that you will have fun creating you own. Oh! And don’t forget to show yours with the #DelinleaDIY

Love
Danielle


Posted in: Christmas, Christmas Countdown 2017, Crafting, Tsum Tsum Tagged: Christmas, Christmas Countdown, clay, Disney, DIY, Free, Mickey, Tsum Tsum
« Vorige 1 2

What are you looking for?!

My Socials

Ko-Fi

I love making all these free things for you, tho it would be very helpfull if you can support me on Ko-Fi! (You don’t have to tho, totally up to you!)

Ko-Fi Shop!!

In my Ko-Fi shop you can find PDF Amigurumi Patterns!! You can pay easily with PayPal.
Go to the shop here!!

Recent Blog Posts

  • ♥ Happy 2022!
  • ♥ Day 12; Lights
  • ♥ Day 11; Flower Deco
  • ♥ Day 10; Snowman
  • ♥ Day 9; Gingerbread Houses

Recent Comments

  • Delinlea op ♥ Pietje Gnome Amigurumi
  • Delinlea op ♥ Toy Story Alien TsumTsum Amigurumi
  • Delinlea op ♥ Pua Tsum Tsum Amigurumi
  • Charli op ♥ Free Pattern; CNY Mouse Amigurumi
  • Peter Pesch op ♥ Pietje Gnome Amigurumi

Categories

  • animation
  • Beadwork
  • Blogmas 2018
  • Blogmas 2020
  • Blogmas 2021
  • Books
  • Bujo
  • Christmas
  • Christmas CAL 2019
  • Christmas Countdown 2017
  • Contest
  • Crafting
  • Crochet
  • Drawing
  • Drawing Lesson
  • Easter
  • Geen categorie
  • Life
  • Miniature
  • Nail Art
  • New Year
  • Paper
  • plush
  • Pokemon
  • Poseable Art Doll
  • Recipe
  • Sewing
  • Shop Pattern
  • Sinterklaas
  • Social Media
  • Tsum Tsum
  • Ufufy

Copyright © 2025 Delinlea - My little fantasy world.

Family WordPress Theme by themehall.com