Delinlea - My little fantasy world
  • ♥ Home
  • ♥ About Me
  • ♥ Blogmas 2021
  • ♥ Free Patterns
    • ♥ Amigurumi; Spring/Easter
    • ♥ Amigurumi; Fall/Halloween
    • ♥ Amigurumi; Winter
    • ♥ Amigurumi Tsum Tsum
    • ♥ Amigurumi Ufufy
    • ♥ Amigurumi Others
    • ♥ Christmas Countdown 2017
    • ♥ Blogmas 2018
    • ♥ Blogmas 2020
  • ♥ Tutorials
    • ♥ Easter
    • ♥ Home Deco
    • ♥ Others
  • ♥ Drawing Lessons
  • ♥ FanFic
    • ♥ Chapter 1
    • ♥ Chapter 2
    • ♥ Chapter 3
    • ♥ Chapter 4
    • ♥ Chapter 5
    • ♥ Chapter 6
    • ♥ Chapter 7
  • ♥ Gallery
    • ♥ Crafts
    • ♥ Drawings
    • ♥ Poseable Art Dolls
  • ♥ Links
  • ♥ Contact
    • Privacy Policy

Crochet

♥ Blogmas 2020!

29 november 2020 by Delinlea Leave a Comment

Hey Lovelies! It’s almost December, as you probably noticed. And as every year I have Christmas blogs in December. I am back this year with Blogmas! Yay! You could also call it advent, just what you like. It just means that we will have 24(!!) days of Christmas Amigurumi this year! A pattern every day until Christmas!

I hope you are ready for that. Don’t worry too much, they are all pretty small and I tried to limit the amount of sewing on these (Most of them at least, some couldn’t be avoided). So, they must be done pretty quickly.

I know December is already a very busy month. This year it feels different as well cause of all the stuff happening in the world. But I just think it’s better to keep as much normal as possible, like decorating, my blogmas, baking etc. Let’s get those Christmas vibes! We are also allowed to have some things we enjoy, let’s focus on the good!

For this year I will also make a PDF pattern with all blogmas patterns in there and post it on my Ko-Fi shop. So, you can enjoy them ad free. And yes, I will probably also make a Etsy shop just for this. I will open it officially somewhere next year probably. The patterns will be available in English (US terms) and in Dutch! Woohoo~~. I will update this blog with the link when it’s live!

I hope you are just as excited as I am, I love all the patterns I made for you this year!

Have a wonderful day and I’ll see you on Dec 1st!

Love
Danielle

PS. if you love those Blogmas patterns, maybe you’d like to support me on Ko-Fi?! So I can keep making content like this!

Posted in: Blogmas 2020, Christmas, Crafting, Crochet Tagged: Amigurumi, Blogmas 2020, Crochet, cute, haken, kawaii, Preview

♥ Pietje Gnome Amigurumi

26 november 2020 by Delinlea 2 Comments

Hey Lovelies! Here is another Sinterklaas related Amigurumi, it’s a little Pietje! I hope you like him. It was very different to make compared to the Sint version (which you can find here!). I kept changing my mind on how I wanted it to look, in the end I just went with this. Tried really hard to not keep fiddling around. Let’s go to the pattern.

Pietje Gnome made with Amigurumi

For this pattern you’ll need:
♥ Yarn in the colors Purple, Blue, White, Black and Brown/Beige. (I used Budgetyarn.com and Stylecraft Special DK)
♥ Crochet hook. ( I used a 3mm)
♥ A few feathers.
♥ Stuffing.
♥ Yarn Needle.
♥ Sewing Pins.
♥ Stitch Marker.

Stitches used (US Terms):
Magic Ring.
CH = Chain.
SLST = Slip Stitch.
SC = Single Crochet.
HDC = Half Double Crochet.
DC = Double Crochet.
ST = Stitch.
BL = Back Loops.
FL = Front Loops.
Inc = Increase.
Dec = Decrease.
(…) = Repeat the space in brackets the given number of times.
[…] = Total number of stitches.

This pattern is made with continues rounds, unless stated otherwise. Use a stitch marker to mark your first/last stitch of your row.

♥ Pattern Pietje Gnome

Body
Use the color Purple.

1: 6SC in a Magic Ring. [6]
2: 2SC in each st around. [12]
3: (1SC, inc) 6 times. [18]
4: (2SC, inc) 6 times. [24]
5: (3SC, inc) 6 times. [30]
6: (4SC, inc) 6 times. [36]
7: (5SC, inc) 6 times. [42]
8: 42SC. [42]
|
13: BL, 42SC. [42]
14: 42SC. [42]
|
18: 42SC. [42]
19: (5SC, dec) 6 times. [36]
20: (4SC, dec) 6 times. [30]
21: (3SC, dec) 6 times. [24]
22: (2SC, dec) 6 times. [18]
23: (1SC, dec) 6 times. [12] Stuff
24: Dec around. [6]
Fasten off and weave in tail.

Collar
Use the color White.
At row13 of the body you worked in BL, now, work in the FL.

1: 42SC. [42]
2: 42SC. [42]
3: (1SC+1HDC in de next st, 2DC in the next st, 1HDC+1SC in the next st) 14times. [84]
Fasten off and weave in tail.

Hat
Start with the color Blue.

1: 8SC in a Magic Ring. [8]
2: 2SC in each st around. [16]
3: (1SC, inc) 8 times. [24]
4: (2SC, inc) 8 times. [32]
5: (3SC, inc) 8 times. [40]
6: (4SC, inc) 8 times. [48]
7: 48SC. [48]
8: 48SC. [48]
9: (5SC, inc) 8 times. [56]
10: 56SC. [56]
11: 56SC. [56]
12: (6SC, inc) 8 times. [64]
13: 64SC. [64]
14: 64SC. [64]
15: 64SC. [64]
16: (6SC, dec) 8 times. [56]
17: 56SC. [56]
18: (5SC, dec) 8 times. [48]
19: (4SC, dec) 8 times. [40]
Change to the color Black.
20: FL, 40SC. [40]
21: 40SC. [40]
Fasten off and leave a long tail for sewing.
You can put a bit of stuffing inside so it won’t be too sloppy.

Nose
Use the color Beige/Brown.

1: 6SC in a Magic Ring. [6]
2: 2SC in each st around. [12]
3: 12SC. [12]
4: 12SC. [12]
5: (2SC, dec) 3 times. [9]
Fasten off and leave a long tail for sewing.

Feet (Make 2)
Use the color Black

1: 6SC in a Magic Ring. [6]
2: 2SC in each st around. [12]
3: 3SC, (inc) 6 times, 3SC. [18]
4: 18SC. [18]
5: 18SC. [18]
6: 3SC, (dec) 6 times, 3SC. [12]
7: 12SC. [12]
8: 12SC. [12]
Fasten off and leave a long tail for sewing.
Stuff the feet as well.

♥ Assembling

Whenever I start to assemble Amigurumi’s I use sewing pins first. This way I can move all parts around until I am happy. I recommend you do so as well.

Sew the hat on the body, it will go up till the collar. On top the the black part of the hat the nose will go. Last sew on his feet. And don’t forget to add some feather to his hat, to finish it off!

That was it already for this Pietje Gnome! It’s not too hard to make, but oh so cute! I hope you will enjoy this pattern. Let’s make it fun inside out home’s even when the world is cruel outside. It’s better to try to do those things we can control and make us feel a little better instead of being anxious all the time.

If you decided to make this Pietje Gnome, please, show me on Twitter or Instagram with the #DelinleaDIY. I would love to see what you made with my patterns!

Have a wonderful day and I’ll see you next week!

Love
Danielle

Posted in: Crafting, Crochet, Sinterklaas Tagged: Amigurumi, Crochet, cute, gnome, haken, kawaii, Piet, Pietje, sinterklaas, yarn

♥ Sinterklaas Gnome Amigurumi

19 november 2020 by Delinlea Leave a Comment

Hey Lovelies! If you live in a country where Sinterklaas is celebrated, you know he’s in the county now. It was weird to watch him on television this year, just like a lot this year, it was also different, without any public. I don’t really know what to think of it. But at least they didn’t cancel it completely. Related to the topic Sinterklaas I wanted to make a amigurumi, and came up with the following design. A Sinterklaas Gnome! I hope you will like him! Next week I will make a Piet Gnome, so he will have company.

Sinterklaas Gnome made using Crochet

For this pattern you’ll need:
♥ Yarn in the colors Red, Yellow, Beige an Black. (I used Budgetyarn.com and Stylecraft Special DK)
♥ Crochet hook. ( I used a 3mm)
♥ White Fluffy Yarn and a 4mm hook.
♥ Stuffing.
♥ Yarn Needle.
♥ Sewing Pins.
♥ Stitch Marker.

Stitches used (US Terms):
Magic Ring.
CH = Chain.
SLST = Slip Stitch.
FSC = Foundation Single Crochet.
SC = Single Crochet.
ST = Stitch.
Inc = Increase.
Dec = Decrease.
(…) = Repeat the space in brackets the given number of times.
[…] = Total number of stitches.

This pattern is made with continues rounds, unless stated otherwise. Use a stitch marker to mark your first/last stitch of your row.

♥ Pattern Sinterklaas Gnome

Body
Use the color Red.

1: 6SC in a Magic Ring. [6]
2: 2SC in each st around. [12]
3: (1SC, inc) 6 times. [18]
4: (2SC, inc) 6 times. [24]
5: (3SC, inc) 6 times. [30]
6: (4SC, inc) 6 times. [36]
7: (5SC, inc) 6 times. [42]
8: 42SC. [42]
|
18: 42SC. [42]
19: (5SC, dec) 6 times. [36]
20: (4SC, dec) 6 times. [30]
21: (3SC, dec) 6 times. [24]
22: (2SC, dec) 6 times. [18]
23: (1SC, dec) 6 times. [12]
24: Dec around. [6]
Fasten off and weave in tail.

Mijter
Use the color Red.
Row 1-21 won’t be worked in continues rounds. From row 22, you will.

1: Ch2, insert in second ch from hook, inc, turn. [2]
2: (inc) 2 times, turn. [4]
3: 4SC, turn. [4]
4: inc, 2SC, inc, turn. [6]
5: 6SC, turn. [6]
6: inc, 4SC, inc, turn. [8]
7: 8SC, turn. [8]
8: inc, 6SC, inc, turn. [10]
9: 10SC, turn. [10]
10: inc, 8SC, inc, turn. [12]
11: 12SC, turn. [12]
12: inc, 10SC, inc, turn. [14]
13: 14SC, turn. [14]
14: inc, 12SC, inc, turn. [16]
15: 16SC, turn. [16]
16: inc, 14SC, inc, turn. [18]
17: 18SC, turn. [18]
18: inc, 16SC, inc, turn. [20]
19: 20SC, turn. [20]
20: inc, 18SC, inc, turn. [22]
21: 22SC, turn. [22]
Break your yarn and make row 1-21 again. Keep your yarn attached at the second one.
22: Connect the first side to the second with a SC. Make 22SC in total, and continue on the second part, and make 22SC on that part as well. [44]
23: 44SC. [44]
24: 44SC. [44]
25: 44SC. [44]
26: 44SC. [44]
Fasten off and leave a long tail for sewing.

Cross (Make 2)
Use the color Yellow.
This part won’t be worked in continues rounds.

1: Ch2, insert in second ch from hook, inc, turn. [2]
2: (inc) 2 times, turn. [4]
3: 4SC, turn. [4]
| – Note, Mark row 15 and 18 on both sides.
26: 4SC, turn. [4]
Fasten off and leave a long tail for sewing.

Now go back to row 15-18, here you will continue to make the sides of the cross. Do this on both sides.
Start from row 18.
1: 4SC, turn. [4]
|
6: 4SC, turn. [4]
7: 2SC, dec, turn. [3]
8: Dec, 1SC, turn. [2]
9: Dec. [1]
Fasten off and weave in tail.

Nose
Use the color Beige.

1: 6SC in a Magic Ring. [6]
2: 2SC in each st around. [12]
3: 12SC. [12]
4: 12SC. [12]
5: (2SC, dec) 3 times. [9]
Fasten off and leave a long tail for sewing.

Cape
Start with the color Red.
This part won’t be worked in continues rounds.

1: 20FSC, Turn. [20]
2: 20SC, Turn. [20]
3: Inc, 18SC, inc, Turn. [22]
4: 22SC, Turn. [22]
5: Inc, 20SC, inc, Turn. [24]
6: 24SC, Turn. [24]
7: Inc, 24SC, inc, Turn. [26]
8: 26SC. [26]
Fasten off and weave in tail.
No alone the edge, except the first row, you’ll crochet SC around with the color Yellow. In the corner you will crochet 3SC. Fasten off and weave in tail.

Beard
Use the White Fluffy yarn.
This part won’t be worked in continues rounds.

1: Ch14, insert in second ch from hook, 13SC, turn. [13]
2: 13SC, turn. [13]
3: Dec, 9SC, dec, turn. [11]
4: Dec, 7SC, dec, turn. [9]
5: Dec, 5SC, dec, turn. [7]
6: Dec, 3SC, dec. [5]
Fasten off and weave in tail.

Feet (Make 2)
Use the color Black

1: 6SC in a Magic Ring. [6]
2: 2SC in each st around. [12]
3: 3SC, (inc) 6 times, 3SC. [18]
4: 18SC. [18]
5: 18SC. [18]
6: 3SC, (dec) 6 times, 3SC. [12]
7: 12SC. [12]
8: 12SC. [12]
9: 12SC. [12]
Fasten off and leave a long tail for sewing.

♥ Assembling

Whenever I start to assemble Amigurumi’s I use sewing pins first. This way I can move all parts around until I am happy. I recommend you do so as well.

First sew the 2 crosses to the Mijter on both sides and you might wanna sew the tip of the Mijter together. Then, sew on his Mijter around row 10 of the body. The cape goes directly under the Mijter. On the other side of the body you will sew on the beard, with the nose centered. Last, position his feet and sew those on.

That was it already for this Sinterklaas Gnome! It’s not too hard to make, but oh so cute! I hope you will enjoy this pattern. Let’s make it fun inside out home’s even when the world is cruel outside. It’s better to try to do those things we can control and make us feel a little better instead of being anxious all the time.

If you decided to make this Sinterklaas Gnome, please, show me on Twitter or Instagram with the #DelinleaDIY. I would love to see what you made with my patterns!

Have a wonderful day and I’ll see you next week!

Love
Danielle

Posted in: Crafting, Crochet, Sinterklaas Tagged: Amigurumi, Crochet, Dutch Tradition, Free Pattern, gnome, haken, nederlands, sinterklaas

♥ Mushu Tsum Tsum Amigurumi

12 november 2020 by Delinlea Leave a Comment

Hey Lovelies! When I was making this Tsum Tsum, I realized that this is the last Tsum pattern of the year! A bit weird to realize the year is almost done, I so hope 2021 wil be a better year!
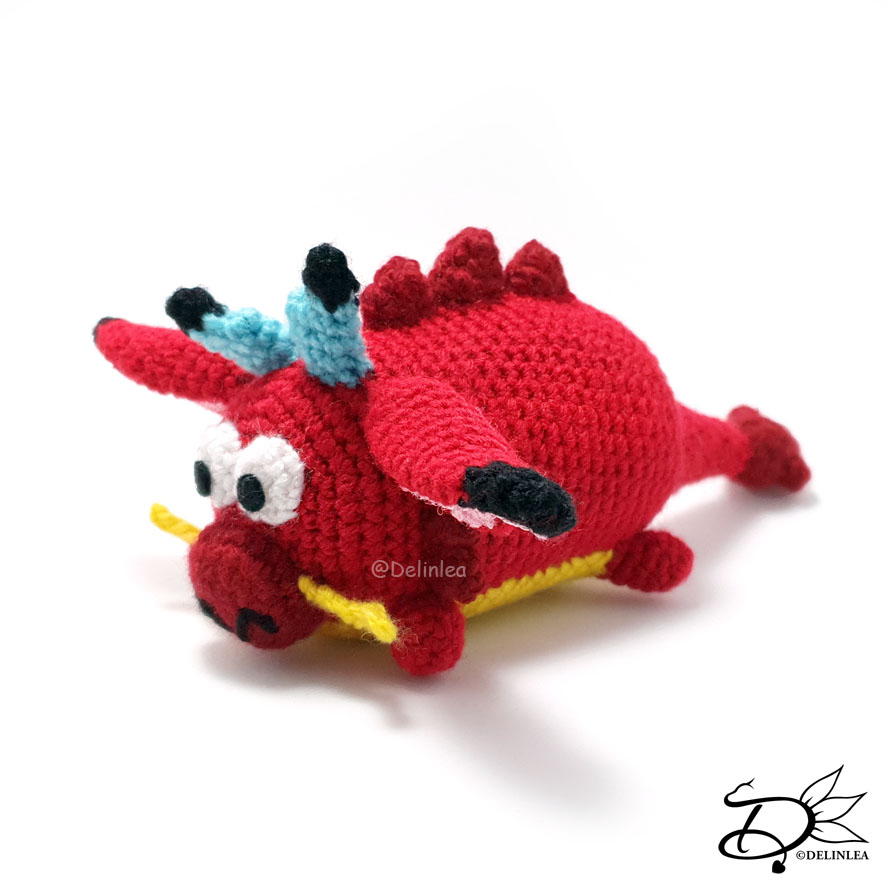
But don’t worry, Tsum Tsum patterns will be back next year! I am already trying to think of what to make etc. Let’s be a bit better prepared this time around. Today we will make Mushu, from Mulan! I somehow struggled a lot with this one, while, in fact, it isn’t too hard. Not sure what was wrong with me. I hope you will have a better time making this pattern.

Mushu Tsum Tsum made of yarn. (Crochet)

For this pattern you’ll need:
♥ Yarn in the colors Red, Dark Red, Yellow, Black, White and Blue. (I used Zeeman Supersoft)
♥ Crochet hook. ( I used a 2mm)
♥ Stuffing.
♥ Yarn Needle.
♥ Sewing Pins.
♥ Stitch Marker.
♥ Black Felt and (Fabric)Glue.
♥ Scissors.
♥ Pink Acrylic Paint + Brush. (optional)

Stitches used (US Terms):
Magic Ring.
CH = Chain.
SLST = Slip Stitch.
SC = Single Crochet.
ST = Stitch.
Inc = Increase.
Dec = Decrease.
(…) = Repeat the space in brackets the given number of times.
[…] = Total number of stitches.

This pattern is made with continues rounds, unless stated otherwise. Use a stitch marker to mark your first/last stitch of your row.

♥ Pattern Mushu

Body
Start with the color Red

1: 6SC in a Magic Ring. [6]
2: 2SC in each st around. [12]
3: (1SC, inc) 6 times. [18]
4: (2SC, inc) 6 times. [24]
5: (3SC, inc) 6 times. [30]
6: (4SC, inc) 6 times. [36]
7: (5SC, inc) 6 times. [42]
8: 42SC. [42]
|
29: 42SC. [42]
30: (5SC, dec) 6 times. [36]
31: (4SC, dec) 6 times. [30]
32: (3SC, dec) 6 times. [24]
33: (2SC, dec) 6 times. [18] Stuff the body.
34: (1SC, dec) 6 times. [12]
35: Dec all around. [6]
Fasten off and weave in tail.

Belly
Use the color Yellow.

1: 1: CH13, insert in the second ch from hook, 11SC, 3SC in the next st, continue along the other side of the chain, 10SC, inc. [26]
2: inc, 10SC, (inc) 3 times, 10SC, (inc) 2 times. [32]
3: 1SC, inc, 10SC, (1SC, inc) 3 times, 10SC, (1SC, inc) 2 times. [38]
4: 2SC, inc, 10SC, inc, (3SC, inc) 2 times, 10SC, inc, 3SC, inc, 1SC. [44]
5: 3SC, inc, 10SC, inc, 3SC, inc, 2SC, inc, 3SC, inc, 10SC, inc, 3SC, inc, 2SC, inc. [52]
6: 52SC. [52]
Fasten off and leave a long tail for sewing.

Tail
Use the color Red.

1: 6SC in a Magic Ring. [6]
2: (2SC, inc) 2 times. [8]
3: 8SC. [8]
4: (3SC, inc) 2 times. [10]
5: 10SC. [10]
6: (4SC, inc) 2 times. [12]
7: 12SC. [12]
8: (5SC, inc) 2 times. [14]
9: 14SC. [14]
10: (6SC, inc) 2 times. [16]
11: 16SC. [16]
12: (7SC, inc) 2 times. [18]
13: 18SC. [18]
14: (5SC, inc) 3 times. [21]
Fasten off and leave a long tail for sewing.

Tip of the Tail.
Use the color Dark red.

1: 4SC in a Magic Ring. [4]
2: (inc, 1SC) 2 times. [6]
3: 6SC. [6]
4: (1SC, inc) 3 times. [9]
5: (2SC, inc) 3 times. [12]
6: 12SC. [12]
7: 12SC. [12]
8: (2SC, dec) 3 times. [9]
Fasten off and leave a long tail for sewing.

Extra for Tip of the Tail (Make 2)
Use the color Dark Red.

5SC in a Magic Ring, SlSt in the first st. [5]
Fasten off and leave a long tail for sewing.

Nose
Use the color Dark Red.

1: 6SC in a Magic Ring. [6]
2: 2SC in each st around. [12]
3: (3SC in the next st, 3SC) 3 times. [18]
4: 1SC, (3SC in the next st, 5SC) 2 times, 3SC in the next st, 4SC. [24]
5: (2Dec, 4SC) 3 times. [18]
Fasten off and leave a long tail for sewing.

Eyes (Make 2)
Use the color White.

1: 5SC in a Magic Ring. [5]
2: 2inc, 2HDC in the next st, 2inc. [10]
Fasten off and leave a long tail for sewing.

Whiskers (Make 2)
Use the color Yellow.

Ch8, Fasten off and leave a long tail for sewing.

Ears (Make 2)
Start with the color Black.
One ear has a little gap, row 6 and 7 are worked differently, after you’ll continue as normal.

1: 6SC in a Magic Ring. [6]
2: (1SC, inc) 3 times. [9]
3: 9SC. [9]
Change to the color Red.
4: (2SC, inc) 3 times. [12]
5: 12SC. [12]
6: (3SC, inc) 3 times. [15] (for the other ear: 3SC, inc, skip3 st, inc, 3SC, inc. [12])
7: 15SC. [15] (For the other ear: 5SC, Ch3, 7SC. [15])
8: (4SC, inc) 3 times. [18]
9: 18SC. [18]
10: 18SC. [18]
11: 18SC. [18]
12: 18SC. [18]
13: (4SC, dec) 3 times. [15]
14: 15SC. [15]
15: (3SC, dec) 3 times. [12]
Fasten off and leave a long tail for sewing.
I have painted the inside of the ears pink with Acrylic paint. You could skip this or add pink felt to it.

Horns (Make 2)
Start with the color black.

1: 4SC in a Magic Ring. [4]
2: 4SC. [4]
Change to the color Blue.
3: 2SC, Ch3, 2SC. [7]
4: 7SC. [7]
5: 7SC. [7]
6: 7SC. [7]
Fasten off and leave a long tail for sewing.

Spikes Small (Make 4)
Use the color Dark Red.

1: 4SC in a Magic Ring. [4]
2: Inc, 1SC, 2HDC in the next st, 1SC. [6]
Fasten off and leave a long tail for sewing.

Spikes Medium (Make 2)
Use the color Dark Red.

Row 1 and 2 same as the Small Spikes.
3: 3SC, (2HDC in the next st) 2 times, 1SC. [8]
Fasten off and leave a long tail for sewing.

Spikes Large (Make 1)
Use the color Dark Red.

Row 1,2 and 3 same as the Medium Spikes.
4: 3SC, 1HDC, (2HDC in the next st) 2 times, 1HDC, 1SC. [10]
Fasten off and leave a long tail for sewing.

♥ Assembling

Whenever I start assembling Amigurumi, I always use sewing pins first. This way I can move parts around until I am happy with how it looks, then I’ll sew them on.

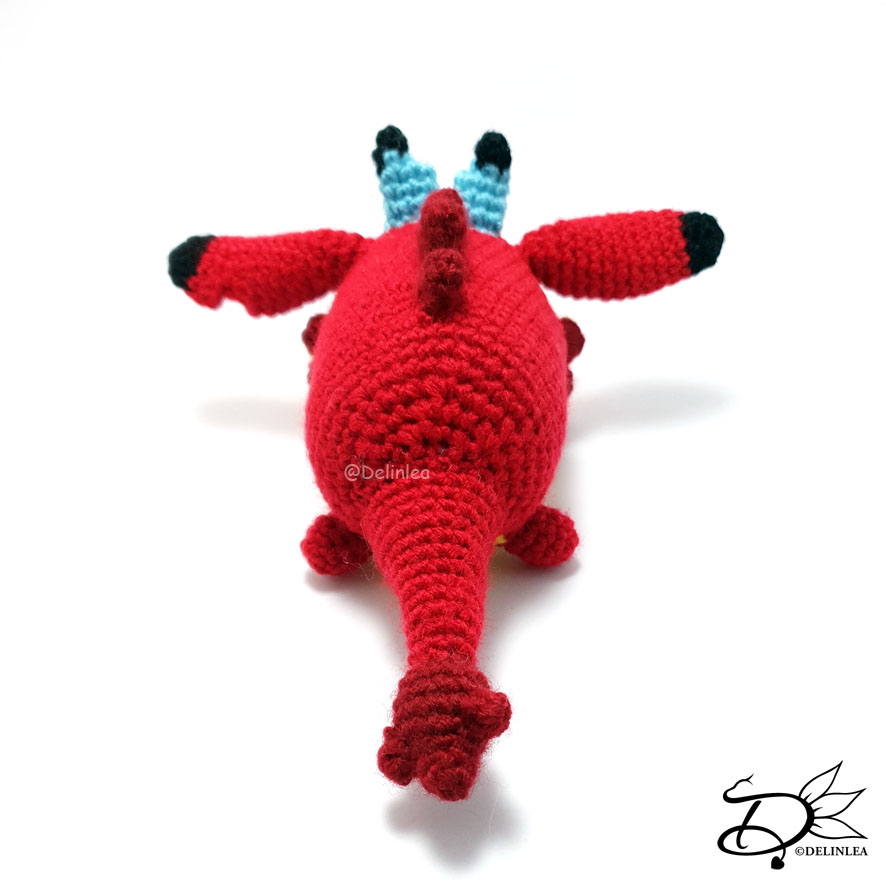
Start with sewing on Mushu’s belly to the body, sew all along the edge. Then you can add the tail as well, don’t forget to add the tip of the tail and the extra pointy bits for the tail. Next sew on Mushu’s legs.
After that it’s time to assemble his face. Start with his nose, I placed it just under where you started the body. Then you also know where the whiskers and eyes go. Sew these all on neatly. When you almost sewn on the nose, add a bit of stuffing in there.
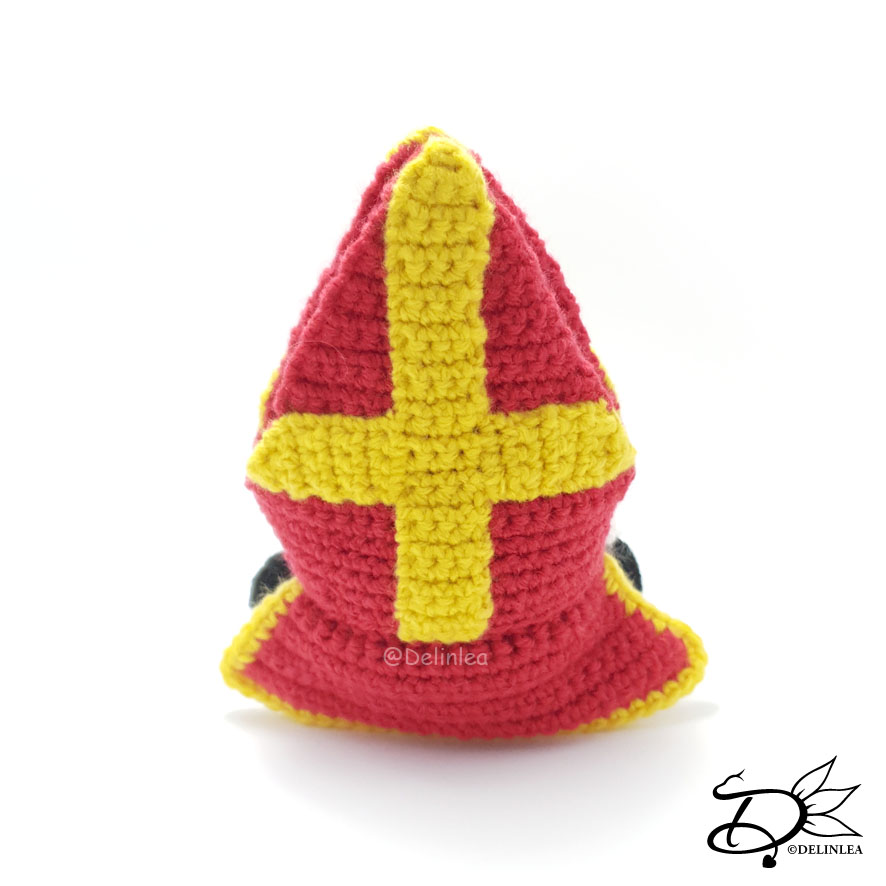
Then position the horns, on top of his head, make sure you sew them on the right way. Under the horns, come the ears. Fold those in half and sew it on. Under that 2 small spikes will go on each side.
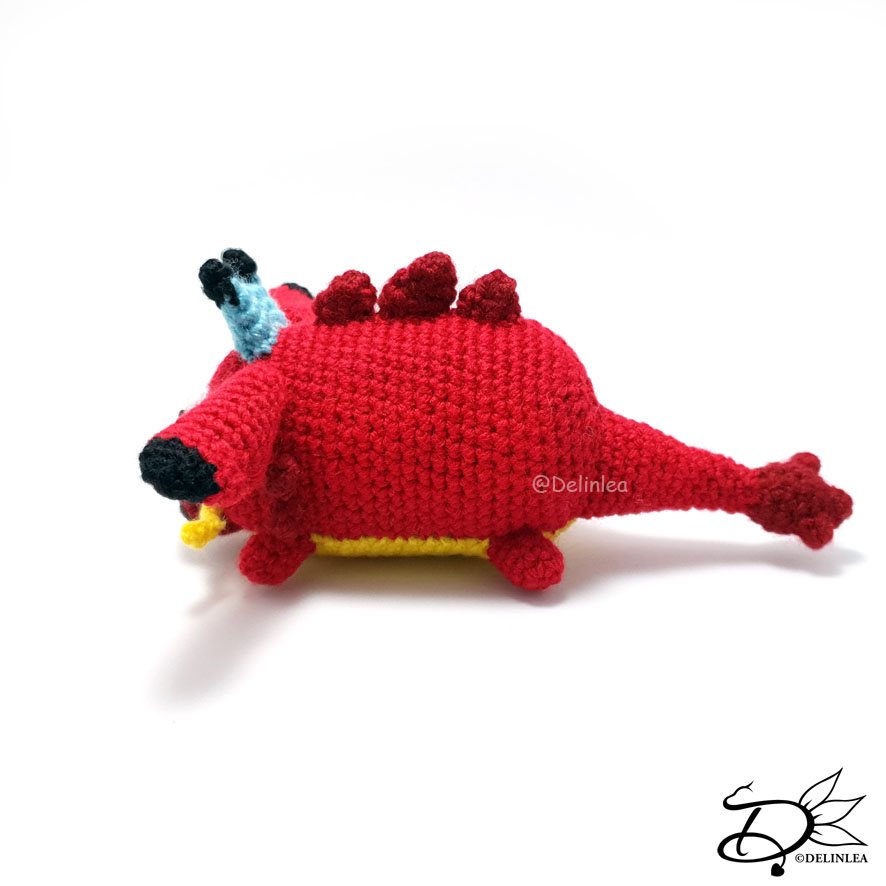
Last sew on the spikes on his back, 1 Medium, 1 Large and then 1 Medium nicely in the middle.
Don’t forget to make pupils for the eyes, I used a bit of black felt and glued it on. There are also some details in the nose, use a bit of black yarn and embroider those on.

And Mushu is done! I hope you had fun making this pattern! This one was requested by one of my followers. So, if you have request for future patterns as well, just let me know and I’ll see what I can do for you! Just contact me on Twitter or Instagram or leave a comment/contact form. If you made any of my patterns I would love to see, please show me on  Socials as well with #DelinleaDIY.

Have a wonderful day and I’ll see you next week!

Love
Danielle

Posted in: Crafting, Crochet, Tsum Tsum Tagged: Amigurumi, Crochet, cute, Disney, Dragon, haken, kawaii, Mulan, Mushu, Tsum Tsum

♥ Cheshire Cat Ufufy Amigurumi

5 november 2020 by Delinlea Leave a Comment

Hey Lovelies! This month’s planning will be a bit different from usual. Normally I would post Ufufy and Tsum Tsum patterns at the end of the month, but this time I switch it around. I will do those at the beginning of the month so I can do some Sinterklaas blogs at the end of the month. I hope you don’t mind! So today pattern will be a Cheshire Cat Ufufy! I hope you will like this pattern, I had at least fun making him!

Cheshire Cat Ufufy

For this pattern you’ll need:
♥ Yarn in the colors Pink, Light Pink and Purple.
♥ Crochet hook. ( I used a 2mm)
♥ Stuffing.
♥ Yarn Needle.
♥ Sewing Pins.
♥ Stitch Marker.
♥ Dark Brown Felt.
♥ Scissors.

Stitches used (US Terms):
Magic Ring.
CH = Chain.
SLST = Slip Stitch.
FSC = Foundation Single Crochet.
SC = Single Crochet.
ST = Stitch.
Inc = Increase.
Dec = Decrease.
(…) = Repeat the space in brackets the given number of times.
[…] = Total number of stitches.

This pattern is made with continues rounds, unless stated otherwise. Use a stitch marker to mark your first/last stitch of your row.

♥ Pattern Cheshire Cat

Body
Start with the color Pink.

1: 6SC in a Magic Ring. [6]
2: 2SC in each st around. [12]
3: (1SC, inc) 6 times. [18]
4: (2SC, inc) 6 times. [24]
5: 24SC. [24]
6: 24SC. [24]
7: (3SC, inc) 6 times. [30]
8: 30SC. [30]
|
11: 30SC. [30]
Change to the color Light Pink.
12: 30SC. [30]
13: 30SC. [30]
Change to the color Pink.
14: 30SC. [30]
15: 30SC. [30]
Change to the color Light Pink.
16: 30SC. [30]
17: 30SC. [30]
Change to the color Pink.
18: (3SC, dec) 6 times. [24]
19: (2SC, dec) 6 times. [18]
20: (1SC, dec) 6 times. [12]
21: Dec around. [6]
Fasten off and weave in tail.

Snout
Use the color Light Pink.

1: 10FSC,turn. [10]
2: 1SC + 1HDC in the next st, 1HDC, 1SC, 4SlSt, 1SC, 1HDC, 1HDC + 1SC in the next st. [12]
Fasten off and leave a long tail for sewing.

Nose
Use the color Purple.

In a Magic Ring crochet; 1SC, 1HDC, 1SC, 1HDC, 1SC, SlSt in the first st.
Fasten off and leave a long tail for sewing.

Ears (Make 2)
Use the color Pink.

1: 4SC in a Magic Ring. [4]
2: (inc, 1SC) 2 times. [6]
Fasten off and leave a long tail for sewing.

Legs (Make 4)
Use the color Light Pink.

1: 6SC in a Magic Ring. [6]
2: 6SC. [6]
Fasten off and leave a long tail for sewing.

Tail
Start with the color Light Pink.

1: 6SC in a Magic Ring. [6]
2: 6SC. [6]
Change to the color Pink.
3: 6SC. [6]
4: 6SC. [6]
Change to the color Light Pink.
5: 6SC. [6]
6: 6SC. [6]
Change to the color Pink.
7: 6SC. [6]
8: 6SC. [6]
Fasten off and leave a long tail for sewing.

♥ Assembling

Whenever I start assembling Amigurumi’s, I use sewing pins first to put it together. This way I can easily move parts around until I am happy. Then I will sew it on.

I started with sewing on the tail of the Cheshire cat first, where you can see rows switching in the back. After I positioned the legs, and sew those on as well.
Then it’s time to get the snout on, find the top light pink row of the body, then go one row up and above that one you can sew on the snout. Then attach the nose as well.
Last I’ve sewn on the ears.
Now for the fluffy bits by the ears and on his cheeks. I use strands of yarn and tied about 2 or 3 together. With a needle I’ve pulled them to the spot I wanted them to be in. Cut them to about the length you want the fluff to be. Use a needle to unraffle the yarn and brush it out to make it fluffy. Give it a final cut to the right length.
Last make his facial detail out of some felt and use a needle and thread if you prefer.

And the Cheshire Cat is all done! I hope you had fun today and were able to make this cutie. If you did, show me on Twitter and Instagram with #DelinleaDIY. I’d love to see.

Have a wonderful day and I’ll see you next week.

Love
Danielle

Posted in: Crafting, Crochet, Ufufy Tagged: Alice In Wonderland, Amigurumi, Cat, Cheshire, Crochet, cute, Disney, haken, kawaii, Ufufy
« Vorige 1 2 3 4 5 6 7 8 9 10 11 12 13 14 … 26 27 28 29 30 Volgende »

What are you looking for?!

My Socials

Ko-Fi

I love making all these free things for you, tho it would be very helpfull if you can support me on Ko-Fi! (You don’t have to tho, totally up to you!)

Ko-Fi Shop!!

In my Ko-Fi shop you can find PDF Amigurumi Patterns!! You can pay easily with PayPal.
Go to the shop here!!

Recent Blog Posts

  • ♥ Happy 2022!
  • ♥ Day 12; Lights
  • ♥ Day 11; Flower Deco
  • ♥ Day 10; Snowman
  • ♥ Day 9; Gingerbread Houses

Recent Comments

  • Delinlea op ♥ Pietje Gnome Amigurumi
  • Delinlea op ♥ Toy Story Alien TsumTsum Amigurumi
  • Delinlea op ♥ Pua Tsum Tsum Amigurumi
  • Charli op ♥ Free Pattern; CNY Mouse Amigurumi
  • Peter Pesch op ♥ Pietje Gnome Amigurumi

Categories

  • animation
  • Beadwork
  • Blogmas 2018
  • Blogmas 2020
  • Blogmas 2021
  • Books
  • Bujo
  • Christmas
  • Christmas CAL 2019
  • Christmas Countdown 2017
  • Contest
  • Crafting
  • Crochet
  • Drawing
  • Drawing Lesson
  • Easter
  • Geen categorie
  • Life
  • Miniature
  • Nail Art
  • New Year
  • Paper
  • plush
  • Pokemon
  • Poseable Art Doll
  • Recipe
  • Sewing
  • Shop Pattern
  • Sinterklaas
  • Social Media
  • Tsum Tsum
  • Ufufy

Copyright © 2025 Delinlea - My little fantasy world.

Family WordPress Theme by themehall.com