Delinlea - My little fantasy world
  • ♥ Home
  • ♥ About Me
  • ♥ Blogmas 2021
  • ♥ Free Patterns
    • ♥ Amigurumi; Spring/Easter
    • ♥ Amigurumi; Fall/Halloween
    • ♥ Amigurumi; Winter
    • ♥ Amigurumi Tsum Tsum
    • ♥ Amigurumi Ufufy
    • ♥ Amigurumi Others
    • ♥ Christmas Countdown 2017
    • ♥ Blogmas 2018
    • ♥ Blogmas 2020
  • ♥ Tutorials
    • ♥ Easter
    • ♥ Home Deco
    • ♥ Others
  • ♥ Drawing Lessons
  • ♥ FanFic
    • ♥ Chapter 1
    • ♥ Chapter 2
    • ♥ Chapter 3
    • ♥ Chapter 4
    • ♥ Chapter 5
    • ♥ Chapter 6
    • ♥ Chapter 7
  • ♥ Gallery
    • ♥ Crafts
    • ♥ Drawings
    • ♥ Poseable Art Dolls
  • ♥ Links
  • ♥ Contact
    • Privacy Policy

Christmas

♥ Day 13; Snowflake Amigurumi

13 december 2020 by Delinlea Leave a Comment

Hey Lovelies! It’s day 13 of Blogmas, and that means we are already half way through. How did that happen so fast. Time really flies fast! Just like this year has went by fast for me, not sure where all time did go, it seems to go faster and faster every year. Do you experience that as well, or is it just me! Anyway, this snowflake will fall really slowly from the sky, like they have all time they want. I love watching snowflakes falling from the sky! It’s so calming when it snows. The whole world around seems to slow down and just be in the moment. For this Snowflake amigurumi, you don’t have to worry it’ll melt any time soon. It will be there for as long as you want.
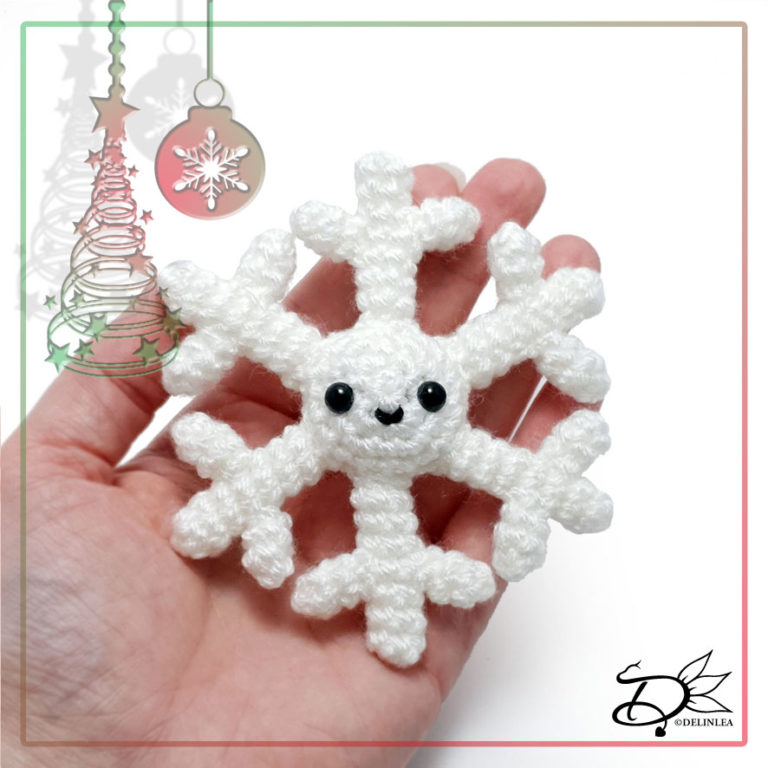
Snowflake made with Amigurumi

For this pattern you’ll need:
♥ Yarn in the color White (I used Stylecraft Special DK)
♥ A bit of extra Black yarn to create it’s mouth.
♥ Crochet hook. (I used 3mm)
♥ Stuffing.
♥ Yarn Needle.
♥ Sewing Pins.
♥ Stitch Marker.
♥ Safety Eyes, 6mm.

Stitches used (US Terms):
Magic Ring.
CH = Chain.
SLST = Slip Stitch.
SC = Single Crochet.
ST = Stitch.
Inc = Increase.
Dec = Decrease.
(…) = Repeat the space in brackets the given number of times.
[…] = Total number of stitches.

This pattern is made with continues rounds, unless stated otherwise. Use a stitch marker to mark your first/last stitch of your row.

♥ Pattern Snowflake

Middle
Use the color White.

1: 6SC in a Magic Ring. [6]
2: 2SC in each st around. [12]
3: (1SC, inc) 6 times. [18]
4: 18SC. [18]
Place the eyes between row 2&3.
5: 18SC. [18]
6: 18SC. [18]
7: (1SC, dec) 6 times. [12]
Stuff here.
8: Dec around. [6]
Fasten off and weave in tail.

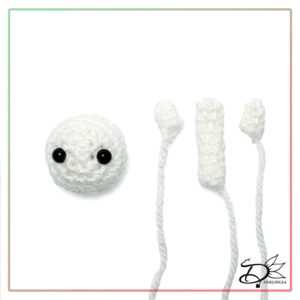
Crystal Part1 (Make 6)
Use the color White.

1: 6SC in a Magic Ring. [6]
2: 6SC. [6]
Repeat row 2 until you have 8 rows total.
Fasten off and leave a long tail for sewing.

Crystal Part2 (Make 12)
Use the color White.

1: 5SC in a Magic Ring. [5]
2: 5SC. [5]
3: 5SC. [5]
Fasten off and leave a long tail for sewing.

♥ Assembling

Whenever I start assembling Amigurumi, I’d like to use sewing pins to position all parts first until I’m happy. Then I will sew them on. I recommend you do so as well.

Complete the Crystals first, you need 1 of ‘part1’and 2 of ‘part2’ to complete one crystal. Sew ‘part2’ opposite of each other to ‘part1’ about 2/3 rows down from the top of ‘part1’.
When you have created 6 complete crystals, take your middle part, spread the crystals evenly around and sew those on.
Then with the piece of black yarn, create his mouth.
If you want to hang it, don’t forget to add a loop to the top.

I hope you enjoyed today’s pattern! I think it’s adorable. If you decided to make any of the blogmas amigurumi, please show me on Twitter or Instagram  with #DelinleaDIY. I’d love to see what you make using my patterns.

And don’t forget that you can get all Blogmas patterns ad free in a PDF bundle in my Ko-Fi shop (English US terms and Dutch). The link you can find on the Blogmas Page here! (Etsy might follow later).

Have a wonderful day and I’ll see you tomorrow!

Love
Danielle

PS. if you love those Blogmas patterns, maybe you’d like to support me on Ko-Fi?! So I can keep making content like this!

// ©2020 Delinlea / Danielle Kaal // Items made with this pattern may be sold in a limited number. Credit to ‘Delinlea’ is appreciated. Not allowed for mass production or commercial purposes. You may not reproduce, translate, share, freely distribute or sell this pattern as your own in digital or printed from.

Posted in: Blogmas 2020, Christmas, Crafting, Crochet Tagged: Amigurumi, Blogmas 2020, Christmas, Crochet, cute, Free Pattern, haken, kawaii, Snowflake

♥ Day12; Santa’s Bag Amigurumi

12 december 2020 by Delinlea Leave a Comment

Hey Lovelies! I am always curious what’s in Santa’s bag. How can he fit in so many presents?! Magic is all I can come up with. I wish I had a bag like Santa, or a bag like Hermione, would give me a lot of space in my room I guess. Anyway, in this little Santa’s bag, won’t fit much, it’s really tiny and I don’t think it can extent like the real Santa bag haha. I hope you’ll enjoy anyway, so cute as decoration!

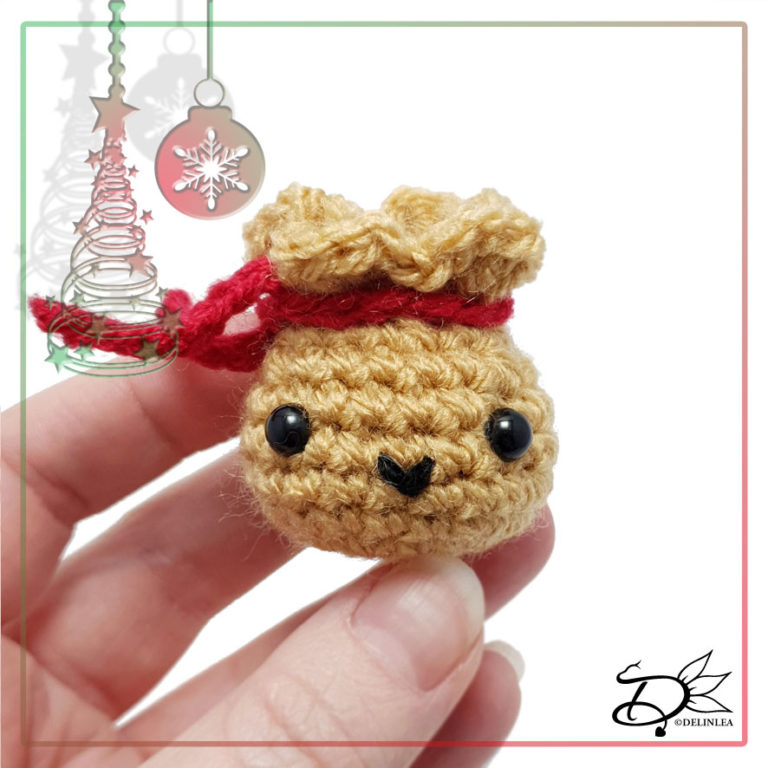
Santa's Bag made with Amigurumi

For this pattern you’ll need:
♥ Yarn in the colors Light Brown and Red (I used Stylecraft Special DK)
♥ A bit of extra Black yarn to create it’s mouth.
♥ Crochet hook. ( I used 3mm)
♥ Stuffing.
♥ Yarn Needle.
♥ Sewing Pins.
♥ Stitch Marker.
♥ Safety Eyes, 6mm.

Stitches used (US Terms):
Magic Ring.
CH = Chain.
SLST = Slip Stitch.
SC = Single Crochet.
HDC = Half Double Crochet.
DC = Double Crochet.
ST = Stitch.
FL = Front Loops.
BL = Back Loops.
Inc = Increase.
Dec = Decrease.
(…) = Repeat the space in brackets the given number of times.
[…] = Total number of stitches.

This pattern is made with continues rounds, unless stated otherwise. Use a stitch marker to mark your first/last stitch of your row.

♥ Pattern Santa’s Bag

Bag
Use the color Light Brown.

1: 6SC in a Magic Ring. [6]
2: 2SC in each st around. [12]
3: (1SC, inc) 6 times. [18]
4: (5SC, inc) 3 times. [21]
5: 21SC. [21]
6: 21SC. [21]
7: 21SC. [21]
8: (5SC, dec) 3 times. [18]
Place the eyes between row 6&7, about 5st apart.
9: (1SC, dec) 6 times. [12]
10: 12SC. [12]
Stuff the bag.
11: FL, (1HDC+2DC in the next st, 1DC+1HDC+1SC in the next st) 6 times. [36]
The previous row you worked on in the FL of row 10, the next row you’ll work in the BL of row 10.
12: BL, Dec around. [6]
Fasten off and weave in tail

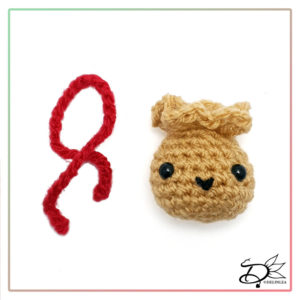
String
Use the color Red.

Ch35. [35]
Fasten off and weave in tail.

♥ Assembling

Whenever I start assembling Amigurumi, I’d like to use sewing pins to position all parts first until I’m happy. Then I will sew them on. I recommend you do so as well.

There isn’t much to assemble for this one, only tie the string around the bag.
Then with the piece of black yarn, create his mouth.
If you want to hang it, don’t forget to add a loop to the top.

I hope you enjoyed today’s pattern! I think it’s adorable. If you decided to make any of the blogmas amigurumi, please show me on Twitter or Instagram  with #DelinleaDIY. I’d love to see what you make using my patterns.

And don’t forget that you can get all Blogmas patterns ad free in a PDF bundle in my Ko-Fi shop (English US terms and Dutch). The link you can find on the Blogmas Page here! (Etsy might follow later).

Have a wonderful day and I’ll see you tomorrow!

Love
Danielle

PS. if you love those Blogmas patterns, maybe you’d like to support me on Ko-Fi?! So I can keep making content like this!

// ©2020 Delinlea / Danielle Kaal // Items made with this pattern may be sold in a limited number. Credit to ‘Delinlea’ is appreciated. Not allowed for mass production or commercial purposes. You may not reproduce, translate, share, freely distribute or sell this pattern as your own in digital or printed from.
Posted in: Blogmas 2020, Christmas, Crafting, Crochet Tagged: Amigurumi, Blogmas 2020, Christmas, Crochet, cute, Free Pattern, haken, kawaii, Santa bag

♥ Day11; Snowman Amigurumi

11 december 2020 by Delinlea Leave a Comment

Hey Lovelies! Do you wanna build a snowman~~ for day 11?! I’m sorry, some of you are probably really tired of that line haha. I just love Frozen, maybe it’s a good idea to watch it again today. It’s important to relax these days as well, and not run around like crazy all the time. Let’s take care of ourselves too, right?!
I hope we get snow this winter tho, I would love to build of snowman..or maybe more like a snow dragon! I love snow, and I think we don’t get it enough here in the Netherlands. So maybe I’ve to do it with this amigurumi this year, that would be sad tho. Anyway, enjoy this pattern!

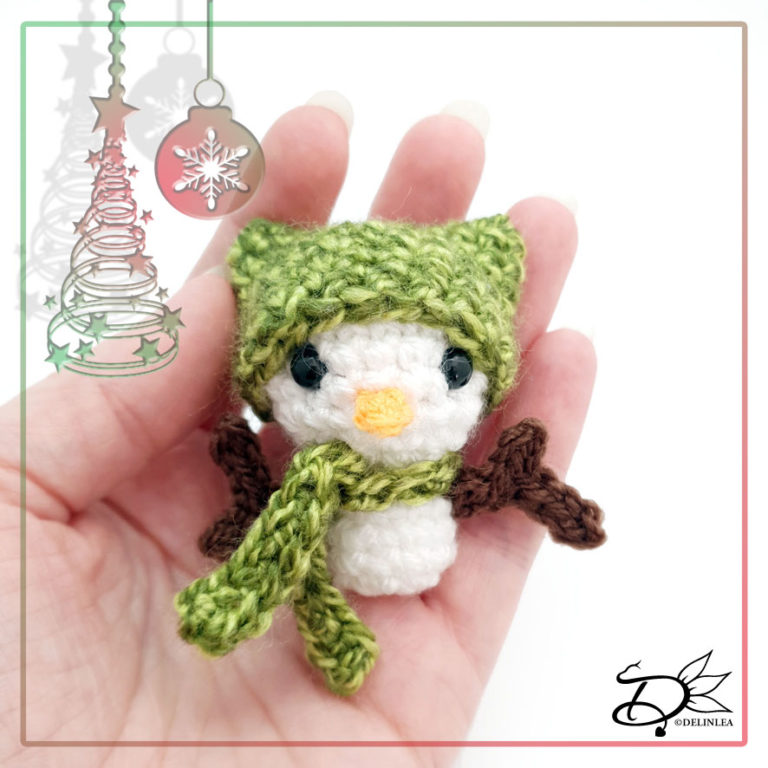
Christmas Snowman Made with Amigurumi

For this pattern you’ll need:
♥ Yarn in the colors White, Green, Brown and Orange. (I used Stylecraft Special DK)
♥ Crochet hook. ( I used 3mm)
♥ Stuffing.
♥ Yarn Needle.
♥ Sewing Pins.
♥ Stitch Marker.
♥ Safety Eyes, 6mm.

Stitches used (US Terms):
Magic Ring.
CH = Chain.
SLST = Slip Stitch.
FSC = Foundation Single Crochet.
SC = Single Crochet.
ST = Stitch.
FL = Front Loops.
Inc = Increase.
Dec = Decrease.
(…) = Repeat the space in brackets the given number of times.
[…] = Total number of stitches.

This pattern is made with continues rounds, unless stated otherwise. Use a stitch marker to mark your first/last stitch of your row.

♥ Pattern Christmas Snowman

Body
Use the color White.

1: 6SC in a Magic Ring. [6]
2: 2SC in each st around. [12]
3: (1SC, inc) 6 times. [18]
4: (5SC, inc) 3 times. [21]
5: 21SC. [21]
6: 21SC. [21]
7: 21SC. [21]
8: (5SC, dec) 3 times. [18]
Place the eyes between row 6&7, ongeveer 4S er tussen.
9: (1SC, dec) 6 times. [12]
10: (2SC, dec) 3 times. [9]
11: FL, 9SC. [9]
Stuff the head.
12: (2SC, inc) 3 times. [12]
13: 12SC. [12]
14: 12SC. [12]
Stuff the body.
15: Dec around. [6]
Fasten off and weave in tail.

Hat
Use the color Green.

1: 21FSC, SlSt in the first st. [21]
2: Ch1, 21SC, SlSt in the first st. [21]
|
6: Ch1, 21SC, SlSt in the first st. [21]
Fasten off and make the hat flat, sew the last row together. Weave in tail after you’re done.

Scarf
Use the color Green.

Make 26FSC, Fasten off and weave in tail.

Arms/Branches (Make 2)
Use the color Brown.

Ch7, insert in second ch from hook, 3SlSt, Ch3, insert in second ch from hook, 2SlSt, continue on the ch you make first, 3SlSt.
Fasten off and leave a long tail for sewing.

Nose
Use the color Orange.

Ch3, insert in second ch from hook, 1SlSt, 1SC.
Fasten off and leave a long tail for sewing.

♥ Assembling

Whenever I start assembling Amigurumi, I’d like to use sewing pins to position all parts first until I’m happy. Then I will sew them on. I recommend you do so as well.

Sew on his nose, slightly in between his eyes. Then sew on his arms to the sides of his body. After, dress him up with his hat and scarf.
If you want to hang it, don’t forget to add a loop to the top.

I hope you enjoyed today’s pattern! I think it’s adorable. If you decided to make any of the blogmas amigurumi, please show me on Twitter or Instagram  with #DelinleaDIY. I’d love to see what you make using my patterns.

And don’t forget that you can get all Blogmas patterns ad free in a PDF bundle in my Ko-Fi shop (English US terms and Dutch). The link you can find on the Blogmas Page here! (Etsy might follow later).

Have a wonderful day and I’ll see you tomorrow!

Love
Danielle

PS. if you love those Blogmas patterns, maybe you’d like to support me on Ko-Fi?! So I can keep making content like this!

// ©2020 Delinlea / Danielle Kaal // Items made with this pattern may be sold in a limited number. Credit to ‘Delinlea’ is appreciated. Not allowed for mass production or commercial purposes. You may not reproduce, translate, share, freely distribute or sell this pattern as your own in digital or printed from.
Posted in: Blogmas 2020, Christmas, Crafting, Crochet Tagged: Amigurumi, Blogmas 2020, Christmas, Crochet, cute, Free Pattern, haken, kawaii, Snowman

♥ Day10; Candle Amigurumi

10 december 2020 by Delinlea Leave a Comment

Hey Lovelies! It’s Day 10 of Blogmas! And this little one will light up your day! Well, he can’t be lit up for real, but it’s adorable right?! You can put this candle literally everywhere, you don’t have to worry about safety like with real flames. I hope you’ll enjoy making him!

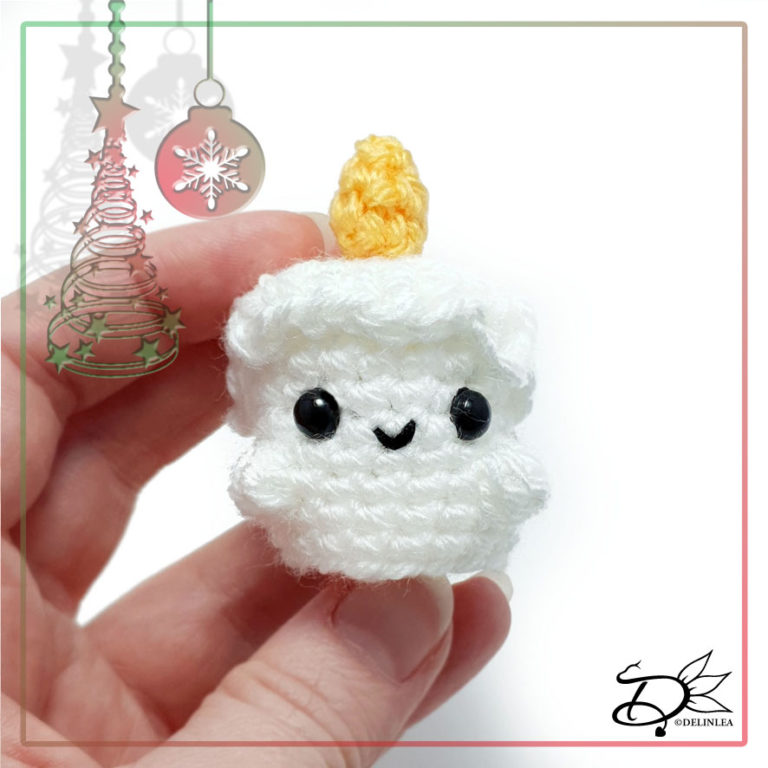
Candle made with Amigurumi

For this pattern you’ll need:
♥ Yarn in the colors White and Yellow. (I used Stylecraft Special DK)
♥ A bit of extra Black yarn to create it’s mouth.
♥ Crochet hook. (I used 3mm)
♥ Stuffing.
♥ Yarn Needle.
♥ Sewing Pins.
♥ Stitch Marker.
♥ Safety Eyes, 6mm.

Stitches used (US Terms):
Magic Ring.
CH = Chain.
SLST = Slip Stitch.
SC = Single Crochet.
HDC = Half Double Crochet.
DC = Double Crochet.
BB = Bobble Stitch.
ST = Stitch.
FL = Front Loops.
BL = Back Loops.
Inc = Increase.
Dec = Decrease.
(…) = Repeat the space in brackets the given number of times.
[…] = Total number of stitches.

This pattern is made with continues rounds, unless stated otherwise. Use a stitch marker to mark your first/last stitch of your row.

♥ Pattern Candle

Candle
Use the color White.

1: 6SC in a Magic Ring. [6]
2: 2SC in each st around. [12]
3: (1SC, inc) 6 times. [18]
4: BL, 18SC. [18]
5: 18SC. [18]
6: 18SC. [18]
7: 18SC. [18]
8: 18SC. [18]
9: 18SC. [18]
10: (5SC, BB) 2 times, 6SC. [18]
Place the eyes between row 8&9, about 4st apart.
11: 18SC. [18]
12: 18SC. [18]
13: BL, (1SC, dec) 6 times. [12]
Stuff the Candle.
14: Dec around. [6]
Fasten off and weave in tail.

Candle Drips
Use the color White.
At row4 of the Candle you worked in Bl, Rejoin your yarn now in the FL.

4SC, Ch4, insert in second ch from hook, 3SC, continue in the FL, 2SC, Ch2, insert in second ch from hook, 1SC, continue in the FL, 3SC, 1DC, 1HDC, 1SC, Ch3, insert in second ch from hook, 2SC, continue in the FL,2SC, Ch4, insert in second ch from hook, 3SC, continue in the FL, 1SC, 1DC, 1HDC, 1SC, Ch3, insert in second ch from hook, 2SC, continue in the FL, 2SC, SlSt in the first st.
Fasten off and leave a long tail for sewing.
Sew the drips to the base of the candle, so they stay in place.

Flame
Use the color Yellow.

1: 6SC in a Magic Ring. [6]
2: 6SC. [6]
3: (dec, 1SC) repeat until you can’t make stitches anymore.
Fasten off and leave a long tail for sewing. With a needle, pull the yarn to the other side of the flame.

♥ Assembling

Whenever I start assembling Amigurumi, I’d like to use sewing pins to position all parts first until I’m happy. Then I will sew them on. I recommend you do so as well.

There isn’t much sewing left to do, since the Drips are already sewn on. All that remains is to sew on the flame. Then with the piece of black yarn, create his mouth.
If you want to hang it, don’t forget to add a loop to the top.

I hope you enjoyed today’s pattern! I think it’s adorable. If you decided to make any of the blogmas amigurumi, please show me on Twitter or Instagram  with #DelinleaDIY. I’d love to see what you make using my patterns.

And don’t forget that you can get all Blogmas patterns ad free in a PDF bundle in my Ko-Fi shop (English US terms and Dutch). The link you can find on the Blogmas Page here! (Etsy might follow later)

Have a wonderful day and I’ll see you tomorrow!

Love
Danielle

PS. if you love those Blogmas patterns, maybe you’d like to support me on Ko-Fi?! So I can keep making content like this!

// ©2020 Delinlea / Danielle Kaal // Items made with this pattern may be sold in a limited number. Credit to ‘Delinlea’ is appreciated. Not allowed for mass production or commercial purposes. You may not reproduce, translate, share, freely distribute or sell this pattern as your own in digital or printed from.
Posted in: Blogmas 2020, Christmas, Crafting, Crochet Tagged: Amigurumi, Blogmas 2020, Candle, Christmas, Crochet, cute, Free Pattern, haken, kawaii

♥ Day9; Christmas Penguin Amigurumi

9 december 2020 by Delinlea Leave a Comment

Hey Lovelies! A little Penguin for day 9! Well, I am still deciding if I should call it a penguin, but let’s go with it for now. I think he’s cute anyway, what do you think? He’s not really Christmassy, I just had to include him. Plus, coming up with 24 Christmas related items that could have eyes was kinda a challenge. Some ideas I just kept throwing into trash. Do you sometimes struggle as well with coming up with new ideas? Anyway, enough babbling, let’s go to the pattern.

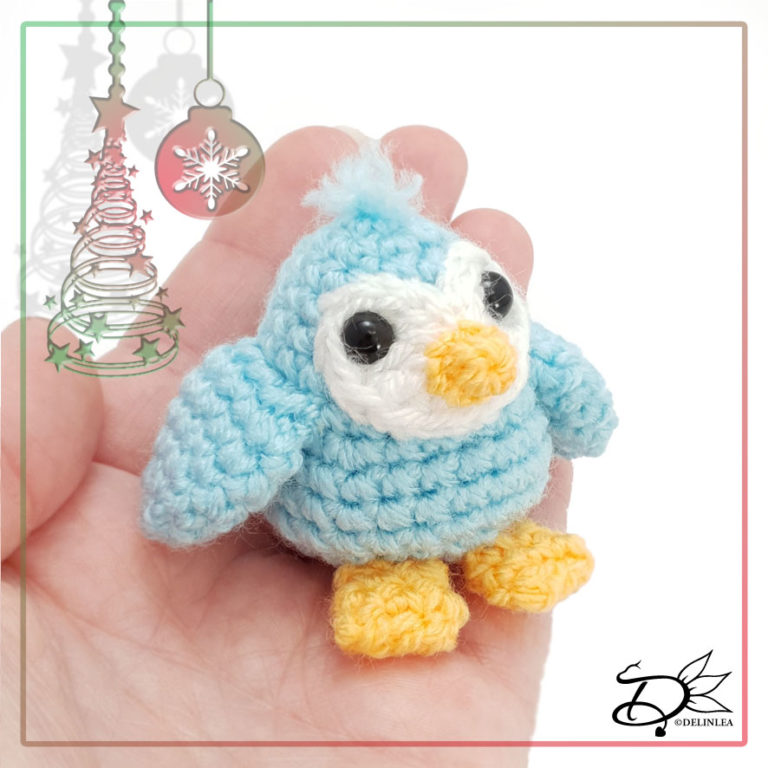
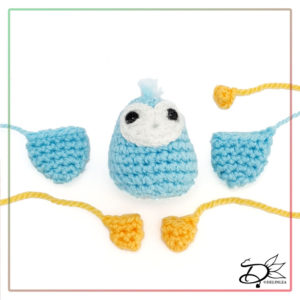
Christmas Penguin

For this pattern you’ll need:
♥ Yarn in the colors Light Blue, White and Yellow/Orange. (I used Stylecraft Special DK)
♥ Crochet hook. ( I used 3mm)
♥ Stuffing.
♥ Yarn Needle.
♥ Sewing Pins.
♥ Stitch Marker.
♥ Safety Eyes, 6mm.

Stitches used (US Terms):
Magic Ring.
CH = Chain.
SLST = Slip Stitch.
SC = Single Crochet.
HDC = Half Double Crochet.
DC = Double Crochet.
TR = Treble Crochet.
ST = Stitch.
Inc = Increase.
Dec = Decrease.
(…) = Repeat the space in brackets the given number of times.
[…] = Total number of stitches.

This pattern is made with continues rounds, unless stated otherwise. Use a stitch marker to mark your first/last stitch of your row.

♥ Pattern Christmas Penguin

Face
Use the color White.

Crochet in a Magic Ring; Ch2, 2TR, 1DC, 1HDC, 3SC, 1HDC, 1DC, 2TR, CH2, SlSt and pull the ring tight.
Fasten off and leave a long tail for sewing.

Body
Use the color Light Blue.
Prepare 3 strings of Light Blue yarn of about 8cm, tie these together.

1: 6SC in a Magic Ring. [6]
Add the 3 strings of White yarn to the magic ring, the close it up.
2: 2SC in each st around. [12]
3: (3SC, inc) 3 times. [15]
4: (4SC, inc) 3 times. [18]
5: 18SC. [18]
6: (5SC, inc) 3 times. [21]
Add the safety eyes between row 4 and 5, but make sure to add the ‘face’ in between the eyes and the body.
7: 21SC. [21]
8: (6SC, inc) 3 times. [24]
9: 24SC. [24]
10: 24SC. [24]
11: 24SC. [24]
12: (2SC, dec) 6 times. [18]
13: (1SC, dec) 6 times. [12]
Stuff the body.
14: Dec all around. [6]
Fasten off and weave in tail.

Beak
Use the color Orange/Yellow

5SC in a Magic Ring, SlSt in the first st. [5]
Fasten off and leave a long tail for sewing.

Feet (Make2)
Use the color Orange/Yellow.

1: 6SC in a Magic Ring. [6]
2: 6SC. [6]
3: (2SC, inc) 2 times. [8]
Fasten off and flatten the piece, sew the last row together.

Wings (Make 2)
Use the color Light Blue.

1: 6SC in a Magic Ring. [6]
2: (1SC, inc) 3 times. [9]
3: (2SC, inc) 3 times. [12]
4: 12SC. [12]
5: 12SC. [12]
6: 12SC. [12]
Fasten off and leave a long tail for sewing.

♥ Assembling

Whenever I start assembling Amigurumi, I’d like to use sewing pins to position all parts first until I’m happy. Then I will sew them on. I recommend you do so as well.

First, sew along the edge of the face, to secure it better. Cut his ‘Hair’ to the length you want and unraffle the yarn with a needle to make it fluffy. Then sew on his beak, feet and wings nicely.
If you want to hang it, don’t forget to add a loop to the top.

I hope you enjoyed today’s pattern! I think it’s adorable. If you decided to make any of the blogmas amigurumi, please show me on Twitter or Instagram  with #DelinleaDIY. I’d love to see what you make using my patterns.

And don’t forget that you can get all Blogmas patterns ad free in a PDF bundle in my Ko-Fi shop (English US terms and Dutch). The link you can find on the Blogmas Page here! (Etsy might follow later).

Have a wonderful day and I’ll see you tomorrow!

Love
Danielle

PS. if you love those Blogmas patterns, maybe you’d like to support me on Ko-Fi?! So I can keep making content like this!

// ©2020 Delinlea / Danielle Kaal // Items made with this pattern may be sold in a limited number. Credit to ‘Delinlea’ is appreciated. Not allowed for mass production or commercial purposes. You may not reproduce, translate, share, freely distribute or sell this pattern as your own in digital or printed from.
Posted in: Blogmas 2020, Christmas, Crafting, Crochet Tagged: Amigurumi, Blogmas 2020, Christmas, Crochet, cute, Free Pattern, haken, kawaii, penguin
« Vorige 1 2 3 4 5 6 7 8 9 10 … 14 15 16 17 18 Volgende »

What are you looking for?!

My Socials

Ko-Fi

I love making all these free things for you, tho it would be very helpfull if you can support me on Ko-Fi! (You don’t have to tho, totally up to you!)

Ko-Fi Shop!!

In my Ko-Fi shop you can find PDF Amigurumi Patterns!! You can pay easily with PayPal.
Go to the shop here!!

Recent Blog Posts

  • ♥ Happy 2022!
  • ♥ Day 12; Lights
  • ♥ Day 11; Flower Deco
  • ♥ Day 10; Snowman
  • ♥ Day 9; Gingerbread Houses

Recent Comments

  • Delinlea op ♥ Pietje Gnome Amigurumi
  • Delinlea op ♥ Toy Story Alien TsumTsum Amigurumi
  • Delinlea op ♥ Pua Tsum Tsum Amigurumi
  • Charli op ♥ Free Pattern; CNY Mouse Amigurumi
  • Peter Pesch op ♥ Pietje Gnome Amigurumi

Categories

  • animation
  • Beadwork
  • Blogmas 2018
  • Blogmas 2020
  • Blogmas 2021
  • Books
  • Bujo
  • Christmas
  • Christmas CAL 2019
  • Christmas Countdown 2017
  • Contest
  • Crafting
  • Crochet
  • Drawing
  • Drawing Lesson
  • Easter
  • Geen categorie
  • Life
  • Miniature
  • Nail Art
  • New Year
  • Paper
  • plush
  • Pokemon
  • Poseable Art Doll
  • Recipe
  • Sewing
  • Shop Pattern
  • Sinterklaas
  • Social Media
  • Tsum Tsum
  • Ufufy

Copyright © 2025 Delinlea - My little fantasy world.

Family WordPress Theme by themehall.com