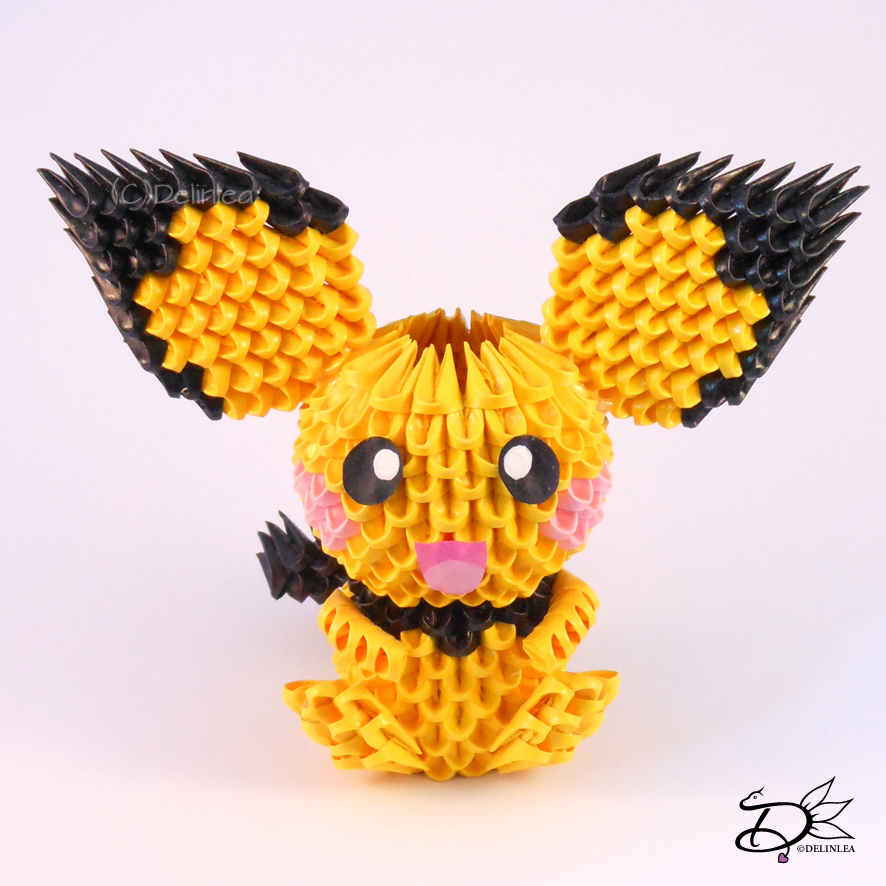
♥ Papercraft; Fall Decor
Hey Lovelies! I really needed a small break from my crochet works, I sometimes forget other crafts excist as well! There is so much fun stuff out there. I really needed to go back to my first love for paper. You can create so much with it, either flat or 3D. For today I created something flat, tho I think it’s very cute to put somewhere in your home, some nice little fall decor. And it also includes some handlettering (I don’t explane how, but there are plenty tutorials out there). I hope you will enjoy this easy, but fun craft!

For this DIY you’ll need:
♥ Cardboard, in Autumn colors (you can also use patterned paper to give it that little extra).
♥ Pencil.
♥ Scissors.
♥ Glue.
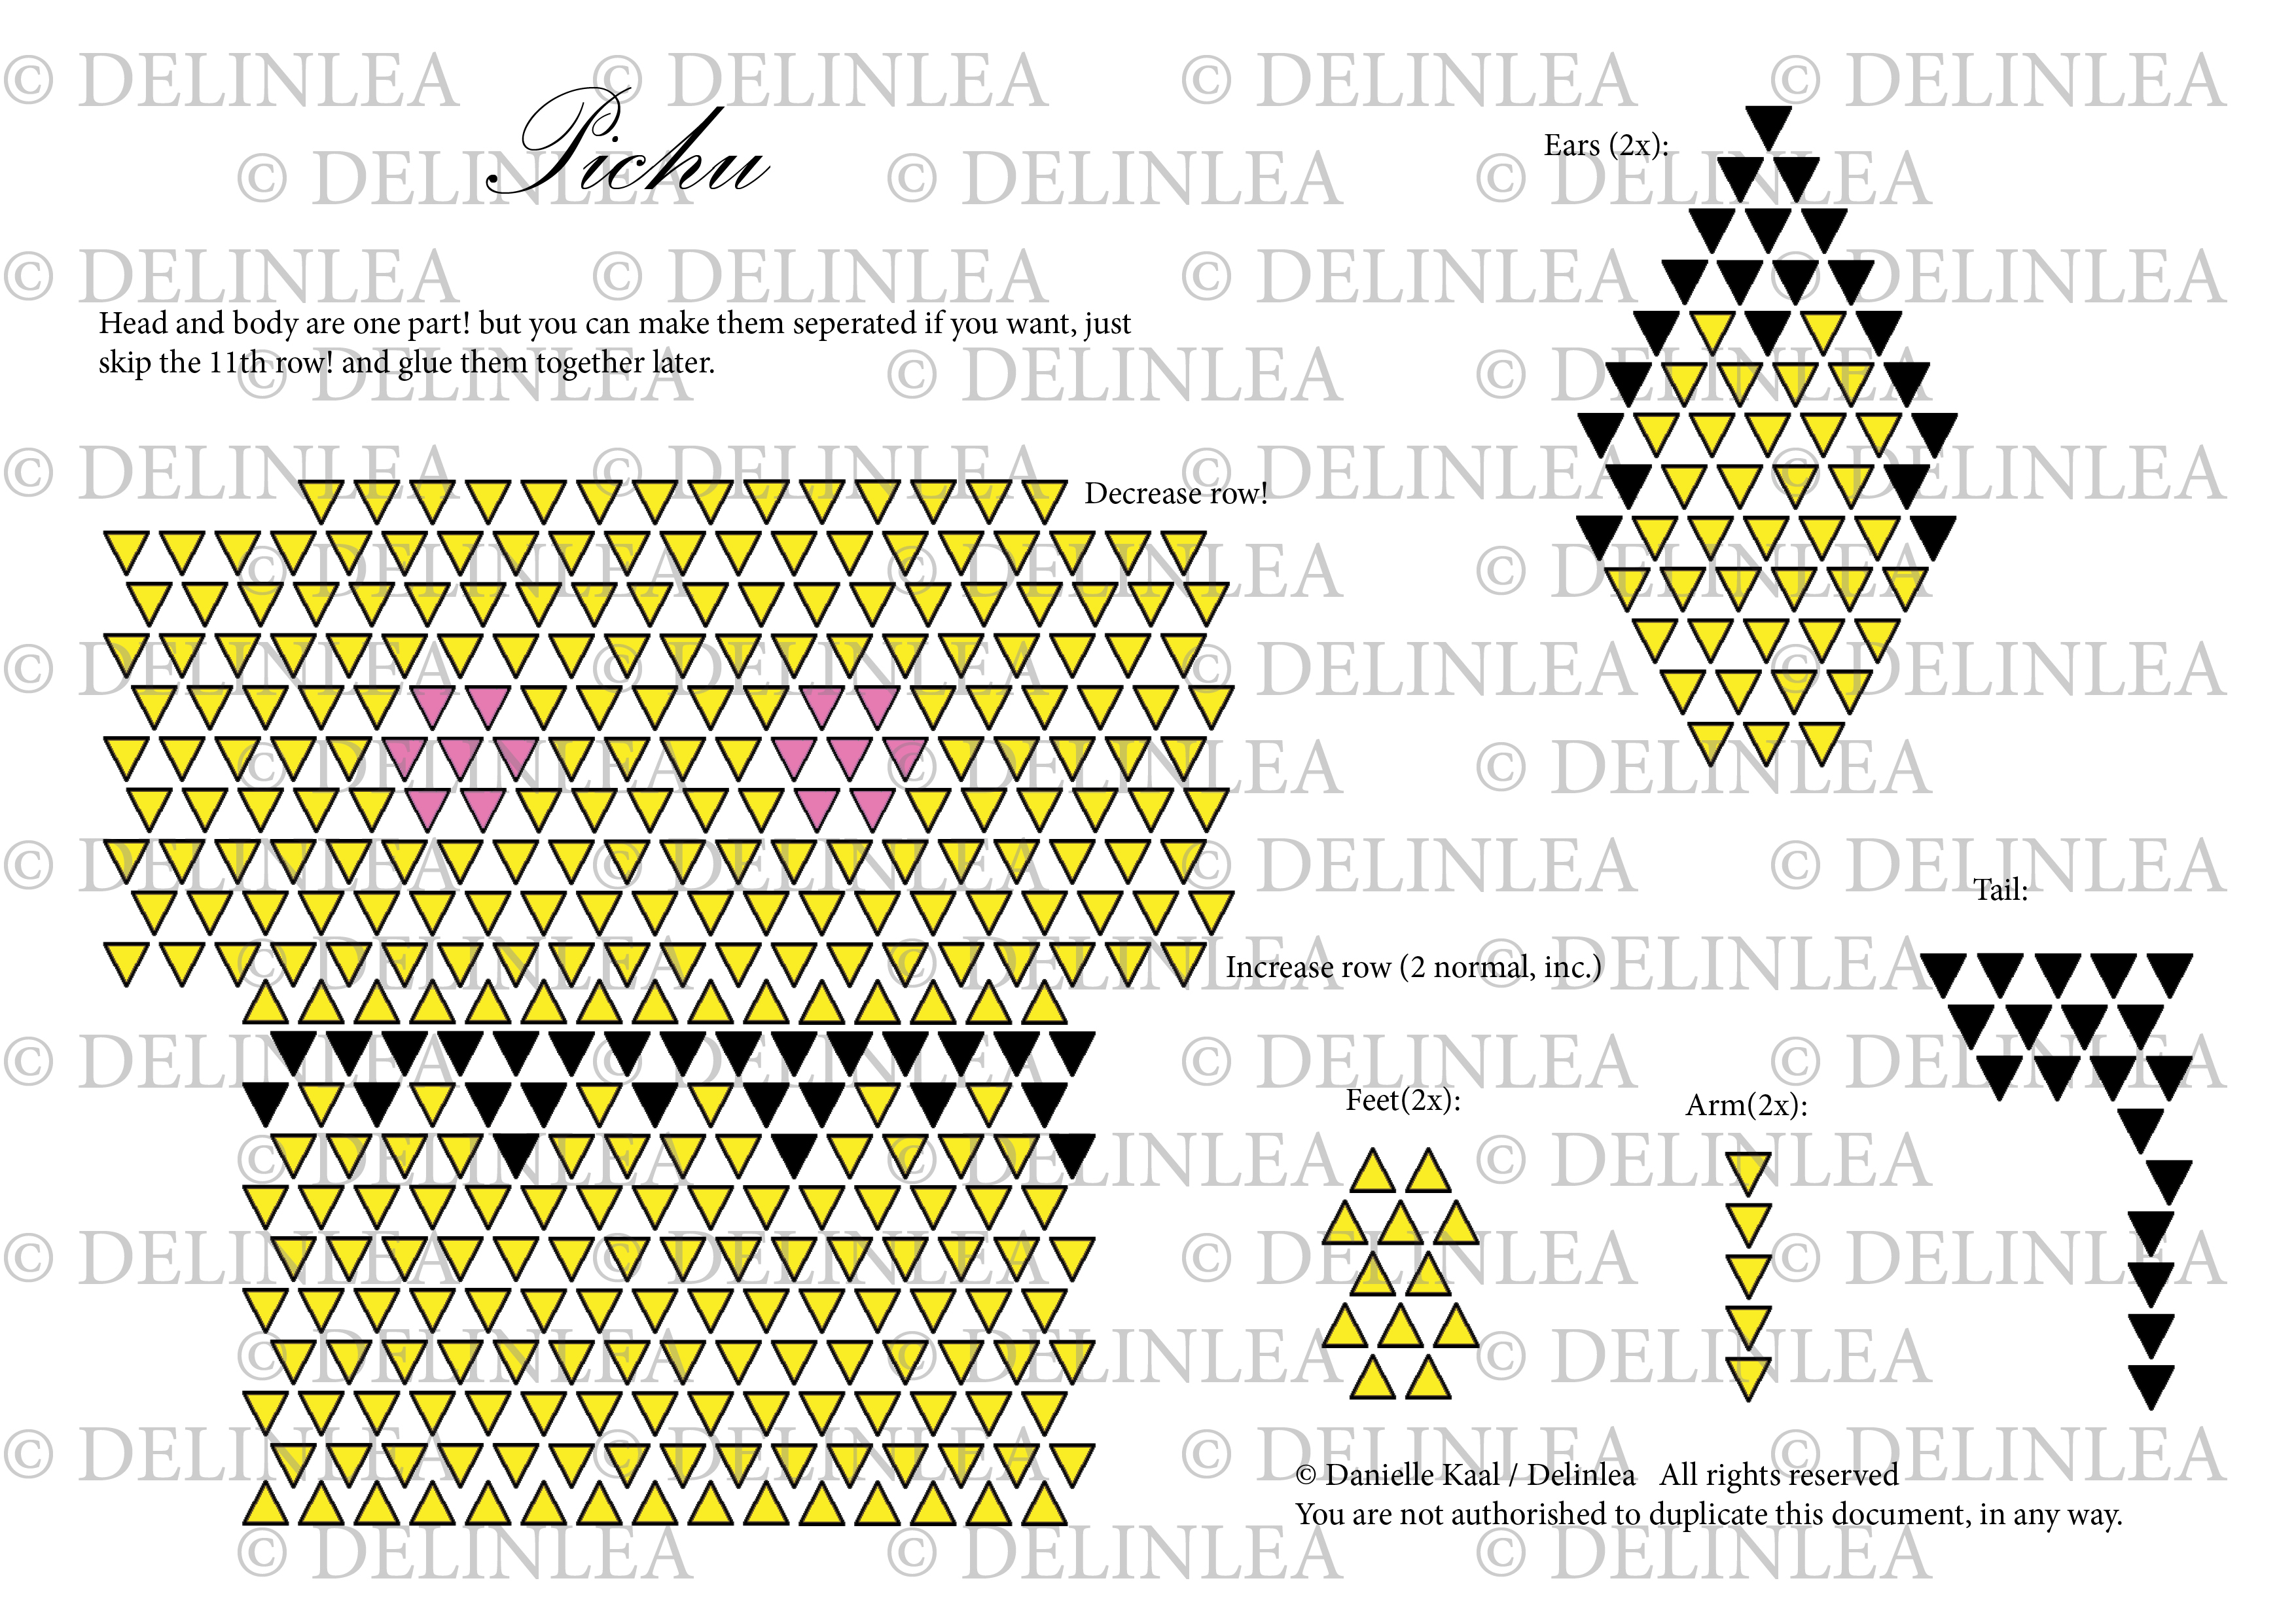
♥ This Template.
♥ Black Fineliner.
DIY
Start with printing out the template (or trace it from your screen if you don’t have a printer). Cut all these parts out.
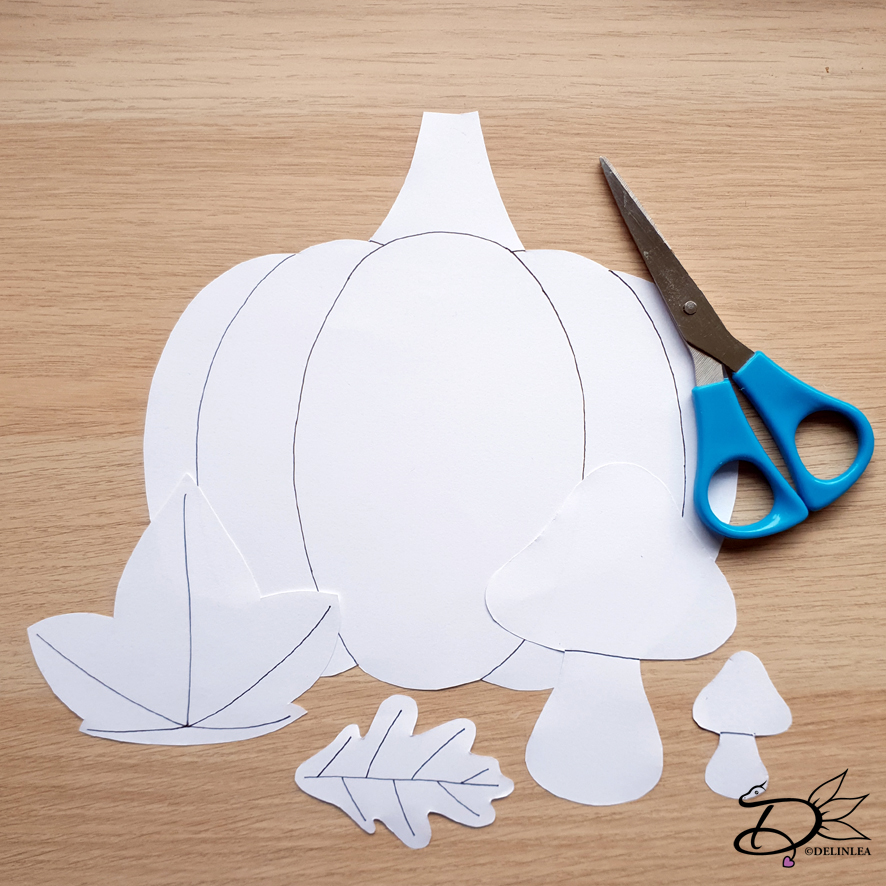
If you have all your parts cutted out, trace those to the
colored paper of choise. Most parts you trace just ones, but for the leaves,
just trace them as many times as you want.
For the hood mushrooms and the stem of the pumpkin, leave them on first if you
trace them on to the main color, then cut off the hoods of the mushrooms and
the stem of the pumpkin. Trace those parts to the desired color seperately.
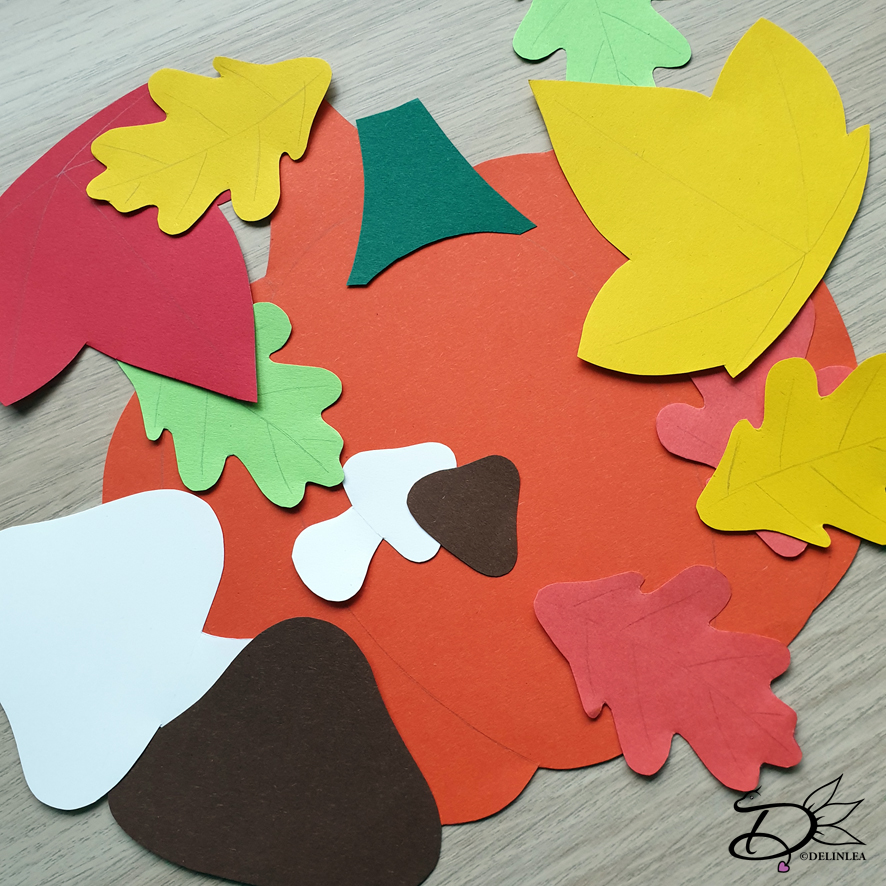
Glue the stem of the pumpkin and the hoods of the mushrooms on the main colored paper.
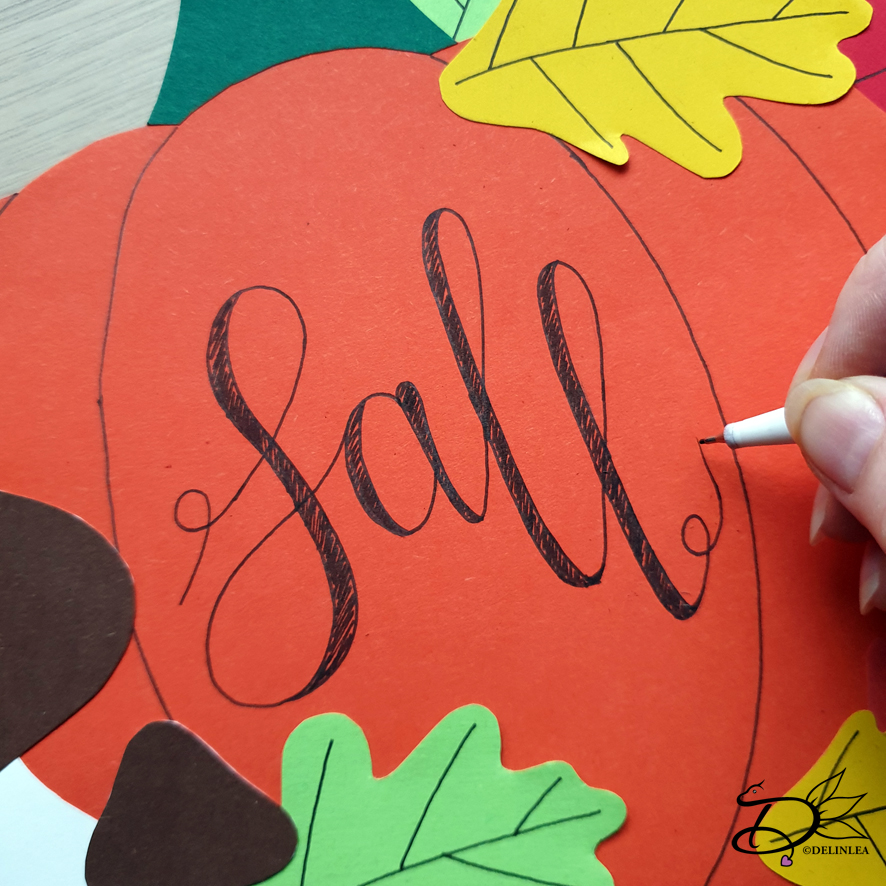
With a black fineliner, draw on the details on the pumpkin and the leaves.
Make an arrangement of all the parts you have made, if you are happy with how it looks, glue all parts to it’s definite place.

Handlettering
Last but not least, handletter on the word ‘Fall’ or ‘Autumn’. I won’t explane, like I said, but you can find plenty of tutorials online. Or simply copy hope I wrote mine!
I hope you enjoyed this easy DIY in between everything, I defenitely did!
Love
Danielle