Delinlea - My little fantasy world
  • ♥ Home
  • ♥ About Me
  • ♥ Blogmas 2021
  • ♥ Free Patterns
    • ♥ Amigurumi; Spring/Easter
    • ♥ Amigurumi; Fall/Halloween
    • ♥ Amigurumi; Winter
    • ♥ Amigurumi Tsum Tsum
    • ♥ Amigurumi Ufufy
    • ♥ Amigurumi Others
    • ♥ Christmas Countdown 2017
    • ♥ Blogmas 2018
    • ♥ Blogmas 2020
  • ♥ Tutorials
    • ♥ Easter
    • ♥ Home Deco
    • ♥ Others
  • ♥ Drawing Lessons
  • ♥ FanFic
    • ♥ Chapter 1
    • ♥ Chapter 2
    • ♥ Chapter 3
    • ♥ Chapter 4
    • ♥ Chapter 5
    • ♥ Chapter 6
    • ♥ Chapter 7
  • ♥ Gallery
    • ♥ Crafts
    • ♥ Drawings
    • ♥ Poseable Art Dolls
  • ♥ Links
  • ♥ Contact

cute

♥ Paper Autumn Lantern DIY

11 november 2021 by Delinlea Leave a Comment

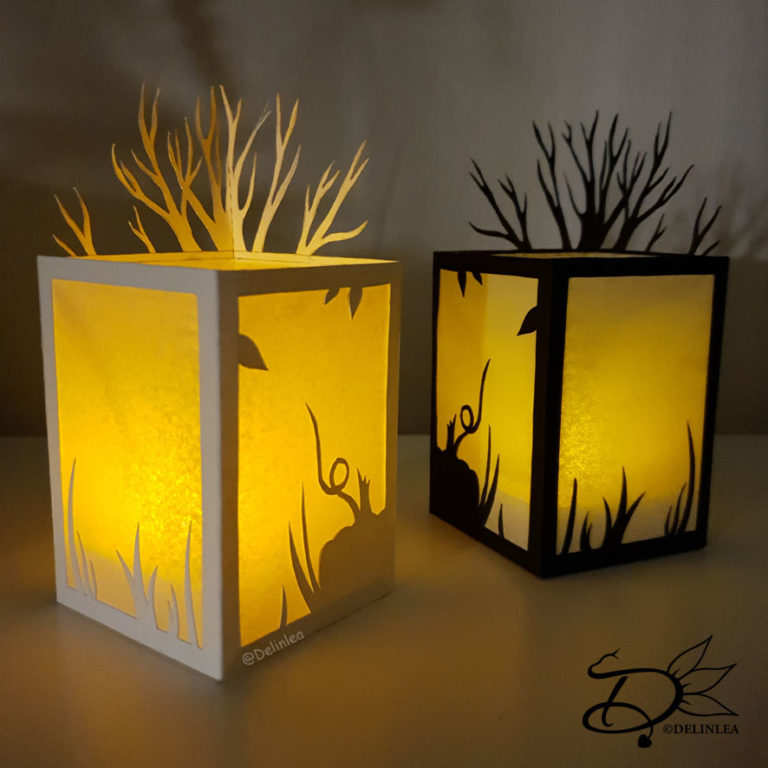
Hey Lovelies! Today it’s November 11th, and there are a bunch of celebrations today, one of the things we celebrate is St. Maarten. Kids go door to door, at night, with a lantern and sing to get candy. It’s a bit similar to trick or treating. It’s also Singles day, but that has nothing to do with today’s blog haha. Maybe a bit, just take time for yourself and craft you own lantern. Cause today we will make this fun paper lantern that you can decorate your house with!

Paper Lantern

For this DIY you’ll need:
♥ Paper in a color of choice (about 200 gr/m2)
♥ This Template.
♥ Semi-Translucent Paper.
♥ Printer or Pencil.
♥ X-acto knife.
♥ Cutting Mat.
♥ Glue.
♥ Bone Folder.

DIY Lantern

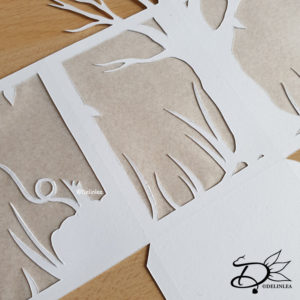
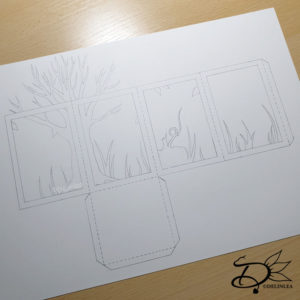
Print out this template, you can use regular printer paper and tape it to your thick paper. Printers sometimes don’t like thick paper. You can use any color of paper I used black and white, but it’s totally up to you.

Cutting out

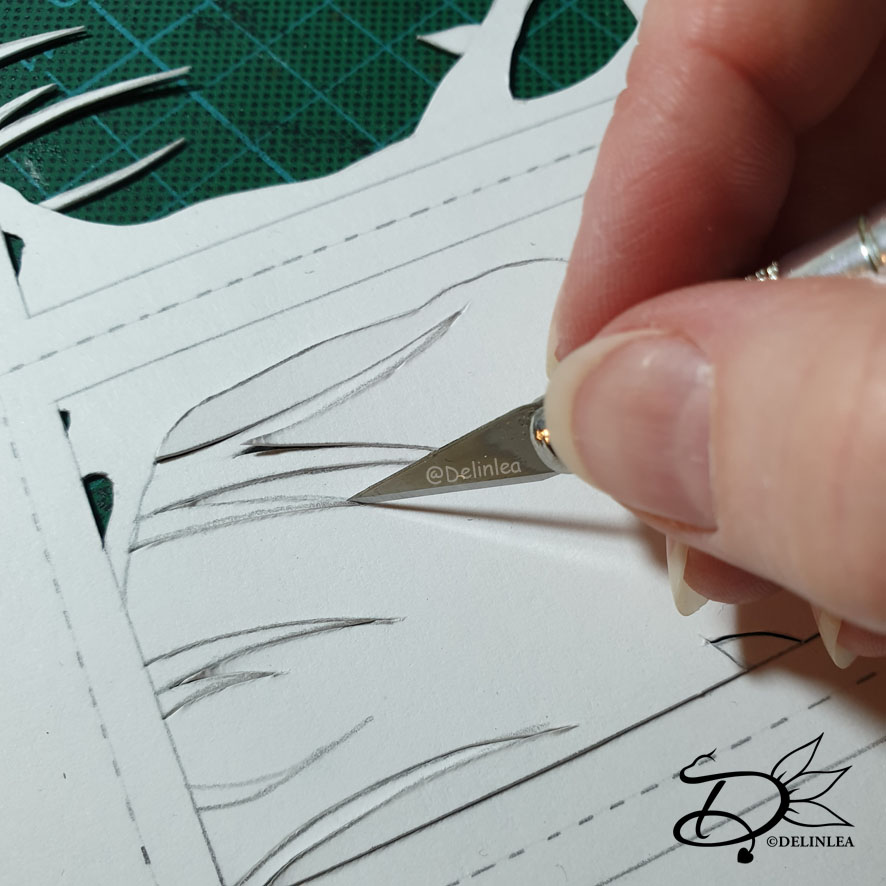
Start cutting out all the solid lines with an x-acto knife. Make sure to put an cutting mat under your work, you don’t wanna damage your workspace. All the dotted lines you leave alone for now. Easiest is to do the insides/windows first.

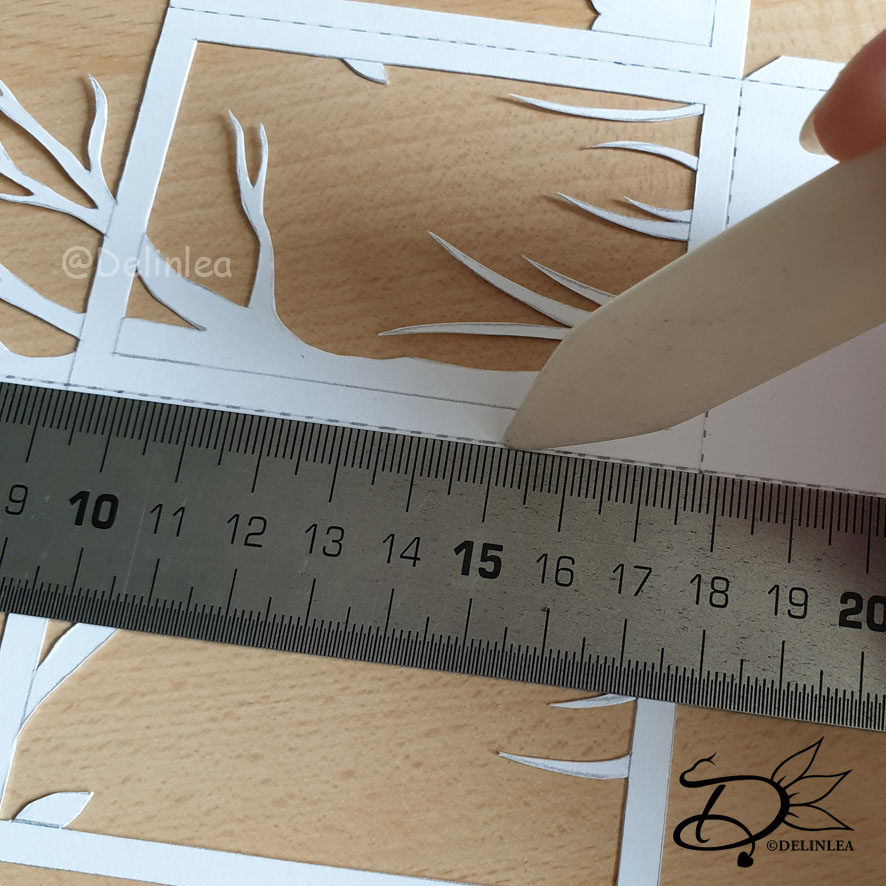
Now score all the dotted lines with a bone folder or anything else you can make an indent with.

Making Windows

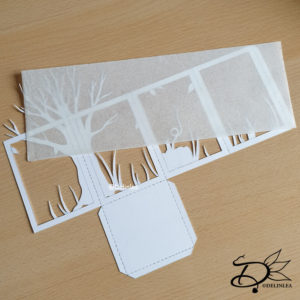
Cut out a rectangle of the semi translucent paper, for the windows, slightly smaller as the paper outlines. (the bottom of the lantern you can ignore). Mine was about 23,7cm by 8,25cm. Glue this neatly to the inside and let it dry well.

!! Just a slight warning, if you use white glue and your paper is not thick enough, it can warp. I prefer to use clear glue for this reason, it doesn’t contain water. !!

Folding and Glueing

When all has dried well, it’s time to folded all the dotted lines that you have scored before. I used a bone folder to make them neat. After that you can glue everything together.

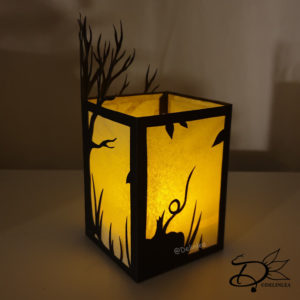
Paper Lantern

Your paper lantern is done! Isn’t it adorable?! I love them, and I already know so many more designs for them, wanna see those too?! Anyway, if you made some as well, please show me on Twitter or Instagram, I’d love to see what you made!

Have a wonderful day!

Love
Danielle

PS. if you love those DIY’s, maybe you’d like to support me on Ko-Fi?! So I can keep making content like this!

// ©2021 Delinlea / Danielle Kaal // Items made with this DIY may be sold in a limited number. Credit to ‘Delinlea’ is appreciated. Not allowed for mass production or commercial purposes. You may not reproduce, translate, share, freely distribute or sell this DIY as your own in digital or printed from.

Posted in: Crafting, Paper Tagged: Autumn, cute, DIY, fall, kawaii, Lantern, paper, Papier, Sint maarten, Template

♥ Fallen Leaves

4 november 2021 by Delinlea Leave a Comment

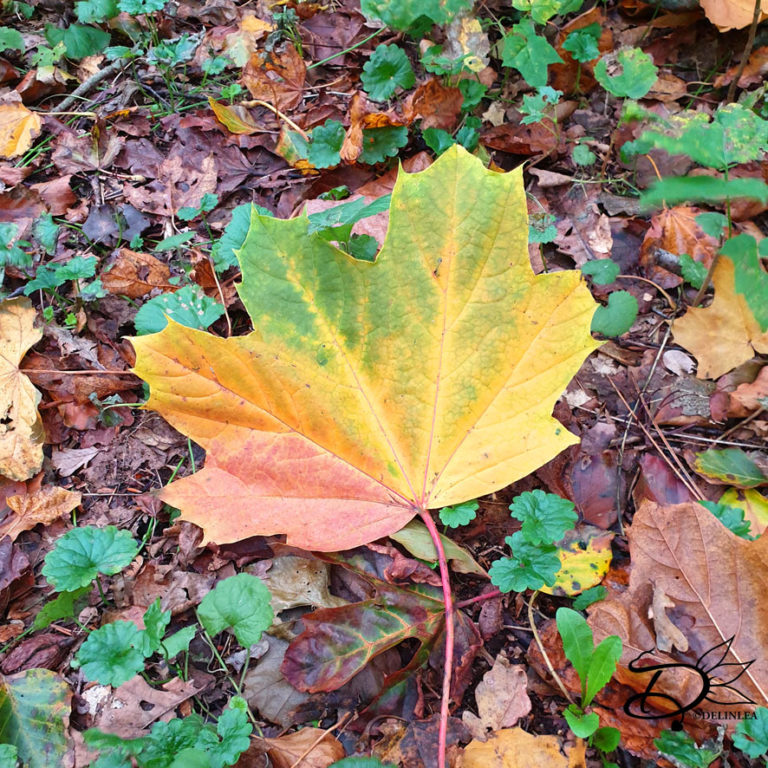
Hey Lovelies! Enjoying fall so far? Well if you live in a country where fall excists. Today I wanna talk about Fallen Leaves. Have you ever seen how pretty those are and not just annoying like many people seem to think? Gosh the amount of people I see during fall, cleaning up all those leaves from their garden and then I think, what ARE you doing, that’s natures food for the earth, a place to live for little creatures etc. *sigh, sorry I just can be really frustrated by that.

Today I wanna give you some ideas what you can also do with those beautiful leaves that has fallen down. Let’s get creative with what nature gives.

Picture of a Fallen Leaf

Tiny leaves

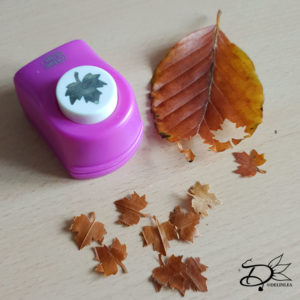
From a real fallen leaf you can actually make tiny leaves, for like miniatures for example. Or anything else you can think of. Find a leaf punch cutter of a shape you’ll like and just punch out tiny leaves from a real leaf you just picked up from outside. It can be a bit fiddly at some times. But it is doable, just do it carefully.
When you have punched out a bunch of tiny leaves, I let them air dry for a day or so, this way they curl up like real dried fallen leaves do. (You can use a dried leaf, the tiny leaves just stay flat then).
When they are dry, you can use them for whatever your heart desires!

Tiny Leaves from a Real Leaf

Fallen Leaves as Canvas

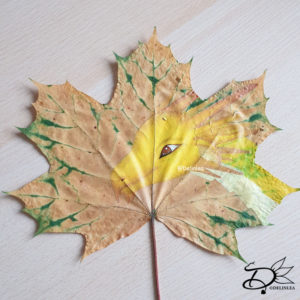
If you find fallen leaves that has just fallen and didn’t dry up yet. You can actually dry them inside a book or between other papers to press it flat. When dried, they make amazing canvasses to paint on. What’s better then to paint of a free canvas that nature gave us?! So usually when it’s fall I take a bunch of leaves home, press them flat between a pile of paper. This way I can use them year round and don’t have to take fresh leaves!

Dragon on Fallen Leaf WIP
Unfinished Dragon Painting on real Leaf

Handlettering

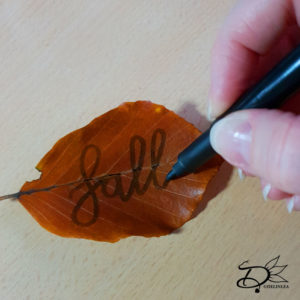
Another fun way, and kinda similar as the previous one, hand letter on them! And hang them everywhere! Or on a cute card to send to family/friends! Isn’t that lovely?! Handlettering you usually do with markers, just test if they work on leaves, some do, others don’t.

Handlettering on fallen leaf

You can probably do more with leaves, I think I’ve seen origami with them before as well. Just play around with things that you can find in nature, you can be pretty surprised!

I hope you got some new ideas after reading this blog. If you did, and started making something, show me on Twitter or Instagram, I’d love to see!

Have a wonderful day!

Love
Danielle

PS. if you love those kind of blogs, maybe you’d like to support me on Ko-Fi?! So I can keep making content like this!

// ©2021 Delinlea / Danielle Kaal // You may not reproduce, translate, share, freely distribute or sell this blog/part of this blog as your own in digital or printed from.
Posted in: Crafting, Miniature Tagged: Autumn, cute, DIY, fall, Fallen Leaves, Ideas, kawaii, leaf

♥ Halloween Creature Amigurumi

21 oktober 2021 by Delinlea Leave a Comment

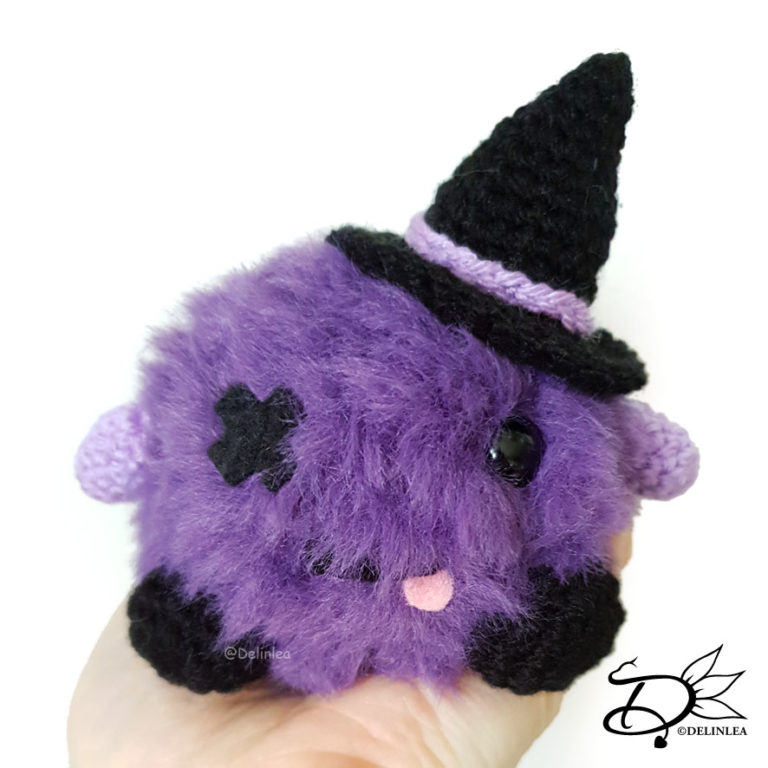
Hey Lovelies! It’s almost Halloween, and I had many ideas, started some ages ago and didn’t finish it yet. And of course I lost the sketch of how it needed to look like. After a lot of searching I finally found the sketch back and managed to finish the amigurumi in no time! This little creature came out of it, and I actually like it, simple but cute. Today is a free pattern for you to enjoy.

(hmm how to type this while my cats want attention?! Haha I keep needing to correct words/sentences since they keep walking over my keyboard. Life with 2 kittens isn’t always easy, but they are adorable and so sweet, they just don’t always listen).

Halloween Creature made with the Amigurumi technique

For this Pattern you’ll need:
♥ Fluffy Yarn in the color Purple.
♥ DK Yarn in the colors Purple and Black.
♥ Crochet Hook, 2,5/3 &6,5MM*.
♥ Stuffing.
♥ Scissors.
♥ Stitch Markers.
♥ Sewing Pins.
♥ Yarn Needle.
♥ 1 Safety Eyes, 10mm.
♥ Bit of Black and Pink felt for the eye and tongue.
♥ (Fabric) Glue.

*Check your yarn that you wanna use, to which hook size you need. For amigurumi it isn’t necessary to use the exact same yarn, they will only turn out bigger or smaller.

Stitches used (US Terms):
Magic Ring.
CH = Chain.
SLST = Slip Stitch.
SC = Single Crochet.
ST = Stitch.
BL = Back Loops only.
Inc = Increase.
Dec = Decrease.
(…) = Repeat the space in brackets the given number of times.
[…] = Total number of stitches.

This pattern is made using continuous rounds, unless stated otherwise. Use a stitch marker to mark the first stitch.

Pattern Halloween Creature

Body
Use the Purple Fluffy yarn and a 6,5mm hook.

1: 6SC in a Magic Ring. [6]
2: 2SC in each st around. [12]
3: (1SC, inc) 6 times. [18]
4-6: 18SC. [18]
7: (1SC, dec) 6 times. [12]
Place the 1 eye around the middle of this body. Stuff the body as well.
8: Dec around. [6]
Fasten off and weave in tail.

Hat
Use the Black DK yarn and a 2,5/3mm hook.

1: 6SC in a Magic Ring. [6]
2: 6SC. [6]
3: (2SC, inc) 2 times. [8]
4: (3SC, inc) 2 times. [10]
5: (4SC, inc) 2 times. [12]
6: (5SC, inc) 2 times. [14]
7: (6SC, inc) 2 times. [16]
8: (7SC, inc) 2 times. [18]
9: (8SC, inc) 2 times. [20]
10: (9SC, inc) 2 times. [22]
11: 22SC. [22]
12: BL, (1SC, inc) 11 times. [33]
13-14: 33SC. [33]
Fasten off and leave a long tail for sewing.
Stuff lightly.

Ribbon for the Hat
Use the Purple DK yarn and a 2,5/3mm hook.

Make 22Ch, SlSt in the first Chain. [22]
Fasten off and leave a long tail for sewing.

Arms (Make 2)
Use the Purple DK yarn and a 2,5/3mm hook.

1: 6SC in a Magic Ring. [6]
2: (1SC, inc) 3 times. [9]
3-5: 9SC. [8]
6: (1SC, dec) 3 times. [6]
Fasten off and leave a long tail for sewing.
Stuff the arms as well.

Feet (Make 2)
Use the Black DK yarn and a 2,5/3mm hook.

1: 8SC in a Magic Ring. [8]
2: 2SC in each st around. [16]
3-4: 16SC. [16]
5: (1SC, dec) 5 times, 1SC. [12]
Fasten off and leave a long tail for sewing.
Stuff the feet as well.

Mouth
Use the Black DK yarn and a 2,5/3mm hook.

Make 8Ch.
Fasten off and leave a long tail for sewing.

Assembling

Whenever I start to assemble an Amigurumi, I use sewing pins first, to position all parts. This way I can move the parts around until I am happy with how it looks. I recommend you do so as well.
Use the pictures as reference, to see where all parts go.

From felt, cut out a cross of black felt and a small tongue for pink felt. Glue the cross on where the other eye should be. Now you can also position where the mouth should go and sew this on and glue on the tongue.
Sew the feet to the body and the arms on each side of the body. Sew the ribbon of the hat on and attach the hat to the body as well.

That’s all for today! But I really love how this one turned out, I hope you do as well. If you decide to make it, make sure to tag me on Twitter or Instagram, I’d love to see what you create with my patterns!

Have a wonderful day!

Love
Danielle

PS. if you love those patterns, maybe you’d like to support me on Ko-Fi?! So I can keep making content like this!

// ©2021 Delinlea / Danielle Kaal // Items made with this pattern may be sold in a limited number. Credit to ‘Delinlea’ is appreciated. Not allowed for mass production or commercial purposes. You may not reproduce, translate, share, freely distribute or sell this pattern as your own in digital or printed from.
Posted in: Crafting, Crochet Tagged: Amigurumi, Creature, Crochet, cute, DIY, Free Pattern, haken, Halloween, kawaii

♥ Mushroom Lady & Kid Amigurumi Shop Pattern

16 oktober 2021 by Delinlea Leave a Comment

Hey Lovelies! It’s a few days later as my usual uploading date, but here we are with a new pattern! I had some troubles with the digital part (always the same haha, me and electronics just don’t go well together), hence why I’m uploading late.

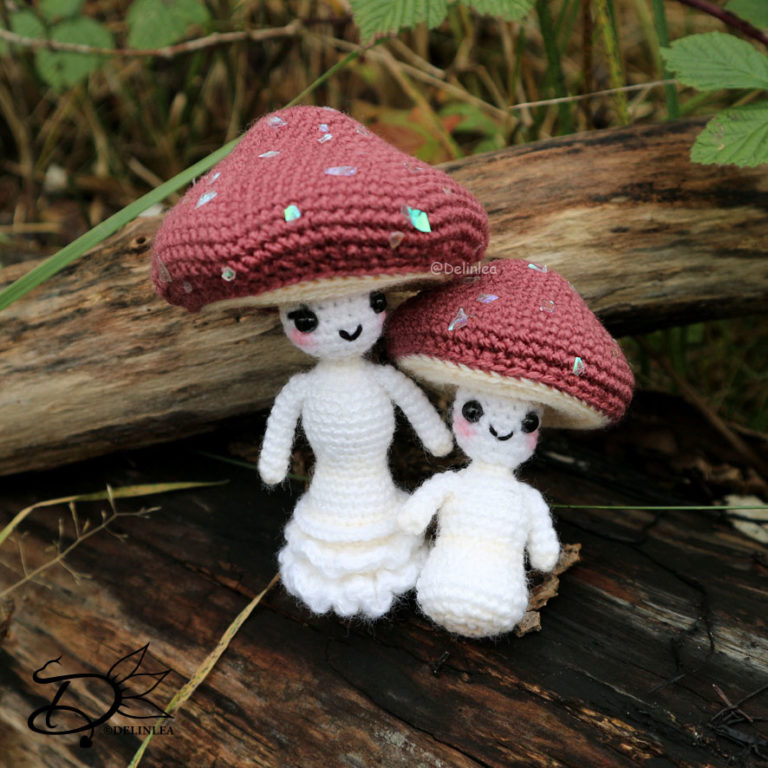
I just love Autumn, if you didn’t knew yet. My new shop pattern will be those cute Mushroom Lady and Kid! Aren’t they adorable together?! I love discovering new mushroom in nature, trying to figure what they are. Nature can be so Beautiful and Inspirational!

Mushroom Lady & Kid amigurumi image

When I was taking pictures in the nearby forest, some people walked by, they were like, that doesn’t grow here haha. I usually hate to get attention like that, socially awkward! But usually when I’m doing what I love, I act a bit easier around people.

Anyway, you can find the shop pattern on my Ko-Fi page here~! (Paypal only)

Have a wonderful day!

Love
Danielle

PS. if you love those patterns, maybe you’d like to support me on Ko-Fi?! So I can keep making content like this!

// ©2021 Delinlea / Danielle Kaal // Items made with this pattern may be sold in a limited number. Credit to ‘Delinlea’ is appreciated. Not allowed for mass production or commercial purposes. You may not reproduce, translate, share, freely distribute or sell this pattern as your own in digital or printed from.
Posted in: Crafting, Crochet, Shop Pattern Tagged: Amigurumi, Autumn, Crochet, cute, fall, haken, kawaii, Ko-Fi, Lady & Kid, mushroom, Pattern, Shop Pattern

♥ River Amigurumi Shop Pattern

1 juli 2021 by Delinlea Leave a Comment

Hey Lovelies! It’s time for a new shop pattern today! I made this pattern a while ago as well, but never did anything with it in the end. I found it back and decided it’s time to work it out! This little one I called River. A tiny little creature with wings or without wings, he’s cute either way.

River Amigurumi Shop pattern

These creatures love to be around you, often wanna sit on your shoulder or on your hands. Totally loves to cuddle. I hope you are ready for that if you wanna bring a River inside your life.

The pattern can be found over at my Ko-fi shop, as usual, you can pay there with Paypal. I still don’t have another place you can buy from for now. I’ll keep you updated if anything changes!

I hope you’ll enjoy those shop patterns, they are easy to make. Just have fun! You wanna make this too!

Have a wonderful day and I’ll see you next week!

Love
Danielle

PS. if you love those patterns, maybe you’d like to support me on Ko-Fi?! So I can keep making content like this!

// ©2021 Delinlea / Danielle Kaal // Items made with this pattern may be sold in a limited number. Credit to ‘Delinlea’ is appreciated. Not allowed for mass production or commercial purposes. You may not reproduce, translate, share, freely distribute or sell this pattern as your own in digital or printed from.
Posted in: Crafting, Crochet, plush, Shop Pattern Tagged: Amigurumi, Crochet, cute, haken, kawaii, river, Shop Pattern
1 2 3 4 5 … 20 21 22 23 24 Volgende »

What are you looking for?!

My Socials

Ko-Fi

I love making all these free things for you, tho it would be very helpfull if you can support me on Ko-Fi! (You don’t have to tho, totally up to you!)

Ko-Fi Shop!!

In my Ko-Fi shop you can find PDF Amigurumi Patterns!! You can pay easily with PayPal.
Go to the shop here!!

Recent Blog Posts

  • ♥ Happy 2022!
  • ♥ Day 12; Lights
  • ♥ Day 11; Flower Deco
  • ♥ Day 10; Snowman
  • ♥ Day 9; Gingerbread Houses

Recent Comments

  • Liane Van der Donck op ♥ Amigurumi Ghost
  • Kimberly Spear op ♥ Free Pattern; Amigurumi Shiber
  • Delinlea op ♥ Pua Tsum Tsum Amigurumi
  • Marfermar op ♥ Free Pattern; Easter Bunny
  • mary op ♥ Pua Tsum Tsum Amigurumi

Categories

  • animation
  • Beadwork
  • Blogmas 2018
  • Blogmas 2020
  • Blogmas 2021
  • Books
  • Bujo
  • Christmas
  • Christmas CAL 2019
  • Christmas Countdown 2017
  • Contest
  • Crafting
  • Crochet
  • Drawing
  • Drawing Lesson
  • Easter
  • Geen categorie
  • Life
  • Miniature
  • Nail Art
  • New Year
  • Paper
  • plush
  • Pokemon
  • Poseable Art Doll
  • Recipe
  • Sewing
  • Shop Pattern
  • Sinterklaas
  • Social Media
  • Tsum Tsum
  • Ufufy

Copyright © 2023 Delinlea - My little fantasy world.

Family WordPress Theme by themehall.com