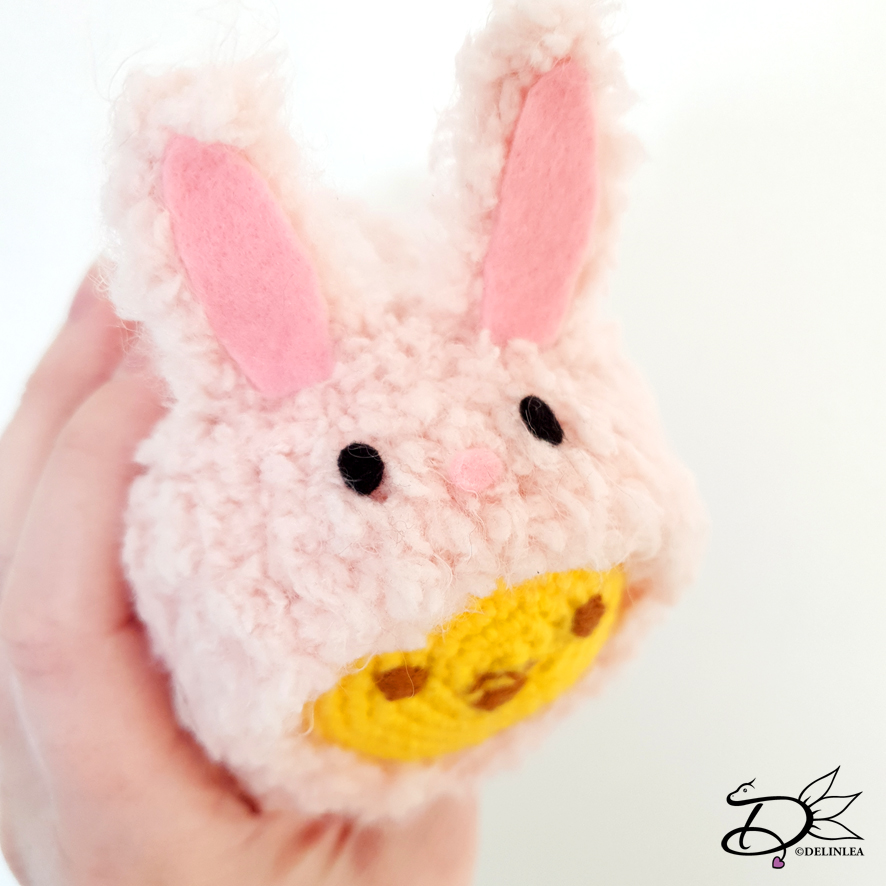
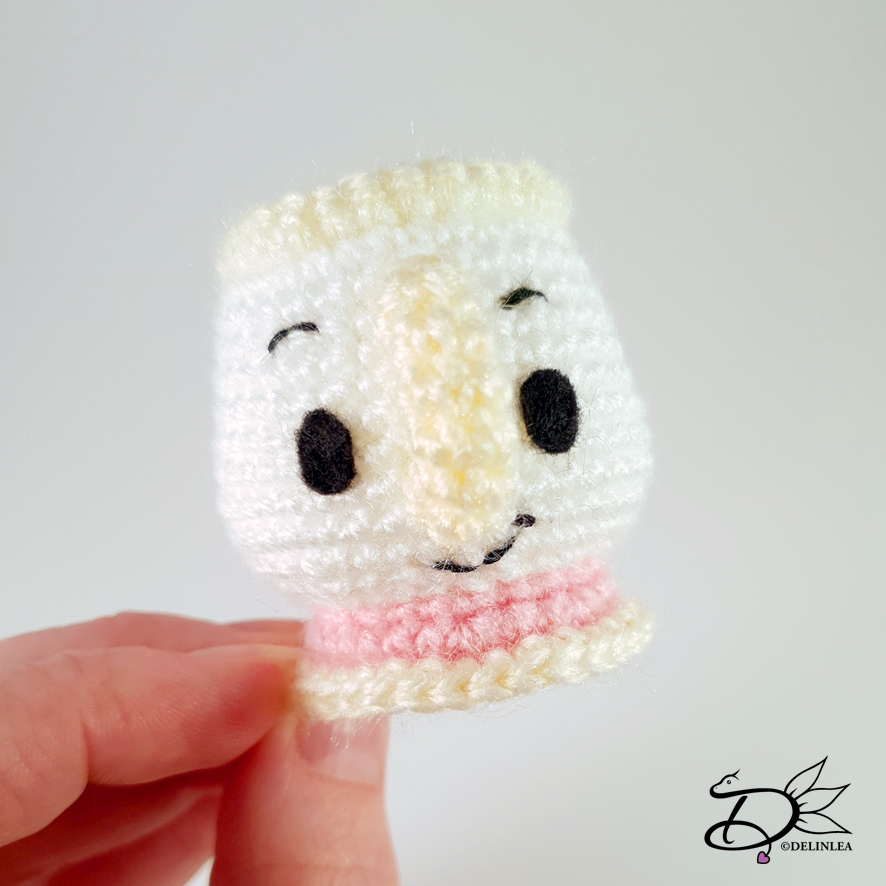
♥ Chip Mug Ufufy
Hey Lovelies! Are you ready for a new Ufufy pattern?! I hope you do. Today’s Ufufy, doesn’t have that typical oval shape, but it’s still cute. Can you already guess which one it will be? Well, I’m gonna tell you now, it’s gonna be Chip Mug! This one just happened when I saw a picture of it. Let’s dive into the pattern.
For this Pattern you’ll need:
♥ Yarn in White, Light Yellow and pink (I used Zeeman Supersoft)
♥ Crochet Hook, 2mm.
♥ Stuffing.
♥ Felt in black and some thread for facial details.
♥ Stitch Markers.
♥ Yarn Needle.
♥ Sewing Pins.
Stitches used (US Terms):
Magic Ring.
CH = Chain.
SLST = Slip Stitch.
SC = Single Crochet.
ST = Stitch.
BL = Back Loops.
FL = Front Loops.
Inc = Increase.
Dec = Decrease.
(…) = Repeat the space in brackets the given number of times.
[…] = Total number of stitches.
Pattern Chip Mug
Work in continues rounds, use a stitch marker to mark your first stitch of every row. This is for every part, unless stated otherwise.
Body
Use the color White.
1: 6SC in Magic
Ring. [6]
2: 2SC in each st around. [12]
3: (1SC, inc) 6 times. [18]
4: (2SC, inc) 6 times. [24]
5: (3SC, inc) 6 times. [30]
6: BL, 30SC. [30]
7: 30SC. [30]
8: (9SC, inc) 3 times. [33]
9: 33SC. [33]
10: (10SC, inc) 3 times. [36]
11: 36SC. [36]
12: (11SC, inc) 3 times. [39]
13: 39SC. [39]
14: 39SC. [39]
15: (11SC, dec) 3 times. [36]
16: (4SC, dec) 6 times. [30]
17: (3SC, dec) 6 times. [24]
18: BL, (2SC, dec) 6 times. [18]
19: (1SC, dec) 6 times. [12]
20: (dec) 6 times. [6]
Fasten off and weave in tail.
At row 6 you worked in the Back Loops only, rejoin now in the Front Loops with
Light Yellow yarn and make 30SC. You can
also make one SC less on the spot you want the ‘chip’ to be, make sure to start
at that point.
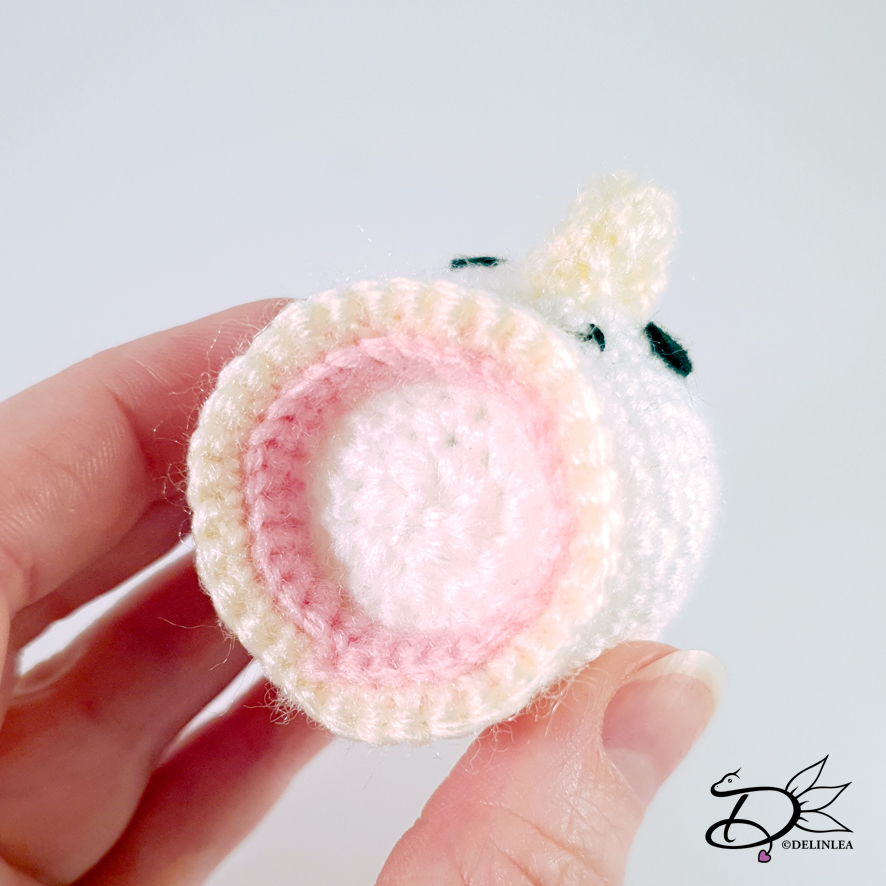
Foot of the Mug
Start with the color Pink.
Rejoin in
the front loops of row 18 of the body.
1: FL, 18SC.
2: (2SC, inc) 6 times. [24]
Change to the color Light Yellow.
3: FL, 24SC. [24]
Fasten off and weave in tail.
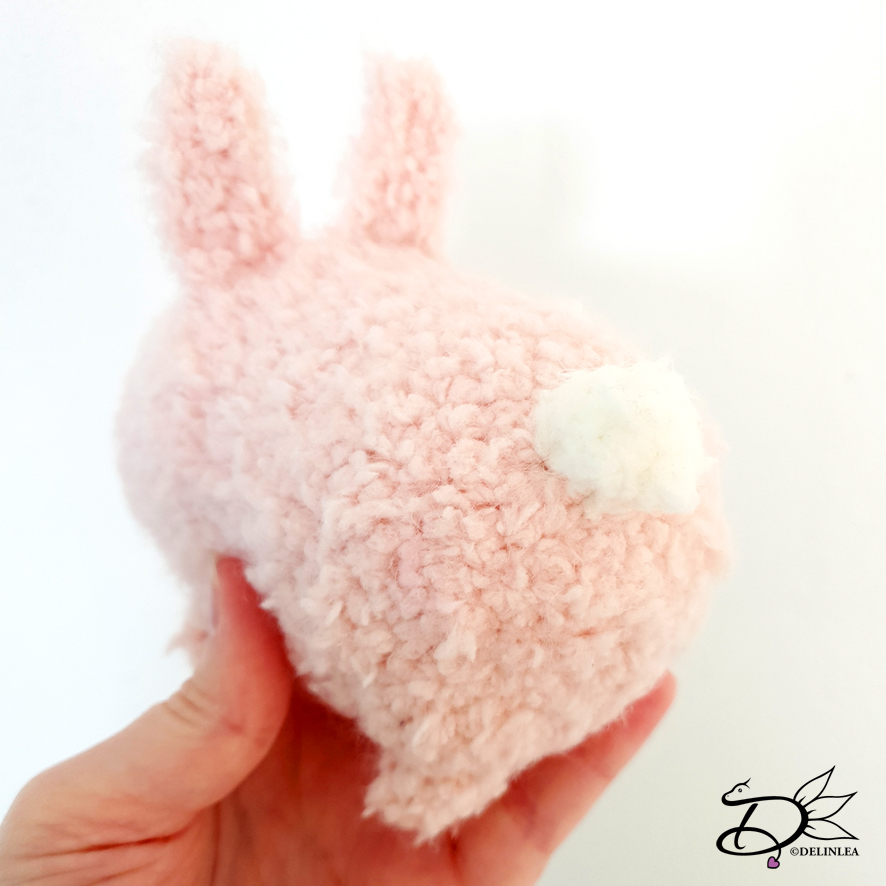
Handle of the Mug
Use the color Light Yellow.
1: 5SC in
Magic Ring. [5]
2: 5SC. [5]
|
8: 5SC. [5]
Fasten off and leave a long tail for sewing.

Assembling
There is
not much to assemble, only the handle of the mug. Place it with sewing pins on
the spot you like it. Make sure that there is space the make the mouth
underneath. Sew it on.
With felt and/or thread make his facial features.
And Chip Mug is already done, and I love him so much! I had a lot of fun making him, and I hope you too!
Have a wonderful day!
Love
Danielle