Delinlea - My little fantasy world
  • ♥ Home
  • ♥ About Me
  • ♥ Blogmas 2021
  • ♥ Free Patterns
    • ♥ Amigurumi; Spring/Easter
    • ♥ Amigurumi; Fall/Halloween
    • ♥ Amigurumi; Winter
    • ♥ Amigurumi Tsum Tsum
    • ♥ Amigurumi Ufufy
    • ♥ Amigurumi Others
    • ♥ Christmas Countdown 2017
    • ♥ Blogmas 2018
    • ♥ Blogmas 2020
  • ♥ Tutorials
    • ♥ Easter
    • ♥ Home Deco
    • ♥ Others
  • ♥ Drawing Lessons
  • ♥ FanFic
    • ♥ Chapter 1
    • ♥ Chapter 2
    • ♥ Chapter 3
    • ♥ Chapter 4
    • ♥ Chapter 5
    • ♥ Chapter 6
    • ♥ Chapter 7
  • ♥ Gallery
    • ♥ Crafts
    • ♥ Drawings
    • ♥ Poseable Art Dolls
  • ♥ Links
  • ♥ Contact

tree

♥ Day 2; Christmas Tree

3 december 2021 by Delinlea Leave a Comment

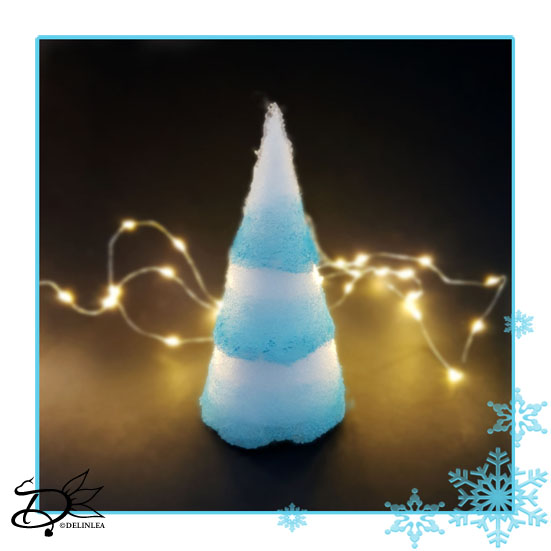
Hey Lovelies! The next day of Christmas. And what is Christmas without a tree, well we really need to make one. Even though this one is not typical, I hope you’ll still like it! It’s a snowy one, almost looking like a cotton candy tree, don’t eat it though! I love how it turned out and I hope yours will turn out amazing as well.

Christmas Tree

For this DIY you’ll need:
♥ This Template. (This download gives you all templates for blogmas 2021)
♥ Paper, about 200gr/m2.
♥ Snow Blanket or Sheet Stuffing.
♥ Light Blue Acrylic Paint.
♥ Sponge.
♥ Scissors.
♥ Pencil/Marker.
♥ (Hot) Glue.

DIY Christmas Tree

Print out this template and cut all parts out of the Christmas Tree.

Base

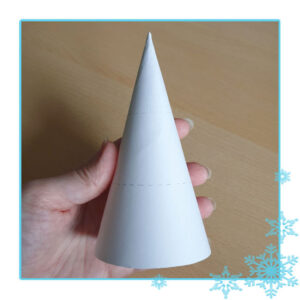
Trace part A on some thicker paper, like 200gr/m2 and make a cone of it, glue neatly together.

Snow

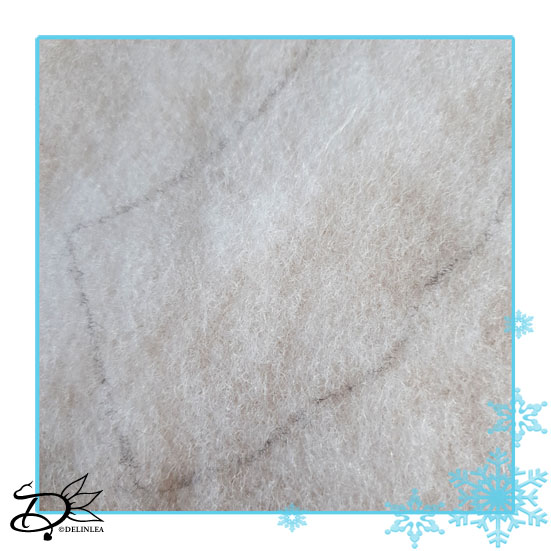
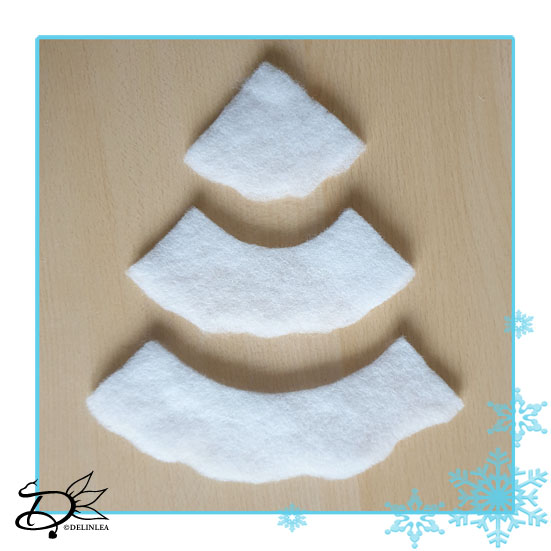
Trace the other parts, B, C and D on to the snow blanket and cut all those parts out. Round of the edge with the waves, with a pair of scissors, to make it look prettier. Try all parts on the cone, matching the lines and see if they fit. If they do, go to the next step.

Painting

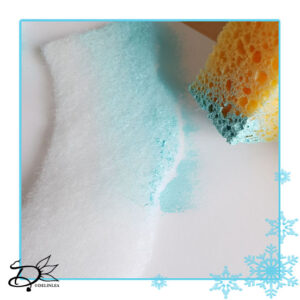
With a sponge I made the edge with the waves, light blue. Just dab it on carefully, leave a part white with a gradient to a light blue edge. You could skip this step as well if you think a white tree is better.

Finishing off

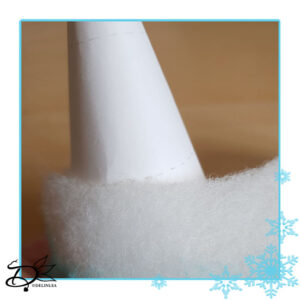
Now it’s time to glue parts B, C and D to the cone (part A). I used hot glue for this to make this go faster. Start with gluing on the bottom layer, Part B use the lines drawn on the cone as guide. Do the same for part C. For Part D, you kinda do the same, but since there is no line to guide you, place the top part about 1cm past the top of the cone and continue to glue it on.

That’s it! The Christmas tree is done. Glue it on top of the snowball, but before you do so, attach a long piece of thread to the snowball and pull it through the tree as well.

If you decided to join this lovely project, or just some parts of it, show me on Twitter or Instagram what you are working on! I’d love to see!

If you like to buy the PDF pattern for this whole project, go to my ko-fi shop. This will have an extra story attached and no ads.

Have a wonderful day!

Love
Danielle

PS. if you love those patterns, maybe you’d like to support me on Ko-Fi?! So I can keep making content like this!

// ©2021 Delinlea / Danielle Kaal // Items made with this pattern/DIY may be sold in a limited number. Credit to ‘Delinlea’ is appreciated. Not allowed for mass production or commercial purposes. You may not reproduce, translate, share, freely distribute or sell this pattern/DIY as your own in digital or printed from.

Posted in: Blogmas 2021, Christmas, Crafting Tagged: Blogmas 2021, Christmas, snow, tree

♥ Day16; Christmas Tree Amigurumi

16 december 2020 by Delinlea Leave a Comment

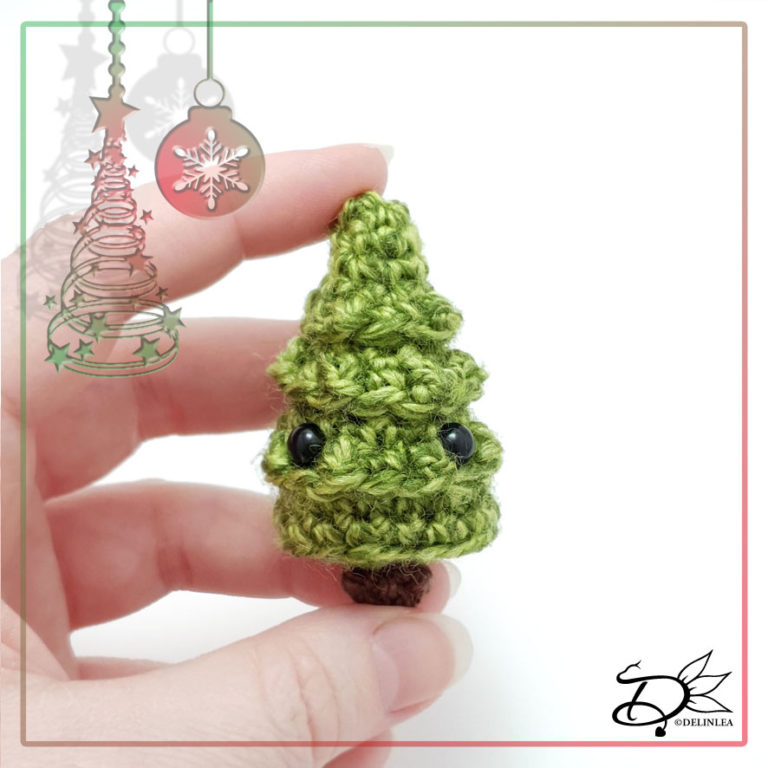
Hey Lovelies! Should we dance around the Christmas Tree this year?! Would be fun, right?! But try not to knock out anything, we don’t wanna break things. Let’s just have fun in ways we can, let’s enjoy the little things we have. This tiny tree would love to dance along, even if he looks a bit grumpy. Deep inside he loves to be around. Just make him go along with you.

Christmas Tree made with Amigurumi

For this pattern you’ll need:
♥ Yarn in the colors Green and Brown. (I used Stylecraft Special DK)
♥ Crochet hook. ( I used 3mm)
♥ Stuffing.
♥ Yarn Needle.
♥ Sewing Pins.
♥ Stitch Marker.
♥ Safety Eyes, 6mm.

Stitches used (US Terms):
Magic Ring.
CH = Chain.
SLST = Slip Stitch.
SC = Single Crochet.
DC = Double Crochet.
ST = Stitch.
BL = Back Loops.
FL = Front Loops.
Inc = Increase.
Dec = Decrease.
(…) = Repeat the space in brackets the given number of times.
[…] = Total number of stitches.

This pattern is made with continues rounds, unless stated otherwise. Use a stitch marker to mark your first/last stitch of your row.

♥ Pattern Christmas Tree

Tree
Use the color Green.

1: 4SC in a Magic Ring. [4]
2: (Inc, 1SC) 2 times. [6]
3: 6SC. [6]
4: (Inc, 2SC) 2 times. [8]
5: 8SC. [8]
6: FL, (1DC, 1SC) 4 times. [8]
The previous row you worked in the the FL of row5, work now in the BL of row 5.
7: BL, (3SC, inc) 2 times. [10]
8: (Inc, 4SC) 2 times. [12]
9: FL, (1DC, 1SC) 6 times. [12]
The previous row you worked in the the FL of row8, work now in the BL of row 8.
10: BL, 12SC. [12]
11: (3SC, inc) 3 times. [15]
12: FL, (1DC, 1SC) 7 times, 1DC. [15]
The previous row you worked in the the FL of row11, work now in the BL of row 11.
13: BL, 15SC. [15]
14: (4SC, inc) 3 times. [18]
15: 18SC. [18]
Place the eyes between row 11&12, about 4st apart.
16: BL, (1SC, dec) 6 times. [12]
Stuff the tree here.
17: Dec around. [6]
Fasten off and weave in tail.

Trunk
Use the color Brown.

1: 6SC in a Magic Ring.[6]
2: 6SC. [6]
Fasten off and leave a long tail for sewing.

♥ Assembling

Whenever I start assembling Amigurumi, I’d like to use sewing pins to position all parts first until I’m happy. Then I will sew them on. I recommend you do so as well.

This one is pretty easy to assemble, just sew the trunk to the tree.
If you want to hang it, don’t forget to add a loop to the top.

I hope you enjoyed today’s pattern! I think it’s adorable. If you decided to make any of the blogmas amigurumi, please show me on Twitter or Instagram  with #DelinleaDIY. I’d love to see what you make using my patterns.

And don’t forget that you can get all Blogmas patterns ad free in a PDF bundle in my Ko-Fi shop (English US terms and Dutch). The link you can find on the Blogmas Page here! (Etsy might follow later).

Have a wonderful day and I’ll see you tomorrow!

Love
Danielle

PS. if you love those Blogmas patterns, maybe you’d like to support me on Ko-Fi?! So I can keep making content like this!

// ©2020 Delinlea / Danielle Kaal // Items made with this pattern may be sold in a limited number. Credit to ‘Delinlea’ is appreciated. Not allowed for mass production or commercial purposes. You may not reproduce, translate, share, freely distribute or sell this pattern as your own in digital or printed from.
Posted in: Blogmas 2020, Christmas, Crafting, Crochet Tagged: Amigurumi, Blogmas 2020, Christmas, Crochet, cute, Free Pattern, haken, kawaii, tree

♥ Christmas CAL 2019; Part 1

5 december 2019 by Delinlea Leave a Comment

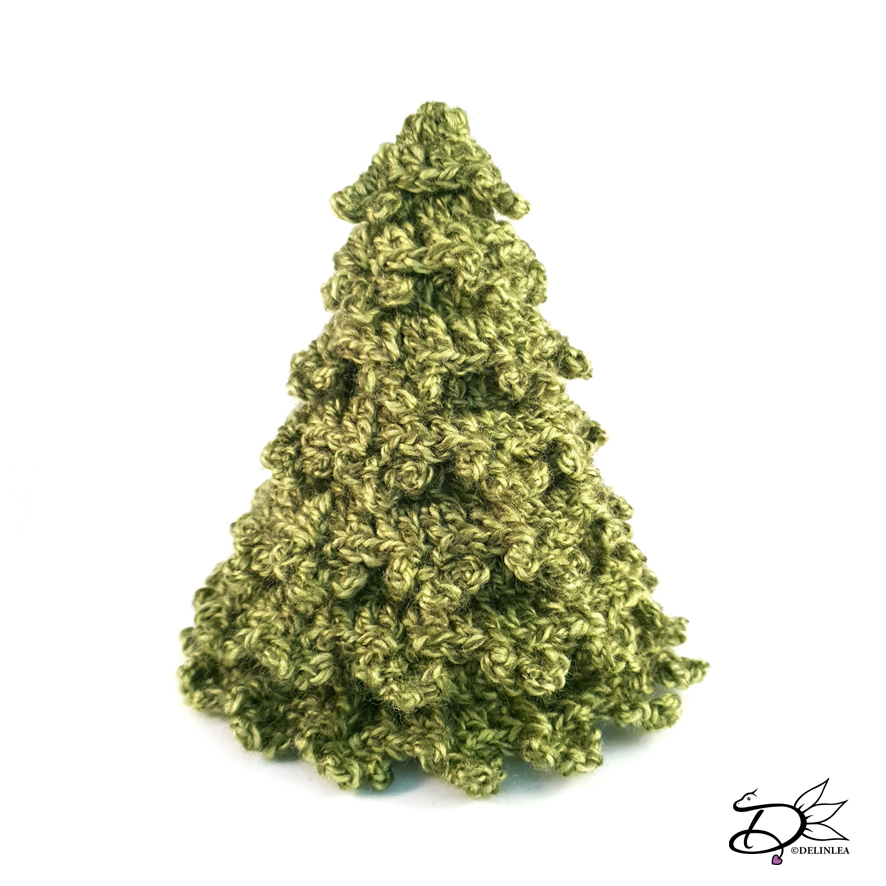
Hey Lovelies! It’s here! The first part of the Christmas CAL 2019, I hope you are ready! First we are gonna make the Christmas tree. Not that hard to make, but read carefully, at some rows you have to work in back loops only, if you forget this, you won’t be able to make the branches. I guess, you don’t wanna start over haha.

Christmas Tree

For this pattern you’ll need:
♥ Green yarn. (I used Greengage from StyleCraft Special)
♥ Crochet hook 2,5 or 3 mm.
♥ Stuffing.
♥ Stitch Marker.
♥ Yarn Needle.

Stitches used (US Terms):
Magic Ring.
CH = Chain.
SLST = Slip Stitch.
SC = Single Crochet.
DC = Double Crochet
Picot = Chain 4 and make a SLST in the 3rd loop of the first chain.
ST = Stitch.
Inc = Increase.
Dec = Decrease.
BL = Back Loops.
FL = Front Loops.
(…) = Repeat the space in brackets the given number of times.
[…] = Total number of stitches.

Pattern

Edit: This pattern is now deleted, I will let you know when it is up in etsy!
This is how the tree looks, before you add the branches.

I hope you had fun making the tree. If something is unclear, let me know, I’ll always try to help out.
Next week we are going to make the Gingerbread Man! So cute!

See you next week.

Love
Danielle

Posted in: Christmas, Christmas CAL 2019, Crafting, Crochet Tagged: Amigurumi, CAL, Christmas, Christmas CAL 2019, Crochet, haken, tree

♥ Christmas CAL 2019; Introduction

2 december 2019 by Delinlea 1 Comment

Hey Lovelies! Such a odd day for me to post something, but I wanted to tell you something. This year I won’t do Blogmas like the last 2 years. I wanted to do something different and give myself also some peace. So from dec 5th, on Thursday, as usual, I will start a CAL. If you don’t know what a CAL is, it’s short for Crochet A Long.

Gingerbread Man Christmas

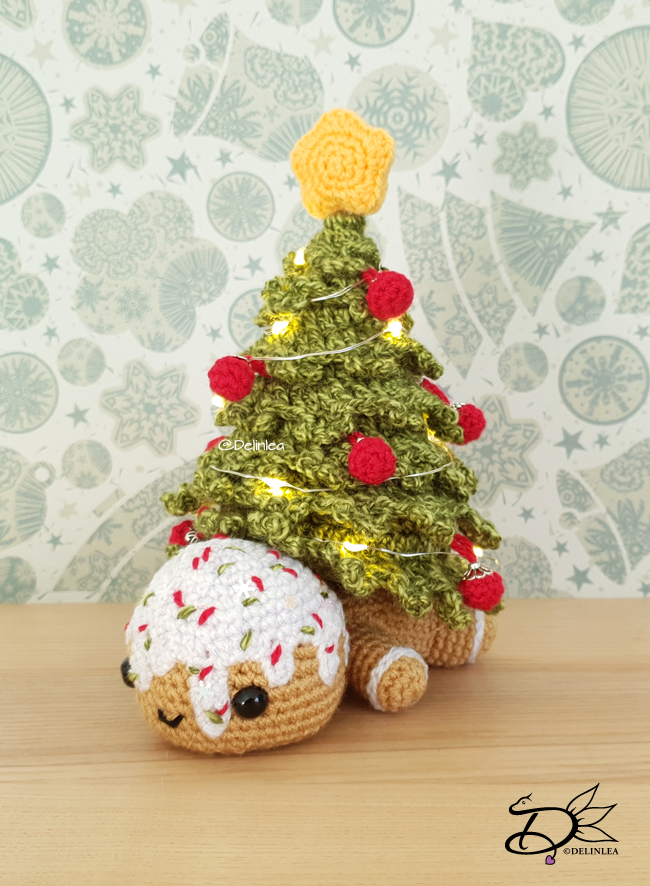
I’ve made this adorable Gingerbread  Man with a Christmas Tree on his back, including some ornaments. Do you like it? I hope you will, and join me on this exciting adventure.

I will split the pattern up in 3. The first week you will get the pattern for the Christmas Tree, the second week the Gingerbread Man and the third week the ornaments.
I will keep doing this on Thursdays, just like you are used to. (The dates are, 5, 12 and 19 December)

Make sure to catch the pattern while you can, and crochet with me and hopefully many others. I am quite excited to do this, I hope you will enjoy! The pattern will be only available during December, after or during the month I will make sure to post it on Etsy or Ravelry or both. Have to see what will work for me .

I can’t wait!

Love
Danielle

Posted in: Christmas, Christmas CAL 2019, Crafting, Crochet Tagged: Amigurumi, CAL, Christmas, Christmas CAL 2019, Crochet, Crochet A Long, Gingerbread, haken, tree

♥ Day 10; Christmas Tree with Legs

10 december 2018 by Delinlea Leave a Comment

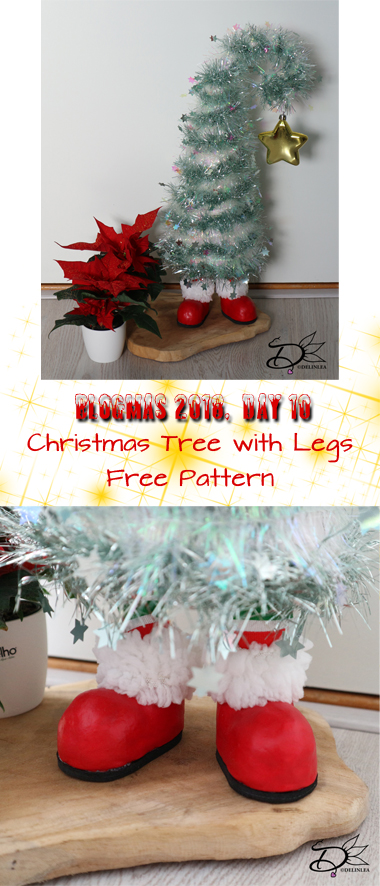
Hey Lovelies! I know today’s blog is late! I’m sorry, but I made a mistake in today’s DIY and I had to fix it xD. Today’s DIY is also the non-pokemon one! yay! I’m excited, cause I really wanted to make this for my room! It’s a cute little christmas tree with legs! xD

For the Tree you’ll need:
Styrofoam Cone of 27cm high.
2 Garlands of 270cm (one color for both, or both different in color)
30 cm Wire.
Aluminum foil.
White Duct Tape.
For the Legs you’ll need:
Clay.
Black Foam.
Faux White Fur.
2X 14cm Wire.
Red Acryllic paint.
Red and Green striped Fabric. (Or white fabric and Acrylic Paint)
Aluminum foil.
Other stuff You’ll need:
Scissors.
Paper.
Hot Glue Gun.
Scewer.
Brushes.
Star Bauble.

Tree

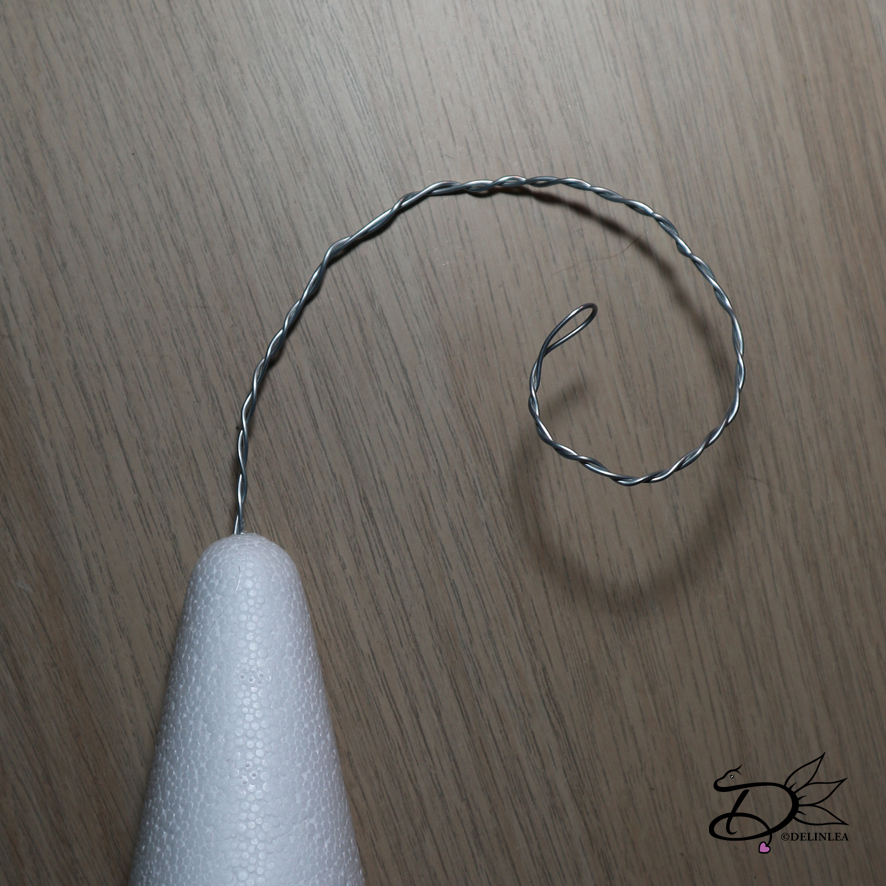
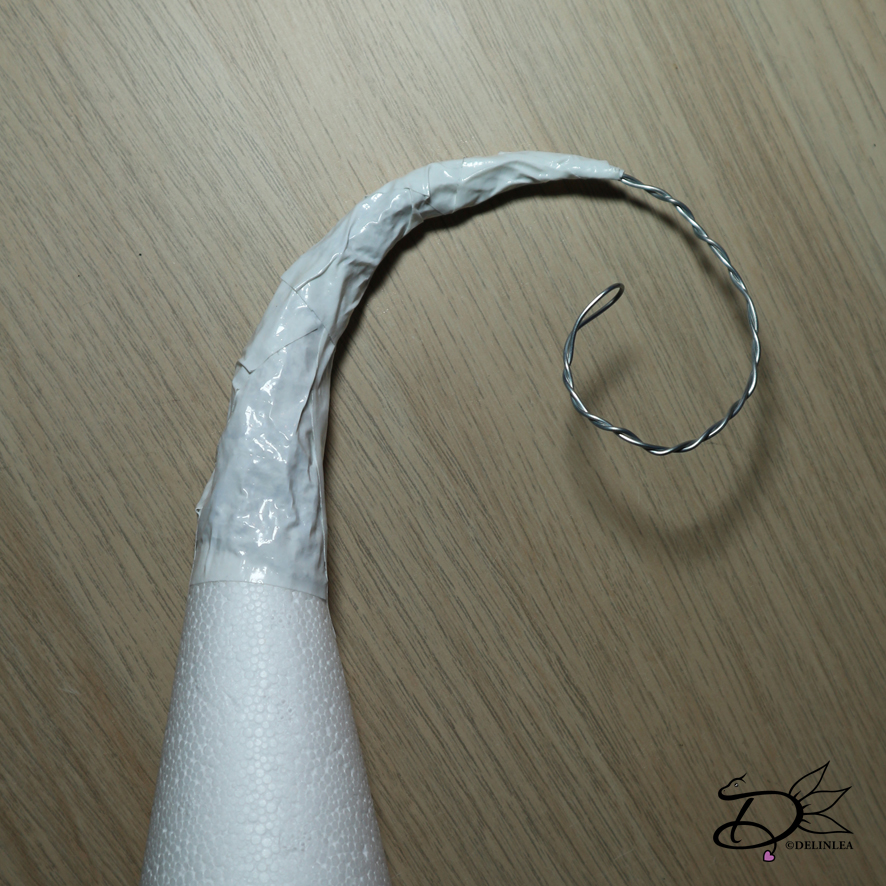
Make a hole with a scewer in the top of the cone, that’s where the wire will go in. Glue the wire to the top of the cone.  And make a curl in it.

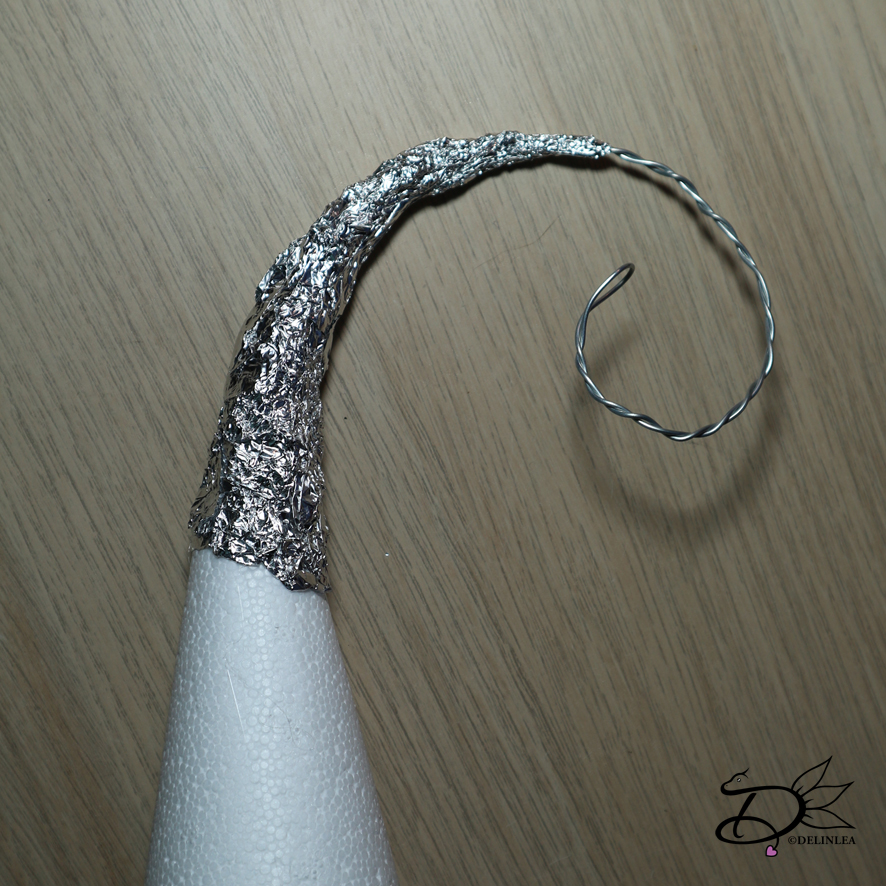
With Aluminium foil, you will create a smoother shape from the cone to the wire.

Cover the aluminum foil with the white Duct Tape, so it doesn’t show so much when you wrap the garlands around it.

Wrap the garlands around the tree shape, start with both at the top of the tree, where the wire is. Glue this tight. And start wrapping it nice and slowly down. Make sure you glue them to the tree shape every now and then, so it won’t fall down.

Now, you can leave it like this and decorate it, oooorrr.. you can something fun!! Let’s give it legs!! It will give it that little extra jolly!

Legs

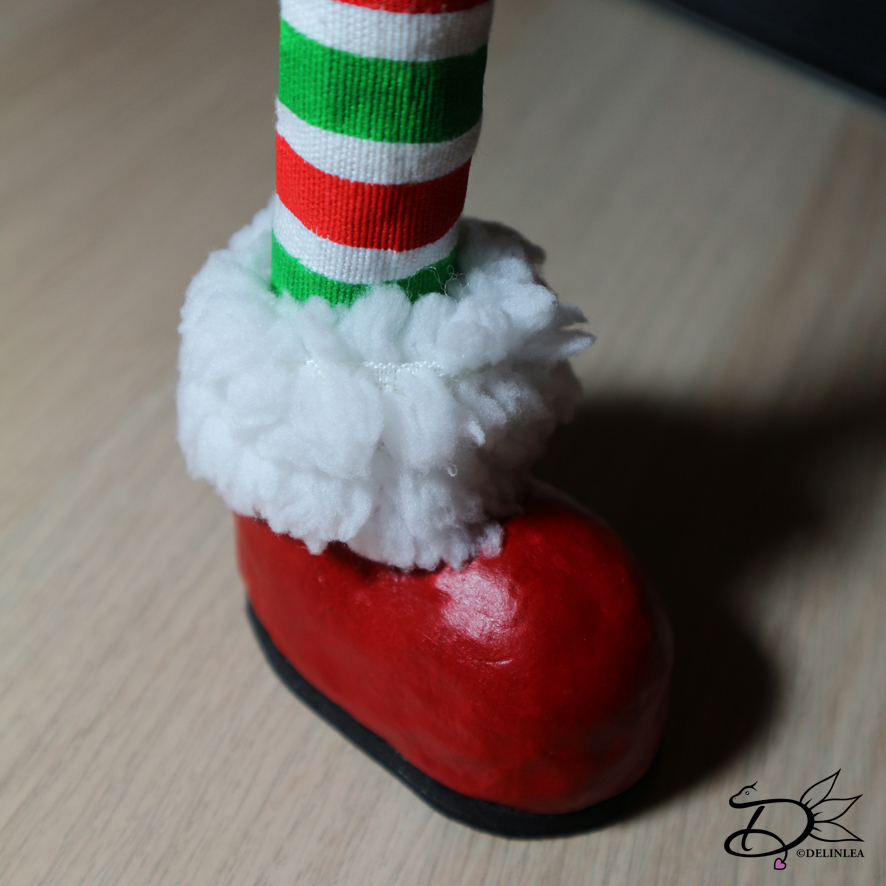
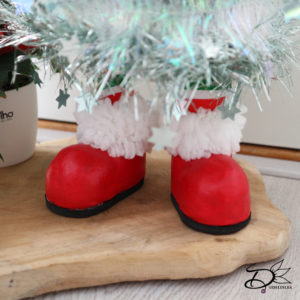
I have made the boots for the tree myself, but ofcourse you can also buy them to make it easier and quicker. It’s up to you!

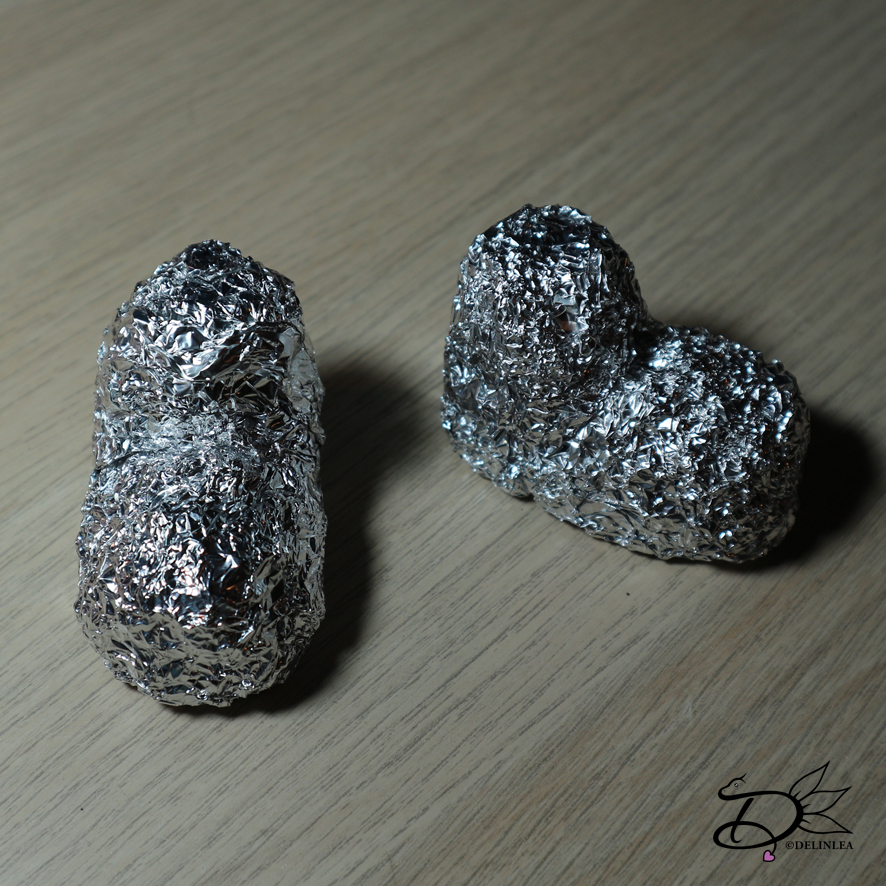
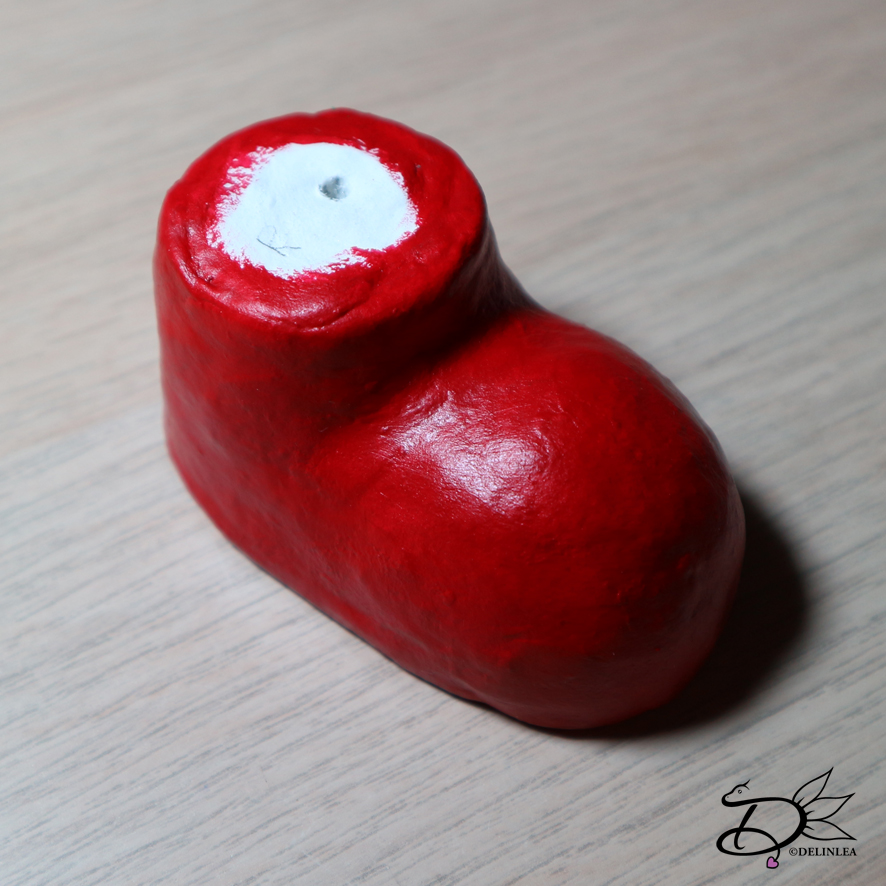
Make with Aluminum foil boot shapes. Make sure they are about the size.

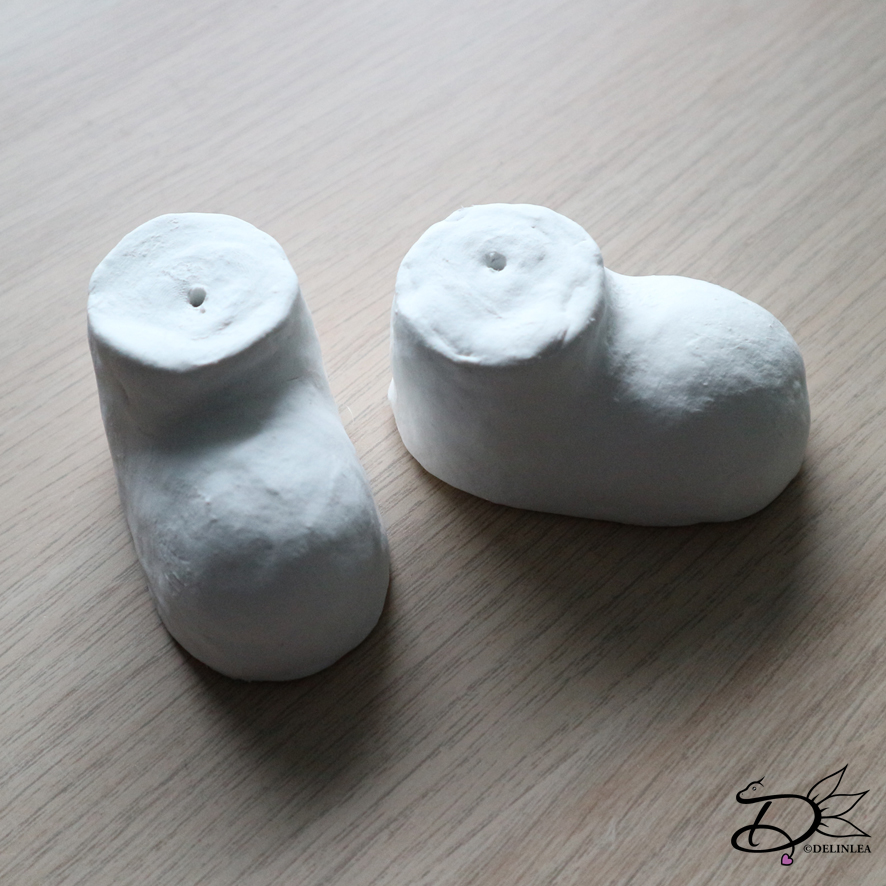
Cover the foil with air dry clay or oven bake clay. it’s up to you. I have use air dry since, I was able to wait xD. Make sure you make a small hole with a scewer where te legs should be, this is for the wire later.

When the clay is dry, or out of the oven and cooled down. Trace the boots on paper, this you will need for the soles later. After that,  it’s time to paint them, I have used Redpaint, but it’s up to you what you like!

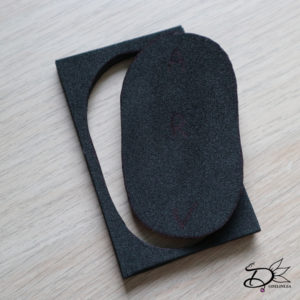
When those are drying, get out your black foam. From this we are gonna make the soles for the boots. Why? Because this way the boots won’t get damaged or the surface they are on, won’t get damaged. You, ofcourse, canmake those out of clay as well, if you prefer.
Trace the template you made earlier on the faom, keep track of what’s front andback, and if it’s left or right. Cut these out.

If you’re paint is dry, you can glue on the soles to the boots.

Now you’ll gonna need your white faux fur. I used a piece of 14 by 4 cm (But make sure this is enough in length for your boots). In length I glued the top and bottom parts to the middle. So the inside of the fur is covered. Now glue this to the top of the boots. Glue also the 14cm wire in the holes you made in the boots.

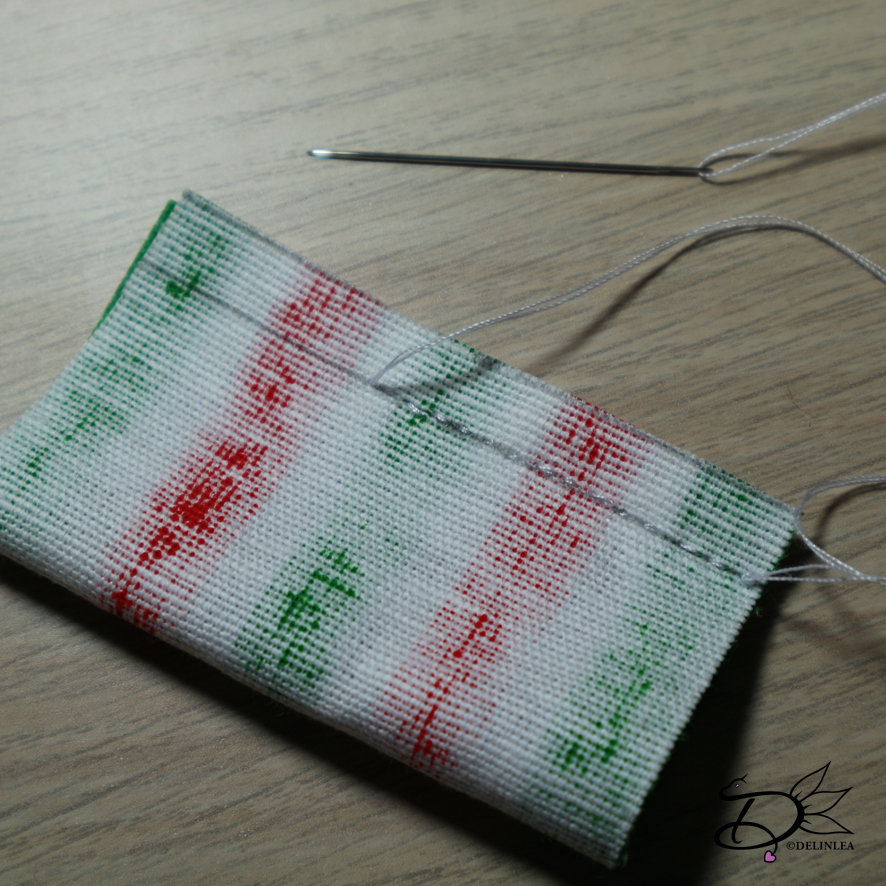
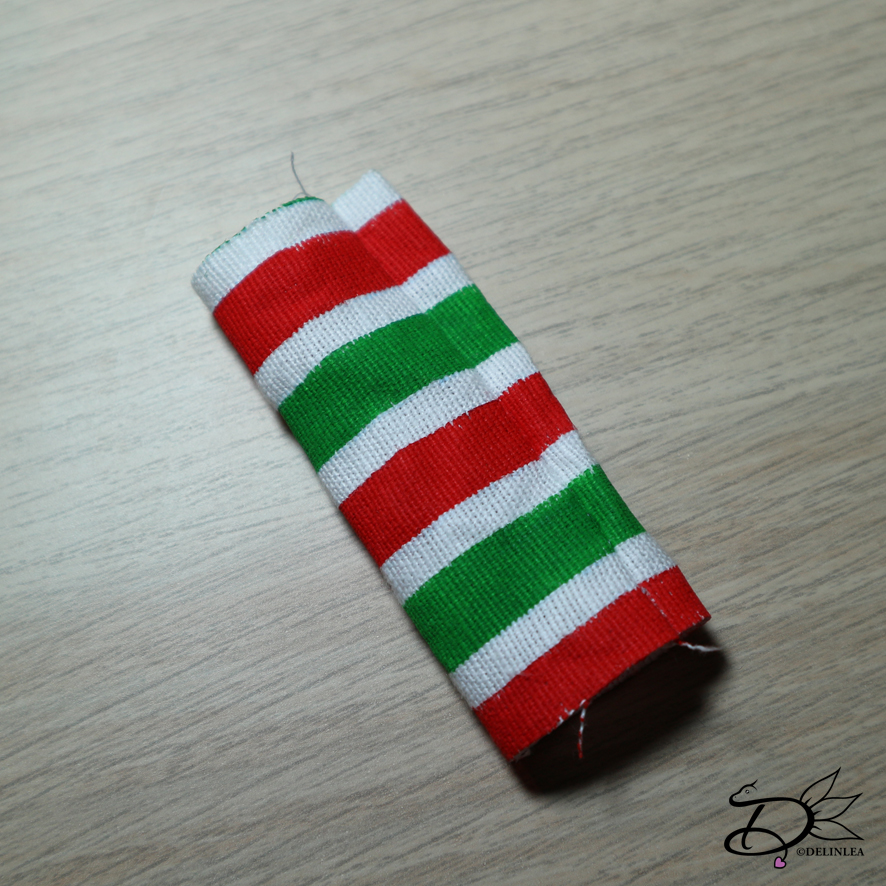
This step is optional, it’s just what you prefer, but I made some kind of pants to cover the wire. Since I had no striped green and red fabric, I used white fabric, that I painted. I Used  2 pieces of 8,5 by 7 cm.
Fold it in half, with the right side of the fabric being in the inside, and line it up neathly, so you have 7 by 4,24cm. Now sew that close and turn inside out. Put this around the wire of the legs.

Now it’s time to attach the legs to the tree, I drew a line through the middel of the bottom of the tree, so I knew the legs are gonna be placed at the same level. Poke a hole with the scewer where you want the legs to be. Then glue the wire of the legs in.

Add the star bauble to the tip of the christmas tree! And you are finished!!

It’s it cute?! I love it, and I hope you will too! If you make it, don’t forget to share with #DelinleaBlogmas2018DIY or #DelinleaDIY

Love you and see you tomorrow!

Danielle

Posted in: Blogmas 2018, Christmas, Pokemon Tagged: blogmas 2018, Christmas, DIY, legs, tree

What are you looking for?!

My Socials

Ko-Fi

I love making all these free things for you, tho it would be very helpfull if you can support me on Ko-Fi! (You don’t have to tho, totally up to you!)

Ko-Fi Shop!!

In my Ko-Fi shop you can find PDF Amigurumi Patterns!! You can pay easily with PayPal.
Go to the shop here!!

Recent Blog Posts

  • ♥ Happy 2022!
  • ♥ Day 12; Lights
  • ♥ Day 11; Flower Deco
  • ♥ Day 10; Snowman
  • ♥ Day 9; Gingerbread Houses

Recent Comments

  • Delinlea op ♥ Pua Tsum Tsum Amigurumi
  • Marfermar op ♥ Free Pattern; Easter Bunny
  • mary op ♥ Pua Tsum Tsum Amigurumi
  • Delinlea op ♥ Life Update + Kittens
  • Delinlea op ♥ Amigurumi Ghost

Categories

  • animation
  • Beadwork
  • Blogmas 2018
  • Blogmas 2020
  • Blogmas 2021
  • Books
  • Bujo
  • Christmas
  • Christmas CAL 2019
  • Christmas Countdown 2017
  • Contest
  • Crafting
  • Crochet
  • Drawing
  • Drawing Lesson
  • Easter
  • Geen categorie
  • Life
  • Miniature
  • Nail Art
  • New Year
  • Paper
  • plush
  • Pokemon
  • Poseable Art Doll
  • Recipe
  • Sewing
  • Shop Pattern
  • Sinterklaas
  • Social Media
  • Tsum Tsum
  • Ufufy

Copyright © 2023 Delinlea - My little fantasy world.

Family WordPress Theme by themehall.com