Delinlea - My little fantasy world
  • ♥ Home
  • ♥ About Me
  • ♥ Blogmas 2021
  • ♥ Free Patterns
    • ♥ Amigurumi; Spring/Easter
    • ♥ Amigurumi; Fall/Halloween
    • ♥ Amigurumi; Winter
    • ♥ Amigurumi Tsum Tsum
    • ♥ Amigurumi Ufufy
    • ♥ Amigurumi Others
    • ♥ Christmas Countdown 2017
    • ♥ Blogmas 2018
    • ♥ Blogmas 2020
  • ♥ Tutorials
    • ♥ Easter
    • ♥ Home Deco
    • ♥ Others
  • ♥ Drawing Lessons
  • ♥ FanFic
    • ♥ Chapter 1
    • ♥ Chapter 2
    • ♥ Chapter 3
    • ♥ Chapter 4
    • ♥ Chapter 5
    • ♥ Chapter 6
    • ♥ Chapter 7
  • ♥ Gallery
    • ♥ Crafts
    • ♥ Drawings
    • ♥ Poseable Art Dolls
  • ♥ Links
  • ♥ Contact
    • Privacy Policy

Christmas

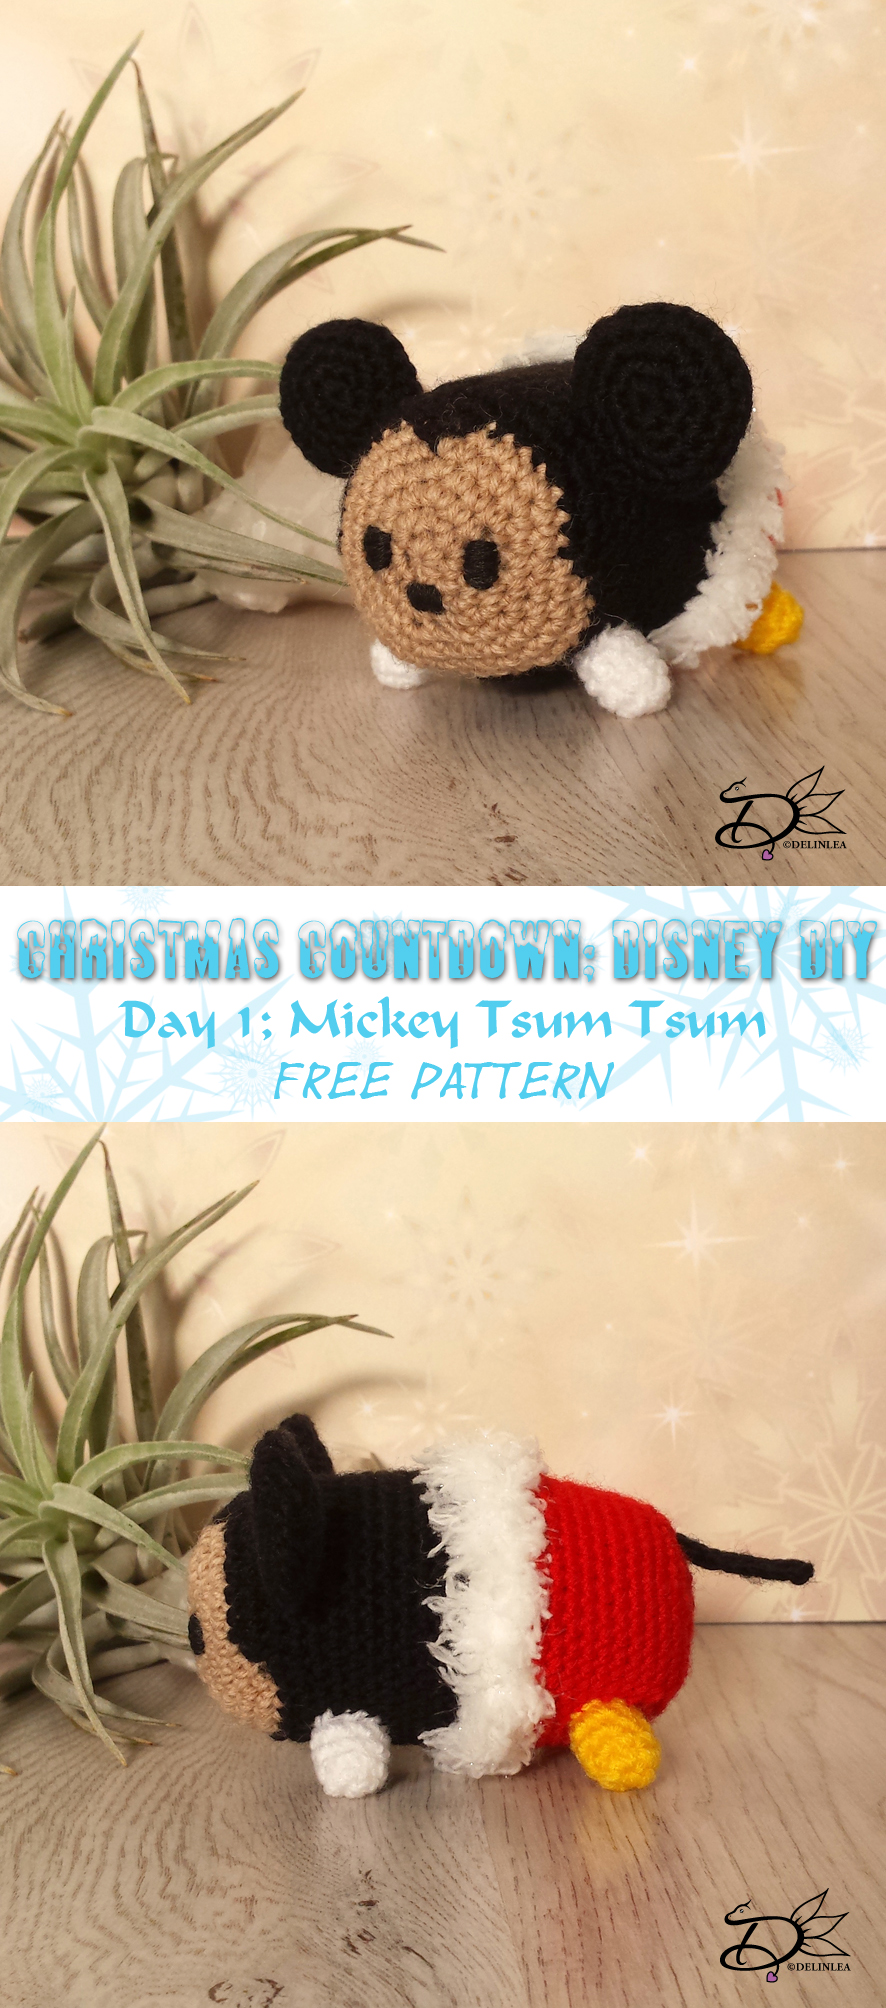
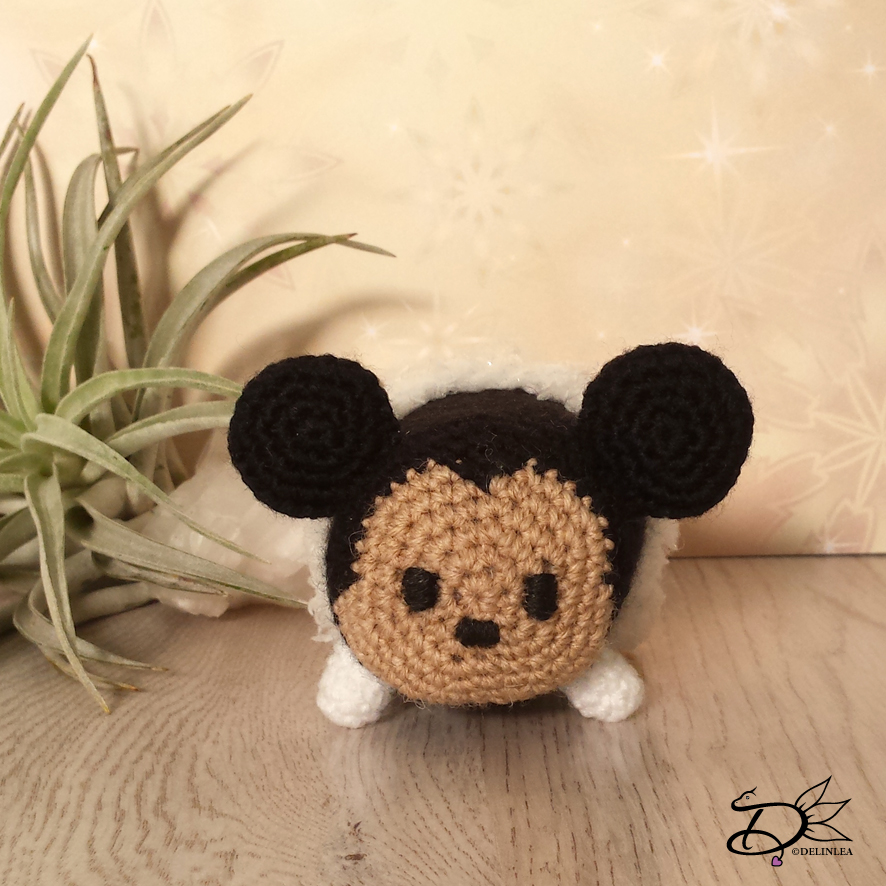
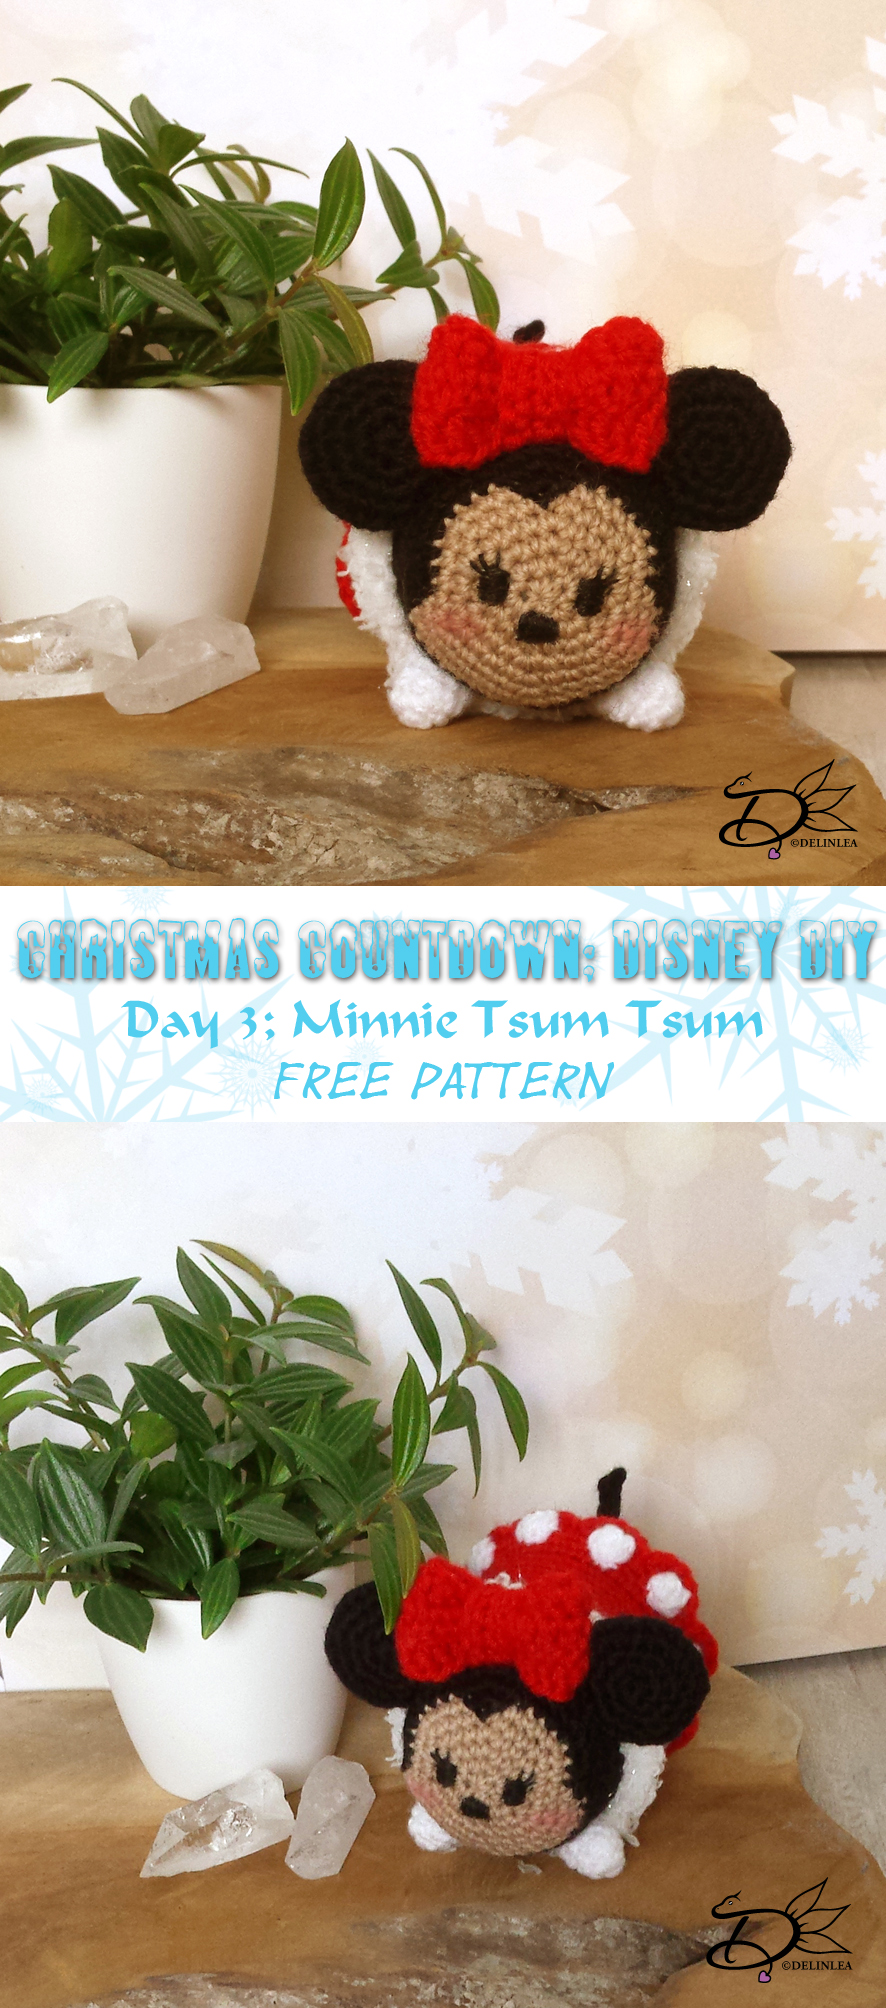
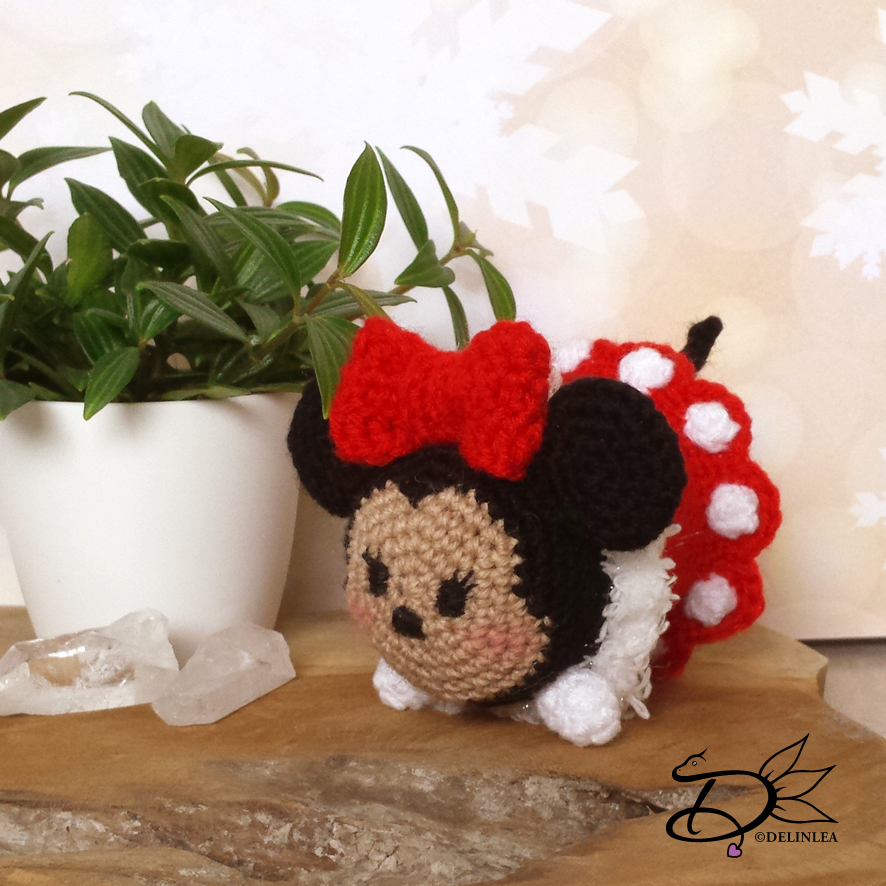
♥ Day 3: Minnie Tsum Tsum Amigurumi

3 december 2017 by Delinlea 2 Comments

Hey Lovelies!

Since we have made a Mickey Tsum Tsum, we need to make Minnie Tsum Tsum as well. You can’t have a Mickey without Minnie, right?!
Anyway, time is going so fast haha, I hope you have some time to make at least a few of the DIYs I post. These days are always so hectic. So, lets relax a bit with making these cuties. Here’s the pattern for Minnie.

Minnie tsum tsum

So for this DIY you will need:
♥  Yarn: in the colors Beige, Black, Red, Yellow and White.
♥  Cloud Yarn in white (optional).
♥  Crochet hook.
♥  Stitch marker.
♥  Fiber fill.
♥  Yarn needle.
♥  Embroidery needle with thread or felt.(Black)
♥  Scissors.

Stitches used:
SC = Single Crochet.
DC = Double Crochet.
ST = Stitch.
Inc = Increase.
Dec = Decrease.
Slst = Slip Stitch.
(…) = Repeat the space in brackets the given number of times.
[…] = Total number of stitches.

Minnie Tsum Tsum

♥ Pattern:

Body:
Start with Beige.

1: 6SC in magic ring. [6]
2: Inc in each st around. [12]
3: (1SC, inc), 6 times. [18]
4: (2SC, inc), 6 times. [24]
5: (3SC, inc) 2 times, 3SC, (1SC Beige and 1SC Black in the same st) Change back to Beige, (3SC, inc)3 times. [30]
6: (4SC, inc) 2 times, 3SC, change to Black, 1SC, inc, 1SC, Change back to Beige, 3SC, inc, (4SC, inc) 2 times. [36]
7: 5SC, inc, 2SC, change to Black, 3SC, inc, (5SC, inc) 2 times, 3SC, change Back to Beige, 2SC inc, 5SC inc. [42]
8: 8SC, change to black, 24SC, Change to Beige, 10SC. [42]
Change to Black.
9: SC in each st around. [42]
14: SC in each st around. [42]
Change to Red.
15: SC in each st around. [42]
16: Work in back loops only, SC in each st around. [42]
17: SC in each st around. [42]
|
26: SC in each st around. [42]
Change to White
27: Work in back loops onlu, SC in each st around. [42]
28: SC in each st around. [42]
29: SC in each st around. [42]
30: (5SC, dec), 6 times. [36]
31: (4SC, dec), 6 times. [30]
32: (3SC, dec), 6 times. [24]
33: (2SC, dec), 6 times. [18] Stuff the body here.
34: (1SC, dec), 6 times. [12]
35: Dec around. [6]
Fasten off and weave in tail.

Now join in the front loops of row 16 with Cloud yarn (or white if you don’t have the fluffy stuff) and Crochet 42 SC. Fasten off and weave in tail.

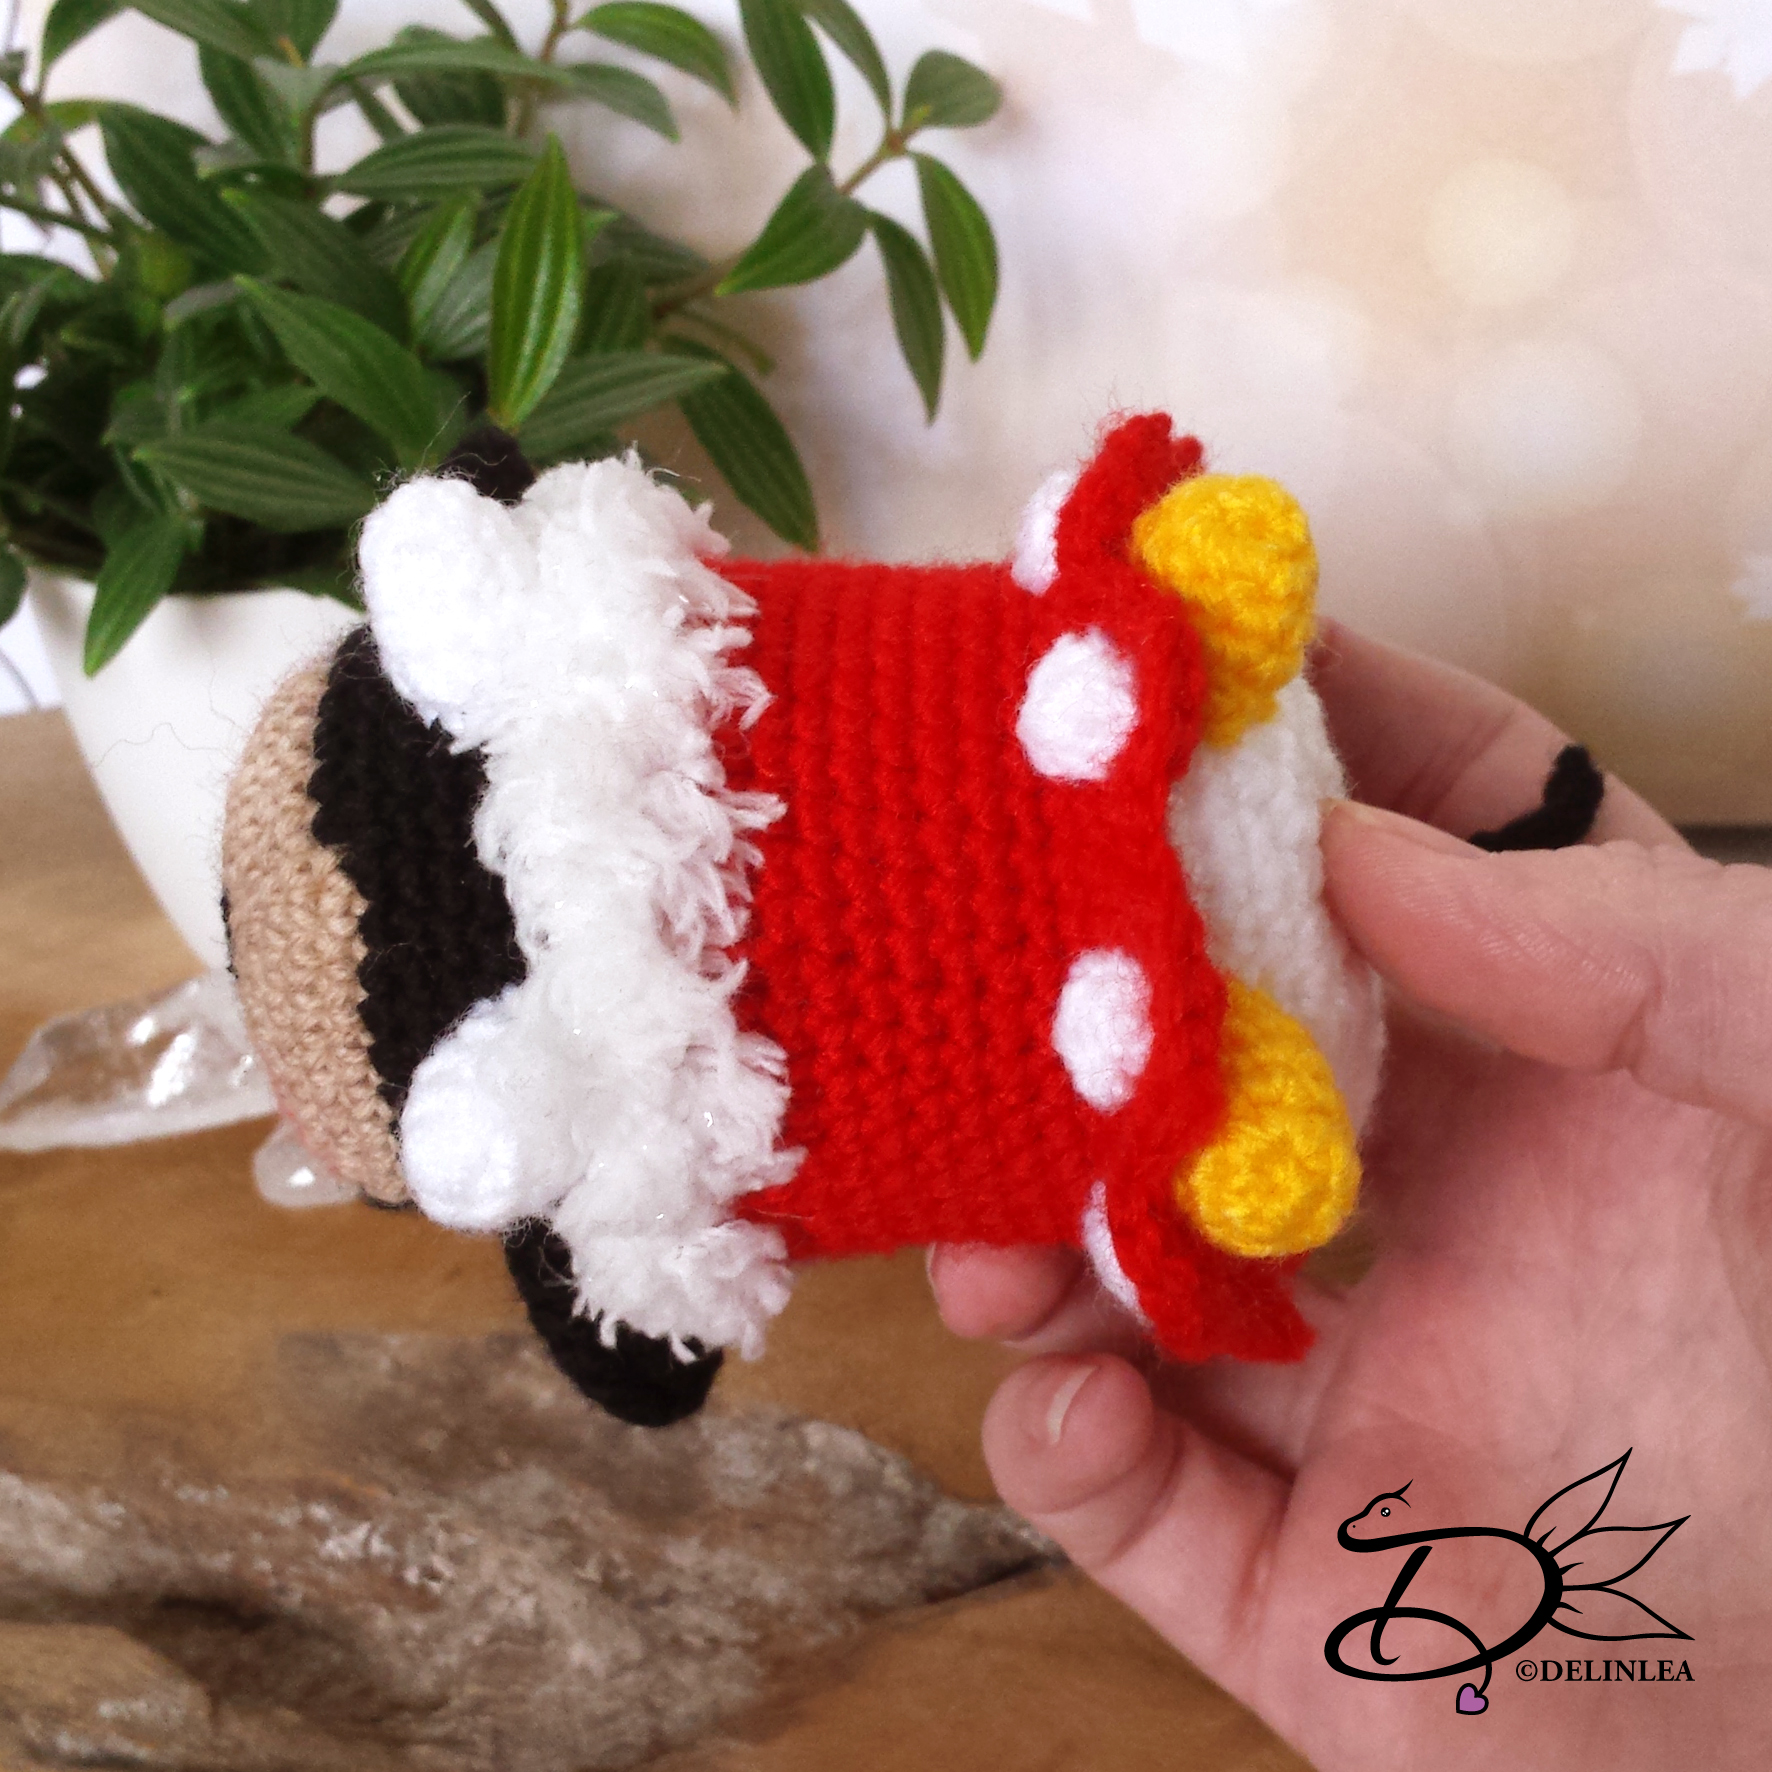
For her Skirt, join in the front loops of row 27 with Red.
1: SC in each st around. [42]
2: SC in each st around. [42]
3: (1SC, skip 1 st, 6DC in the next st, skip one st) 10 times. [66]
Fasten off and weave in tail.

Dots on her dress: (10)

Crochet 5SC in magic ring and fasten off. leave a long tail for sewing.

Minnie Tsum Tsum

Legs: (4)
Make 2 with white and 2 with yellow.

1: 4SC in magic ring. [4]
2: Inc in each st around. [8]
3: SC in each st around. [8]
|
5: SC in each st around. [8]
Fasten off and leave a long tail for sewing. You don’t have to stuff the legs.

Ears: (4)
In black.

1: 6SC in magic ring. [6]
2: Inc in each st around. [12]
3: (1SC, inc), 6 times. [18]
4: (2SC, inc), 5 times. [21] Fasten off.

Now sew 2 of the ears together so you get nice puffy ears, don’t stuff them tho.

Tail:

Chain 9, insert in second chain from hook and make 8 slst. Fasten off and leave long tail for sewing.

Bow:
In red.

1: CH22, insert in 3rd chain from hook, 20DC, turn [20]
2: Ch1, 20DC, turn [20]
3: Ch1, 20DC. [20]
Fasten off and sew both ends together so you get a circle. Keep the sewd together part in the middle wher the middle band of the bow comes and flatten it.

Middle part of the bow:
In red.

1: Ch 9, insert in 2nd chain from hook, 8SC, turn. [8]
2: Ch1, 8SC, turn. [8]
3: Ch1, 8SC. [8]
Fasten off and sew both ends together and place it in the middle of the main part of the bow. The easiest way to do this to sew it around it. Leave long tail to sew it onto her head.

Minnie Tsum Tsum

♥ Assembling

To make sure you sew all parts in the right place, you can use some sewing pins to position them. When you are happy with the position, you can sew them on.
Sew the legs on to the bottom of the body, the front legs are pointing to the front. The back legs are pointing to the side.
As for the ears, sew them about 2 or 3 layers from the face. Use my photo’s as a guideline to place them on the right spot.
In the middle of the ears, sew the bow. and fluff it up a bit.
The tail you’ll sew on her butt.
Sew the Dots on her skirt.
For the eyes and nose you can either choose to use felt or you can embroider them on. I chose to embroider them on, cause yeah why choose the easy way haha. But which way you choose, Minnie will look cute.

I hope my pattern is clear.  If you have any questions, leave a comment below and I’ll get back to you.

I would love to see what yours look like! Leave a link in the comments below or tag me on Twitter or Instagram and use the #DelinleaDIY.

Have fun making Minnie! Good luck~

Love
Danielle


Posted in: Christmas, Christmas Countdown 2017, Contest, Crafting, Tsum Tsum Tagged: Amigurumi, Christmas, Christmas Countdown, Disney, DIY, Minnie mouse, Tsum Tsum

♥ Day 2: Contest Time

2 december 2017 by Delinlea Leave a Comment

Hey Lovelies!

Edit: Contest deadline extended!

So today is a little bit different from all the other DIYs I have planned. It doesn’t involve any Disney characters, but Dragons, baby Dragons! I just couldn’t do a Christmas countdown without any dragon, I love them to much for that.
Also if you join this one, you can win some prizes! Are you getting excited already?!

Okay, so, it’s coloring contest time! I have drawn this baby dragon Christmas tree, and it’s up to you how you color it. You can use anything you want, colored pencils, markers, glitter, flowers..well anything xD let the creative juices flow~. (You can color it digitally, but I prefer the traditional way, just saying xD). Just download your PDF or JPEG from this link, and print it out on the paper you prefer, and start!

Dragon Christmas Tree

There will be one winner. But maybe if there are a lot of people joining, I’ll extend that to 3. Now to the question that’s in your mind, yes, I know it’s there. (secretly I can read minds xD)

What can you win?!
♥  A Crochet Baby Dragon, made by me.
♥  4 Mechanical pencils HB.
♥  24 Mini gelpens.
♥  A print of Choise.
♥  Pretty colored paper.

I hope you like those prizes. ^-^
Now on to the important, but boring part. The rules.

Rules:

♥ The contest is World Wide!
♥  If you are under 18 make sure you have permission from your parents or legal guirdian to give me your adress in case you win.
♥  You can enter only 1 time.
♥  Deadline is 25 december 2017  January 2018, 23:59 CET.
♥  To enter, send me an e-mail (delinlea@gmail.com) with a scan or picture of your work. Or you can post it on instagram/twitter with the #DelinleaChristmasContest and tag me.

I can’t wait to see what you all will create with the line art I drew! I hope many of you will join, Good luck to everyone!

Love
Danielle

Disclaimer: You are only allowed to use this line art for this contest or for personal use. You are not allowed to use it in any other way.

Dragon Christmas Tree

Posted in: Christmas, Christmas Countdown 2017, Contest, Crafting, Tsum Tsum Tagged: Christmas, Christmas Countdown, Coloring Contest, Dragon, Fantasy

♥ Day 1: Mickey Tsum Tsum Amigurumi

1 december 2017 by Delinlea 2 Comments

Hey Lovelies!

It’s here! The first day of my Christmas Countdown, with all Disney DIYs! From today on, I’ll post a DIY everyday up until Christmas! I hope you will like what I have planned for you. I’m pretty excited to do this, and I hope you will be as well! Let’s start, shall we?!

Mickey Tsum Tsum

I kick off with this adorable Mickey Tsum Tsum. During this countdown you will see some more of those TsumTsum’s (I just can’t resist them XD). This year I was planning to make one every week, but that didn’t happen. I only made 3. So, I thought, if we make enough TsumTsum to make a small Christmas ’tree’, wrap them in lights. How cute will that be?!

So for this DIY you will need:
♥  Yarn: in the colors Beige, Black, Red, Yellow and White.
♥  Cloud Yarn in white (optional).
♥  Crochet hook.
♥  Stitch marker.
♥  Fiber fill.
♥  Yarn needle.
♥  Embroidery needle with black thread or black felt.
♥  Scissors.

Stitches used:
SC = Single Crochet.
ST = Stitch.
Inc = Increase.
Dec = Decrease.
Slst = Slip Stitch.
(…) = Repeat the space in brackets the given number of times.
[…] = Total number of stitches.

♥ Pattern:

Mickey Tsum Tsum

Body:
Start with Beige.

1: 6SC in magic ring. [6]
2: Inc in each st around. [12]
3: (1SC, inc), 6 times. [18]
4: (2SC, inc), 6 times. [24]
5: (3SC, inc) 2 times, 3SC, (1SC Beige and 1SC Black in the same st) Change back to Beige, (3SC, inc)3 times. [30]
6: (4SC, inc) 2 times, 3SC, change to Black, 1SC, inc, 1SC, Change back to Beige, 3SC, inc, (4SC, inc) 2 times. [36]
7: 5SC, inc, 2SC, change to Black, 3SC, inc, (5SC, inc) 2 times, 3SC, change Back to Beige, 2SC inc, 5SC inc. [42]
8: 8SC, change to black, 24SC, Change to Beige, 10SC. [42]
Change to Black
9: SC in each st around. [42]
|
19: SC in each st around. [42]
Change to White Cloud yarn. (You can use regular white yarn as well).
20: SC in each st around. [42]
21: SC in each st around. [42]
Change to Red.
22: SC in each st around. [42]
|
29: SC in each st around. [42]
30: (5SC, dec), 6 times. [36]
31: (4SC, dec), 6 times. [30]
32: (3SC, dec), 6 times. [24]
33: (2SC, dec), 6 times. [18] Stuff the body here.
34: (1SC, dec), 6 times. [12]
35: Dec around. [6]
Fasten off and weave in tail.

Legs: (4)
Make 2 with white and 2 with yellow

1: 4SC in magic ring. [4]
2: Inc in each st around. [8]
3: SC in each st around. [8]
|
5: SC in each st around. [8]
Leave long tail for sewing the legs.

Ears: (4)
In black

1: 6SC in magic ring. [6]
2: Inc in each st around. [12]
3: (1SC, inc), 6 times. [18]
4: (2SC, inc), 5 times. [20]
Fasten off and leave long tail for sewing.

Now sew 2 of the ears together so you get nice puffy ears, don’t stuff them tho.

Tail:

Chain 9, insert in second chain from hook and mak 8 slst. Fasten off and leave long tail for sewing.

Mickey Tsum Tsum

♥ Assembling:

To make sure you sew all parts in the right place, you can use some sewing pins to position them. When you are happy with the position, you can sew them on.
Sew the legs on to the bottom of the body, the front legs are pointing to the front. The back legs are pointing to the side.
As for the ears, sew them about 2 or 3 layers from the face. Use my photo’s as a guideline to place them on the right spot.
The tail you’ll sew on his butt.
For the eyes and nose you can either choose to use felt or you can embroider them on. I chose to embroider them on, cause yeah why choose the easy way haha. But which way you choose, Mickey will look cute.

Mickey Tsum Tsum

I hope my pattern is clear. I usually only write patterns down for myself, so this is quit challenging. If you have any questions, leave a comment below and I’ll get back to you.

I would love to see what yours look like! Leave a link in the comments below or tag me on Twitter or Instagram. hm.. maybe it’s easier to use a hashtag, maybe #DelinleaDIY ..yeah, let’s do that.

Have fun making Mickey! Good luck~

Love
Danielle

Posted in: Christmas, Christmas Countdown 2017, Crafting, Tsum Tsum Tagged: Christmas, Christmas Countdown, Disney, DIY, Mickey, Tsum Tsum

♥ Merry Christmas!!

25 december 2015 by Delinlea Leave a Comment

It’s Christmas time~~ *sings*

I love this time of the year, all the lights and decoration, it just makes me feel good! Even though I’m struggling with life lately, I decided to stay away from social media for a while, I will see when I go back and start using it again =).

In the mean while, I made a some christmas decoration (and made some food, but before I even can make pictures it’s gone already, thank you family haha love you anyway)
Let me show you how some parts of my room look and some decoration I made ^^ (and yup, Jimmy had to be there =P)

Room decoration

Room Decoration 2

And let me show now what I made and where I got the inspiration from! ^^

Santa

I made this Santa out of Foam, I wanted to make it for years and finally found the time to make him! Isn’t he cute?! Here’s the tutorial I used for it *Click* (Warning it’s in Spanish!)

Stockings  Gingerbread and Santa's lil Helper

And then it was time for Crochet, somehow I always start making things I love to do, but never do *sigh I’m stupid xD I should do things I love more often, and not focus on one medium. Anyway, for the stockings I used this pattern. I love them, only the picture I made I don’t like hmm.
And isn’t Santa’s lil helper cute? I made 2 actually, I couldn’t stop! Here’s the pattern (warning it’s in spanish, let me know if you need help). Last but not least the gingerbread cookie! When I saw the image, I was like ‘I have to make him!’ and I did! I only used this picture as reference.

Penguin Wine Glass

I saw those kind of wine glasses painted all over the internet, I fell in love with the idea! So I made my own version of it, a Penguin!! Adorable right?! I only learned that I need to use quality acrylics to paint, like the white and not cheap ones like the black, it somehow comes off with every layer of paint you add, it gets all crumbly >_<. Now I actually wanna paint more wine glasses *_* (I have 2 more, so I actually can, but..as what?!).

Quilled Christmas Tree

Woops, I almost forgot my christmas tree made out of paper, the technix is called Quilling. You basicly roll up paper stripes (3mm) and then you give it the shape you want. After I got all the shapes, I made a paper cone and glued all rolls on there ^^ decorating with some hearts, and thats it, easy peasy haha xD

Sparkle Ball

Last but not least, A SPARKLE BALL *_* when I saw those on youtube here. I just had to make it, got the materials right away and made one! I only found out that I didn’t got the right cups, so I had to improvise a little *sigh I think it took me 4 hours ORZ. Oh well I am very happy with how it looks on my wall, so pretty *_*.

I hope you like what I made! Maybe some inpiration, maybe not for this year, but next year? ^^

With love,
Danielle

Posted in: Christmas, Crafting Tagged: Christmas, DIY, Handmade
« Vorige 1 2 3 4 5 … 12 13 14 15 16

What are you looking for?!

My Socials

Ko-Fi

I love making all these free things for you, tho it would be very helpfull if you can support me on Ko-Fi! (You don’t have to tho, totally up to you!)

Ko-Fi Shop!!

In my Ko-Fi shop you can find PDF Amigurumi Patterns!! You can pay easily with PayPal.
Go to the shop here!!

Recent Blog Posts

  • ♥ Happy 2022!
  • ♥ Day 12; Lights
  • ♥ Day 11; Flower Deco
  • ♥ Day 10; Snowman
  • ♥ Day 9; Gingerbread Houses

Recent Comments

  • Liane Van der Donck op ♥ Amigurumi Ghost
  • Kimberly Spear op ♥ Free Pattern; Amigurumi Shiber
  • Delinlea op ♥ Pua Tsum Tsum Amigurumi
  • Marfermar op ♥ Free Pattern; Easter Bunny
  • mary op ♥ Pua Tsum Tsum Amigurumi

Categories

  • animation
  • Beadwork
  • Blogmas 2018
  • Blogmas 2020
  • Blogmas 2021
  • Books
  • Bujo
  • Christmas
  • Christmas CAL 2019
  • Christmas Countdown 2017
  • Contest
  • Crafting
  • Crochet
  • Drawing
  • Drawing Lesson
  • Easter
  • Geen categorie
  • Life
  • Miniature
  • Nail Art
  • New Year
  • Paper
  • plush
  • Pokemon
  • Poseable Art Doll
  • Recipe
  • Sewing
  • Shop Pattern
  • Sinterklaas
  • Social Media
  • Tsum Tsum
  • Ufufy

Copyright © 2023 Delinlea - My little fantasy world.

Family WordPress Theme by themehall.com