Delinlea - My little fantasy world
  • ♥ Home
  • ♥ About Me
  • ♥ Blogmas 2021
  • ♥ Free Patterns
    • ♥ Amigurumi; Spring/Easter
    • ♥ Amigurumi; Fall/Halloween
    • ♥ Amigurumi; Winter
    • ♥ Amigurumi Tsum Tsum
    • ♥ Amigurumi Ufufy
    • ♥ Amigurumi Others
    • ♥ Christmas Countdown 2017
    • ♥ Blogmas 2018
    • ♥ Blogmas 2020
  • ♥ Tutorials
    • ♥ Easter
    • ♥ Home Deco
    • ♥ Others
  • ♥ Drawing Lessons
  • ♥ FanFic
    • ♥ Chapter 1
    • ♥ Chapter 2
    • ♥ Chapter 3
    • ♥ Chapter 4
    • ♥ Chapter 5
    • ♥ Chapter 6
    • ♥ Chapter 7
  • ♥ Gallery
    • ♥ Crafts
    • ♥ Drawings
    • ♥ Poseable Art Dolls
  • ♥ Links
  • ♥ Contact

felt

♥ Day 5; Winter Fairy from Felt

9 december 2021 by Delinlea Leave a Comment

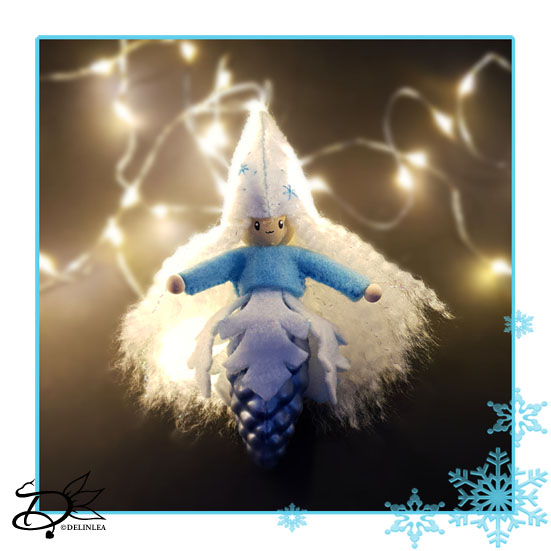
Hey Lovelies! I love fairies, what you do you think of fairies?! I hope you like them, because today I’ll gonna show you how to make this Winter Fairy from felt and a Bauble. I hope it’s not too fiddly, but I think it’s a good size this way. I hope you’ll have fun making this one.

Note; This tutorial, for this fairy, will only be available during December 2021, after that I will make a separate PDF file in my ko-fi shop.

Winter Fairies from Felt

For this DIY you’ll need:
♥ This Template. (This download gives you all templates for blogmas 2021)
♥ Oval Bauble, about 5,5-6cm in height.
♥ White and Light Blue Felt.
♥ White (Sparkly) Yarn.
♥ Needle and thread.
♥ 18cm of thin wire.
♥ Wooden Bead, 15mm.
♥ 2 Small Wooden Beads, 5mm.
♥ Acrylic Paint and Brush to make a face.
♥ (Hot) Glue.
♥ Pen.
♥ Scissors.

Winter Fairy DIY

Start with printing out this template and cut out all parts for the Winter Fairy.

Snowflake Skirt

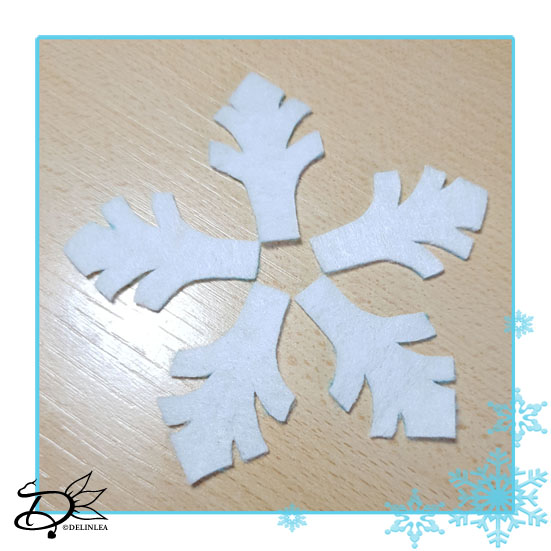
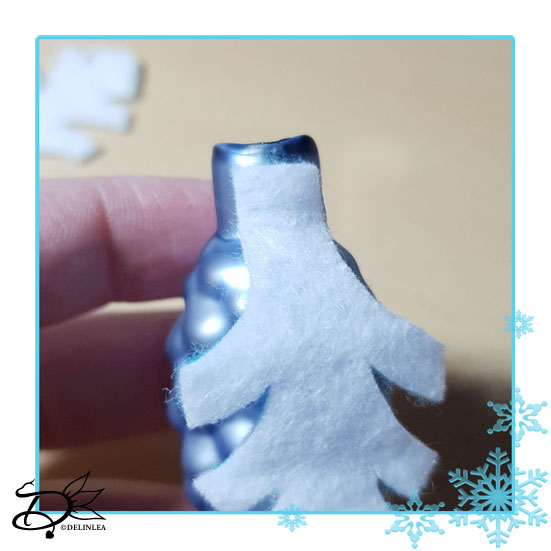
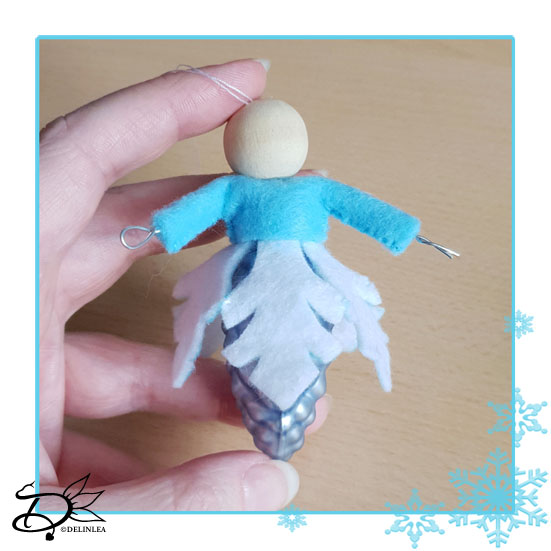
Start with part A, trace this on white felt, about 5 times (If your bauble is bigger, maybe you need more pieces). Cut those pieces out neatly. Glue all those pieces around the top of the bauble (Where the hook was).
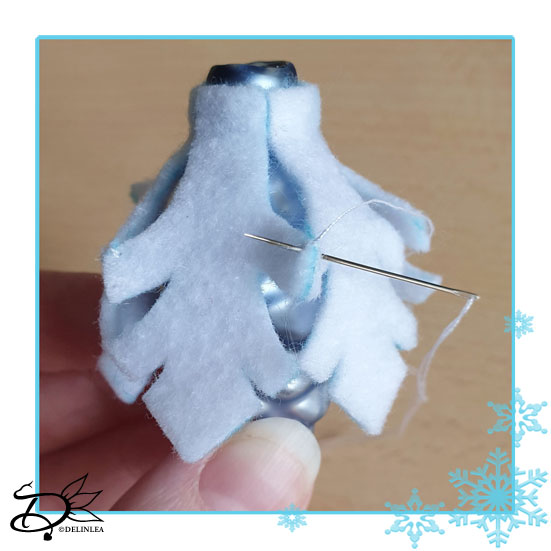
With a needle and thread, sew the points together that are next to each other, where the cross is in the template.

Body

Use part B of the template now and trace this on Light Blue felt. Cut out neatly.

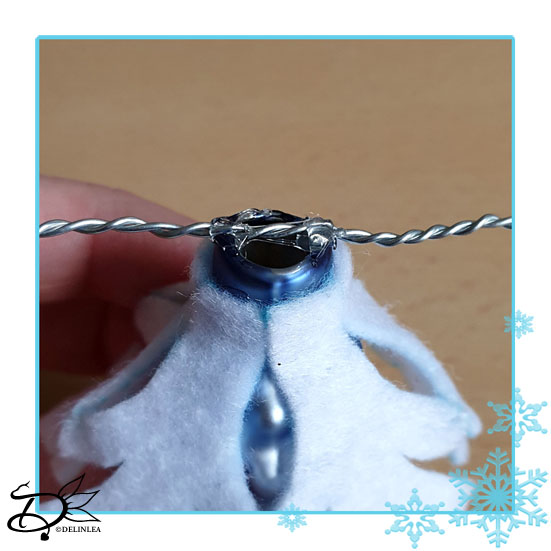
Take the 18cm of wire, fold it in half and twist it together. Glue this to the top of the bauble, this will be the structure for the arms.

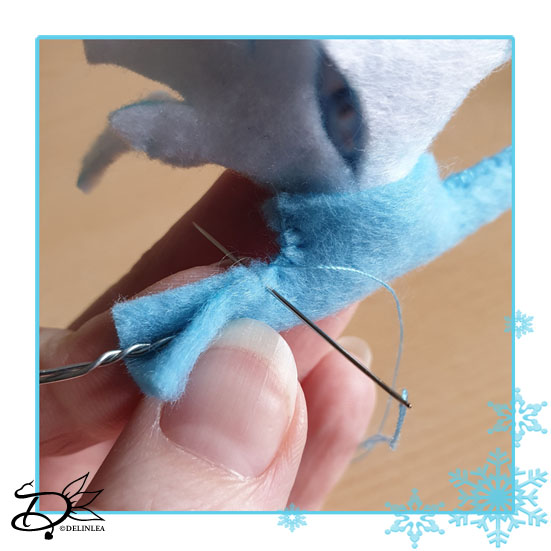
Sew part b around the arms/body with the blanket stitch, so it’s gonna be a shirt. Bend the arms down a bit, carefully.

Head

Take the 15mm bead and glue this on top of the body. You could draw/paint a face on it now, but I prefer to do that last.
Inside the bead, glue a loop from 20cm thread (You can make it longer, depends on how you wanna hang them).

  • Winter Fairies from Felt DIY

Hands

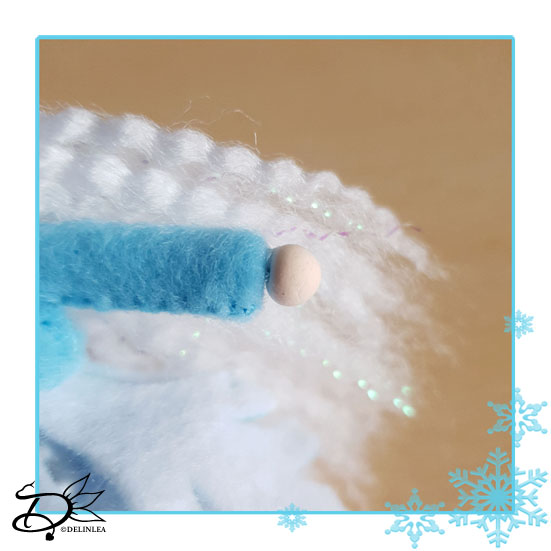
For the hands you use the 2 small beads. Trim the wire for the arms a bit if it’s still too long, it needs to stick out about 3mm from the sleeve. Then glue the beads on. (Since I didn’t had small beads, I used a bit of clay).

Hair

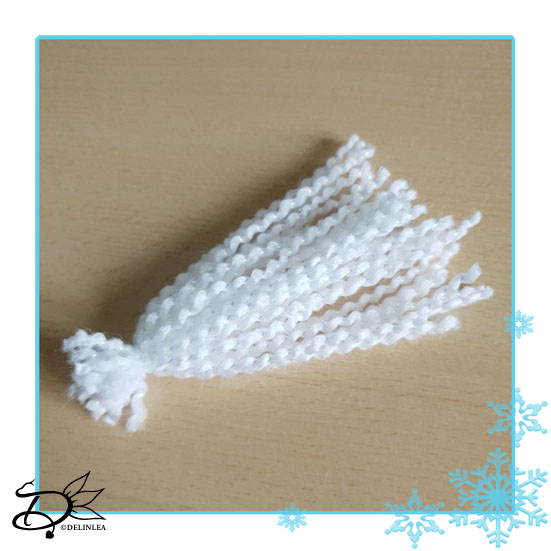
Get out the white yarn and cut 35 strands (or more) of about 8cm in length. Tie these tightly together, at the top, with a bit of white thread. Don’t worry about how neat it looks for now, you’ll trim that later on.
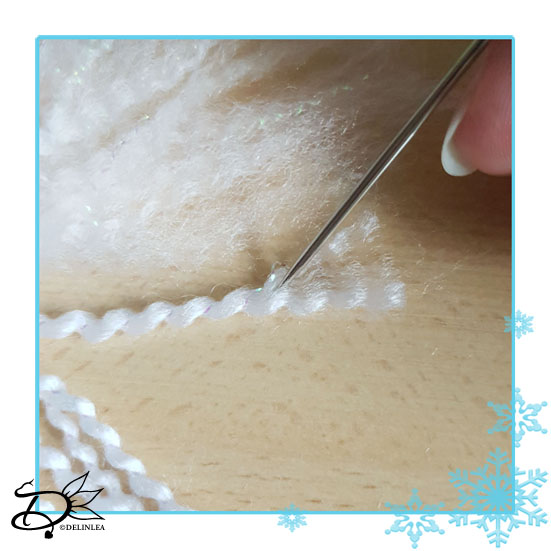
Unravel the strands of yarn with a big needle, so it’s looks a bit more like hair. This can be quite a progress, but if you lay it down on your desk and do it bit by bit, you’ll be fine.
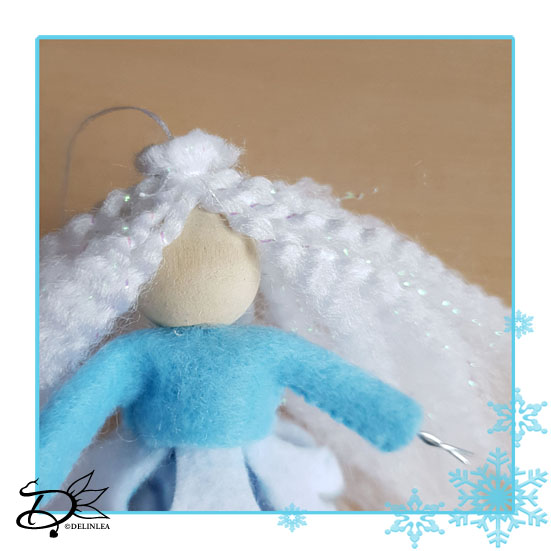
When that’s done, take the loop of thread and get that through the top of the hair with a needle. Glue the hair to the top of the bead. Keep in mind where you want to face to be, keep the hair to the sides of the face.

If you want you can trim the hair a bit now.

Hat

Trace part C three times on to white felt and cut those out.

On at least one part, embroider some ‘snowflakes’ and dots with light blue thread. When you’ve done that, sew it together using the long sides.

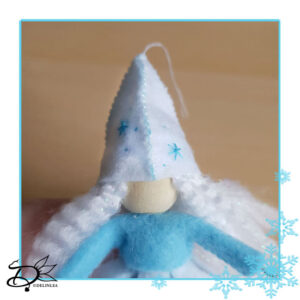
Now that the hat is created, carefully put it on its hat. Don’t forget to take the loop of thread through first! You can use a bit of glue if it won’t stay in place.

Finishing off

Last is to paint a face one with some acrylic, you can make it as fancy as you want. I kept it quite simple this time.

Now you can hang the Winter Fairy on to the Snowball. You can hang as many as you want.

If you decided to join this lovely project, or just some parts of it, show me on Twitter or Instagram what you are working on! I’d love to see!

If you like to buy the PDF pattern for this whole project, go to my ko-fi shop. This will have an extra story attached and no ads.

Have a wonderful day!

Love
Danielle

PS. if you love those patterns, maybe you’d like to support me on Ko-Fi?! So I can keep making content like this!

// ©2021 Delinlea / Danielle Kaal // Items made with this pattern/DIY may be sold in a limited number. Credit to ‘Delinlea’ is appreciated. Not allowed for mass production or commercial purposes. You may not reproduce, translate, share, freely distribute or sell this pattern/DIY as your own in digital or printed from.

Posted in: Blogmas 2021, Christmas, Crafting Tagged: Blogmas 2021, Christmas, Fairy, felt, vilt, winter, Winter Wonderland

♥ Spring Wreath from Scratch

9 april 2020 by Delinlea Leave a Comment

Hey Lovelies! I love making wreath’s, they just give that little extra to your home. And the fun thing is that you can make them however you like. Since we had some cuttings from the garden that I didn’t wanna waste. I decide to make a wreath with it. And I’ll gonna try to explain to you how to make your own. And also give you an idea how you can decorate it with links to tutorials I used.

For this DIY you’ll need:
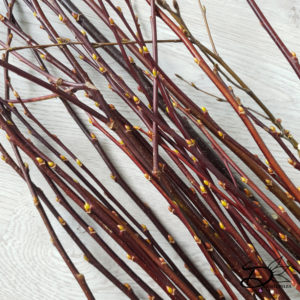
♥ 100-200cm Twigs, preferably those that are flexible, like from a Willow. Freshly cut twigs are easier to work with. It depends on what you go for on how many twigs you need, but make sure to have plenty.
♥ Pruning Shears.
♥ Things to decorate, like flowers, greens, succulents, etc.

Tutorial

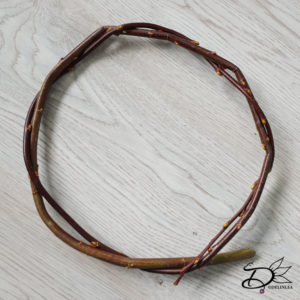
Start with one of you longest twigs, keep your hand at the thick side and bend this one carefully in a circle to the size you want. Mine is about 22cm. When you are happy with the size, wrap the end of the twig around itself. This way it will hold it shape, sorta, without the need of using glue or wire.

Don’t worry if your circle isn’t perfect, you can adjust that along the way.

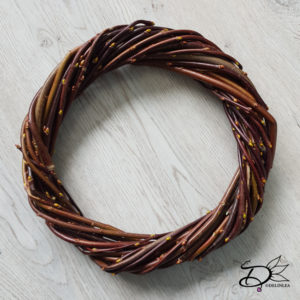
Now start adding more twigs, I always added the thick side of the twig, at what you choose to be the back, and wrap it around the base circle you made.  If you keep the same flow as the first one, you get one like I made. But you can also make it more messy if you prefer.  Let’s just have fun and see what you can make with materials from nature!

Like I said, along the way you can adjust the shape into a more perfect circle, keep checking what your wreath needs. Add twigs until you are happy with the size and thickness of the whole thing.

And that’s basically it for a basic wreath! it’s not that hard, just need to be careful not to break the twigs. But practice makes perfect!

Decorating

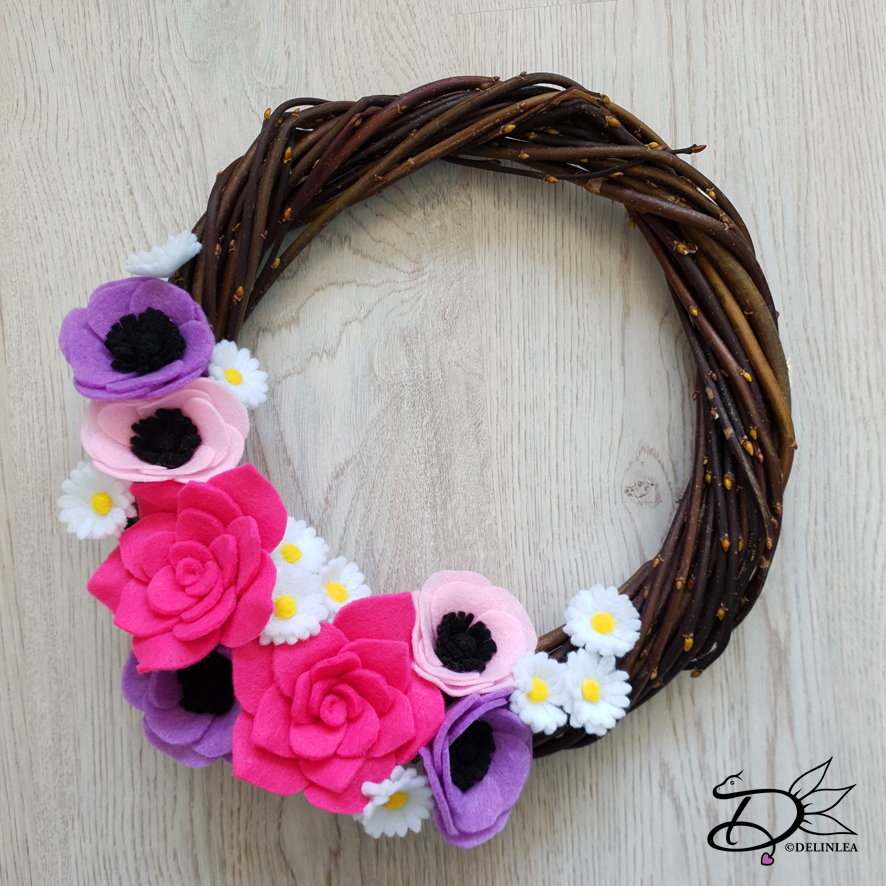
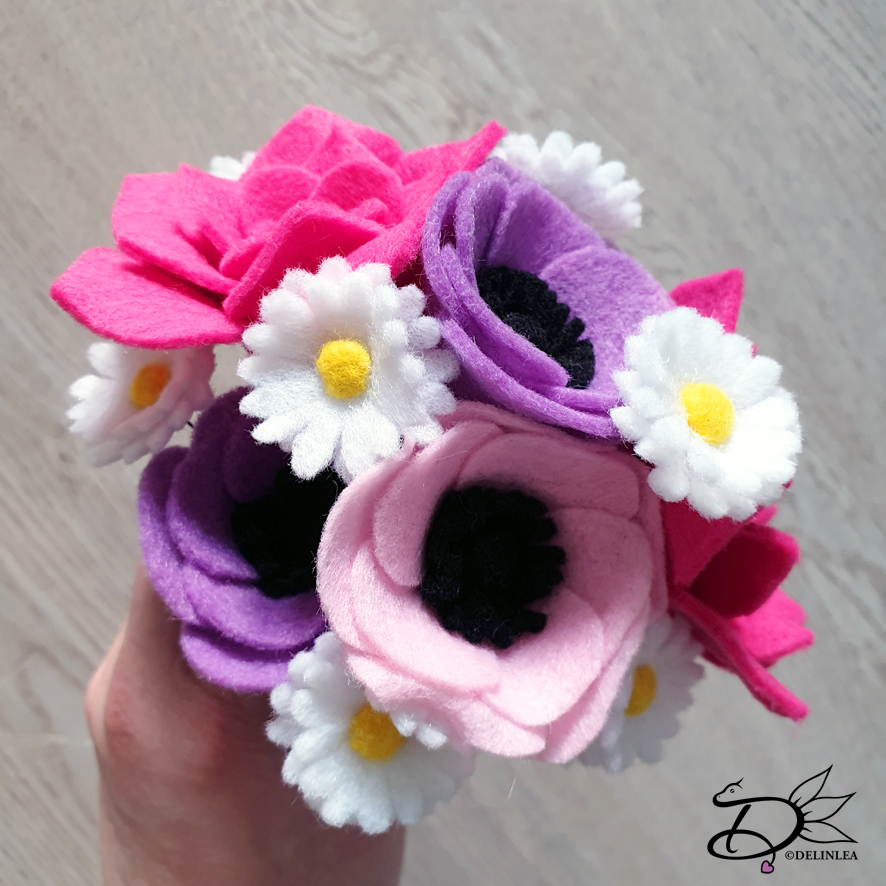
For decorating you can use anything that suits you, I chose to make flowers from felt and add those. Since it’s spring, I wanted to use more pastel tints and  flowers that would bloom now. These are the ones I made, some kind of Rose, Anemone and Daisies.

Here are the tutorials I used, but as usual, I didn’t really followed them along and just modified to whatever I wanted xD. I’m always this person that just start something and then follow along my own rules. Haha.

Link to Rose tutorial.
Link to Anemone tutorial.
Link to Daisy tutorial.

I hope you will have fun making your own wreath!! I love to make things from scratch and be happy with the end result. Plus this really makes you home looks happier!

Have a wonderful day!

Love
Danielle

Posted in: Crafting, Easter Tagged: DIY, felt, flowers, Tutorial, twigs, Wreath

♥ Day 12; Pikachu Stocking

12 december 2018 by Delinlea Leave a Comment

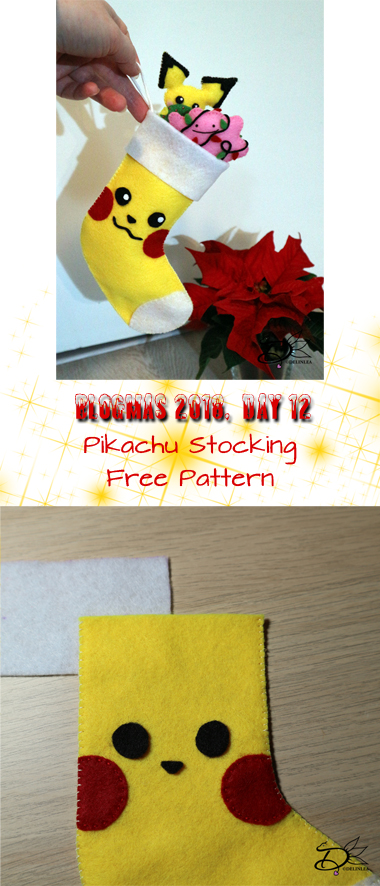
Hey Lovelies! It’s day 12 of Blogmas 2018. And that means, we are half way through! Are you happy it’s going so fast, or do you want it to slow down?! For today’s DIY I wanted to make a stocking, even tho it doesn’t have those Christmassy colors, I think you will still like it. I actually wanted to do a charmander one, but I had no orange felt, so a Pikachu Stocking it is! But ofcourse you can change it to any pokemon you want! Have fun!

For this DIY you’ll need:
♥  Felt in the colors White, Yellow, Red andBlack.
♥  Sewing thread in matching colors to the felt.
♥  Sewing Needle.
♥  Trick Marker or anything else where you cancopy the pattern with onto your felt.
♥  Pattern.
♥  Scissors.
♥  Stuffing.
♥  Fabric Glue. (optional)
♥  Acryllic Paint in White. (optional)
♥  15cm of white yarn.

DIY

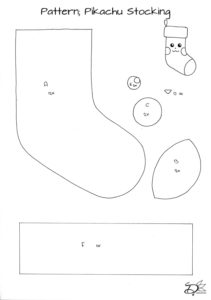
First off all, download the pattern HERE! And print it out (or draw it from your screen). The good thing is, you can make it as big as you want! Then cut out all the pieces. On every piece is stated how many times you need to cut it out of felt.

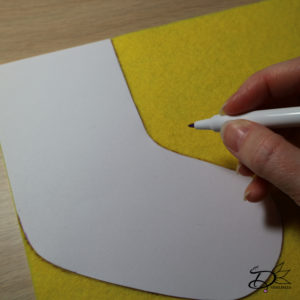
Cut part A out of Yellow Felt, Part B and F out of White felt. Part C out of Red felt. Part D, E and the mouth out of Black felt. Optional: the white dot in the eye, you can either paint it on or cut it out of white felt.

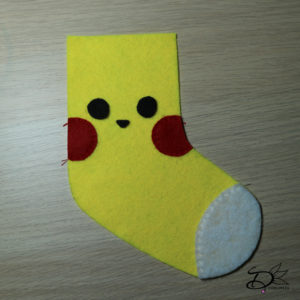
Sew parts B to parts A with a running stitch, only the part that’s in the middle of the sock.

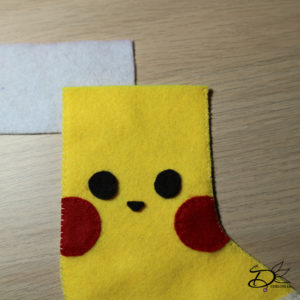
Glue or sew on the face of Pikachu, make sure you don’t forget the white dots in the eyes, with either paint or felt. The circles for his cheeks I trimmed down the edge.

Now it’s time to sew parts a together with a Blanket stitch. All around.

When you’ve done that, it’s time to glue or sew on part F to the sock. I placed it about half way. (see the pic) But later I thought it would look better to fold in 1 cm from the top. Its best to do that first, and then glue/sew it to the sock.

Last but not least, tie a knot in both end together in the piece of yarn, so you’ll get a loop. And glue this to the stocking.

And it’s done! See, you can make many variations on this! Go wild, get creative! Have fun! And don’t forget to share with #DelinleaBlogmas2018DIY or #DelinleaDIY.

Love
Danielle

Posted in: Blogmas 2018, Christmas, Pokemon Tagged: blogmas 2018, DIY, felt, pikachu, Pokemon, Stocking

♥ Day 9; Chikorita Felt Ornament

9 december 2018 by Delinlea Leave a Comment

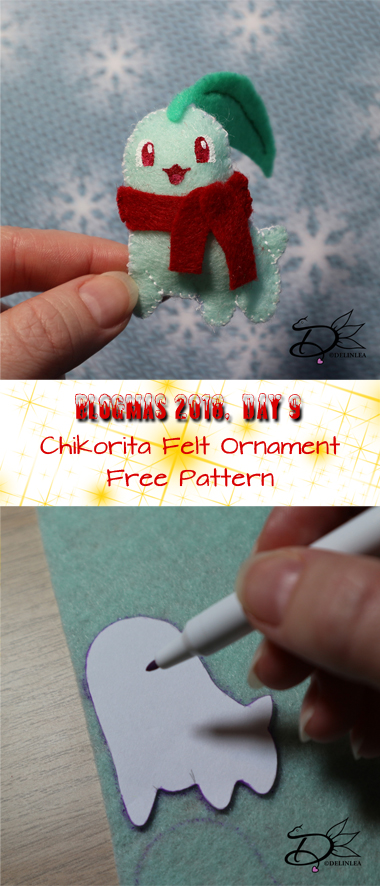
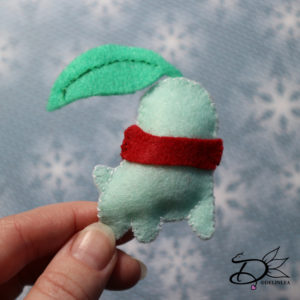
Hey Lovelies! It’s day 9 of Blogmas 2018! I love making those cute felt ornaments so I planned another one for today! It’s Chikorita’s turn! He needed some warmth so he’s wearing a scarf! ^_^

For this DIY you’ll need:
♥  Felt in the colors Light Green, Green and Red(white optional).
♥  Sewing thread in matching colors to the felt.
♥  Sewing Needle.
♥  Trick Marker or anything else where you cancopy the pattern with onto your felt.
♥  Pattern.
♥  Scissors.
♥  Stuffing.
♥  Fabric Glue. (optional)
♥  Acryllic Paint in white and Red (optional)

DIY

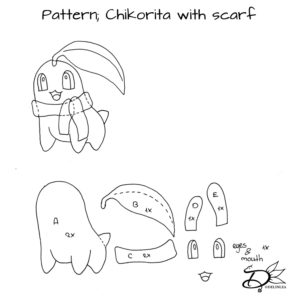
First off all, download the pattern HERE! And print it out(or draw it from your screen). The good thing is, you can make it as big as you want! Then cut out all the pieces. On every piece is stated how many times youneed to cut it out of felt.

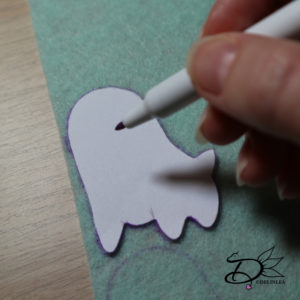
Cut all the pieces out of felt. Part A out of Light Green,Part B out of Green Felt, Part C, D and E out of Red felt. The eyes and mouthyou can either choose to make them out of Felt or paint them on like I did.Depends on what you want.

Sew parts A together with a Blanket stitch. There are some lines in the body that continue, use a running stitch to make those lines, and go back the same way.

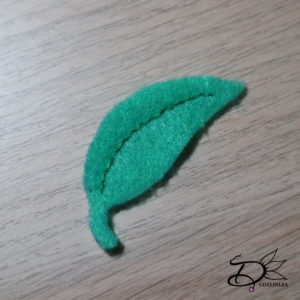
With a running stitch you’ll make the details in the leave (part B). After that, you’ll glue or sew it to Chikorita’s head.

Then it’s time to put on his scarf, I glued all pieces on, only on the sides of parts C I used a blanket stitch.

Last but not least, paint on his eyes and Mouth. Or if you chose to make them out of felt, do that now.

And another ornament is done! This one we can add to our collection! And if you made one, don’t forget to share with #DelinleaBlogmas2018DIY or #DelinleaDIY on Twitter or Instagram, so I can see^^

Love
Danielle

Posted in: Blogmas 2018, Christmas, Pokemon Tagged: blogmas 2018, chikorita, Christmas, felt, Free Pattern, ornament, Pokemon

♥ Day 5; Pichu Felt Ornament

5 december 2018 by Delinlea Leave a Comment

Hey lovelies! Day 5 is here and time for a new DIY! The 3rd ornament for Blogmas is here. And a bunch more will come, I’m hoping you’ll be happy with that! ^^
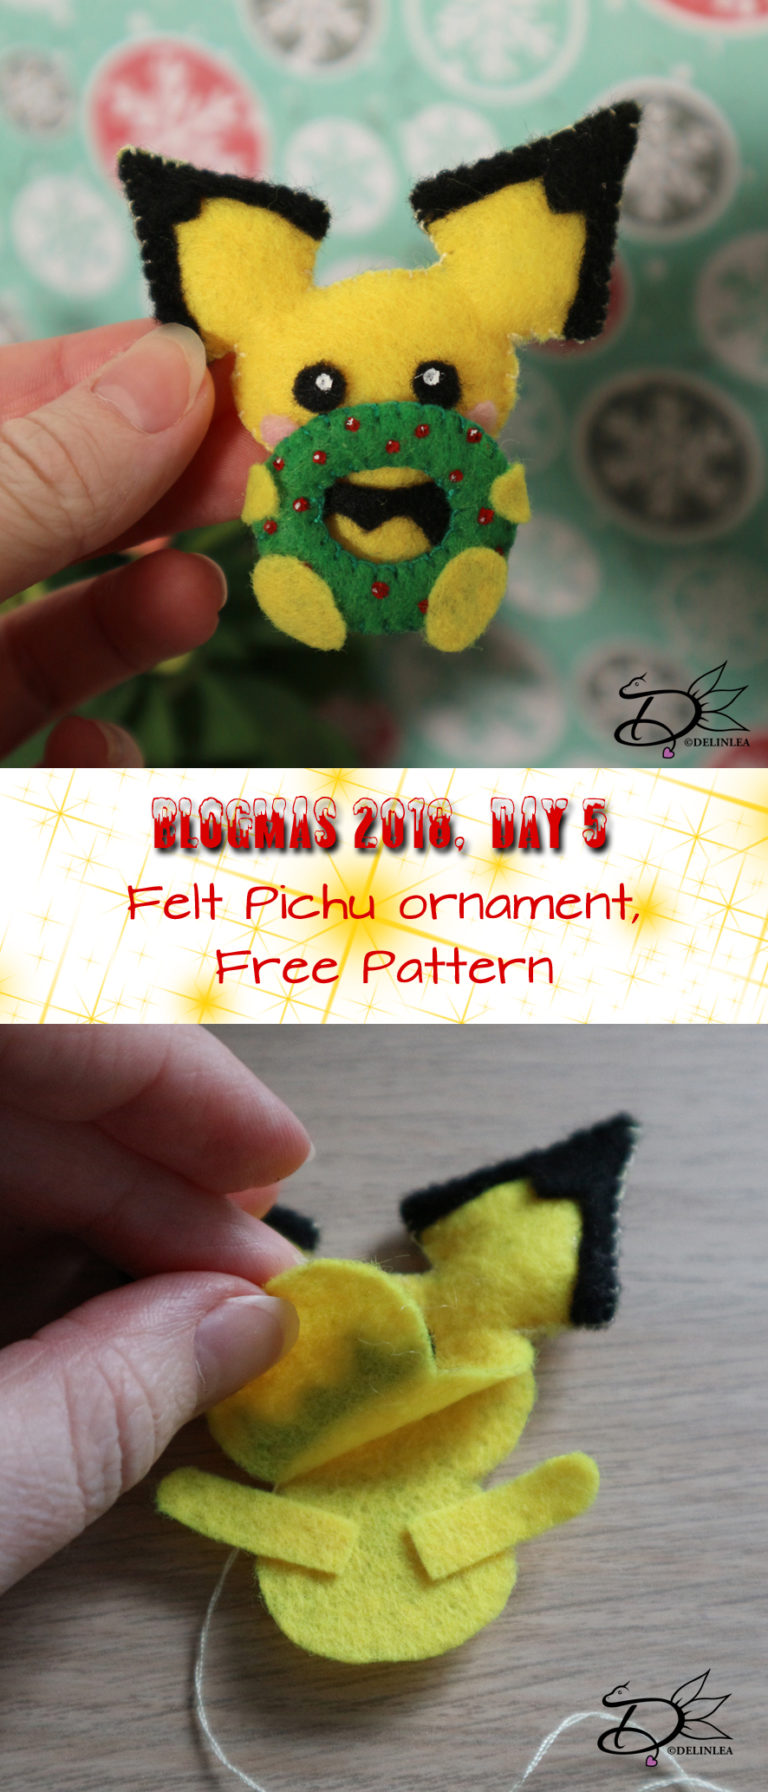
Today we are going to make a Pichu who’s holding a wreath. I love it, let’s go~~!

For this DIY you’ll need:
♥  Felt in the colors Yellow, Black, Green and Pink.
♥  Sewing thread in matching colors to the felt.
♥  Sewing Needle.
♥  Trick Marker or anything else where you can copy the pattern with onto your felt.
♥  Pattern.
♥  Scissors.
♥  Stuffing.
♥  Fabric Glue. (optional)
♥  Acryllic Paint in Red and White.

DIY

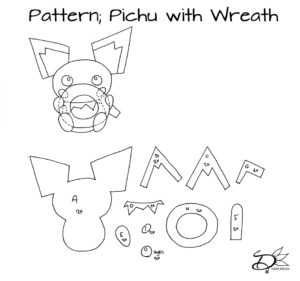
First off all, download the pattern HERE! And print it out (or draw it from your screen). The good thing is, you can make it as big as you want! Then cut out all the pieces. On every piece is stated how many times you need to cut it out of felt.

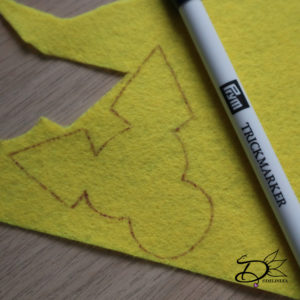
Use a trick marker or anything else you can copy the pattern with on to the felt. Cut Parts A, E and F out of yellow felt. Parts B, C, D, G and the eyes out of black felt. Part i you’ll cut out of pink and part H you’ll cut out of green felt. Make sure you’ll cut out the right amount of every piece, the way it’s stated on the pattern.
Don’t loose track of which piece is which.

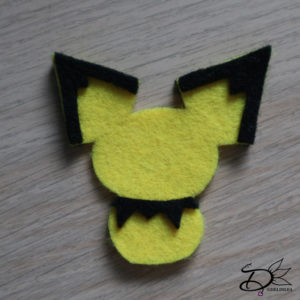
On part A you’ll position parts B (left ear), C (right ear) and D on the right places. You can use a tiny bit of glue to keep them in place.

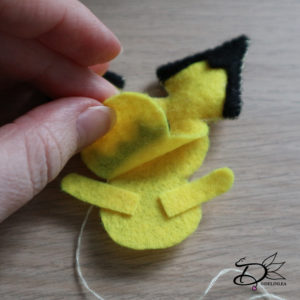
Then start sewing at the right ear with a blanket stitch. Make sure before closing the first ear, that you’ll stuff it already! You will get in trouble if you don’t. Just go along the edge of the head, the other ear, and do the same for the other ear with stuffing. Before you start closing the body, make sure you place the arms (part F) in between the layers. and use a running stitch to keep the in place, sew the rest of the body with the blanket stitch. And before entirely closing it up, stuff the head and body.

Glue the eyes and the cheeks to his face, and with a white dot of acryllic paint you’ll bring the eyes alive.

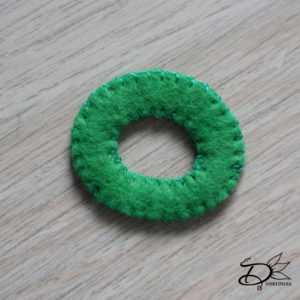
Sew both part H togheter with a blanket stitch, both the inside and the outside of the wreath. When you are done, paint red dots on there (little berries). You can put a tiny white dot in every ‘berry’ for a bit of shine.

Position the wreath and glue it to the body. Then glue the hands around the wreath. On the wreath you’ll glue the feet (part E) and the tail (part G) on his back.

And another felt ornament is ready! cute right?! Share yours with #DelinleaBlogmas2018DIY on twitter or insta!

I will see you tomorrow again! Have a nice day!

Love
Danielle


Posted in: Blogmas 2018, Crafting, Pokemon Tagged: blogmas 2018, Christmas, DIY, felt, Free, ornament, pichu, Pokemon
1 2 Volgende »

What are you looking for?!

My Socials

Ko-Fi

I love making all these free things for you, tho it would be very helpfull if you can support me on Ko-Fi! (You don’t have to tho, totally up to you!)

Ko-Fi Shop!!

In my Ko-Fi shop you can find PDF Amigurumi Patterns!! You can pay easily with PayPal.
Go to the shop here!!

Recent Blog Posts

  • ♥ Happy 2022!
  • ♥ Day 12; Lights
  • ♥ Day 11; Flower Deco
  • ♥ Day 10; Snowman
  • ♥ Day 9; Gingerbread Houses

Recent Comments

  • Liane Van der Donck op ♥ Amigurumi Ghost
  • Kimberly Spear op ♥ Free Pattern; Amigurumi Shiber
  • Delinlea op ♥ Pua Tsum Tsum Amigurumi
  • Marfermar op ♥ Free Pattern; Easter Bunny
  • mary op ♥ Pua Tsum Tsum Amigurumi

Categories

  • animation
  • Beadwork
  • Blogmas 2018
  • Blogmas 2020
  • Blogmas 2021
  • Books
  • Bujo
  • Christmas
  • Christmas CAL 2019
  • Christmas Countdown 2017
  • Contest
  • Crafting
  • Crochet
  • Drawing
  • Drawing Lesson
  • Easter
  • Geen categorie
  • Life
  • Miniature
  • Nail Art
  • New Year
  • Paper
  • plush
  • Pokemon
  • Poseable Art Doll
  • Recipe
  • Sewing
  • Shop Pattern
  • Sinterklaas
  • Social Media
  • Tsum Tsum
  • Ufufy

Copyright © 2023 Delinlea - My little fantasy world.

Family WordPress Theme by themehall.com