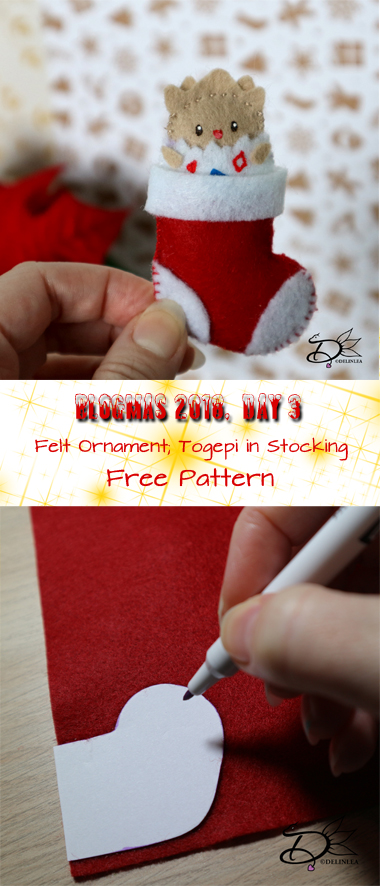
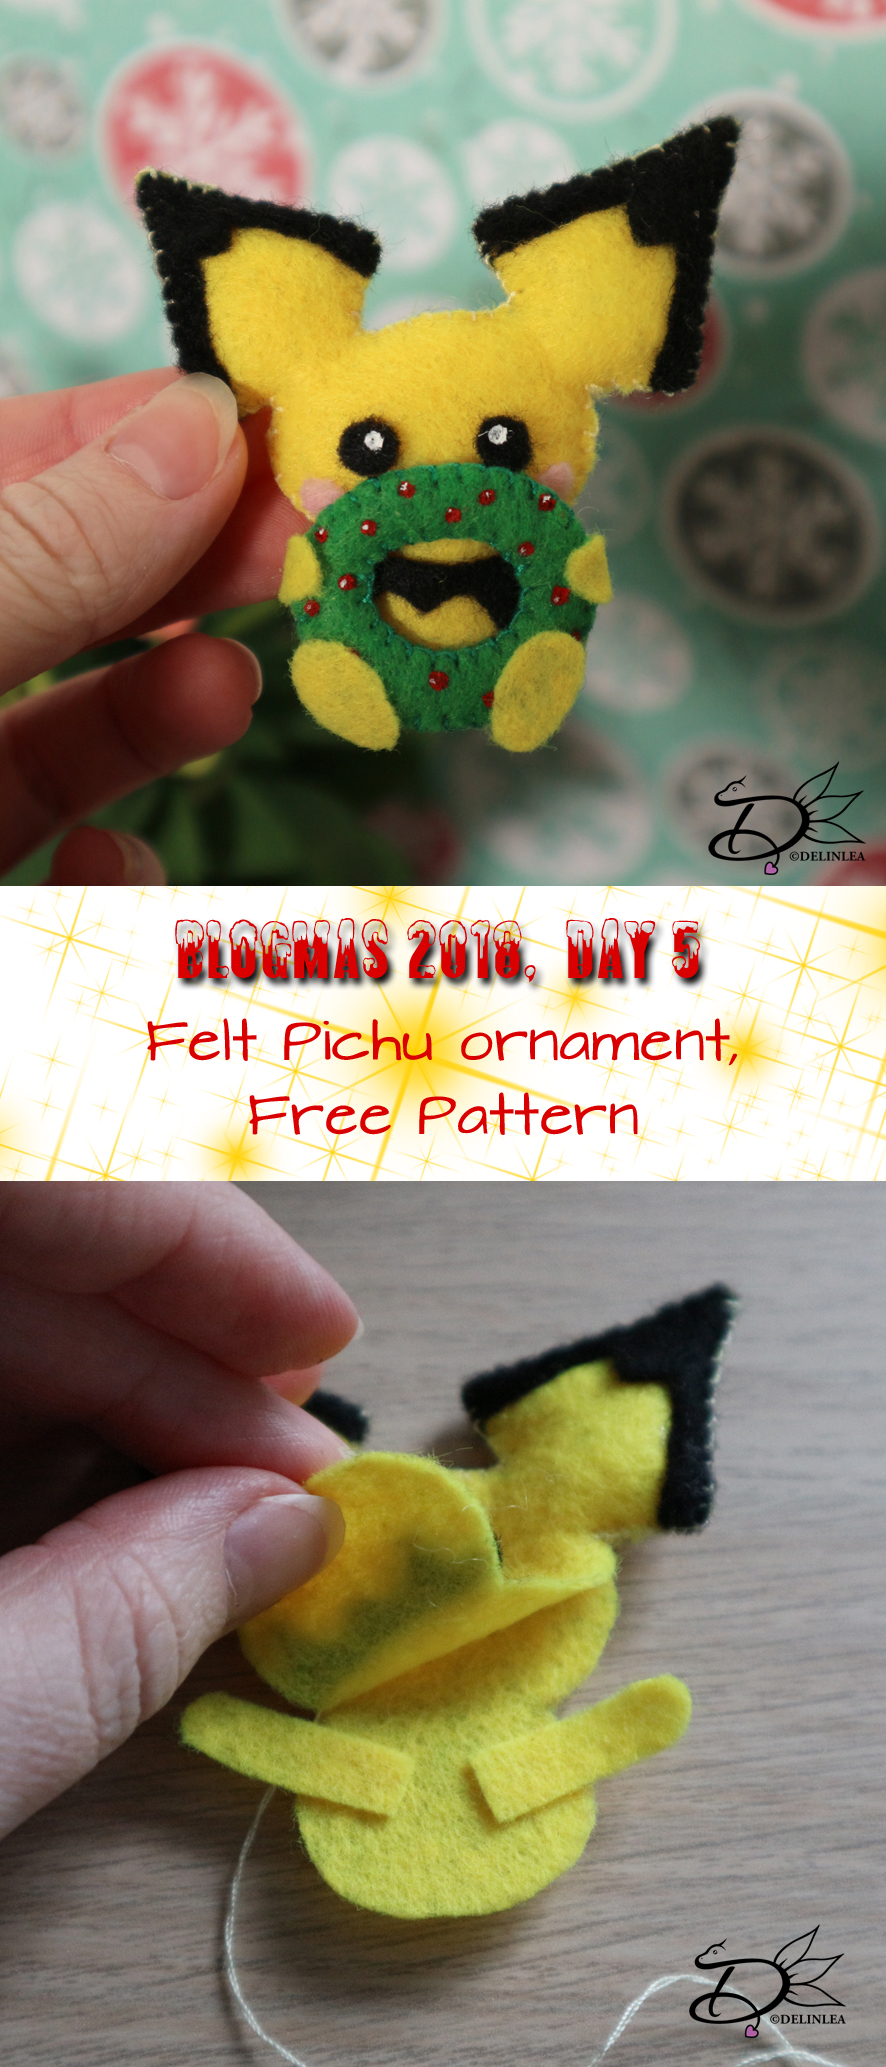
♥ Day 5; Pichu Felt Ornament
Hey lovelies! Day 5 is here and time for a new DIY! The 3rd ornament for Blogmas is here. And a bunch more will come, I’m hoping you’ll be happy with that! ^^
Today we are going to make a Pichu who’s holding a wreath. I love it, let’s go~~!
For this DIY you’ll need:
♥ Felt in the colors Yellow, Black, Green and Pink.
♥ Sewing thread in matching colors to the felt.
♥ Sewing Needle.
♥ Trick Marker or anything else where you can copy the pattern with onto your felt.
♥ Pattern.
♥ Scissors.
♥ Stuffing.
♥ Fabric Glue. (optional)
♥ Acryllic Paint in Red and White.
DIY
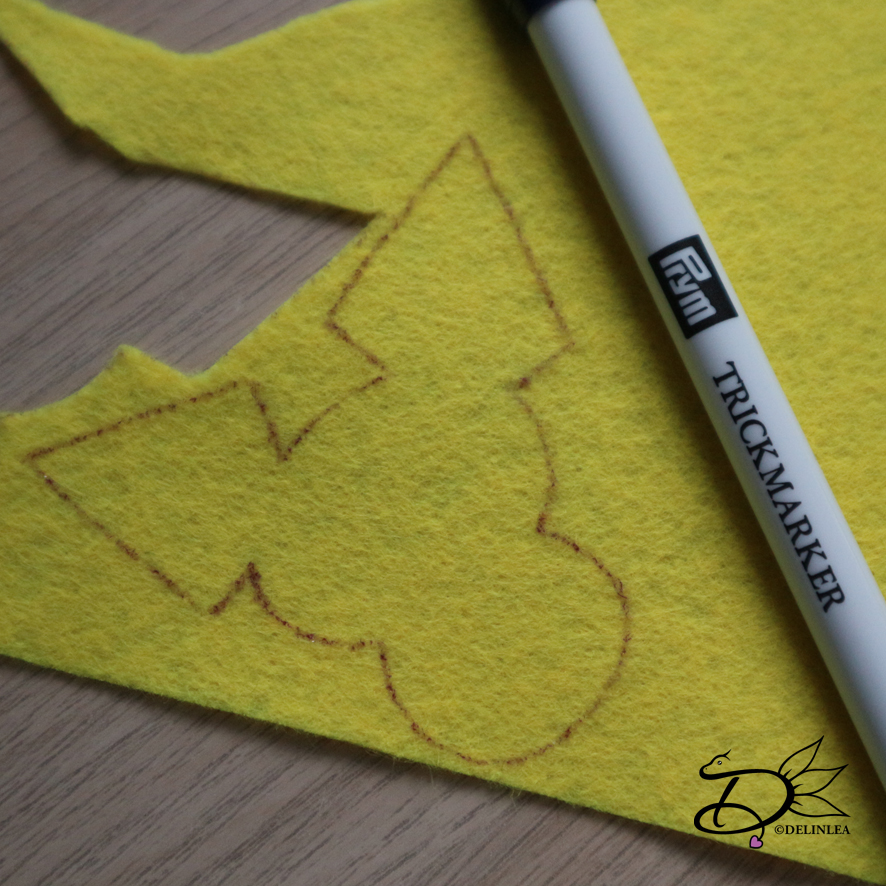
First off all, download the pattern HERE! And print it out (or draw it from your screen). The good thing is, you can make it as big as you want! Then cut out all the pieces. On every piece is stated how many times you need to cut it out of felt.

Use a trick marker or anything else you can copy the pattern with on to the felt. Cut Parts A, E and F out of yellow felt. Parts B, C, D, G and the eyes out of black felt. Part i you’ll cut out of pink and part H you’ll cut out of green felt. Make sure you’ll cut out the right amount of every piece, the way it’s stated on the pattern.
Don’t loose track of which piece is which.
On part A you’ll position parts B (left ear), C (right ear) and D on the right places. You can use a tiny bit of glue to keep them in place.
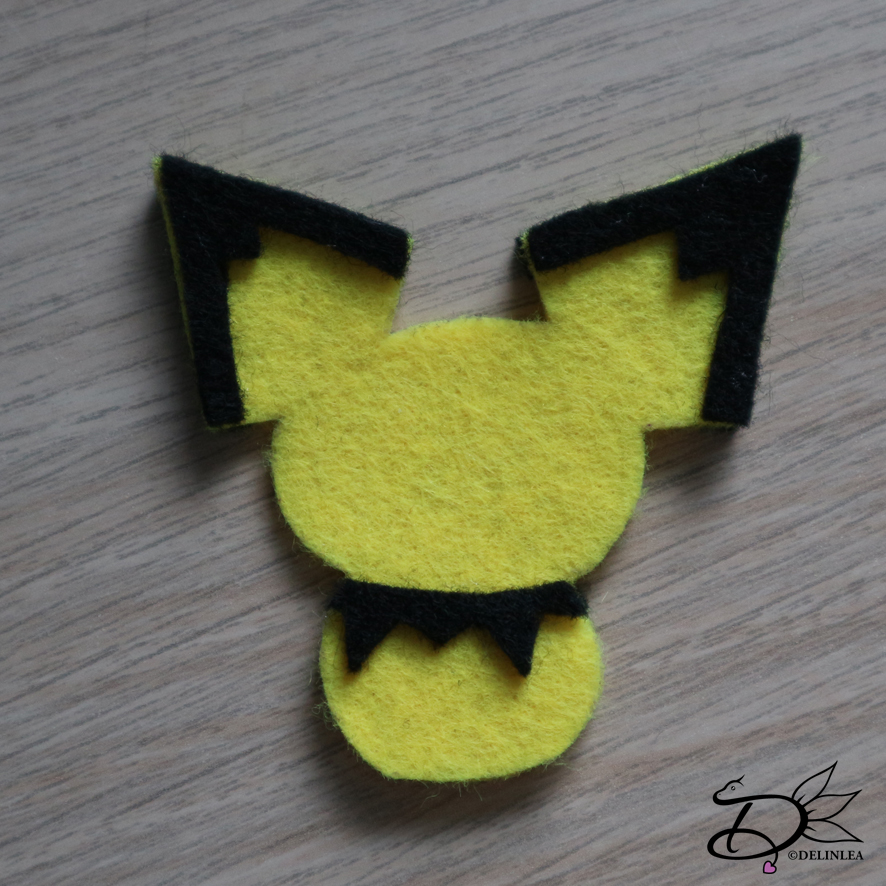
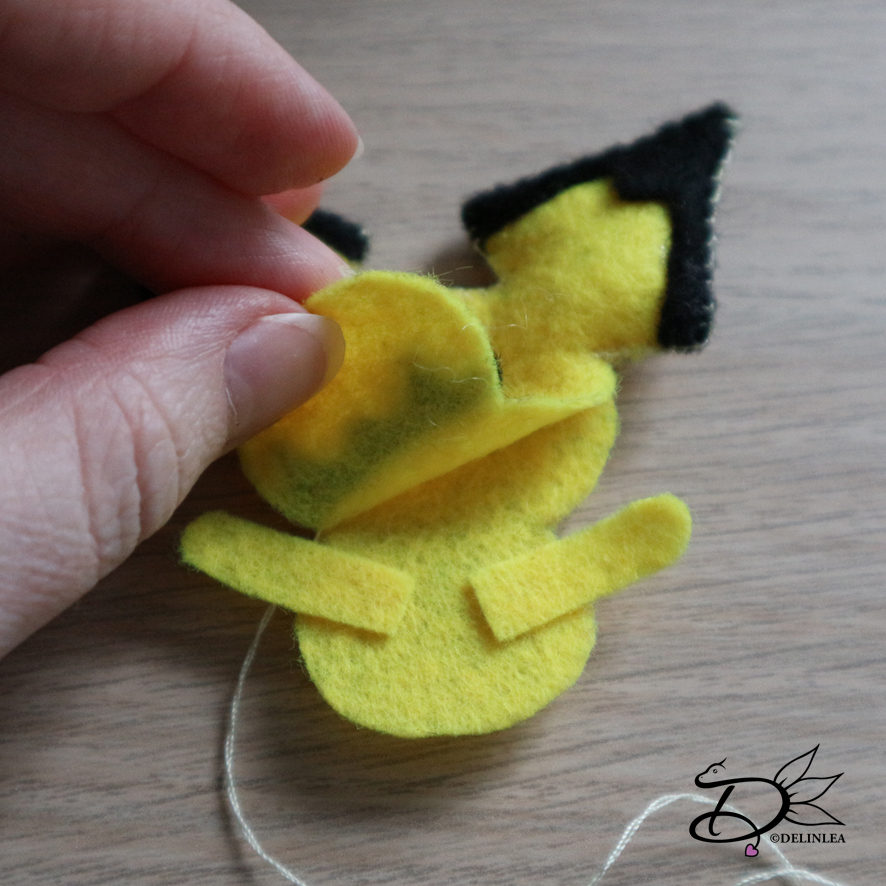
Then start sewing at the right ear with a blanket stitch. Make sure before closing the first ear, that you’ll stuff it already! You will get in trouble if you don’t. Just go along the edge of the head, the other ear, and do the same for the other ear with stuffing. Before you start closing the body, make sure you place the arms (part F) in between the layers. and use a running stitch to keep the in place, sew the rest of the body with the blanket stitch. And before entirely closing it up, stuff the head and body.
Glue the eyes and the cheeks to his face, and with a white dot of acryllic paint you’ll bring the eyes alive.
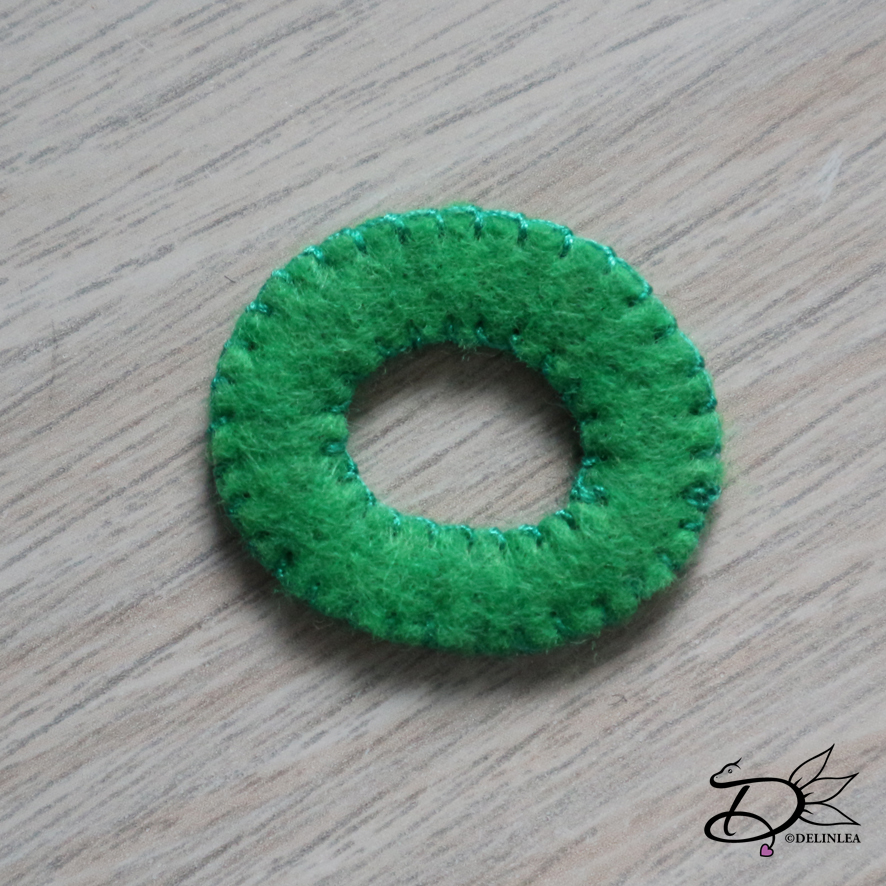
Sew both part H togheter with a blanket stitch, both the inside and the outside of the wreath. When you are done, paint red dots on there (little berries). You can put a tiny white dot in every ‘berry’ for a bit of shine.
Position the wreath and glue it to the body. Then glue the hands around the wreath. On the wreath you’ll glue the feet (part E) and the tail (part G) on his back.
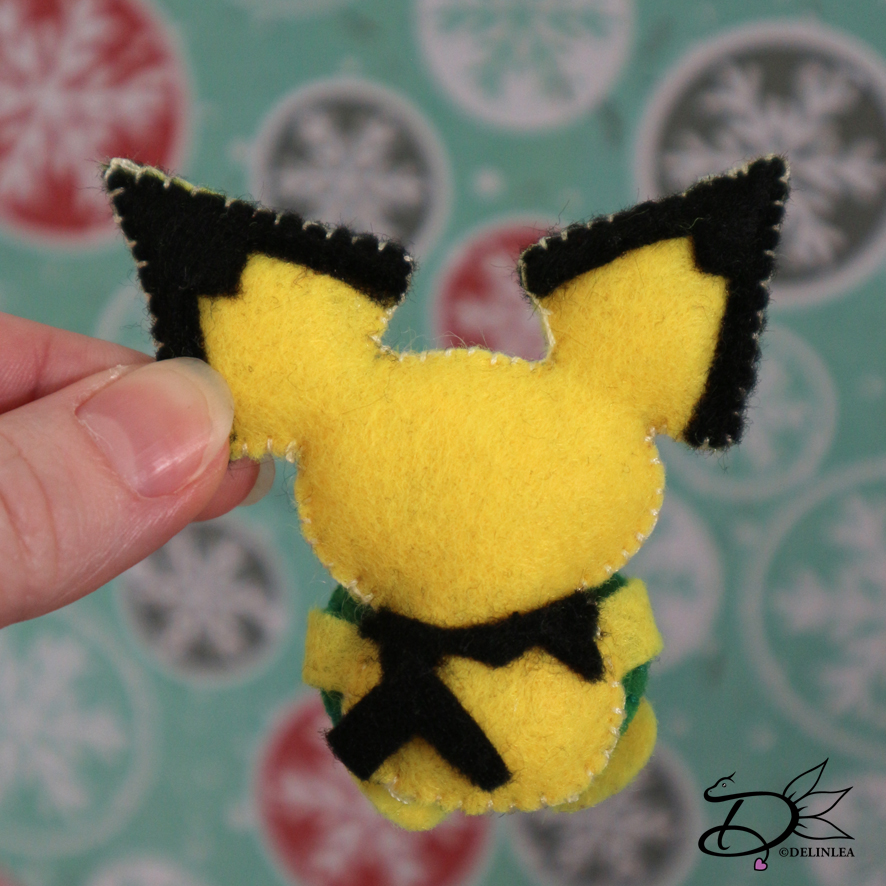
And another felt ornament is ready! cute right?! Share yours with #DelinleaBlogmas2018DIY on twitter or insta!
I will see you tomorrow again! Have a nice day!
Love
Danielle