Delinlea - My little fantasy world
  • ♥ Home
  • ♥ About Me
  • ♥ Blogmas 2021
  • ♥ Free Patterns
    • ♥ Amigurumi; Spring/Easter
    • ♥ Amigurumi; Fall/Halloween
    • ♥ Amigurumi; Winter
    • ♥ Amigurumi Tsum Tsum
    • ♥ Amigurumi Ufufy
    • ♥ Amigurumi Others
    • ♥ Christmas Countdown 2017
    • ♥ Blogmas 2018
    • ♥ Blogmas 2020
  • ♥ Tutorials
    • ♥ Easter
    • ♥ Home Deco
    • ♥ Others
  • ♥ Drawing Lessons
  • ♥ FanFic
    • ♥ Chapter 1
    • ♥ Chapter 2
    • ♥ Chapter 3
    • ♥ Chapter 4
    • ♥ Chapter 5
    • ♥ Chapter 6
    • ♥ Chapter 7
  • ♥ Gallery
    • ♥ Crafts
    • ♥ Drawings
    • ♥ Poseable Art Dolls
  • ♥ Links
  • ♥ Contact

Crafting

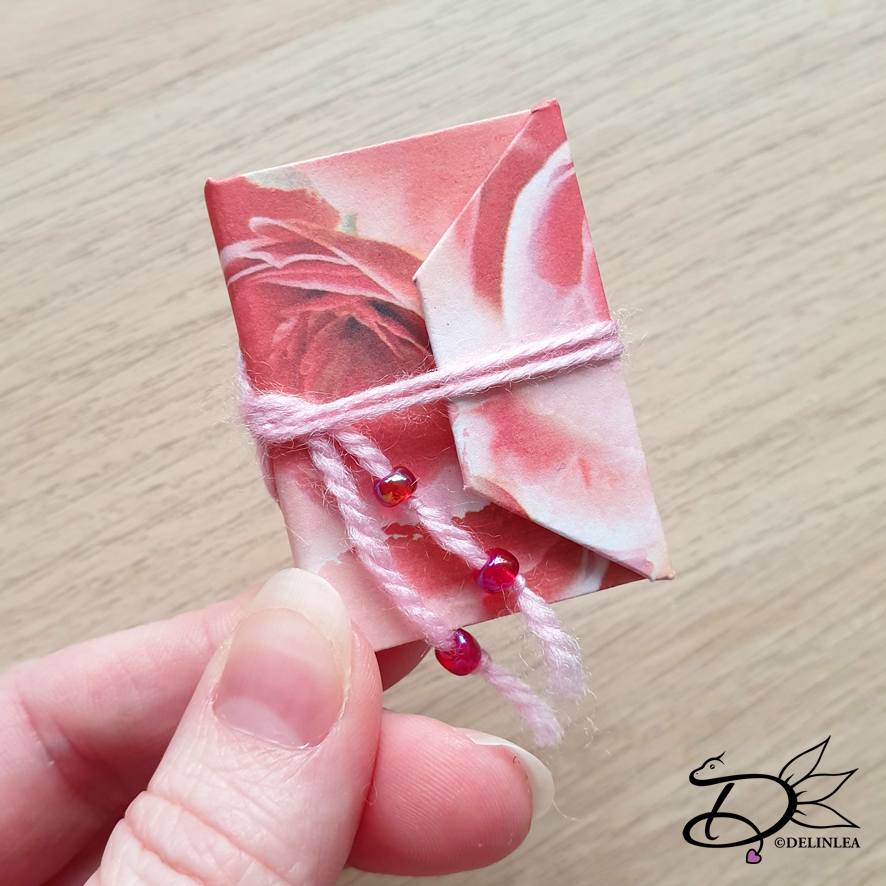
♥ DIY Envelope Booklet

13 februari 2020 by Delinlea Leave a Comment

Hey Lovelies! Did you also survive the storm Ciara, if you lived in Europe? It really went nuts here, but nothing got damaged and I could walk most of the days without been blown away haha. I kinda like to walk outside when it storms, not completely sure why, just love it. For today I wanted to make a small booklet that looks like an envelope. I first wanted to create something else, but what I imaged, didn’t worked out in reality. So sad, but sometimes it’s like that. I hope you’ll like this tutorial. The booklet would also be very cute to use as a valentines gift with little notes or drawings, how cute would that be?!

Envelope Booklet

For this DIY you’ll need:
♥ 1mm Board.
♥ Pretty Cardstock or Paper.
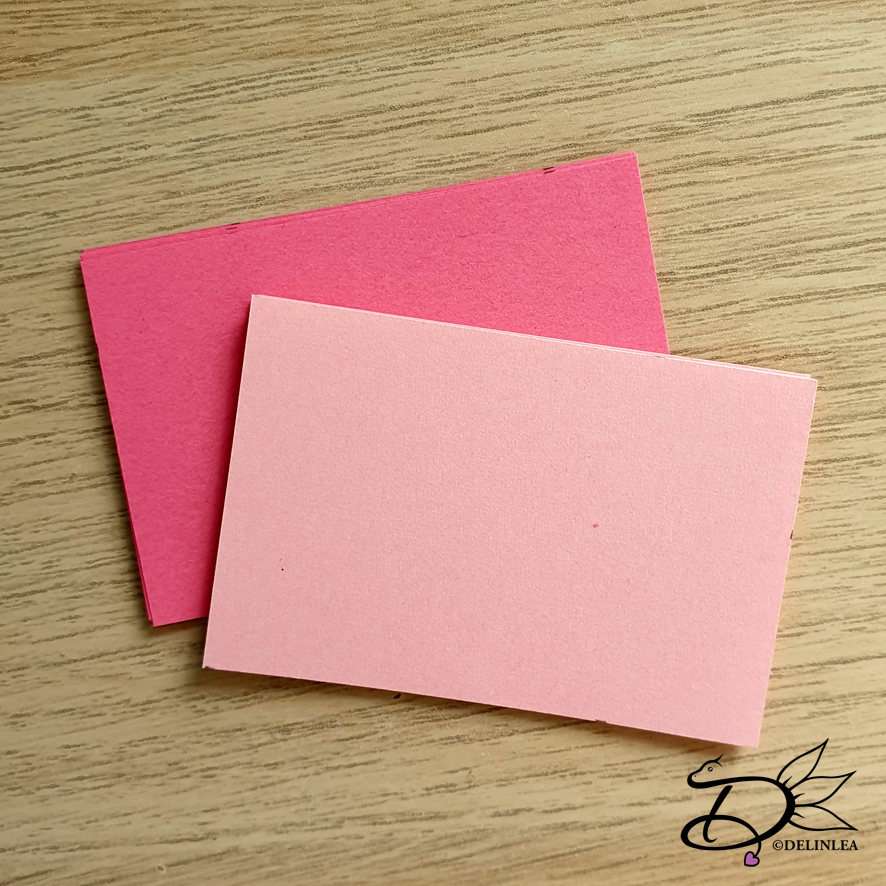
♥ Paper for the sheets inside, I used dark and light pink.
♥ Scissors.
♥ Ruler.
♥ X-acto Knive.
♥ Glue.
♥ Needle that’s strong enough to poke through board.
♥ Piece of Yarn, about 30cm.
♥ Beads. (optional)

DIY

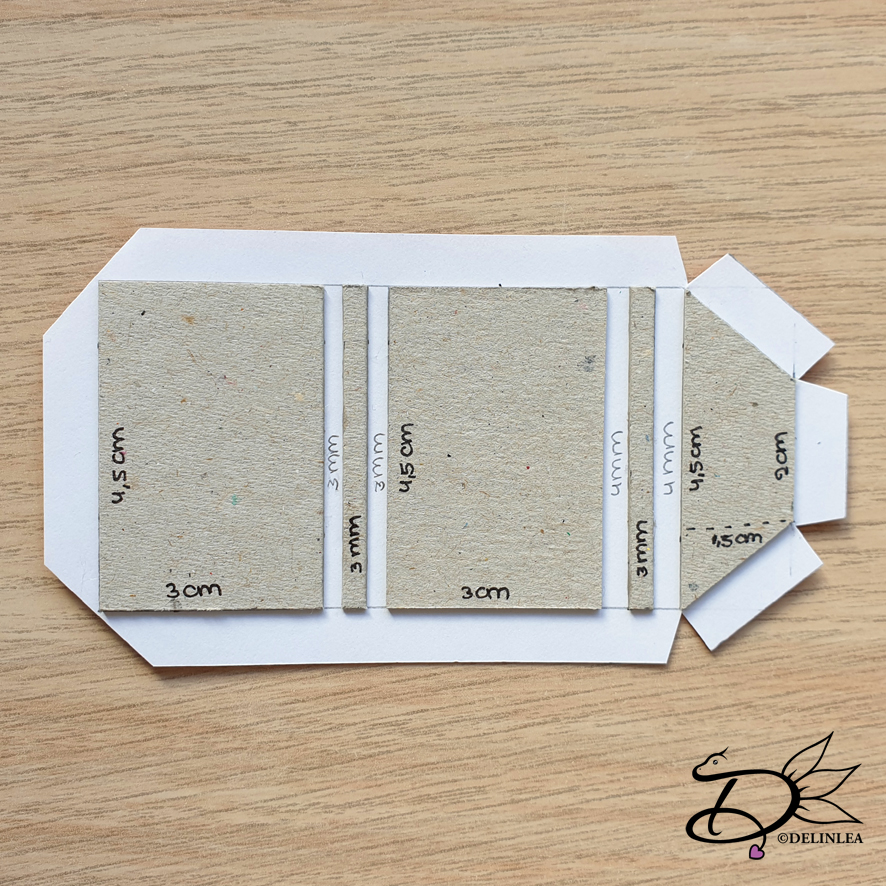
Cut the board to size, according to the picture below. All heights are the same, 4,5cm.

Then also cut the cardstock that you wanna use for the cover. The best way to do this is to start measuring out 0,75cm, then line up all the pieces including the space in between the spine pieces of the book, and add another 0,75cm. Add 0,75 on the top and bottom as well. Try to make it look like the picture below. (The good side of the paper is facing down).

Glue all pieces of board to the cardstock.

Now cut all the corners of the cardstock, like I did in the picture. Make sure to leave a little space close to the board (about 1mm) so the corners will get covered nicely.

Now glue all edges around the board.

For the inside of the cover, choose some paper/cardstock you like and cut it to size. It’s the same size but 1,5mm less from all edges.
Glue this to the inside.

Pages for the Booklet

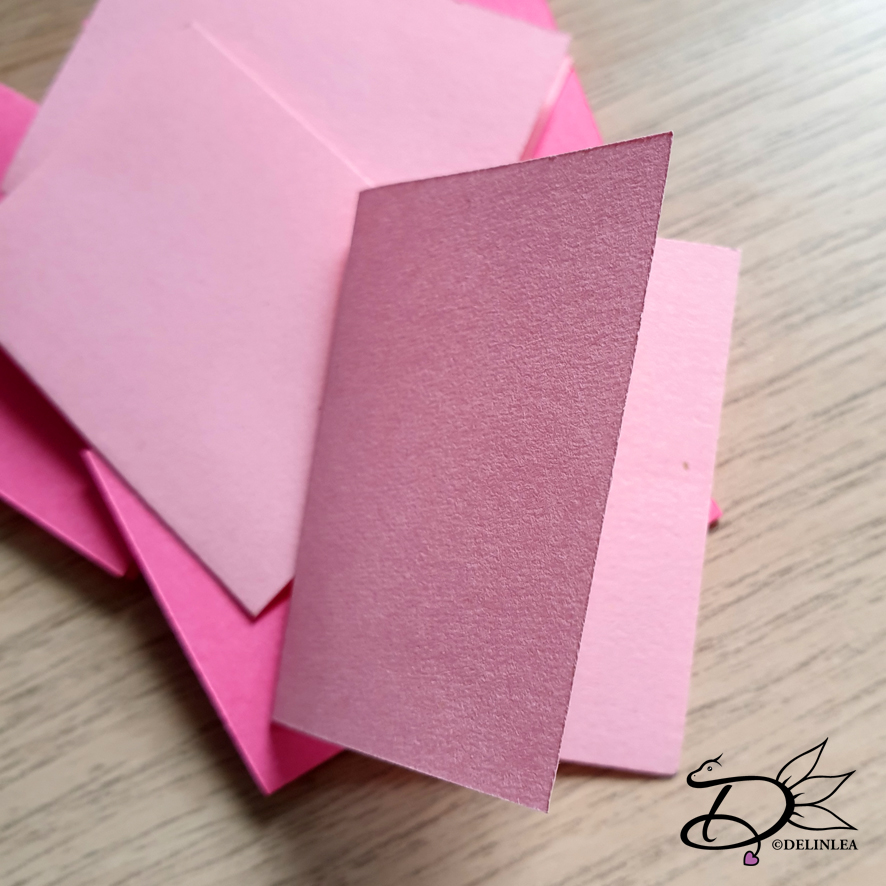
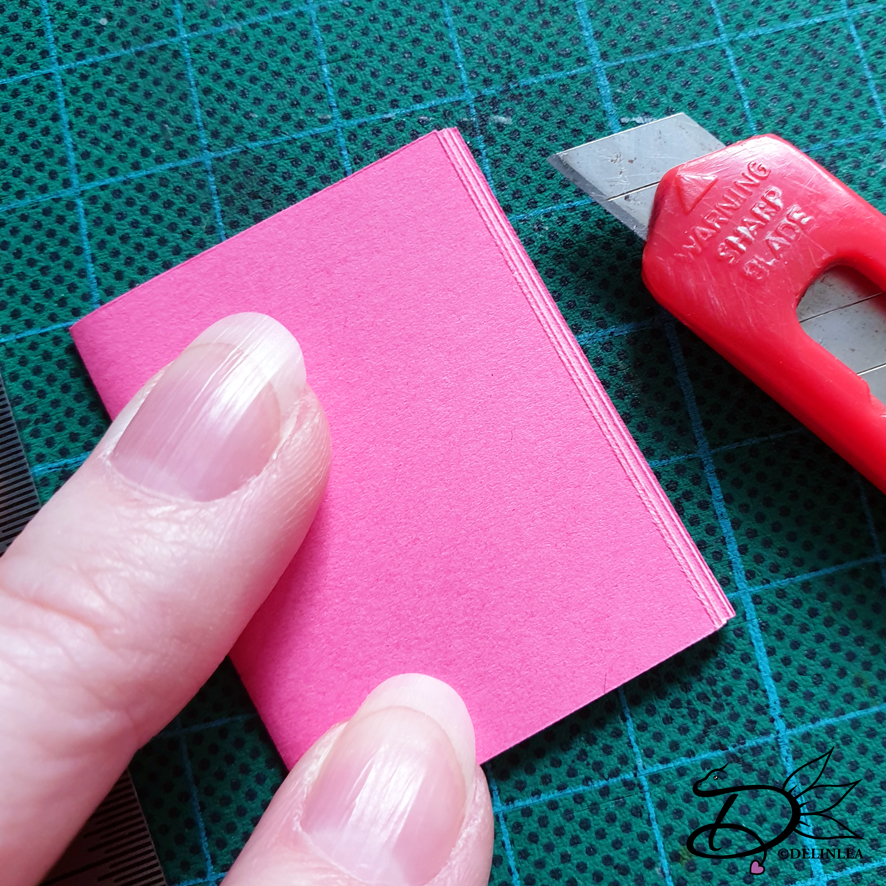
Cut 7 sheets of paper for the pages of the booklet, 6 by 4cm. Fold them in half on the short side, so you get folded sheets of 3 by 4cm.

Stack all sheets together. As you will notice, when you stack them together, you can an outward facing V-shape on the side where you would open the book. You can leave them as it is. Or trim it down smooth. Just what you prefer.

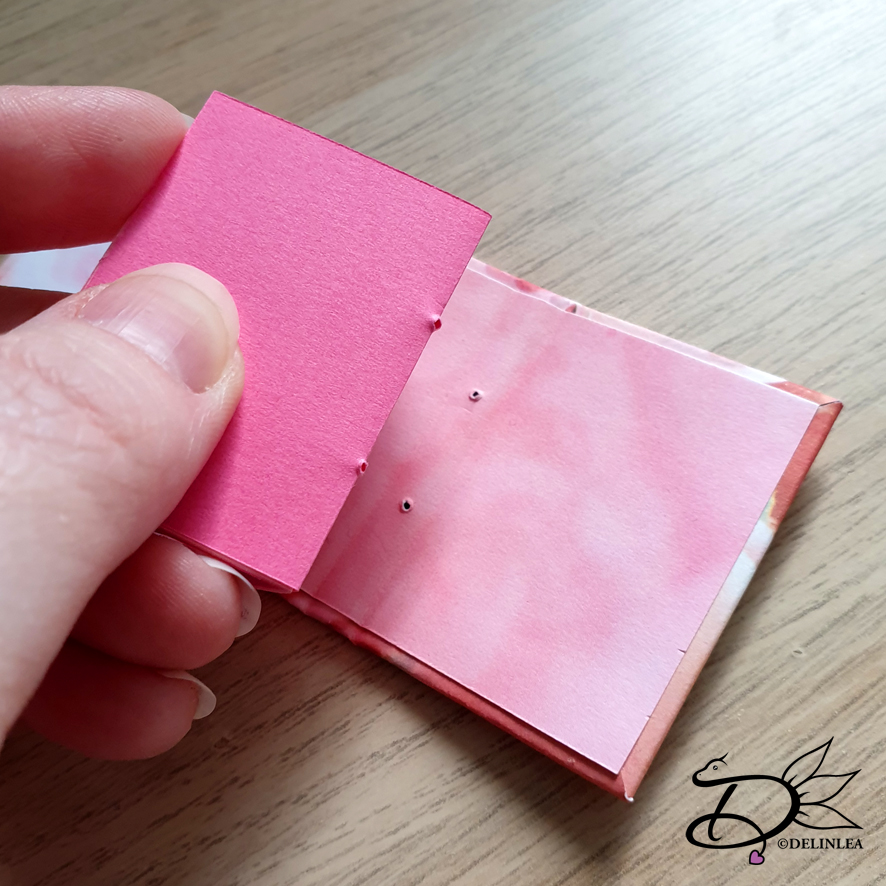
It’s time to make the binding holes. Measure 1,25cm inwards on the spine at the left side. Both from top and bottom so you’ll end up with 2 holes. Poke those through with a needle, make sure to be careful. Copy those holes to the pages and poke those through as well.

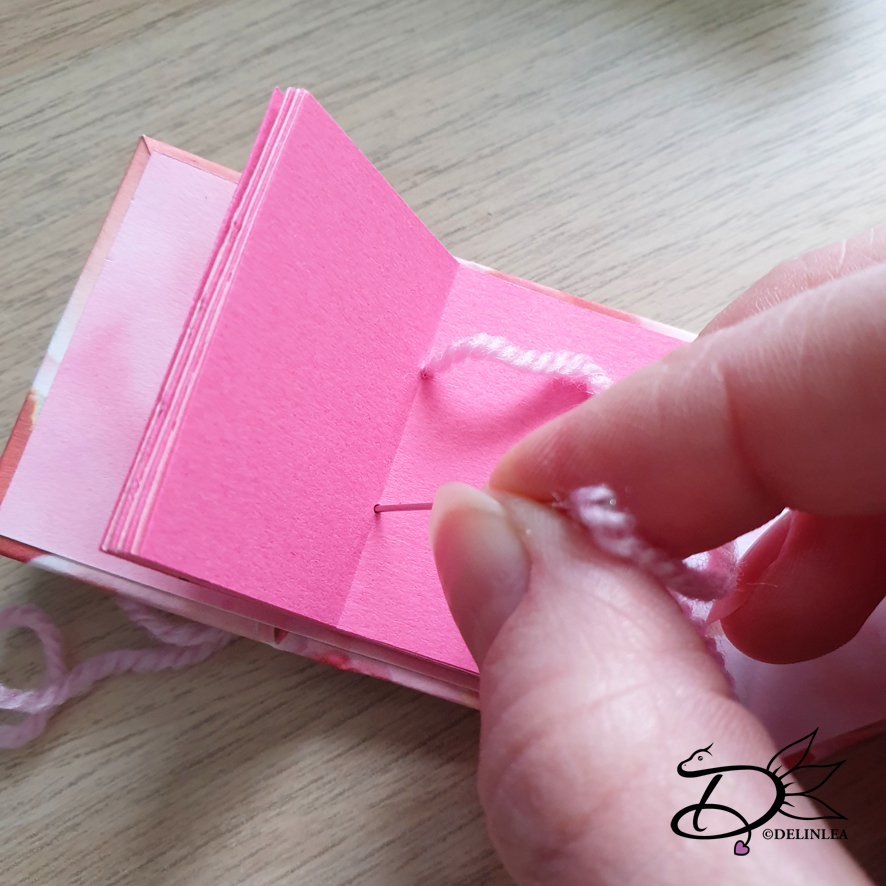
Using the yarn, put it on your needle and go from the outside of the book to the inside, through the stack of pages. Then go through the other hole to the outside again. Tie a knot on the outside, on the spine. Try to have even ends of the yarn.

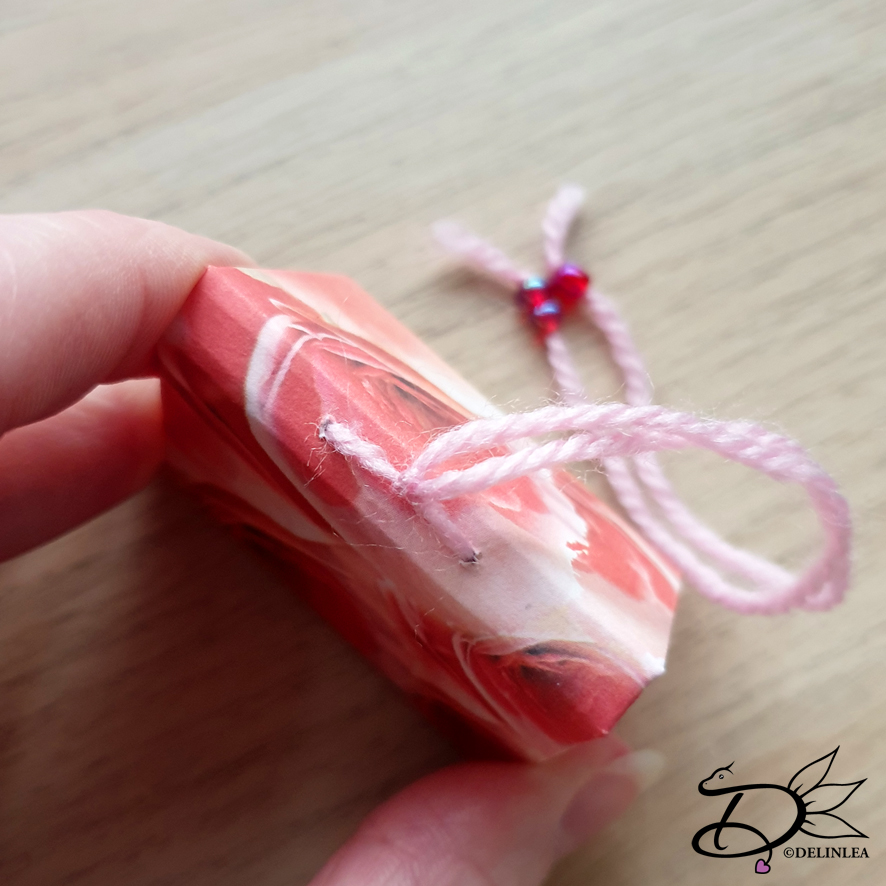
The ends of the yarn you can decorate if you prefer, for example with beads and use those ends to be able to close the book. You can also use a sticker for example to close it or anything else you can think of.

Envelope Booklet

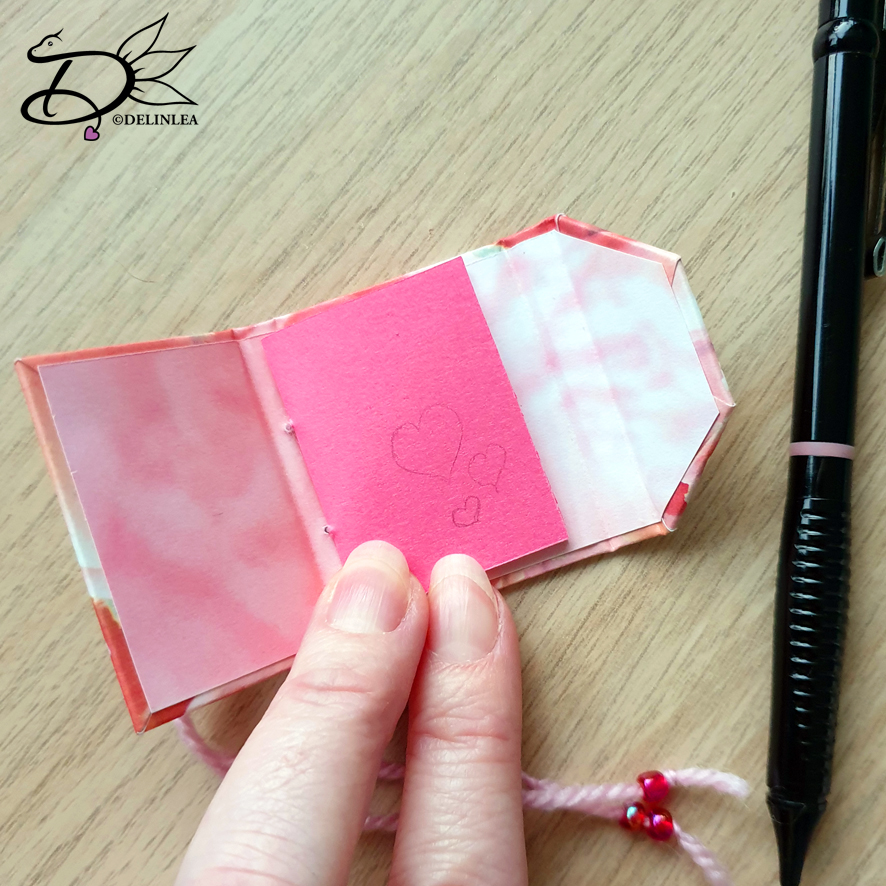
And you just reached the end of the DIY. I hope you enjoyed making this little booklet! It would be a fun gift for your valentine with a cute little message or drawings.

I hope you had fun, and I’ll see you next week!

Love
Danielle

Posted in: Crafting, Paper Tagged: Bookbinding, booklet, cute, DIY, envelope, kawaii, mini, tiny, Tutorial, Valentine

♥ Free Pattern; Hearty

6 februari 2020 by Delinlea Leave a Comment

Hey Lovelies! Are you ready for today’s blog? I hope you are. Soon it will be Valentine’s day, so to stay in the love thoughts I made something with a heart, used as a body for today’s amigurumi! You can make this for your lover.. or.. maybe even better something just for yourself. It’s very important to love yourself! Hearty will love you for sure. Let’s go to the pattern.

Hearty

For this Pattern you’ll need:
♥ DK Yarn in the colors; Pink and White. (I used Stylecraft Special)
♥ Some extra Red yarn for the Nose.
♥ Crochet Hook (I used a 2,5mm hook).
♥ Stuffing.
♥ Scissors.
♥ Sewing Pins.
♥ Yarn Needle.
♥ Wire, 0,3mm, about 10cm.
♥ 2 White Mini Pompom’s, 1cm in diameter, bought or made by yourself.
♥ Glue.
♥ Safety Eyes, 7mm.

Stitches used (US Terms):
Magic Ring.
CH = Chain.
SLST = Slip Stitch.
SC = Single Crochet.
DC = Double Crochet.
TR = Treble Crochet.
ST = Stitch.
BL = Back Loops.
FL = Front Loops.
Inc = Increase.
Dec = Decrease.
(…) = Repeat the space in brackets the given number of times.
[…] = Total number of stitches.

Pattern Hearty

For this pattern you will work in continues rounds, unless stated otherwise.

Body
Use the Pink yarn.

1: 6SC in Magic Ring. [6]
2: 2SC in each st around. [12]
3: (1SC, inc) 6 times. [18]
4: 18SC. [18]
Cut the yarn and make row 1-4 a second time without cutting the yarn.
5: 9SC, attach the other part you made earlier, 18SC, continue working on the first part, 9SC. [36]
6: 36SC. [36]
The eyes go between those 2 rows, about 3cm apart.
7: (4SC, dec) 6 times. [30]
8: 30SC. [30]
9: 30SC. [30]
10: (3SC, dec) 6 times. [24]
11: 24SC. [24]
12: (2SC, dec) 6 times. [18]
13: 18SC. [18]
14: (1SC, dec) 6 times. [12]
15: 12SC. [12] Stuff.
16: Dec all around.[6]
Fasten off and weave in tail.

Belly
Use the White yarn.

In a Magic Ring, Ch3, 2TR, 3DC, Ch1, 1TR, Ch1, 3DC, 2TR, Ch3, SlSt in the base of the Magic Ring and pull tight. Leave a long tail for sewing.

Arms (Make 2)
Use the Pink yarn.

1: 6SC in Magic Ring. [6]
2: (1SC, inc) 3 times. [9]
3: 9SC. [9]
Fasten off and leave a long tail for sewing.

Feet (Make 2)
Start with the White yarn.

1: 6SC in Magic Ring. [6]
2: 2SC in each st around. [12]
Change to the Pink yarn.
3: FL, 12SC. [12]
4: 12SC. [12]
5: 12SC. [12]
6: Work this row just as you would normal, but also work in the BL of row 3 at the same time. This way you will create some definition in the feet. It can be a bit fiddly, but it’s doable. 12SC. [12]
7: 12SC. [12]
8: 6SC. [6]
Fasten off and leave a long tail for sewing. Stuff as well.

Tail
Use the White yarn.

1: 6SC in Magic Ring. [6]
2: 6SC. [6]
Fasten off and leave a long tail for sewing.

Ears (Make 2)
Use the Pink yarn.

1: 6SC in Magic Ring. [6]
2: 2SC in each st around. [12]
3: (3SC, inc) 3 times. [15]
4: 15SC. [15]
5: 15SC. [15]
Fasten off and leave a long tail for sewing.

Assembling

I always use sewing pins to position all of the parts first. This way I can easily move things around until I am happy with how it looks. I suggest you do the same.

Under the eyes, position the Heart Belly first and sew it on. From there position the feet the way you want them and sew those on too. Now you know where the arms go and the tail as well, sew those on. Last but not least sew on the ears, I place them from the first row of the body down.
From the wire, twist it around something round, like your crochet hook, but make sure your are able to get it off. Twist the whole length of the wire, closely beside each other. Take it off and cut in half. Stretch it to the length you want and glue one side to the pompom and one side to the head of the body.
With the bit of Red yarn, stitch on the nose as a finishing touch of Hearty!

Congratz! You finished Hearty!! xD I hope you enjoyed this pattern, if you did, please show me on socials! I would love to see!

Have a wonderful day!

Love
Danielle

Posted in: Crafting, Crochet Tagged: Amigurumi, bear, Crochet, cute, Free Pattern, haken, hearty, kawaii, pink, Valentine

♥ Free Pattern; Elsa TsumTsum Amigurumi

31 januari 2020 by Delinlea Leave a Comment

Hey Lovelies! I am so sorry I am posting this blog late this week! Some personal things were going on and I still haven’t managed to work ahead this year! I will try to do so, from now on, so I don’t stress myself out too much. Anyway, I am planning to make at least one Tsum a month. I’m quite excited about that, I hope you are too! For this week I planned to make a Elsa, from Frozen, as a TsumTsum! I had to figure out how to make her hair, but I guess I figured it out, I hope you will like her!? Let’s dive into this week’s pattern.

For this Pattern you’ll need:
♥ DK Yarn in the colors; Beige, Light Blue, Darker Blue, Light Yellow. (I used BudgetYarn.com and Stylecraft Special)
♥ Some extra White yarn for the details on her body.
♥ Crochet Hook (I used a 2,5mm hook).
♥ Stuffing.
♥ Scissors.
♥ Sewing Pins.
♥ Yarn Needle.
♥ Light blue felt.
♥ Glue.
For the Cape:
♥ White or Light Blue Mesh, 10 by 7cm.
♥ Dark Blue Acrylic Paint. (Optional)
♥ Brush. (Optional)
♥ Tape. (Optional)
♥ Piece of Glass. (Optional)

Stitches used (US Terms):
Magic Ring.
CH = Chain.
SLST = Slip Stitch.
SC = Single Crochet.
ST = Stitch.
Inc = Increase.
Dec = Decrease.
(…) = Repeat the space in brackets the given number of times.
[…] = Total number of stitches.

Pattern

For this pattern you will work in continues rounds, unless stated otherwise.

Body
Start with the Beige color.

1: 6SC in Magic Ring. [6]
2: 2SC in each st around. [12]
3: (1SC, inc) 6 times. [18]
4: (2SC, inc) 6 times. [24]
5: (3SC, inc) 6 times. [30]
6: (4SC, inc) 6 times. [36]
7: (5SC, inc) 6 times. [42]
8: 42SC. [42]
|
14: 42SC. [42]
Change to the Light Blue color.
15: 42SC. [42]
|
24: 42SC. [42]
Change to the Dark Blue color.
25: 42SC. [42]
|
29: 42SC. [42]
30: (5SC, dec) 6 times. [36]
31: (4SC, dec) 6 times. [30]
32: (3SC, dec) 6 times. [24]
33: (2SC, dec) 6 times. [18] Stuff.
34: (1SC, dec) 6 times. [12]
35: dec all around. [6]
Fasten off and weave in tail.
With white yarn, stitch on a stripe between row 14-15 and between row 19-20. In between those two stripes, make a snowflake pattern.

Legs (Make 4)
2 in Beige Yarn and 2 in Light Blue yarn.

1: 4SC in Magic Ring. [4]
2: 2SC in each st around. [8]
3: 8SC. [8]
|
5: 8SC. [8]
Fasten off and leave a long tail for sewing.

Ears (Make2)
Use the Beige color.

6SC in Magic Ring.
Fasten off and leave a long tail for sewing.

Hair
Use the Light Yellow color.

1: Ch11, insert in second Ch from hook, 9SC, 3SC in the next st, work along the other side of the Chain, 8SC, inc. [22]
2: Inc, 8SC, (inc) 3 times, 8SC, (inc) 2 times. [28]
3: 2SC, inc, (6SC, inc) 3 times, 4SC. [32]
4: (16SC, Ch5, insert in second Ch from hook, 4SC, continue working on the base shape) 2 times. [50]
5: 20SC, inc, 24SC, inc, 4SC. [52]
6: 52SC. [52]
Fasten off and leave a long tail for sewing.

Lock of hair
Use the Light Yellow color.

1: 4SC in Magic Ring. [4]
2: (1SC, inc) 2 times. [6]
3: 6SC. [6]
Fasten off and leave a long tail for sewing.

Strands of hair for the braid. (Make 6)
Use the Light Yellow color.

Chain 20.
Fasten off and leave along tail for sewing.

Cape from Elsa

The cape will be made from the mesh, you can leave it as it is of paint on detail with some acrylic paint. Tape the mesh to a very smooth surface, like glass (from a frame for example). Put the pattern I drew under the glass and trace this with the acrylic paint on the mesh. do about 2 layers of paint and let is dry very well. The you will carefully take it off the glass.

Assembling

I always use sewing pins to position all the parts, this way I can still move all the parts around until I am happy. Then I will sew it on.

First sew on the legs, the beige ones go on the beige part of the body, the light blue ones go on the dark blue part of the body.
Then sew on the hair. Start on the back side, so you can sew this along the edge of the light blue part of the body, this way you know where the front part of the hair goes. Stuff the hair while you sew along.  You will make sections of the hair. You do this with a long piece of matching yarn and go around the part you want the notch, pull tight until you are happy with the look. Make about 7 sections.
Now sew on the lock of hair in front and on the back sew on the strands of hair for the braid, about 3 side by side and the other 3 on top of those. Braid those together and tie them with a piece of light blue yarn.
Last make eyes out of felt and glue those on. Also attach the cape on her back, you can use glue of stitch it on. Finalize some details on her face.

And you are done! Isn’t Elsa adorable?! The only thing I would change are the eyes, I really wanna embroider them on. But that’s for later! I hope you enjoyed this pattern.

Have a wonderful day!

Love
Danielle

Posted in: Crafting, Crochet, Tsum Tsum Tagged: Amigurumi, Crochet, cute, Disney, Elsa, Free Pattern, haken, kawaii, Tsum Tsum

♥ Free Pattern; CNY Mouse Amigurumi

23 januari 2020 by Delinlea 4 Comments

Hey Lovelies! Guess what, it’s almost Chinese New Year! Saturday the 25th to be exact. Here in my country we don’t celebrate, sad enough, only some Chinese related things will, like restaurants. I wish I could go visit one to watch the fireworks, but I don’t live near one ;;. Anyway, 2020 will be the year of the rat/mouse. So I made a little something for you to make, it’s so adorable this little mouse!

CNY Mouse

For this DIY you’ll need:
♥ DK Yarn in the colors; Beige and Grey. (I used BudgetYarn.com)
♥ Some extra Pink yarn for the nose.
♥ Crochet Hook (I used a 2,5mm hook).
♥ Safety Eyes, 5mm.
♥ Stuffing.
♥ Scissors.
♥ Sewing Pins.
♥ Yarn Needle.

Stitches used (US Terms):
Magic Ring.
CH = Chain.
SLST = Slip Stitch.
SC = Single Crochet.
ST = Stitch.
Inc = Increase.
Dec = Decrease.
(…) = Repeat the space in brackets the given number of times.
[…] = Total number of stitches.

Pattern Mouse

Work in continues rounds, use a stitch marker to mark your first stitch of every row. This is for every part, unless stated otherwise.

Body
Use Grey yarn.

Before you start, prepare 3 strands of yarn, about 6cm. Tie them together with knot and put them aside. This will be for his hair.

1: 6SC in a Magic Yarn. [6] Before closing the magic ring, put in the 3 strands you prepared earlier, with the knot on the inside. now close the magic ring.
2: 2SC in each st around. [12]
3: (3SC, inc) 3 times. [15]
4: (4SC, inc) 3 times. [18]
5: 18SC. [18]
6: (5SC, inc) 3 times. [21]
7: 21SC. [21]
8: (6SC, inc) 3 times. [24]
9: 24SC. [24]
|
11: 24SC. [24]
12: (2SC, dec) 6 times. [18]
13: (1SC, dec) 6 times. [12] Place the eyes between row 5 and 6, about 1cm apart. Stuff the body firmly.
14: Dec all around. [6]
Fasten off and weave in tail.

Ears (Make2)
Use Grey yarn.

1: 6SC in a Magic Ring. [6]
2: 2SC in each st around. [12]
3: 12SC. [12]
4: 12SC. [12]
5: (2SC, dec) 3 times. [9]
Fasten off and leave a long tail for sewing. You don’t stuff, just flatten the ears.

Tail
Use the Beige yarn.

Chain 18 and leave a long tail for sewing.

Assembling

Whenever I start assembling Amigurumi’s I use sewing pins to put all things together first. This way I can move them around until I am happy with how it looks.

For the hairs you added when you started with the body, those 3 strands of grey yarn. Unraffle those, so they get fluffy. When you have done that, trim it to the size you like!

Make a little nose with pink yarn. After that position the ears and sew them on. Do the same for the tail. And you are already done. This is a real quick one!

I hope you liked making this little mouse! So adorable if you ask me. I might wanna make some other colors as well. And if you saw my insta stories, the body only with the eyes and hairs is very cute as well, who needs ears and a tail?! xD

Have a wonderful day and enjoy the Chinese New Year if you celebrate!

Love
Danielle

Posted in: Crafting, Crochet, New Year Tagged: 2020, Amigurumi, Chinese new year, CNY, Crochet, cute, Free Pattern, haken, kawaii, Mouse, Rat

♥ Tutorial; Clay Snow Dragon

16 januari 2020 by Delinlea Leave a Comment

Hey Lovelies! How are you doing?! I am sad it’s still raining and storming outside, no snow for me. I keep imagining how much snow all the rain would have been xD. Anyway I am still in winter mode, so I have made this adorable snow dragon out of clay. Just a little sculpture to have around and lift up the winter spirit. It’s perfect to use clay around this time of year.

Clay Snow Dragon

For this DIY you’ll need:
♥ Aluminum Foil.
♥ Air Dry Clay.
♥ Skewer.
♥ Some Rough Brush or Tooth Brush for Clay Purposes.
♥ Water and/or Glue.
♥ Some Branches.
♥ Clay tools.
♥ Acrylic Paint.
♥ Varnish.
♥ Brush.
♥ Glitter/nailart deco. (optional)

Tutorial

Make 2 balls out of aluminum foil. One about 3,5cm and the other about 2cm.

Prick the skewer in the large ball, this makes it easier to hold. Cover it entirely with clay, about 1cm thick. It doesn’t have to be perfectly smooth. If you ever made a snowman with real snow, you know that’s almost impossible the get a perfectly smooth ball xD. When it’s covered, texture the clay using the rough brush or toothbrush. If that’s done, put it upside down with the skewer straight up and let it dry before you continue. Usually with air dry clay, this doesn’t take too long, although it depends on the clay!

When the large ball is as good as dry, do the same for the small one, but don’t let it dry. Cut the skewer smaller and pull out the one of the large one. Add a bit of glue around the hole of the large ball and slide in the skewer of the small one. if you left any marks where you hold it, make sure to texture it again.

Take a bit of clay, a ball around 2cm and make a oval shape of it. Put it on a flat surface and flatten the side/edges towards the flat surface. (Not sure how to explain this well, check the pics). This will be his beak. If the clay of the small ball is still wet then you can use water to put both parts together, if not use a bit of glue. Try to smooth out the edges , doesn’t have to be perfect. Don’t forget to texture it!

Horns

Make two balls out of clay, approx  0,5cm each. Make a pine cone shape of both balls. Glue those to the head where you like them. try to smooth out the edges and texture those as well.
From here I let it completely dry before I continued.

Tail

Make a long cone shape that you wanna use for the tail. At the widest part you wanna slice a part of with a knife to be able to apply it to the body easily. Texture the tail too.

Shawl

Make a long snake of clay, and flatten it a bit. Wrap about 10 to 15 cm around his neck (depends on your work), like shown in the picture. Make sure to use a bit of glue/water, cause air dry clay won’t stick to dry air dry clay.
Now make a little gap where the clay starts to overlap. In here you will add another piece of the flatten snake you made. Cut off about 4 to 5cm of the snake and flatten one side of it a bit more, this will make it easier to slide in the gap. If you have done that, add it carefully in the gap and fold the remaining part down. Make sure to use glue here as well.

Ears

Make 2 balls of about 1cm each and shape those into a flat-ish triangle. Apply those to the head and make sure to texture those as well.

Arms

Poke a hole with something sharp on the place where you want the arms to go. Cut pieces of a branch to the size you like and put those in the holes you just made.

Eyes and Buttons

With little pieces of clay make the eyes and buttons on the snow dragon. Make sure to leave those smooth so they could look like little stones stuck into the snow.

Painting

Last paint the parts you like to paint. I painted the scarf light blue and the eyes/buttons black. Further I left everything white. You can varnish the snow dragon if you like. I added some glitter to the varnish for that little extra. If you have ever seen snow, you know it sparkles. So so pretty! *-*

I hope you liked this little tutorial how to make a snow dragon out of clay! Show me if you made one as well, I’d love to see! Have a wonderful day!

Love
Danielle

Posted in: Crafting Tagged: clay, crafting, cute, DIY, Dragon, kawaii, snow, winter
« Vorige 1 2 3 4 5 … 18 19 20 21 22 23 24 25 26 … 40 41 42 43 44 Volgende »

What are you looking for?!

My Socials

Ko-Fi

I love making all these free things for you, tho it would be very helpfull if you can support me on Ko-Fi! (You don’t have to tho, totally up to you!)

Ko-Fi Shop!!

In my Ko-Fi shop you can find PDF Amigurumi Patterns!! You can pay easily with PayPal.
Go to the shop here!!

Recent Blog Posts

  • ♥ Happy 2022!
  • ♥ Day 12; Lights
  • ♥ Day 11; Flower Deco
  • ♥ Day 10; Snowman
  • ♥ Day 9; Gingerbread Houses

Recent Comments

  • Delinlea op ♥ Pua Tsum Tsum Amigurumi
  • Marfermar op ♥ Free Pattern; Easter Bunny
  • mary op ♥ Pua Tsum Tsum Amigurumi
  • Delinlea op ♥ Life Update + Kittens
  • Delinlea op ♥ Amigurumi Ghost

Categories

  • animation
  • Beadwork
  • Blogmas 2018
  • Blogmas 2020
  • Blogmas 2021
  • Books
  • Bujo
  • Christmas
  • Christmas CAL 2019
  • Christmas Countdown 2017
  • Contest
  • Crafting
  • Crochet
  • Drawing
  • Drawing Lesson
  • Easter
  • Geen categorie
  • Life
  • Miniature
  • Nail Art
  • New Year
  • Paper
  • plush
  • Pokemon
  • Poseable Art Doll
  • Recipe
  • Sewing
  • Shop Pattern
  • Sinterklaas
  • Social Media
  • Tsum Tsum
  • Ufufy

Copyright © 2023 Delinlea - My little fantasy world.

Family WordPress Theme by themehall.com