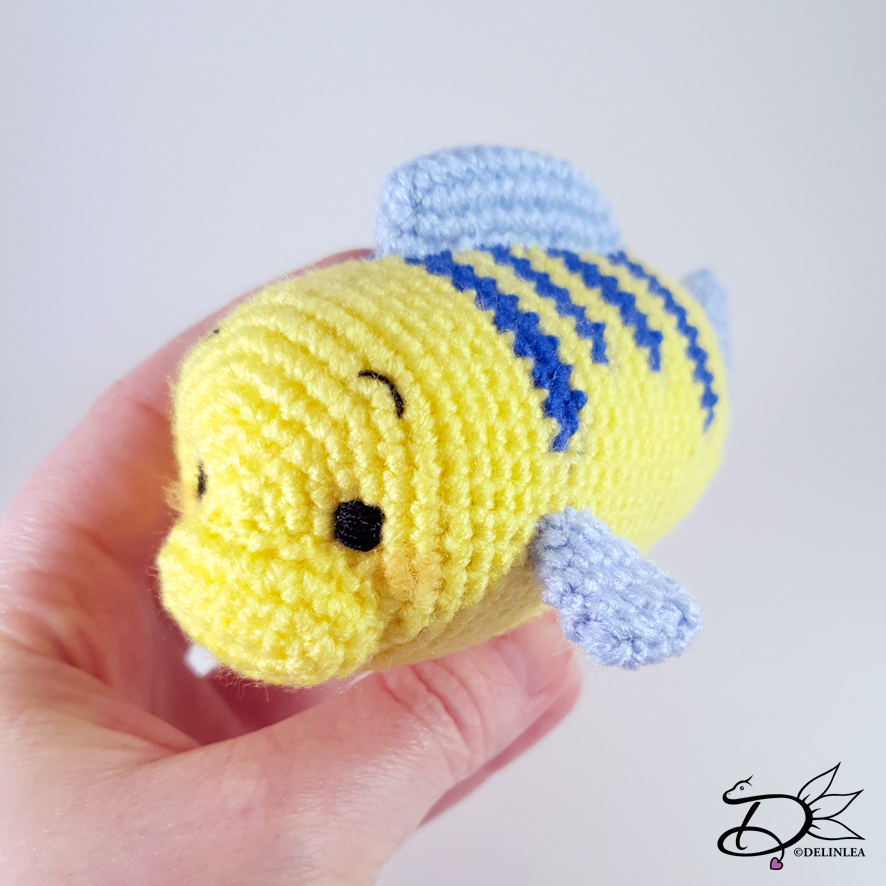
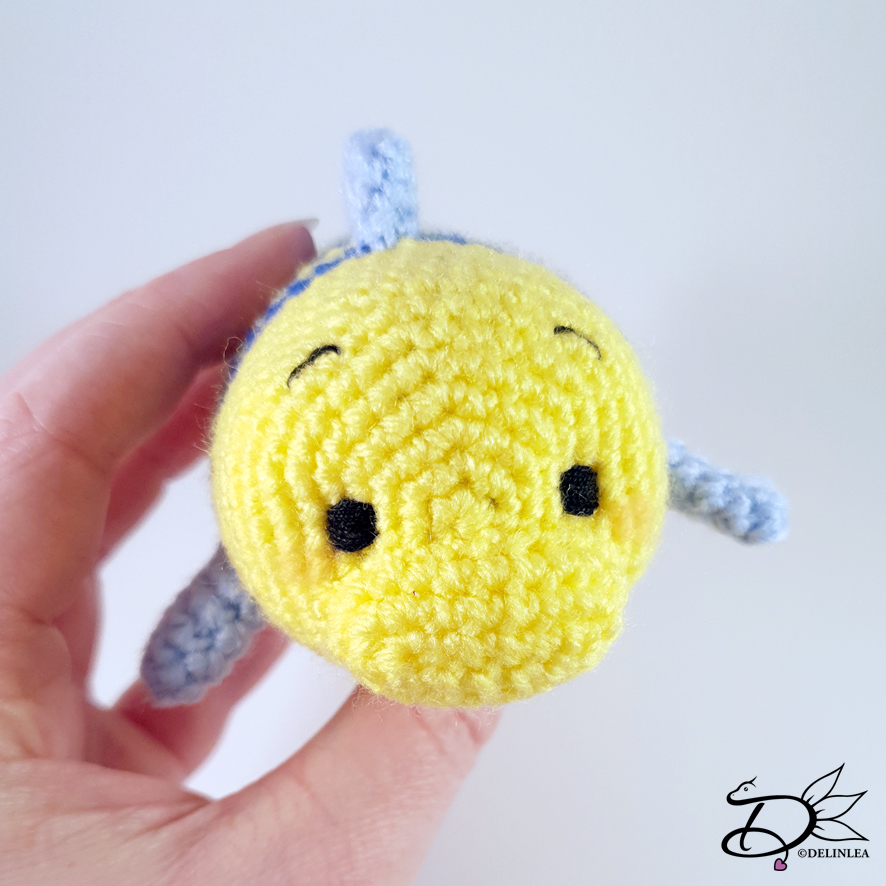
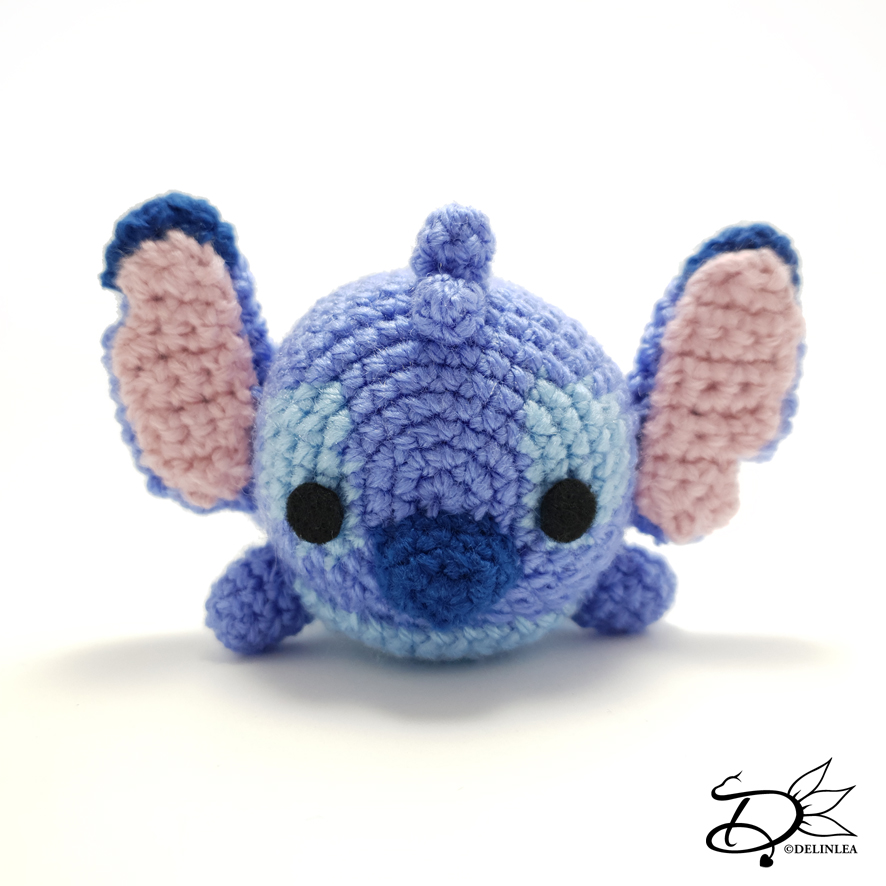
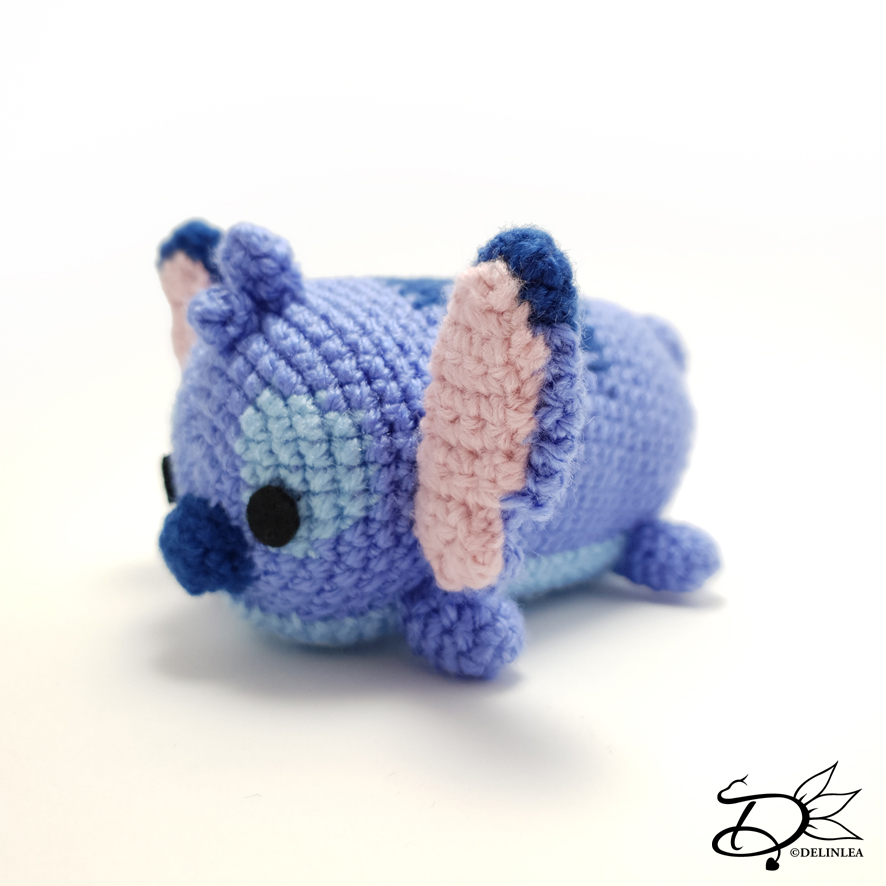
♥ Stitch Tsum Tsum Amigurmi
Hey Lovelies! I am finally writing this blog post, my laptop is a tiny bit old (Almost 7 years) and it had some troubles doing what it is suppose to do. Oh well, it’s working now, all fine xD. I just think it is time to look around for a new one, finally. (I’ve been putting that of haha). Anyway, back to the point of this blog, pattern time! It’s Tsum Tsum time today and I was asked if I could make Stitch! Such an adorable creature that was on my list for quite some time now, so I pushed him a bit forward. I hope you will enjoy him as much as I do.
For this Pattern you’ll need:
♥ Yarn in 3 shades of Blue (Light Blue, Blue and Dark Blue) and Pink (I used Stylecraft Special DK and Budgetyarn.com)
♥ Black Felt or Yarn for the eyes.
♥ Crochet Hook. (I used a 2,5mm)
♥ Stuffing.
♥ Stitch Markers.
♥ Yarn Needle.
♥ Sewing Pins.
♥ (Fabric)Glue. (In case you decided to go with felt).
Stitches used (US Terms):
Magic Ring.
CH = Chain.
SLST = Slip Stitch.
SC = Single Crochet.
ST = Stitch.
Inc = Increase.
Dec = Decrease.
(…) = Repeat the space in brackets the given number of times.
[…] = Total number of stitches.
Pattern Stitch
This pattern is made using continuous rounds, unless stated otherwise.
Body
Start with the color Blue.
1: 6SC in a
Magic Ring. [6]
2: 2SC in each st around. [12]
3: (1SC, inc) 6 times. [18]
From here on you’ll change colors every now and then to create the eyes.
4: Blue; 3SC, Light Blue; 1SC in the same st as the last sc, 3SC, Blue; 1SC in
the same st as the last sc, 2SC, inc, 3SC, Light Blue; 1SC in the same st as
the last sc, 3SC, Blue; 1SC in the same st as the last sc, 2SC, inc. [24]
5: Blue; 3SC, Light Blue; inc, 3SC, inc, Blue; 3SC, inc, 2SC, Light Blue; inc,
3SC, inc, Blue; 4SC, inc. [30]
6: Blue; 4SC, Light Blue; inc, 4SC, inc, Blue; 4SC, inc, 2SC, Light Blue; inc,
4SC, inc, Blue; 6SC, inc. [36]
7: Blue; 6SC, Light Blue; 1SC in the same st as the last sc, 5SC, Blue; inc,
5SC, inc, 2SC, inc, Light Blue; 6SC, Blue; 1SC in the same st as the last sc,
8SC, inc. [42]
8: Blue; 7SC, Light Blue; 4SC, Blue; 15SC, Light Blue; 4SC, Blue; 12SC. [42]
Continue with only the Blue yarn.
9: 42SC. [42]
|
14: 42SC. [42]
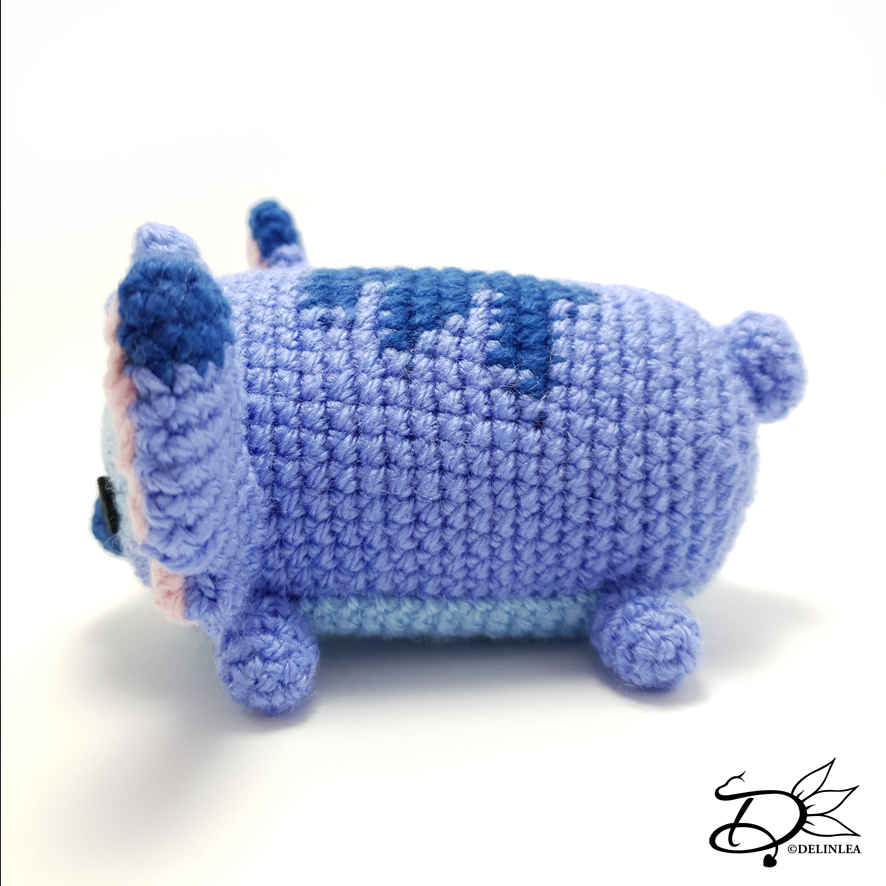
From here on you’ll change colors every now and then to create the shape on his
back.
15: Blue; 16SC, Dark Blue; 7SC, Blue; 19SC. [42]
16: Same as Row 15.
17: Blue; 18SC, Dark Blue; 3SC, Blue; 21SC. [42]
18: Blue; 14SC, Dark Blue; 11SC, Blue; 17SC. [42]
19: Blue; 15SC, Dark Blue; 9SC, Blue; 18SC. [42]
20: Same as Row 15.
21: Same as Row 17.
22: Same as Row 18.
23: Blue; 13SC, Dark Blue; 13SC, Blue; 16SC. [42]
24: Same as Row 17.
25: Same as Row 17.
Continue with only the Blue yarn.
26: 42SC. [42]
|
29: 42SC. [42]
30: (5SC, dec) 6 times. [36]
31: (4SC, dec) 6 times. [30]
32: (3SC, dec) 6 times. [24]
33: (2SC, dec) 6 times. [18] Stuff the body here.
34: (1SC, dec) 6 times. [12]
35: (dec) 6 times. [6]
Fasten off and weave in tail.
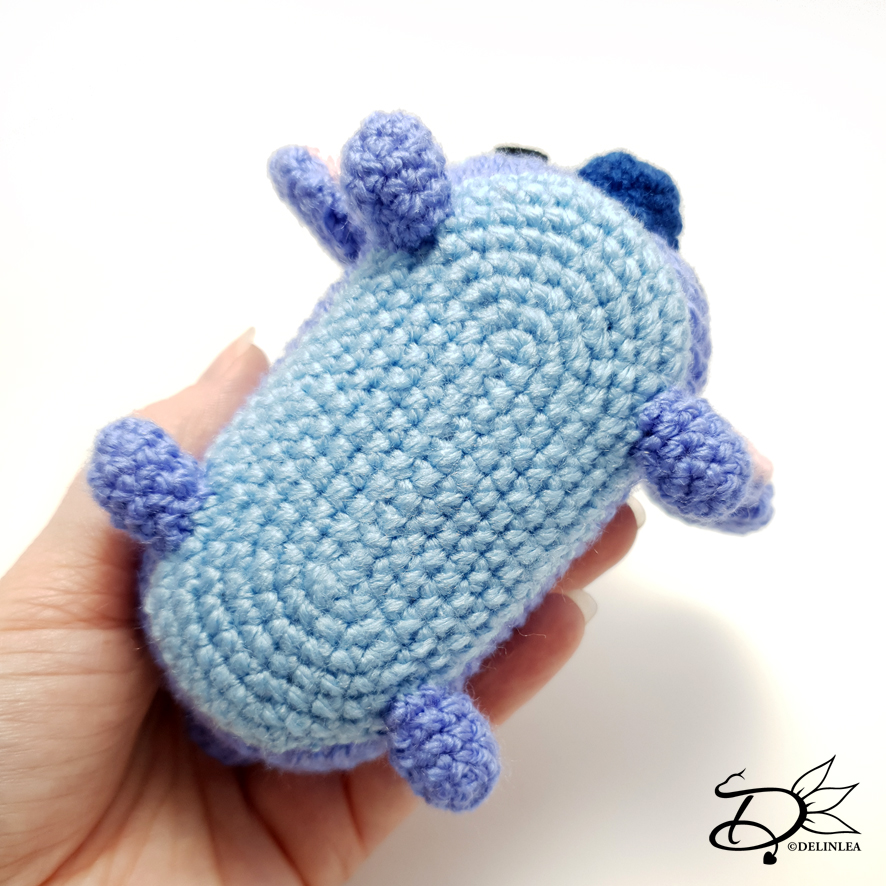
Belly
Use the color Light Blue.
1: CH13,
insert in the second ch from hook, 11SC, 3SC in the next st, continue along the
other side of the chain, 10SC, inc. [26]
2: inc, 10SC, (inc) 3 times, 10SC, (inc) 2 times. [32]
3: 1SC, inc, 10SC, (1SC, inc) 3 times, 10SC, (1SC, inc) 2 times. [38]
4: 2SC, inc, 10SC, inc, (3SC, inc) 2 times, 10SC, inc, 3SC, inc, 1SC. [44]
5: 3SC, inc, 10SC, inc, 3SC, inc, 2SC, inc, 3SC, inc, 10SC, inc, 3SC, inc, 2SC,
inc. [52]
6: 4SC, inc, 10SC, inc, (4SC, inc) 3 times, 10SC, inc (4SC, inc) 2 times. [60]
7: 60SC. [60]
Fasten off and leave a long tail for sewing.
Nose
Use the color Dark Blue.
1: 6SC in a Magic Ring. [6]
2: (1SC, 3SC in the next st) 2 times, 2SC. [10]
3: 10SC. [10]
Fasten off and leave a long tail for sewing.
Hair 1
Use the color Blue.
1: 4SC in a
Magic Ring. [4]
2: 4SC. [4]
Fasten off and leave a long tail for sewing.
Hair 2
Use the color Blue.
1: 5SC in a
Magic Ring. [5]
2: 5SC. [5]
3: 5SC. [5]
Fasten off and leave a long tail for sewing.
Ears (Make 2)
Start with the color Dark Blue
Note before you continue, you will have a right and a left ear, read well what you need to do.
1: 6SC in a
Magic Ring. [6]
2: (1SC, inc) 3 times. [9]
3: 9SC. [9]
Change to the color Blue.
4: (2SC, inc) 3 times. [12] If you make the left ear the row is as follow:
(2SC, inc) 2 times, Skip 2st, inc. [10]
5: 12SC. [12] If you make the left ear the row is as follow: 8SC, Ch2, 2SC.
[12]
6: 12SC. [12]
7: 12SC. [12]
8: 12SC. [12]
9: 12SC. [12]
10: 12SC. [12] If you make the right ear the row is as follow: 4SC, skip 3st,
5SC. [9]
11: 12SC. [12] If you make the right ear the row is as follow: 4SC, ch3, 5SC.
[12]
12: (2SC, dec) 3 times [9]
13: (1SC, dec) 3 times. [6]
Fasten off and leave a long tail for sewing.
Inner Ears (Make 2)
Use the color Pink.
Note before
you continue, you will have a right and a left ear, read well what you need to
do.
Also this part is not made in continues rounds.
1: Ch3, insert in second ch from hook, 2SC, turn. [2]
2: (inc) 2 times, turn. [4]
3: 4SC, turn. [4] If you make the left inner ear the row is as follow: 3SC, Ch2, turn. [5]
4: 4SC, turn. [4] If you make the left inner ear the row is as follow: Insert in second ch, 4sc, turn. [4]
5: 4SC, turn. [4]
6: 4SC, turn. [4]
7: 4SC, turn. [4] If you make the right inner ear the row is as follow: 3SC, Ch2, turn. [5]
8: 4SC, turn. [4] If you make the right inner ear the row is as follow: Insert in second ch, 4sc, turn. [4]
9: (dec) 2 times. [2]
Fasten off and sew the inner ears to the ears.
Legs
Use the color Blue.
1: 4SC in a Magic Ring [4]
2: 2SC in each st around. [8]
3-5: SC in each st around. [8]
Fasten off and leave a long tail for sewing.
Tail
Use the color Blue.
1: 6SC in a Magic Ring. [6]
2: 2SC in each st around. [12]
3: 12SC. [12]
4: (2SC, dec) 3 times. [9]
Fasten off and leave a long tail for sewing.

Assembling
Whenever I start assembling amigurumi ’s I use sewing pins to put it together first. This way I can move parts around easily until I am happy and sew them on.
Start with
sewing on his nose, just under the middle of the start of the body, in between
the eyes.
Then sew on his belly, make sure to place it right, since the front part create
Stitch mouth.
After the belly is on you can attach his legs, sew them there where the belly
meets his body.
last also sew on his tail, hair and ears! I did the ears last so I could place
them in the right spot when everything is already there.
Of course don’t forget to give him some eyes! Use either felt or embroidery to
do so.
And little Stitch is born and added to our growing tsum tsum collection! I hope you had fun and I’ll see you next week! Don’t forget to show me yours on either Twitter or Instagram!
Love
Danielle