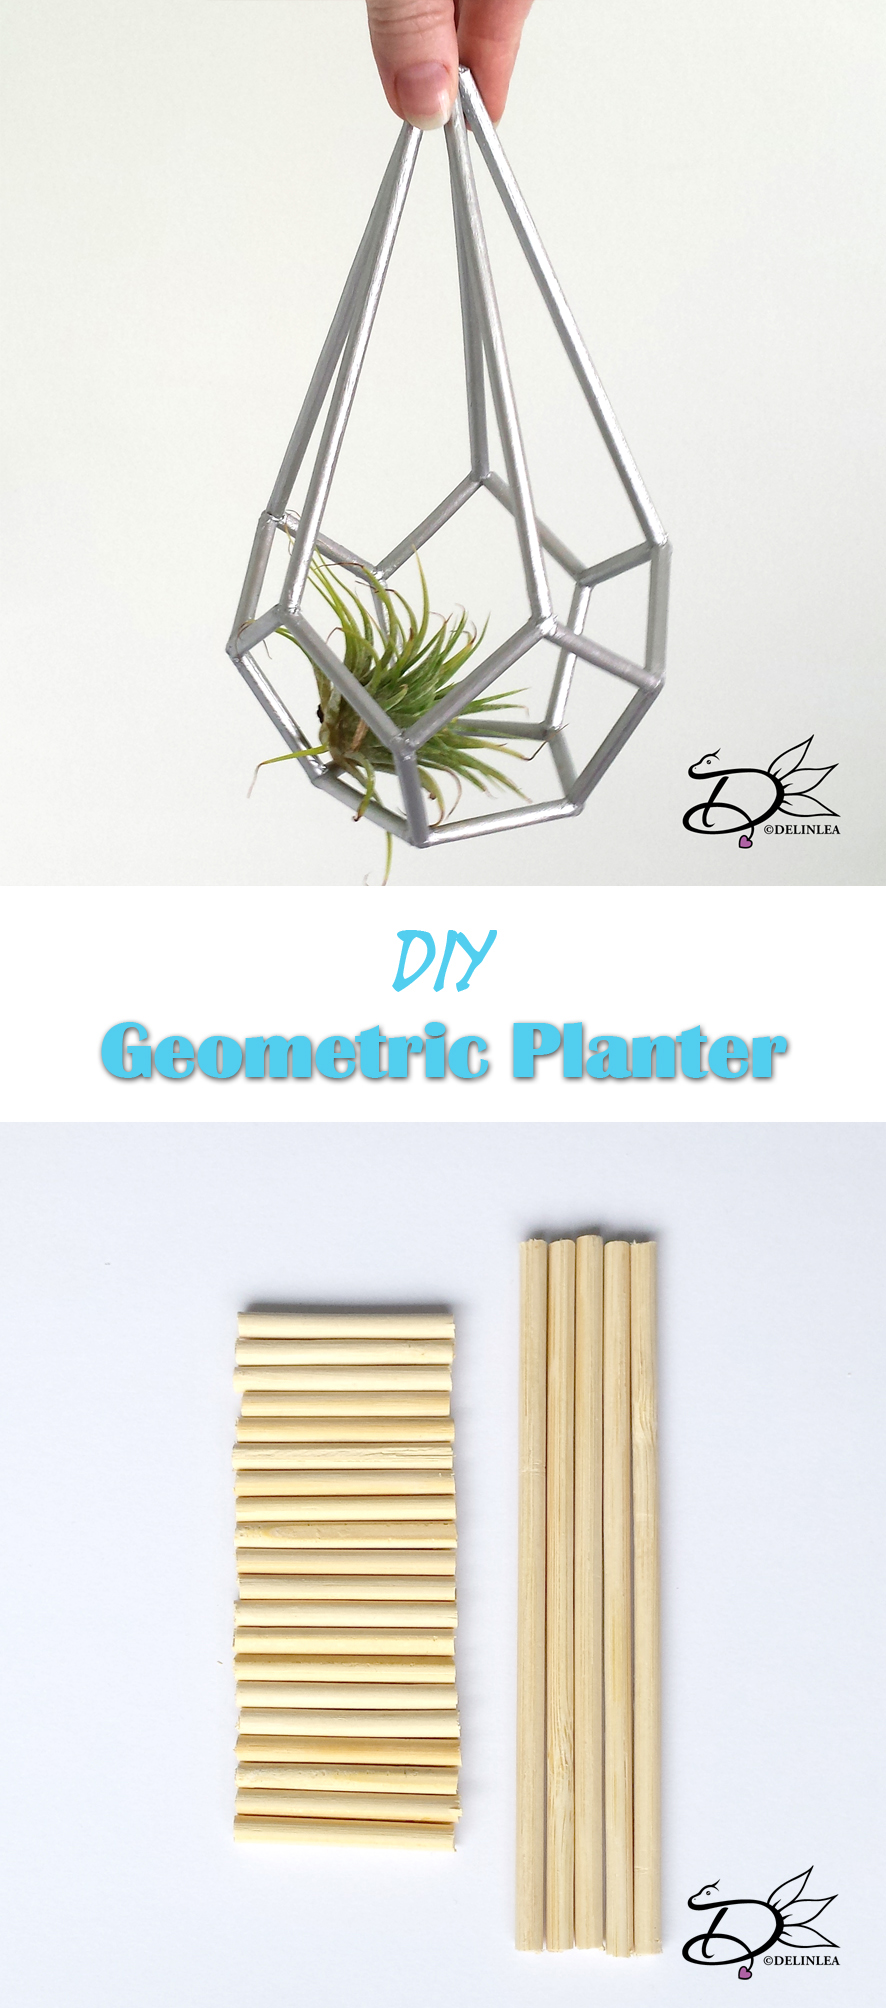
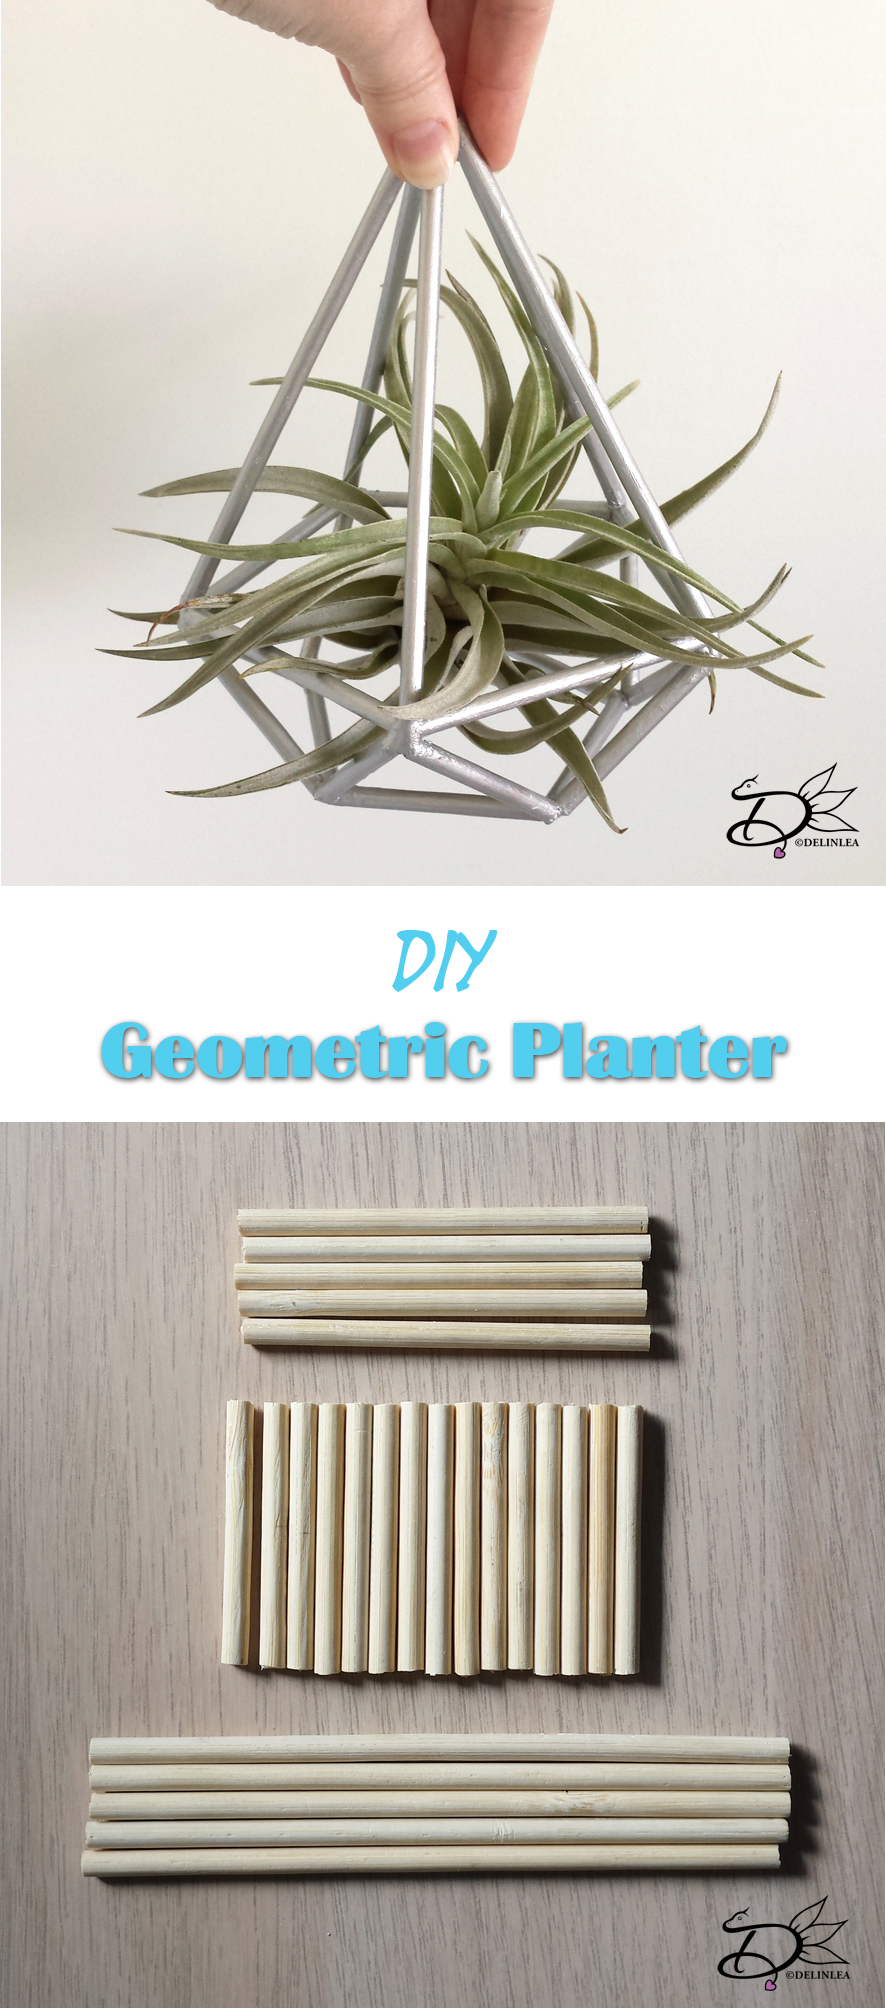
♥ Geometric Planter 3
Hey Lovelies!
As I am typing this, I don’t feel to well. I’m not doing good with hot weather, and yesterday, I went cycling to another city, maybe not the best decission xD. But I am glad it’s raining right now, so I hope the heat will go away for some time!
Anyway, today we will make the last geometric planter, probably the most complicated one to explane. you will find out why soon.
For this DIY you’ll need:
♥ 4 Wooden Sticks of about 40cm. (Can be longer or shorter, you only need more or less)
♥ Saw or anything to cut the sticks with.
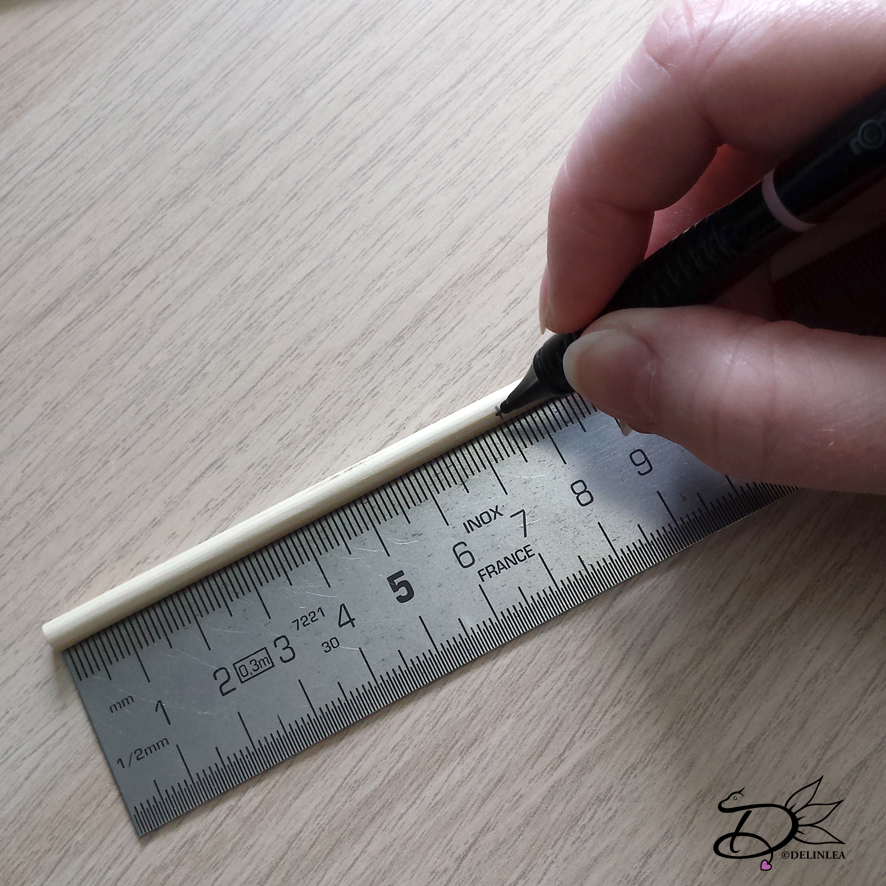
♥ Pencil.
♥ Ruler.
♥ Masking Tape.
♥ Hot Glue Gun and Glue.
♥ (Metallic) Acryllic Paint.
♥ Brush.
First step
For this geometric panter we won’t precut all the pieces, why?! Because I kinda freestyled it as I go. So I’ll gonna explane you step by step what to do exactly! oh and btw, get that glue gun hot!
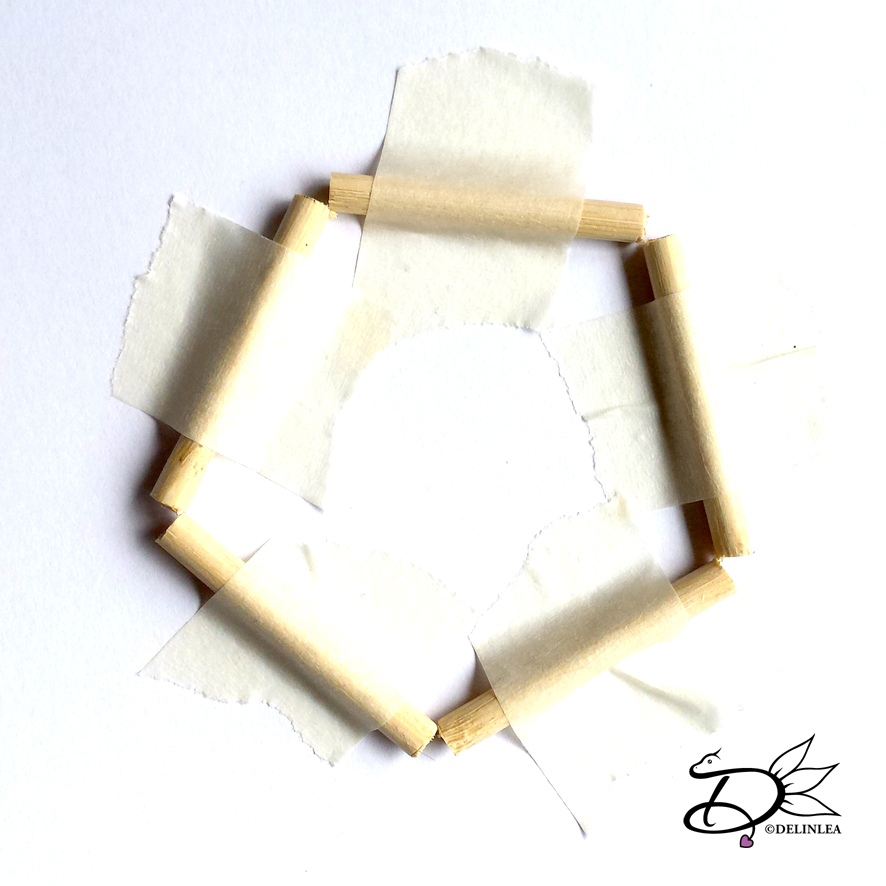
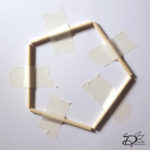
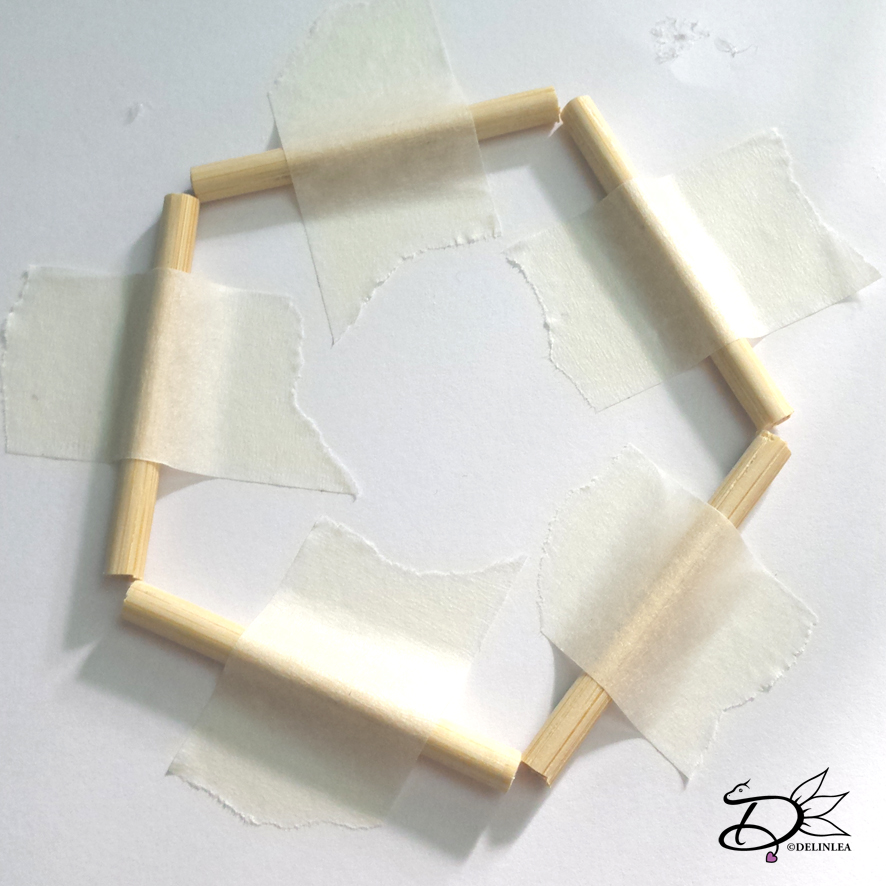
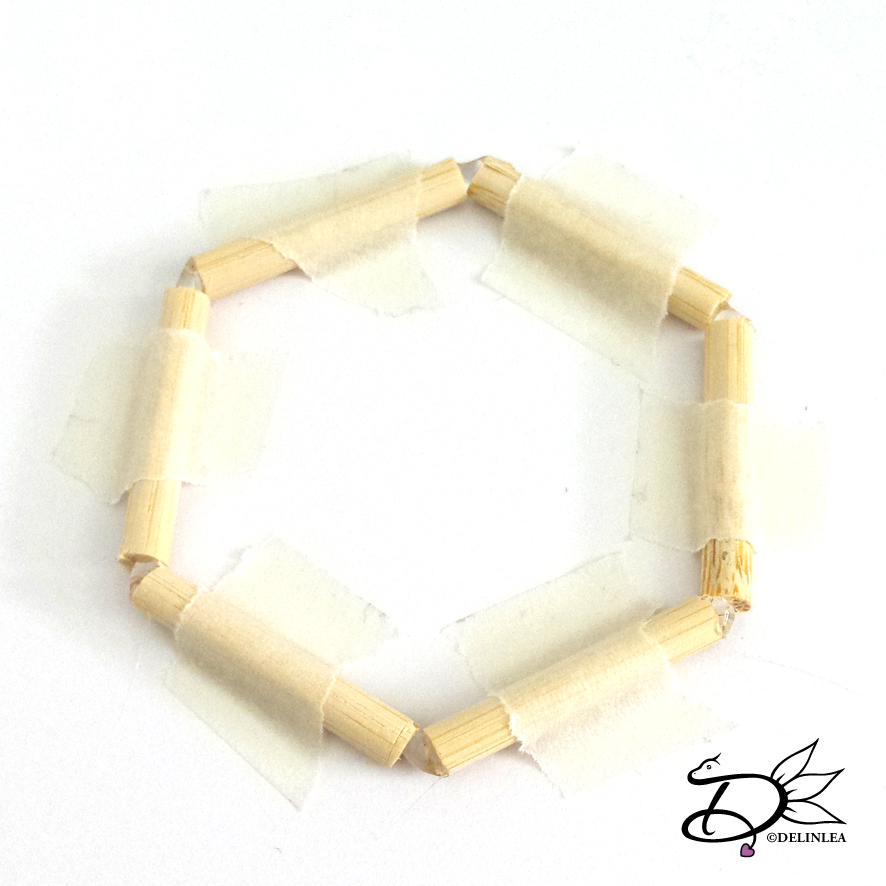
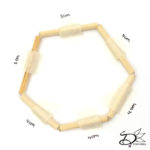
First cut 6 pieces of 3cm in length of the wooden sticks. Chop these with a tool you prefer, I used a handsaw. Place these on a piece of paper in the shape of a hexagon. I used some masking tape to keep them in place. Glue all the corners together with a bit of hot glue!
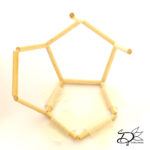
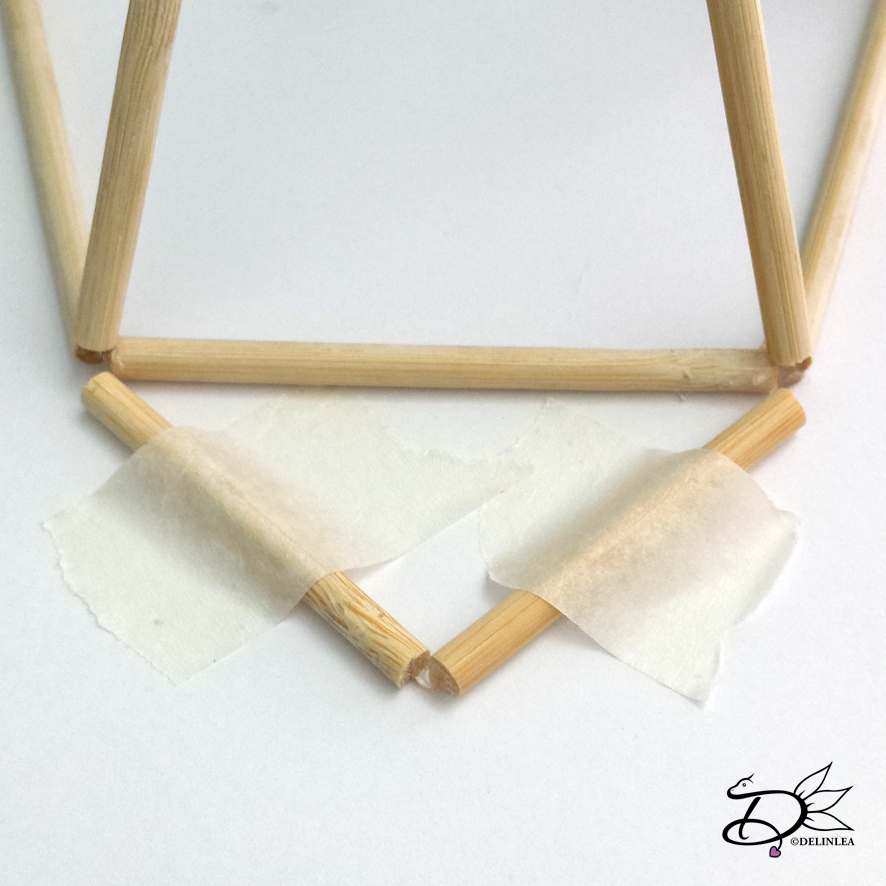
Second step
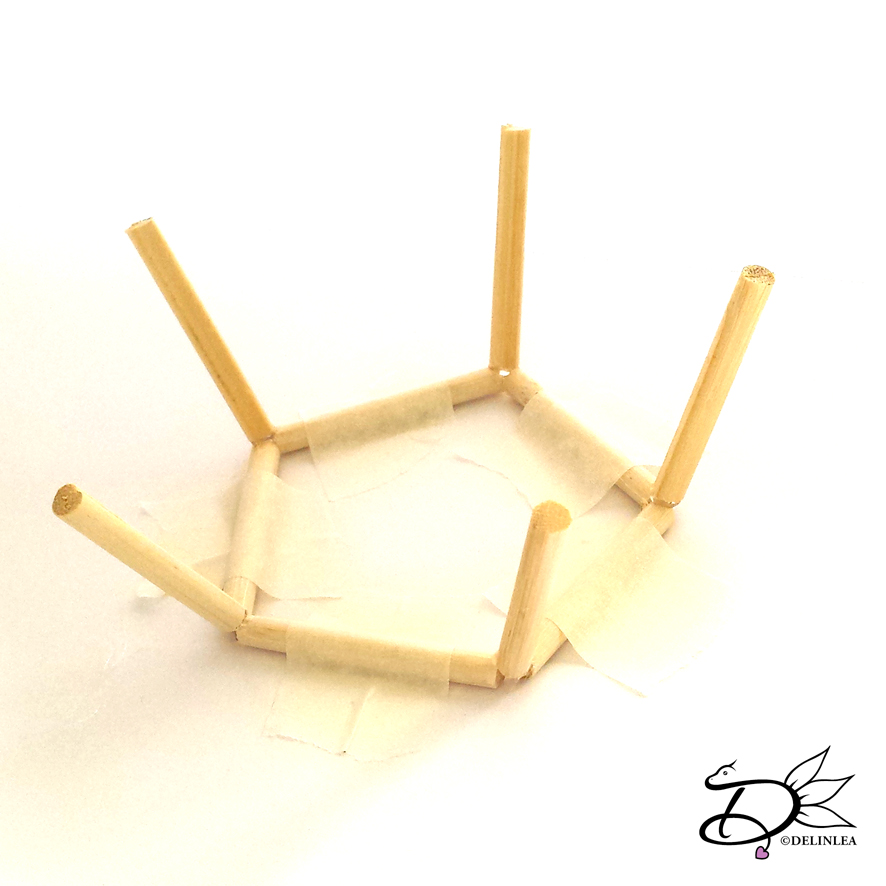
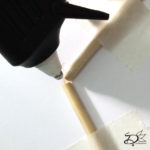
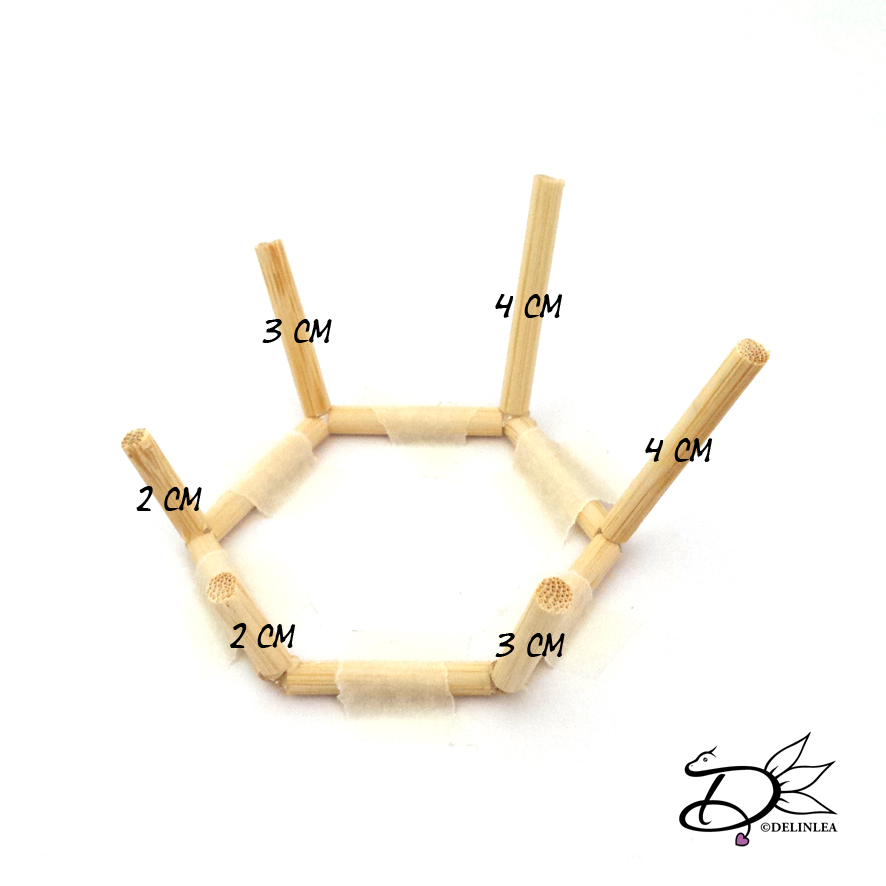
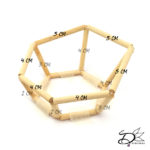
Now we need 6 more pieces; 2 of 2cm, 2 of 3cm and 2 of 4cm. Cut these to the desired length. With some hot glue you’re glueing these to every corner, on a slight angle to the outside. Use the below to see where I placed every length.
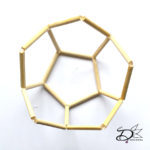
Third step
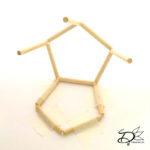
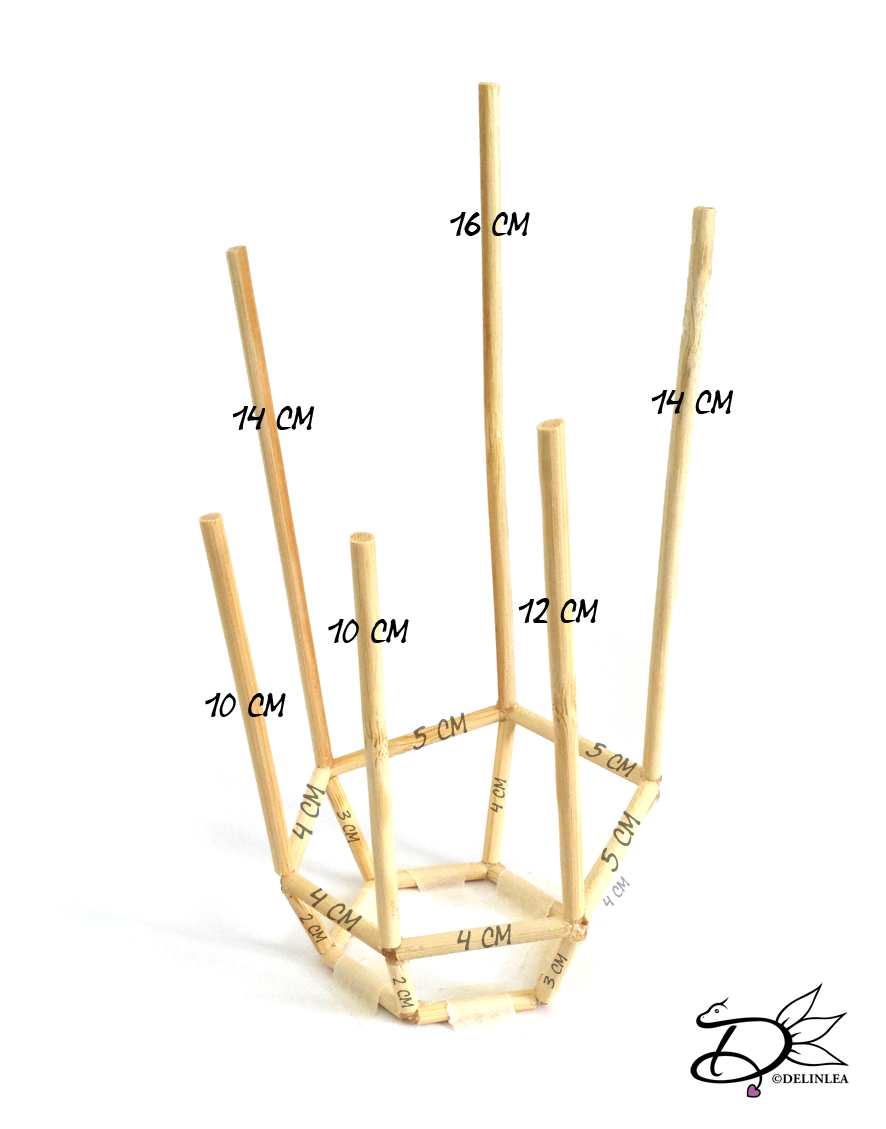
For the next layer we need 3 sticks of 4cm and 3 of 5cm. Just like the first step you are gonna place these in the shape of a haxagon first. Put them on a piece of paper again (to prevent your service you’re working on to get glued). Get them in the right shape, tape them down, and glue all the corners. This hexagon won’t be even, cause of the different sizes in length.
Now glue this hexagon to the sticks of step 2. How to place it exactly?! Use the pictures below. I will add all lengths to all sticks.
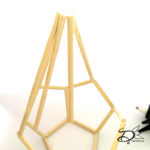
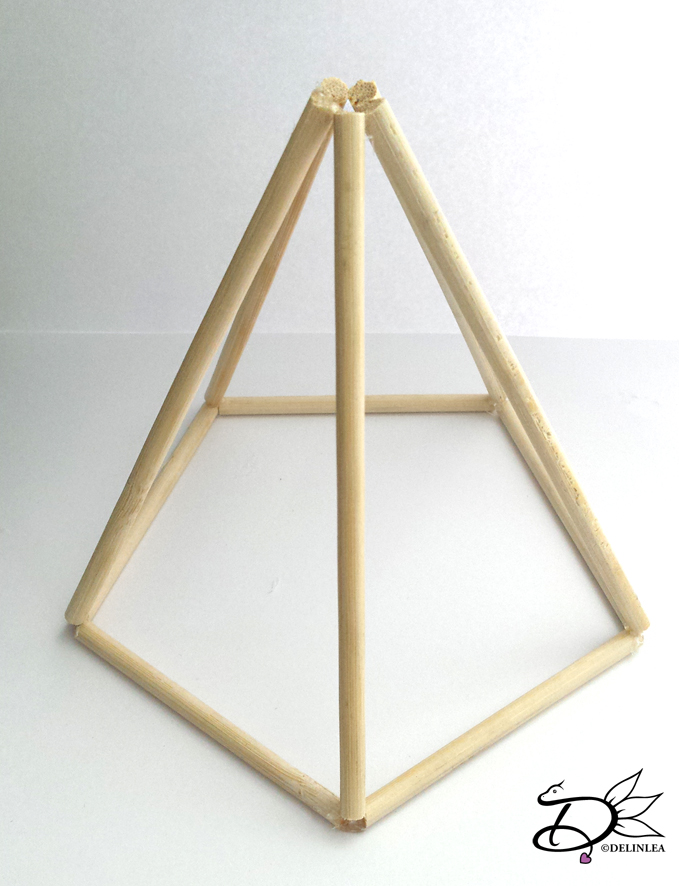
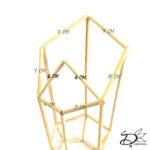
Fourth step
Cut 1 stick of 16cm, 2 of 14cm, 1 of 12 cm and 2 of 10cm in length. This is where you get you height of the planter. You can always make them longer if you want to. I liked it this way.
Now, glue these sticks straight up! On every corner of the hexagon from the previous row, use the pictures again to know which one goes, where. You don’t have to do it too precise. It will turn out good anyway! Like I explaned last 2 times, the glue is gonna stay flexible after setting, you’ll be able to move them around a bit.
Fifth step
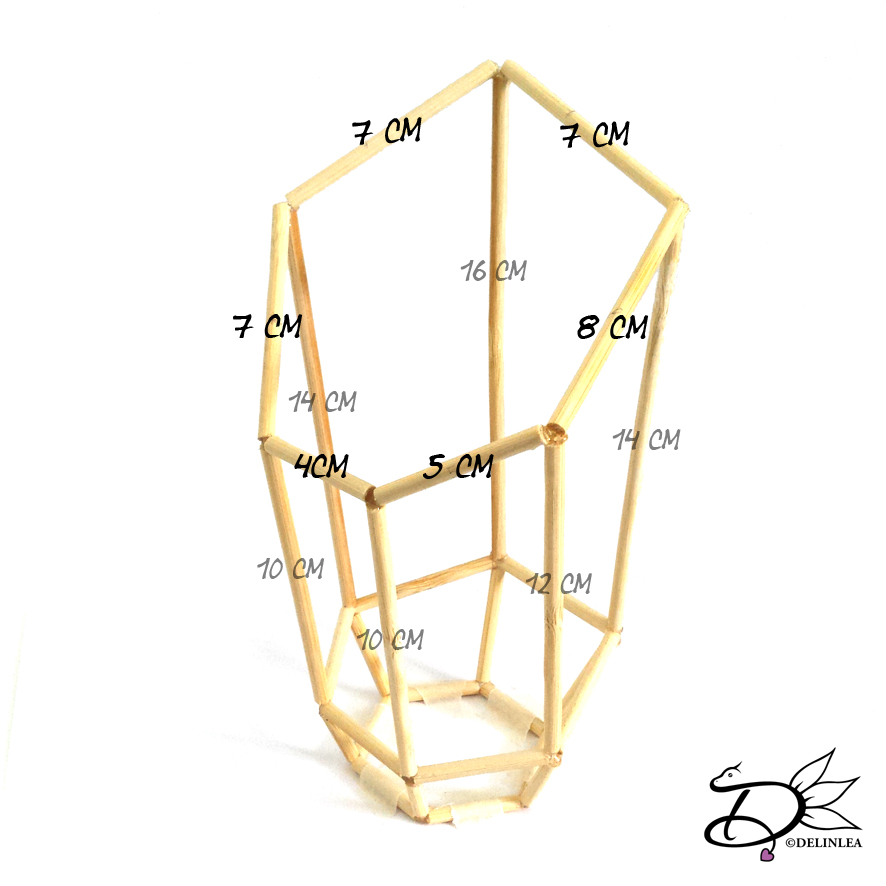
Chop up some more sticks in the length of: 3 of 7cm, 1 of 8cm, 1 of 5cm and 1 of 4cm. When you have done that, use the pictures below to see which stick goes where and glue those on the sticks of the previous row.
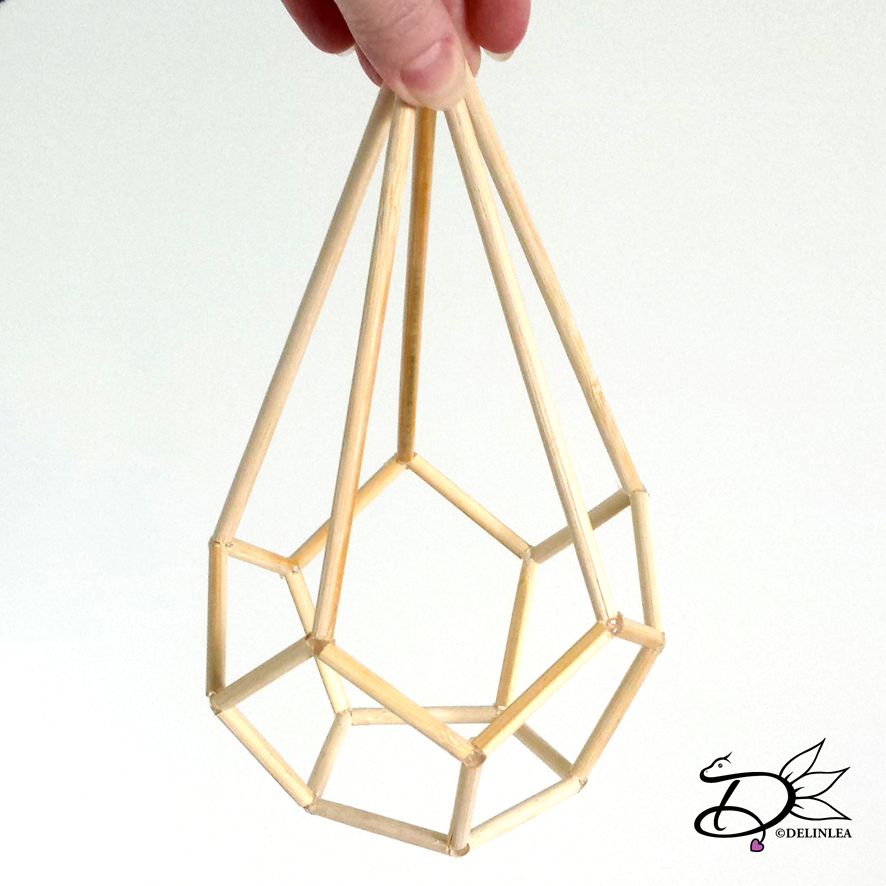
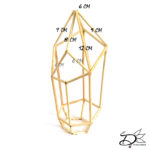
Sixth step
The last step to complete the planter. For this step you need 7 sticks instead of 6. The lengths are: 3 of 6cm, 1 of 8cm, 2 of 9cm and 1 of 12 cm. Now, take 2 sticks of 6cm and glue these together so they form a wide V shape. When the glue has set, glue these in place following the pics below.
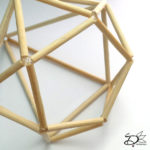
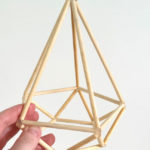
When that’s done, glue the remaining sticks in place as well, and you have completed the whole structure. It’s optional, but you can fill up any gaps where the sticks meet, with some more hot glue. This will make the end result much better.
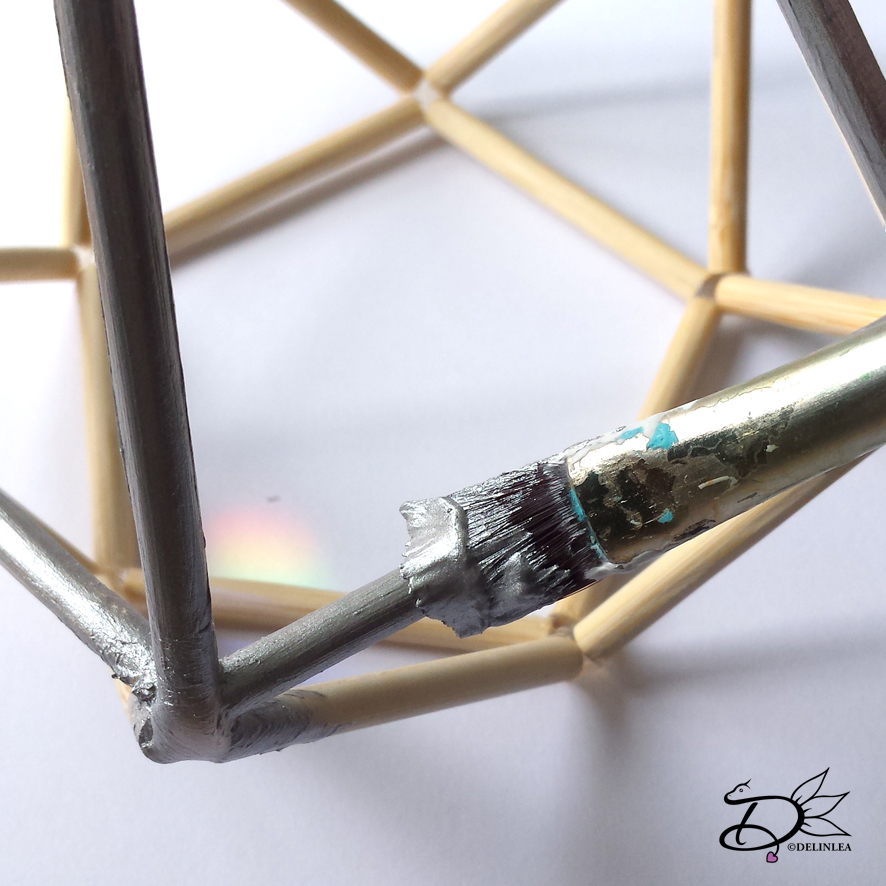
Painting
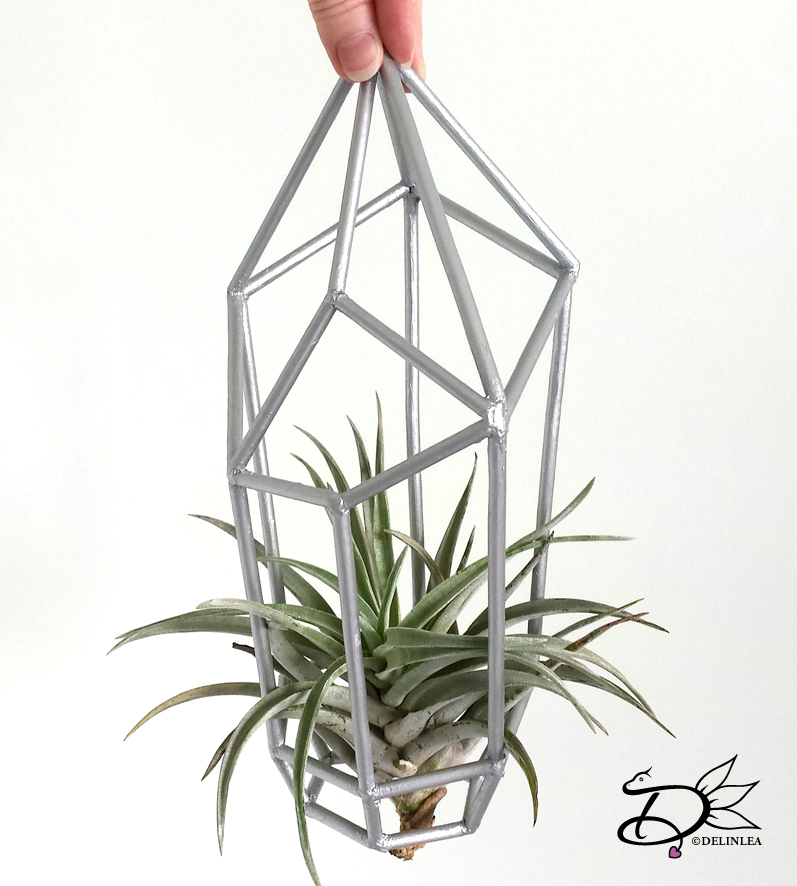
An important step that you don’t wanna skip. Paint the whole thing! I used silver paint but of course you can use any color you like! I had to do 2 coats so it looks neat but it really depends on the quality of the paint you are using.
I hope you liked making these planters and put them in your house everywhere, I am hanging them infront of my window. But you can just put them on a cabinet with a plant in it and decorate a bit more like you see in these facy styling magazines haha.
Have a lovely day everyone!
Love
Danielle