Delinlea - My little fantasy world
  • ♥ Home
  • ♥ About Me
  • ♥ Blogmas 2021
  • ♥ Free Patterns
    • ♥ Amigurumi; Spring/Easter
    • ♥ Amigurumi; Fall/Halloween
    • ♥ Amigurumi; Winter
    • ♥ Amigurumi Tsum Tsum
    • ♥ Amigurumi Ufufy
    • ♥ Amigurumi Others
    • ♥ Christmas Countdown 2017
    • ♥ Blogmas 2018
    • ♥ Blogmas 2020
  • ♥ Tutorials
    • ♥ Easter
    • ♥ Home Deco
    • ♥ Others
  • ♥ Drawing Lessons
  • ♥ FanFic
    • ♥ Chapter 1
    • ♥ Chapter 2
    • ♥ Chapter 3
    • ♥ Chapter 4
    • ♥ Chapter 5
    • ♥ Chapter 6
    • ♥ Chapter 7
  • ♥ Gallery
    • ♥ Crafts
    • ♥ Drawings
    • ♥ Poseable Art Dolls
  • ♥ Links
  • ♥ Contact

Crafting

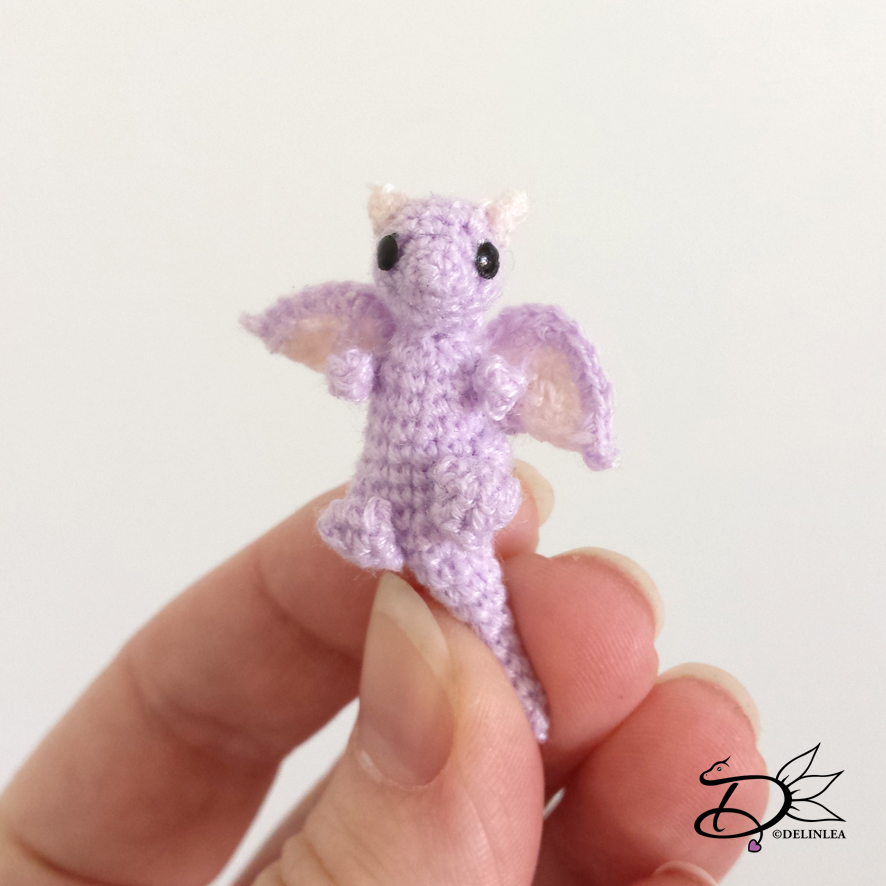
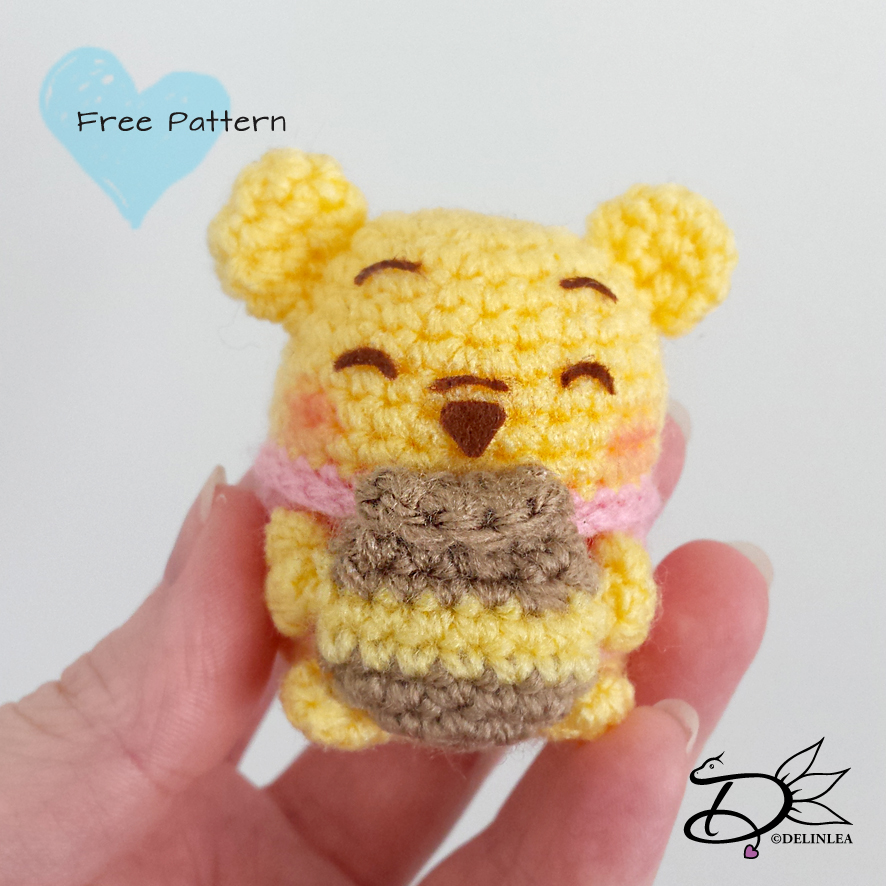
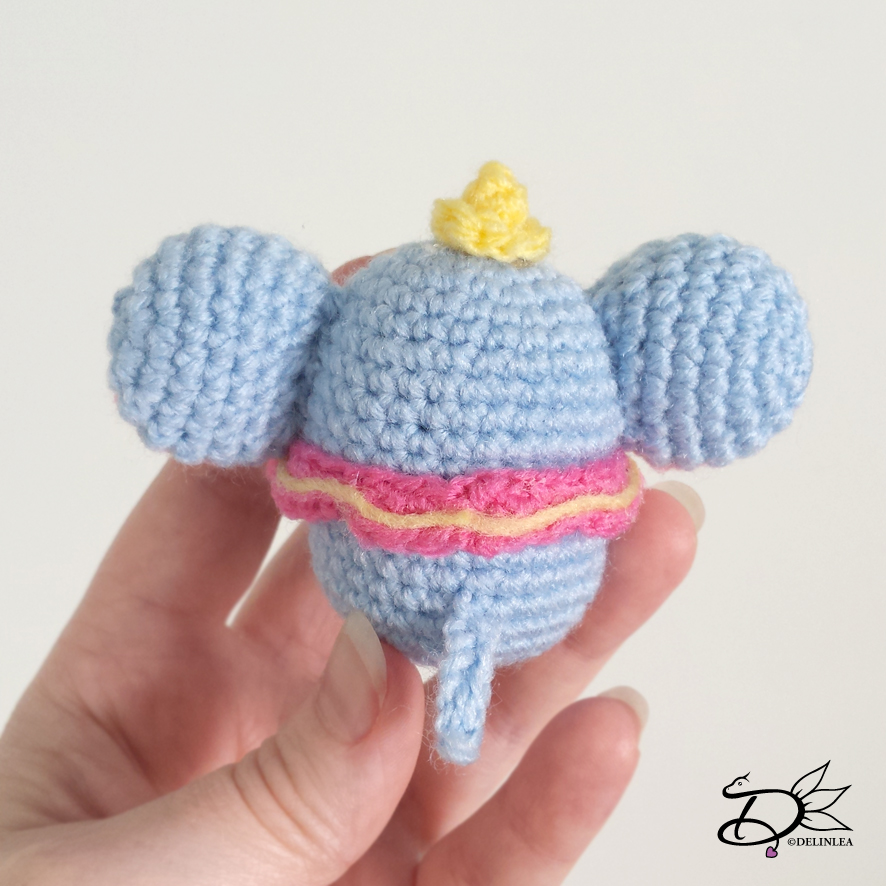
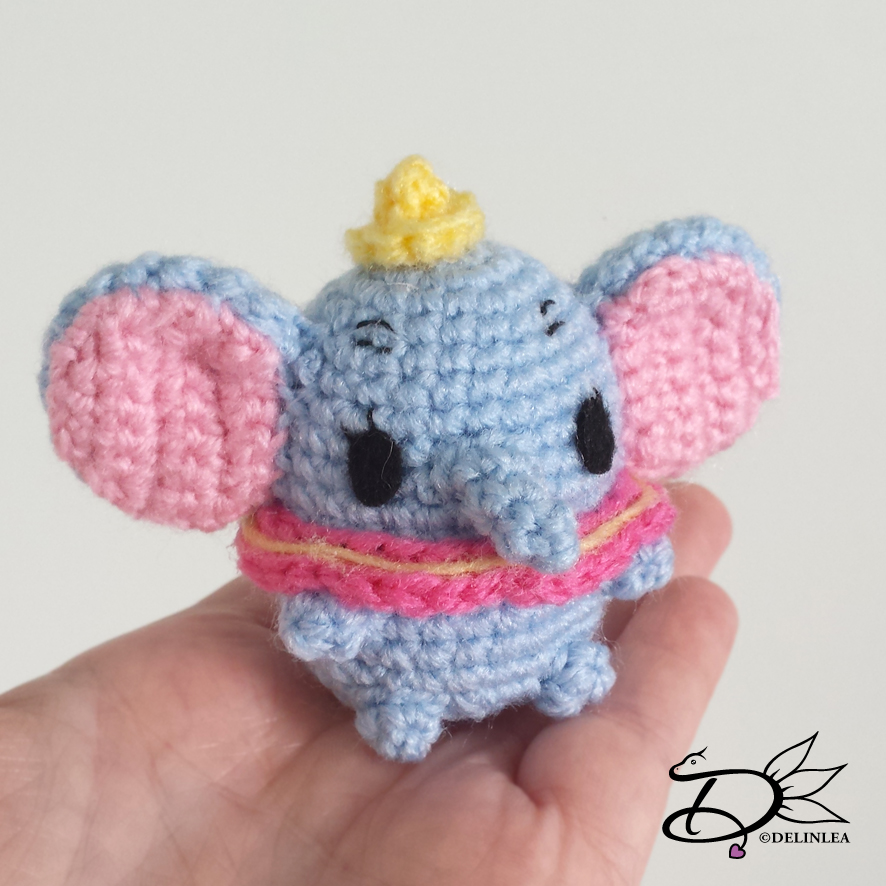
♥ Dumbo Ufufy Amigurumi

10 mei 2018 by Delinlea 6 Comments

Hey Lovelies!

Time for another DIY, I kept is simple this week and chose to make a Dumbo Ufufy! I’m struggling with my health so I wasn’t able to do something else. By the way, what do you like to see tutorials or patterns for?! Let me know in the comments below! Now, let’s go on to the pattern!

For this DIY you’ll need:
♥  Yarn. I used thin acrylic yarn. Light Blue, Pink, Light Yellow and Dark Pink or Reddish.
♥  Crochet hook.
♥  Stitch marker.
♥  Yarn needle.
♥  Sewing pins. (optional)
♥  Scissors.
♥  Fiber Fill.
♥  Black Felt.
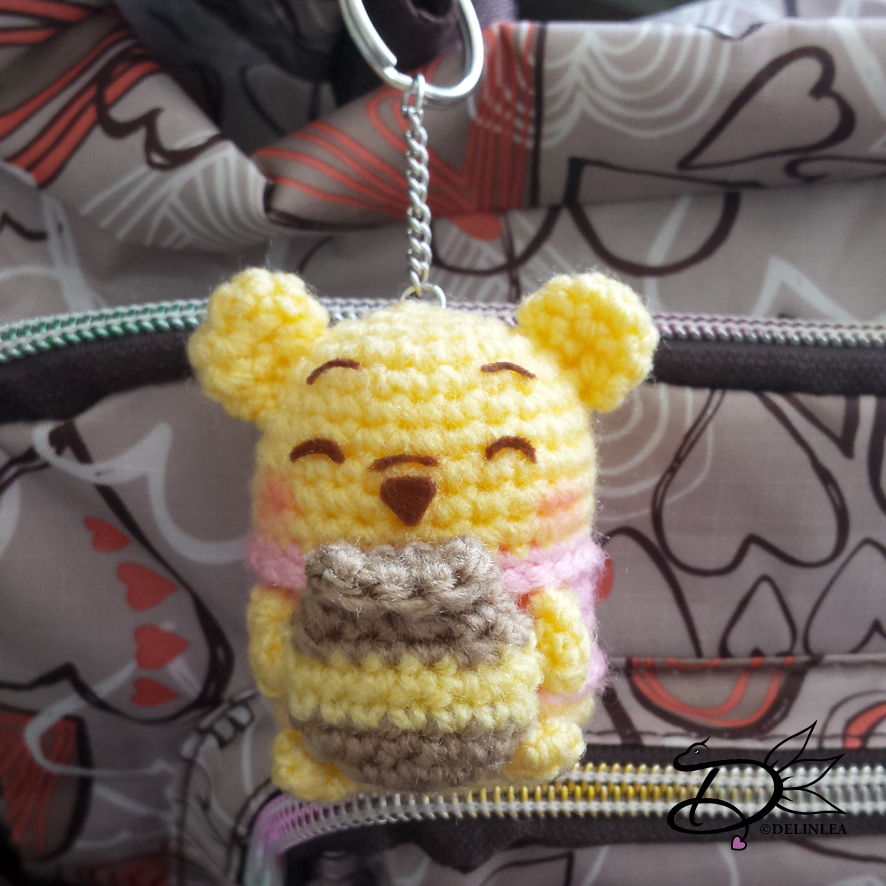
♥  Key Chain. (optional)
♥  Glue. (optional)

Stitches used:
CH = Chain.
SC = Single Crochet.
HDC = Half Double Crochet
ST = Stitch.
Inc = Increase.
Dec = Decrease.
Slst = Slip Stitch.
BL = Back Loops
(…) = Repeat the space in brackets the given number of times.
[…] = Total number of stitches.

Pattern:

Work in continues rounds, use a stitch marker to mark your first stitch of every row. This is for every part, unless stated otherwise.

Body
In Light Blue.

1: 6SC in magic ring. [6]
2: 2SC in each ST around. [12]
3: (1SC, inc), 6 times. [18]
4: (2SC, inc), 6 times. [24]
5: SC in each st around. [24]
6: SC in each st around. [24]
7: (3SC, inc), 6 times. [30]
8: SC in each st around. [30]
|
17: SC in each st around. [30]
18: (3SC, dec), 6 times. [24]
19: (2SC, dec), 6 times. [18] Stuff the body here.
20: (1SC, dec), 6 times. [12]
21: Dec all around. [6]
Fasten off and  weave in tail.

Legs (4)
In Light Blue.

1: 4SC in Magic Ring. [4]
2: (1SC, inc), 2 times. [6]
Fasten off and leave long tail for sewing. You don’t have to stuff them, just flatten.

Ears (2)
In Light Blue.

1: 6SC in magic ring. [6]
2: 2SC in each st around. [12]
3: (1SC, inc) 6 times. [18]
4: SC in each st around. [18]
|
7: SC in each st around. [18]
8: (1SC, dec) 6 times. [12]
Fasten off and leave a long tail for sewing.

Inside of the Ears (2)
In Pink, don’t work in continues rounds.

1: CH5, insert in 2nd chain from hook, 4SC, turn. [4]
2: CH1, inc, 2SC, inc, turn. [6]
3: CH1, inc, 4SC, inc, turn. [8]
4: CH1, 8SC, turn. [8]
5: CH1, 8SC, turn. [8]
6: CH1, dec, 4SC, dec. [6]
Fasten off and leave a long tail for sewing.

Nose
In Light Blue.

1: 4SC in magic ring. [4]
2: SC in each st around. [4]
3: (1SC, inc) 2 times. [6]
4: inc, 1SC, slst.
Fasten off and leave a long tail for sewing.

Hat
In Light Yellow.

1: 4SC in magic ring. [4]
2: (1SC, inc) 2 times. [6]
3: Work in back loops only, (1SC, inc) 3 times. [9]
Fasten off and leave a long tail for sewing.

Tail
In Light Blue.

CH6, insert in 2nd chain from hook, 5SC.
Fasten off and leave a long tail for sewing.

Collar
In Dark Pink or Reddish.

Chain 30 (or more/less, depends on how you stuffed the body, just wrap it around.) Make a circle by making a slst in the first CH.
Make 1SC, 2HDC in the next st, 1SC, SLST. and repeat this until the end of the chains.
Fasten off and weave in tail.
Make with Light Yellow a border around the collar, I tried to sew it on, but didn’t like the look of it, so I used glue in the end.

Assembling

Sew on the legs, use some sewing pins to place the legs first, so you can easily replace them. I placed the lower legs first with about a cm apart, then placed the upper leggs and sewn them on.
Now sew on Dumbo’s nose, just above the middle of the body.
For the ears, sew this inside of the ear to the outer part of the ear and fasten off. Place the ears onto the body with some sewing pins, and when you are happy with the look of it, sew them on.
Sew his tail to his butt. and place his hat on top of the body. I personally was lazy, so I glued it on, but you can totally sew it on!
Cut his eyes out of some black felt and glue these to both sides of the nose. You can add some details, like eyelashes with embroidery if you want, but that’s totally up to you!
Last place his collar around his neck and you are done! You don’t have to sew the collar it stays in place as it is, but ofcourse you can sew it if you are worried that it will come off.

I hope you liked this pattern of another Ufufy! And stay tuned to see what DIY will be up next week. Let me know in the comments below if there is anything you like to see a patternor DIY for. I will do my best to make it! Have a wonderful day everyone!

Love
Danielle


Posted in: Crafting, Crochet, Ufufy Tagged: Amigurumi, Crochet, Disney, dumbo, haken, Ufufy

♥ Crochet! How small can you go?!

3 mei 2018 by Delinlea Leave a Comment

Hey Lovelies!

How are you all doing?! This week I decided to challenge myself, crochet something as small as I could go! I always love to make small things. In school I always heard that I worked way to small haha, it’s just my thing, I guess.

On the internet I often saw people crochet these tiny plushes. Always amazed by them and wondered how that was possible. Never thought of making one myself… until now. I thought why not try it, I can always quit! xD So, I grabbed my embroidery floss (I was cleaning it out anyway), devided it into 3 parts (so 2 threads in a bundle), and just go. I used a 0,9mm hook.

At the beginning I was like.. HOW do you do this >_< annoyed a bit, but I kept trying. I just don’t give up easily! And after a while of trying and doing my best to make it look like crochet xD, it actually started to get like normal crochet.. only small! It wasn’t so hard at all, easier as I could ever imagine! In the end I enjoyed crocheting so tiny. Can you imagine that?! haha.

I made a dragon from my own pattern (Which I will not share, I’m sorry!) And it’s just 4cm in length! I love it! I made the eyes from a bit of UV resin and black paint, then glued it on. In case you were wondering! I hope you can see in the pictures how tiny it is!

I made 2 other dragons to compare: for the big one I used Royal Acrylic yarn from the Zeeman (100g, 241m), made with a 3,5mm hook, it’s about 12cm in length. For the middle one I used Supersoft Acrylic yarn also from the zeeman (50gr, 199m), with a 2mm hook, it’s about 8cm in length.


I think, I’m addicted to crocheting small now… xD I wanna make so many more! I might try to go a bit smaller and use sewing thread with a 0,75mm hook. Let’s start another Ufufy! haha. I will keep you updated on my instagram and probably make a blog post about it, when I made plenty.

NOW I challenge you as well! How small can you go?! Tag me on instagram/twitter/vero if you tried! love to see if you could do it too!

Have a wonderful day everyone!

Love
Daniëlle

Posted in: Crafting, Crochet, Miniature Tagged: Amigurumi, challenge, Crochet, Dragon, Miniature

♥ Oranje Crazyness

26 april 2018 by Delinlea Leave a Comment

Hey Lovelies!

Tomorrow it’s Kingsday here, in the Netherlands! And yes literally everything will turn orange.. these pics you always see floating around the internet, these are true haha. So, I thought, why not join the orange crazyness ones more. Wanted to create something cute, so are you ready to find out how it will turn out?!

For this DIY you’ll need:
♥  Yarn, in Orange, Red, White and Blue
♥  Crochet hook.
♥  Stitch marker.
♥  Yarn needle.
♥  Sewing pins. (optional)
♥  Scissors.
♥  Fiber Fill.
♥  Safety Eyes.
♥  Black Felt.
♥  Glue.

Stitches used:
CH = Chain.
SC = Single Crochet.
DC = Double Crochet.
ST = Stitch.
Inc = Increase.
Dec = Decrease.
Slst = Slip Stitch.
(…) = Repeat the space in brackets the given number of times.
[…] = Total number of stitches.

Pattern

Head
In Orange

1: 6SC in magic ring. [6]
2: 2SC in each st around. [12]
3: (1SC, inc), 6 times. [18]
4: (2SC, inc), 6 times. [24]
5: (3SC, inc), 6 times. [30]
6: (4SC, inc), 6 times. [36]
7: (5SC, inc), 6 times. [42]
8: (6SC, inc), 6 times. [48]
9: SC in each st around. [48]
| Note: insert the safety eyes in between row 11 and 12.
15: SC in each st around. [48]
16: (6SC, dec), 6 times. [42]
17: (5SC, dec), 6 times. [36]
18: (4SC, dec), 6 times. [30]
19: (3SC, dec), 6 times. [24]
20: (2SC, dec), 6 times. [18] Stuff firmly here.
21: (1SC, dec), 6 times. [12]
22: Dec all around. [6]
Fasten off and weave in tail.

Snout
In Orange, you don’t work in continues rounds for the snout, close of every row (SLST).

1: CH10, insert in 2nd chain from hook, 8SC, crochet 3SC in the last chain. Continue crocheting along the other side of the chain. 7SC, inc, SLST.
2: CH1, 1SC, inc, 7SC, (1SC, inc) 3 times, 7SC, (1SC, inc) 2 times, SLST. [32]
3: CH1, 32SC, SLST. [32]
4: CH1, 32SC, SLST. [32]
Fasten off and leave long tail for sewing.

Body:
in Orange

1: 6SC in magic ring. [6]
2: 2SC in each st around. [12]
3: (1SC, inc), 6 times. [18]
4: (2SC, inc), 6 times. [24]
5: (3SC, inc), 6 times. [30]
6: (4SC, inc), 6 times. [36]
7: SC in each st around. [36]
|
12: SC in each st around. [36]
13: (4SC, dec), 6 times. [30]
14: (3SC, dec), 6 times. [24]
15: SC in each st around. [24]
|
17: SC in each st around. [24]
18: (2SC, dec), 6 times. [18]
16: SC in each st around. [18]
Fasten off and leave long tail for sewing. Stuff firmly.

Arms (2)
In Orange

1: 5SC in magic ring. [5]
2: 2SC in each st around. [10]
3: SC in each st around. [10]
|
5: SC in each st around. [10]
6: (1SC, dec), 3 times, 1SC. [7] Stuff after this row.
7: SC in each st around. [7]
|
10: SC in each st around. [7]
Fasten off and leave long tail for sewing.

Feet (2)
In Orange

1: 6SC in magic ring. [6]
2: 2SC in each st around. [12]
3: (3SC, inc) 3 times. [15]
4: SC in each st around. [15]
|
8: SC in each st around. [15]
9: (3SC, dec) 3 times. [12]
10: SC in each st around. [12]
11: (2SC, dec) 3 times. [9] Stuff lightly here.
|
13: SC in each st around. [9]
14: (1SC, dec) 3 times. [6]
Fasten off and leave long tail for sewing.

Ears (2)
in Orange

1: 4SC in magic ring. [4]
2: (1SC, inc) 2 times. [6]
3: (1SC, inc) 3 times. [9]
4: (2SC, inc) 3 times. [12]
5: (3SC, inc) 3 times. [15]
6: (4SC, inc) 3 times. [18]
7: (5SC, inc, 3 times. [21]
8 SC in each st around. [21]
Fasten off and leave long tail for sewing.

Tail
In Orange

1: 6SC in magic ring. [6]
2: 2SC in each st around. [12]
3: SC in each st around. [12]
4: SC in each st around. [12]
Fasten off and leave long tail for sewing.

Shawl
Start with red.

Chain 3 and slst in the first chain.
1: CH4 (this counts as the first DC and a CH), 3DC, CH3, 3DC, CH1, 1DC.
2: CH4 (this counts as the first DC and a CH), 3DC in the chain space of the previous row, CH1, 3DC in the chain3 space of the previous row, CH3, 3DC in the chain3 space as well, CH1, 3DC in the next chain space of the previous row, CH1, 1DC.
Change to white.
3-6: Repeat row 2, and increase with 3DC, CH1 in the Chain space at the beginning and end of every row.
After row 4 with white you change to blue.

Assembling

Attach the head with the body. If you struggle to get in on neatly, use some sewing pins to keep it in place while sewing. I always use this as well for placing and limbs or other features, this way you can easily replace them if you don’t like the position.
Sew on the snout, just in between the eyes, leave a small gap to stuff the snout and finish sewing it on. Attach the ears as well.
It’s the easiest if you sew on the arms first, and then sew on the feet (flatten the feet a bit).
Sew on his tail on his butt.
Cut a big nowe from black felt and glue it on, now tie his shawl around his neck and you are finished!

I hope you enjoyed this pattern, I’m not completly sure what it is.. a cat?.. a dog? a Lion without manes?! xD Gah, I don’t care xD he’s cute~!

And for those who are gonna celebrate kingsday tomorrow, have fun!

Love Danielle
 

Posted in: Crafting, Crochet Tagged: Amigurumi, Crochet, cute, haken, Kingsday, Koningsdag, Oranje

♥ Amigurumi: Winnie the Pooh Ufufy Keychain

19 april 2018 by Delinlea Leave a Comment

Hey Lovelies!

Another week, another DIY! I just love these Ufufy’s! They look so adorable! I can’t recist them. So, I thought why not make another keychain for my bag, you can never have enough. But of course you don’t have to turn it into a keychain, just leave them as they are and put them anywhere and everywhere haha. Let’s make an whole army of them so they can conquer the world.

For this DIY you’ll need:
♥  Yarn. I used thin acrylic yarn. Pink, Light Yellow and Light Brown
♥  Crochet hook.
♥  Stitch marker.
♥  Yarn needle.
♥  Sewing pins. (optional)
♥  Scissors.
♥  Fiber Fill.
♥  Brown Felt.
♥  Key Chain.
♥  Glue (optional).

Stitches used:
CH = Chain.
SC = Single Crochet.
ST = Stitch.
BL = Back Loop.
FL = Front Loop.
Inc = Increase.
Dec = Decrease.
Slst = Slip Stitch.
(…) = Repeat the space in brackets the given number of times.
[…] = Total number of stitches.

Pattern:

Body
Start with Light Yellow

1: 6SC in magic ring. [6]
2: 2SC in each ST around. [12]
3: (1SC, inc), 6 times. [18]
4: (2SC, inc), 6 times. [24]
5: SC in each st around. [24]
6: SC in each st around. [24]
7: (3SC, inc), 6 times. [30]
8: SC in each st around. [30
|
10: SC in each st around. [30]
Change to Pink
11: SC in each st around. [30]
12: Work in Back Loops only, SC in each st around. [30]
13: SC in each st around. [30]
|
15: SC in each st around. [30]
Change back to Light Yellow.
16: Work in Back loops only, SC in each st around. [30]
17: SC in each st around. [30]
18: (3SC, dec), 6 times. [24]
19: (2SC, dec), 6 times. [18] Stuff the body here.
20: (1SC, dec), 6 times. [12]
21: Dec all around. [6]
Fasten off and  weave in tail.

Working in Back Loops is optional, but this gives a bit more 3D-ish look. So at row 12 and 16 you worked in Back Loops, join now in the Front Loops and SLST around. Fasten off and weave in tail.

Legs (4)
In Light Yellow.

1: 4SC in Magic Ring. [4]
2: (1SC, inc), 2 times. [6]
Fasten off and leave long tail for sewing. You don’t have to stuff them, just flatten.

Ears (2)
in Light Yellow

1: 5SC in magic ring. [5]
2: 2SC in each st around. [10]
3: SC in each st around. [10]
4: (dec, 1SC), 3 times, SLST. [7]
Fasten off and leave long tail for sewing. You don’t have to stuff them, just flatten.

Honey pot
Start with Light Brown.

1: 6SC in magic ring. [6]
2: 2SC in each st around. [12]
3: (3SC, inc), 3 times. [15]
Change to light yellow.
4: SC in each st around. [15]
5: SC in each st around. [15]
Change back to light brown.
6: (3SC, dec). 3 times. [12]
7: (1SC, dec), 4 times. [8]
8. SC in each st around. [8]
9: SC in each st around. [8]
Fasten off and weave in tail. Roll to top part a bit so you will get the rim of the pot. Further, stuff it slightly or not at all and just flatten it.

Assembling

Now it’s time to assemble Winnie the Pooh. Use some sewing pins to place the legs and ears first, so you can easily move them around until you like how Pooh looks.
When you are happy with the position, sew on the legs and ears.
Sew the honey pot in between his front legs, so he kinda holds the pot. I made the pot flat, but I guess you can also stuff it slightly.
Cut his facial features out of the brown felt and glue those on, you can use some pastel dust or blusher to add some blush to his cheeks. Add the keychain if you want and he is done! I love how he turned out, even tho his ears are slightly too big haha.

I hope you enjoyed this Pattern! Would love to see yours if you made it! #DelinleaDIY on Instagram/Twitter/Vero.

Love
Danielle


Posted in: Crafting, Crochet, Ufufy Tagged: Amigurumi, Disney, DIY, Free Pattern, haken, Ufufy, Winnie the pooh

♥ Amigurumi: Donald And Daisy Ufufy Keychain

5 april 2018 by Delinlea 5 Comments

Hey Lovelies!

Do you have your crochet hook ready?! I really needed a keychain to go on my bag, it feels so boring! And then I had to the trouble of picking what I want to go on there! Oh well, I can always change it up again. So, I thought of making a Donald and Daisy Duck Ufufy! Hope you will like that as well!

For this DIY you’ll need:
♥  Yarn. I used thin acrylic yarn. White, Pink, Light Yellow, Light purple for Daisy, Light Blue and Black for Donald.
♥  Crochet hook.
♥  Stitch marker.
♥  Yarn needle.
♥  Sewing pins. (optional)
♥  Embroidery Neeldle and Black thread.
♥  Scissors.
♥  Fiber Fill.
♥  Black Felt.
♥  Key Chain.
♥  Glue (optional).

Stitches used:
CH = Chain.
SC = Single Crochet.
ST = Stitch.
BL = Back Loop.
FL = Front Loop.
Inc = Increase.
Dec = Decrease.
Slst = Slip Stitch.
(…) = Repeat the space in brackets the given number of times.
[…] = Total number of stitches.

Pattern

Body
Start with White.

1: 6SC in magic ring. [6]
2: 2SC in each ST around. [12]
3: (1SC, inc), 6 times. [18]
4: (2SC, inc), 6 times. [24]
5: SC in each st around. [24]
6: SC in each st around. [24]
7: (3SC, inc), 6 times. [30]
8: SC in each st around. [30
|
10: SC in each st around. [30]
Change to Light Blue for Donald of Light Purple for Daisy.
11: SC in each st around. [30]
12: Work in Back Loops only, SC in each st around. [30]
13: SC in each st around. [30]
|
15: SC in each st around. [30]
Change back to White.
16: Work in Back loops only, SC in each st around. [30]
17: SC in each st around. [30]
18: (3SC, dec), 6 times. [24]
19: (2SC, dec), 6 times. [18] Stuff the body here.
20: (1SC, dec), 6 times. [12]
21: Dec all around. [6]
Fasten off and  weave in tail.

Working in Back Loops is optional, but this gives a bit more 3D-ish look. So at row 12 and 16 you worked in Back Loops, join now in the Front Loops and SLST around. Fasten off and weave in tail.

Legs (4)
2 in White, 2 in Light Yellow.

1: 4SC in Magic Ring. [4]
2: (1SC, inc), 2 times. [6]
Fasten off and leave long tail for sewing. You don’t have to stuff them, just flatten.

Beak
In Light Yellow.

1: 6SC in Magic Ring. [6]
2: (1SC, inc), 3 times. [9]
Fasten off and leave long tail for sewing. You don’t have to stuff them, just flatten.

Bow
In Pink.

1: Chain 7, insert in 2nd chain from hook, 6SC, turn. [6]
2: Chain 1, 6SC. [6]
3: SLST around the bow for a nice edge.
Fasten off and leave a long tail. Use a Yarn Needle to go to the middle of the bow and wrap the tail tightly around several times and fasten off.

Donalds Hat
Start with Light Blue.

1: 6SC in Magic Ring. [6]
2: 2SC in each st around. [12]
3: Work in Back Loops only, (1SC, dec), 4 times. [8]
Change to Black.
4: Dec all around. [4]
Fasten off and leave long tail for sewing. You don’t have to stuff it.

Assembling

Sew on the beak to the larger part of the white, just above the colored part. Cut some eyes out of black felt and glue those to both sides of the beak.
Now you know where the middle is, you can place the legs easily, use some sewing pins to make sure you potition them first, before sewing on. This way you can easily move them around until you are happy with the look. The white ones go on the colored part and the light yellow ones, go on the white part just under the colored part, sew them on.
If you made Donald, sew his hat slightly to the side of his head. If you are done sewing, pull the left over thread through the hat, so you can make his little tag. Leave it a bit longer and cut it off.
For both Daisy and Donald I gave them some fluff on the head, I just took 3 pieces of white yarn, tied a knot on one side and pulled it though the side, with a yarn needle, to the middle of the head. Make sure the knot dissapears inside the body. Cute the yarn slightly longer as you want and with the yarn needle you can untwist the yarn, so it get’s fluffy. Now you can give them the final hair cut ^^.
Time for the bow. I glued them on, but you can totally sew them on if you prefer. By Donald it goes under his beak. And with Daisy it goes on top of her head.

I hope you enjoyed this Pattern! Would love to see yours if you made it! #DelinleaDIY on Instagram/Twitter/Vero.

Love
Danielle


Posted in: Crafting, Crochet, Ufufy Tagged: Amigurumi, Crochet, Daisy Duck, Disney, DIY, Donald Duck, Free Pattern, haken, Ufufy
« Vorige 1 2 3 4 5 … 32 33 34 35 36 37 38 39 40 41 42 43 44 Volgende »

What are you looking for?!

My Socials

Ko-Fi

I love making all these free things for you, tho it would be very helpfull if you can support me on Ko-Fi! (You don’t have to tho, totally up to you!)

Ko-Fi Shop!!

In my Ko-Fi shop you can find PDF Amigurumi Patterns!! You can pay easily with PayPal.
Go to the shop here!!

Recent Blog Posts

  • ♥ Happy 2022!
  • ♥ Day 12; Lights
  • ♥ Day 11; Flower Deco
  • ♥ Day 10; Snowman
  • ♥ Day 9; Gingerbread Houses

Recent Comments

  • Liane Van der Donck op ♥ Amigurumi Ghost
  • Kimberly Spear op ♥ Free Pattern; Amigurumi Shiber
  • Delinlea op ♥ Pua Tsum Tsum Amigurumi
  • Marfermar op ♥ Free Pattern; Easter Bunny
  • mary op ♥ Pua Tsum Tsum Amigurumi

Categories

  • animation
  • Beadwork
  • Blogmas 2018
  • Blogmas 2020
  • Blogmas 2021
  • Books
  • Bujo
  • Christmas
  • Christmas CAL 2019
  • Christmas Countdown 2017
  • Contest
  • Crafting
  • Crochet
  • Drawing
  • Drawing Lesson
  • Easter
  • Geen categorie
  • Life
  • Miniature
  • Nail Art
  • New Year
  • Paper
  • plush
  • Pokemon
  • Poseable Art Doll
  • Recipe
  • Sewing
  • Shop Pattern
  • Sinterklaas
  • Social Media
  • Tsum Tsum
  • Ufufy

Copyright © 2023 Delinlea - My little fantasy world.

Family WordPress Theme by themehall.com