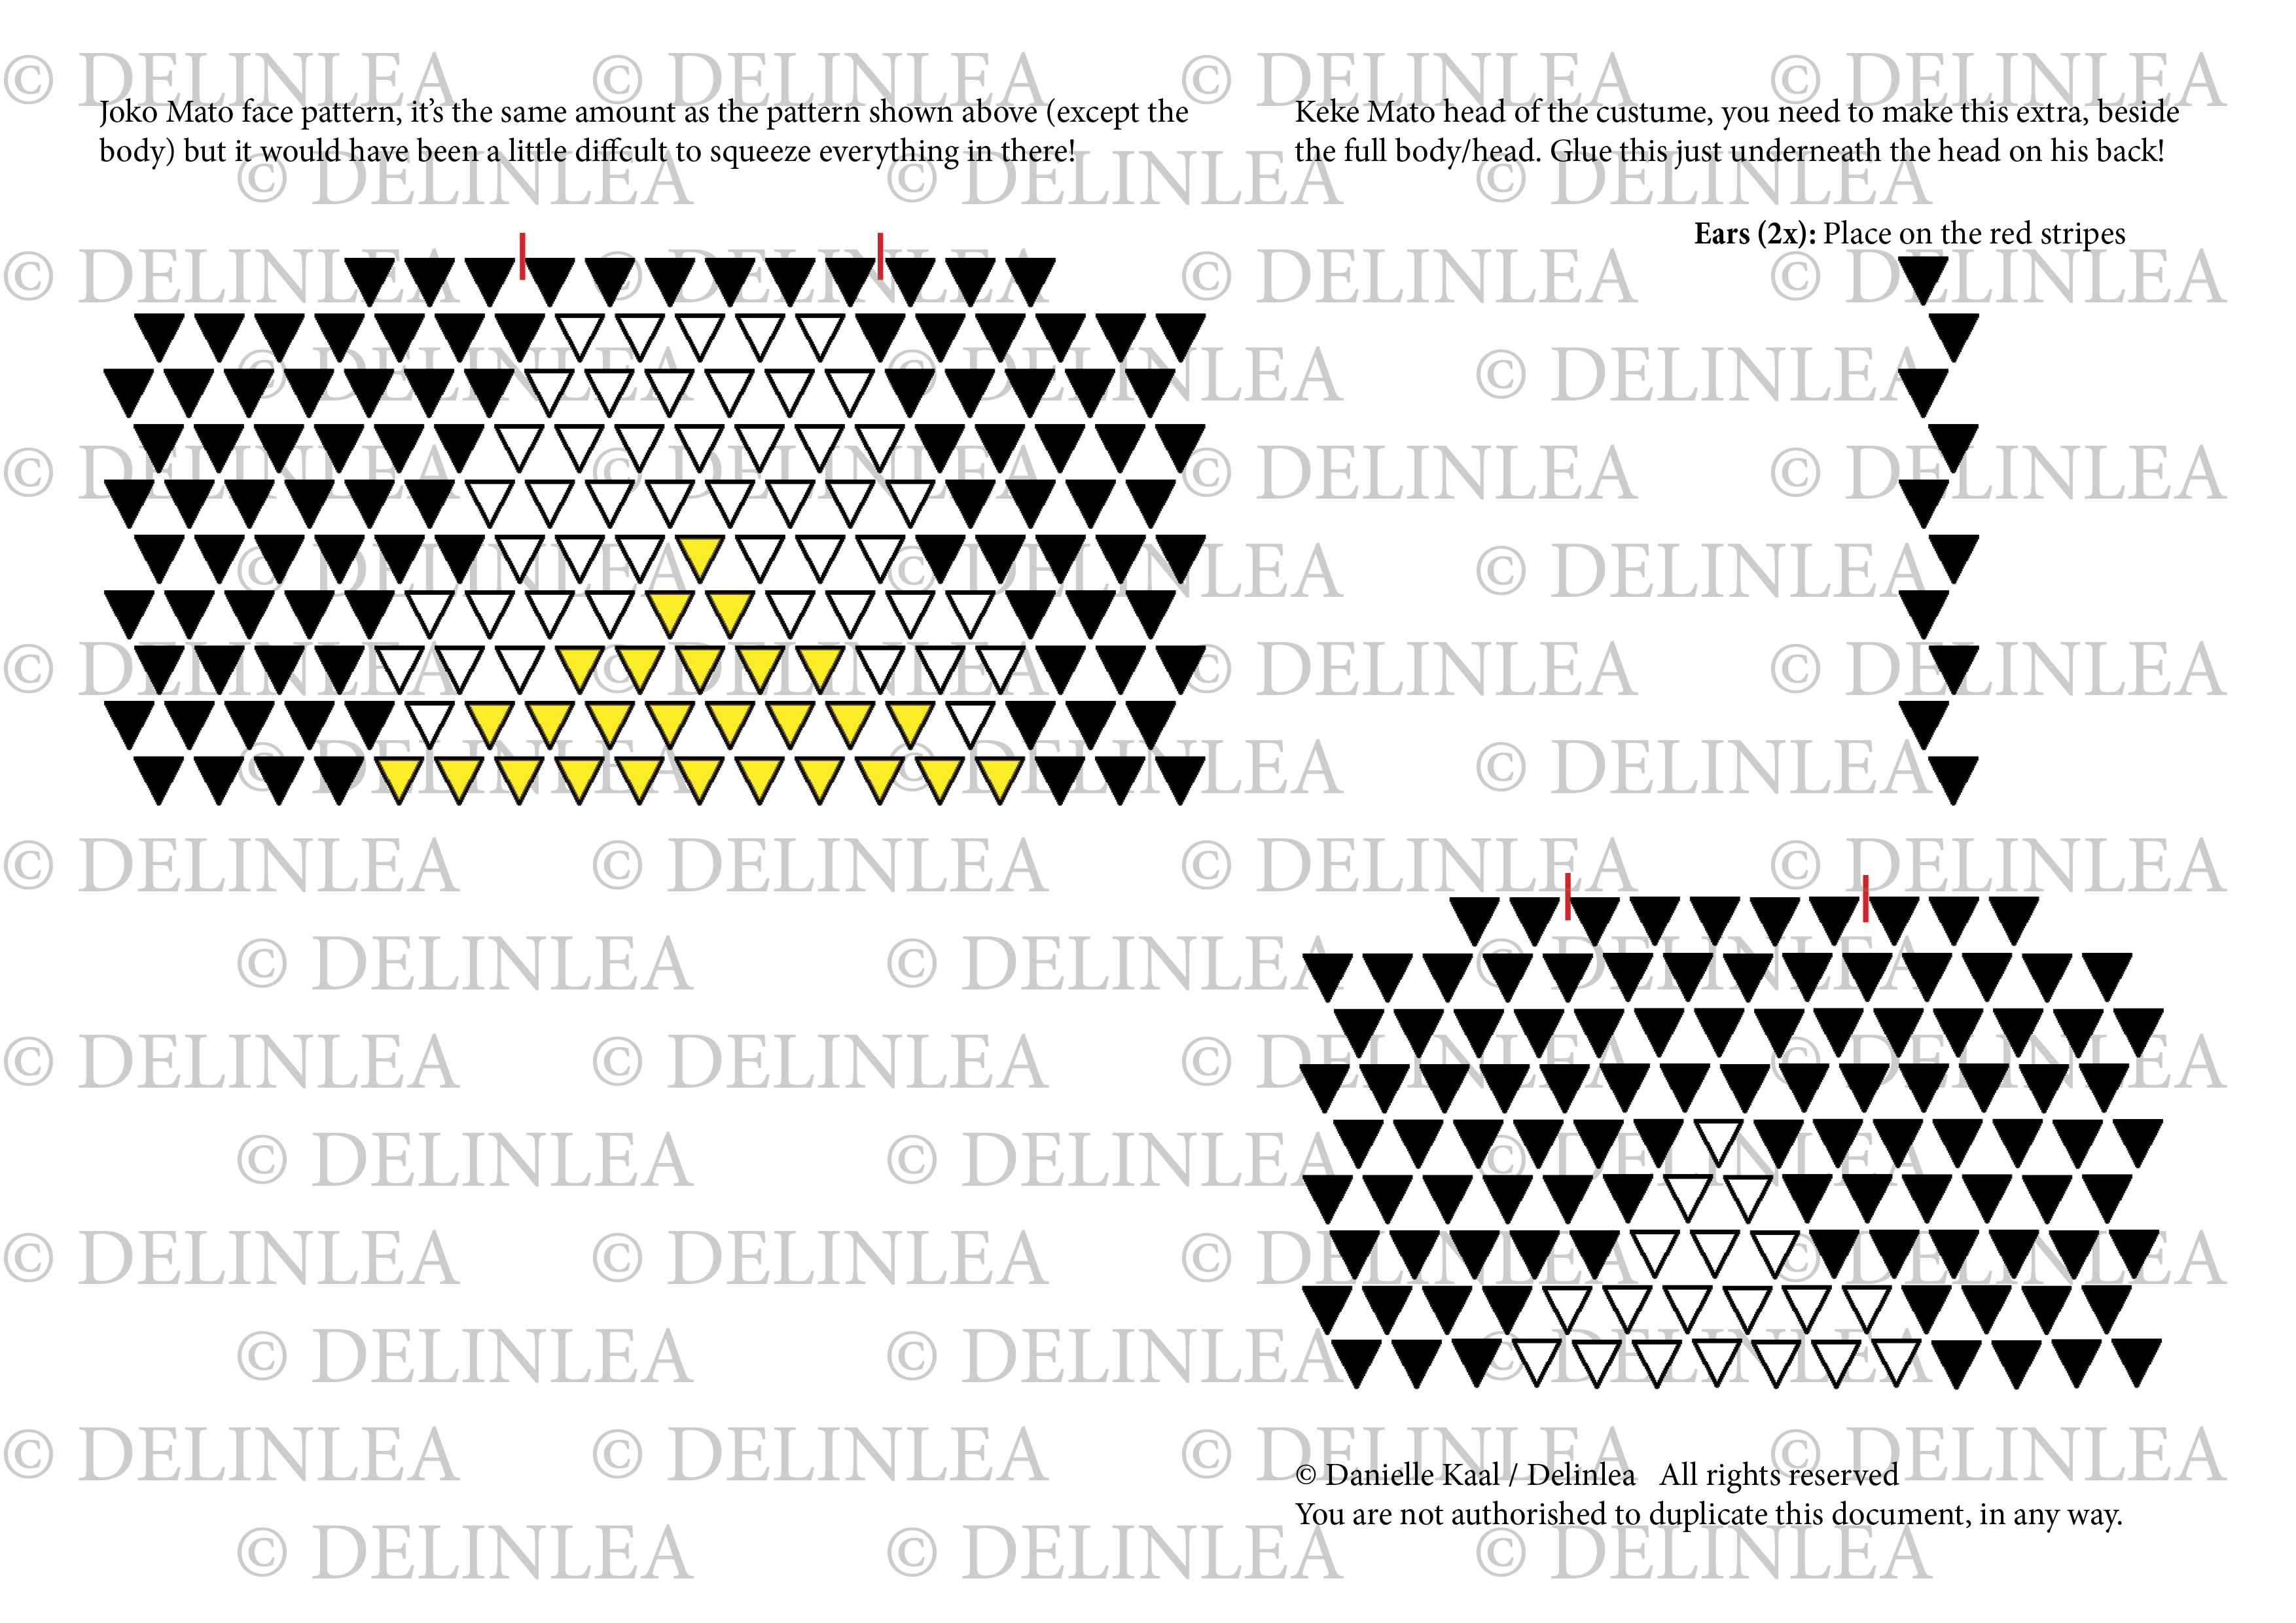
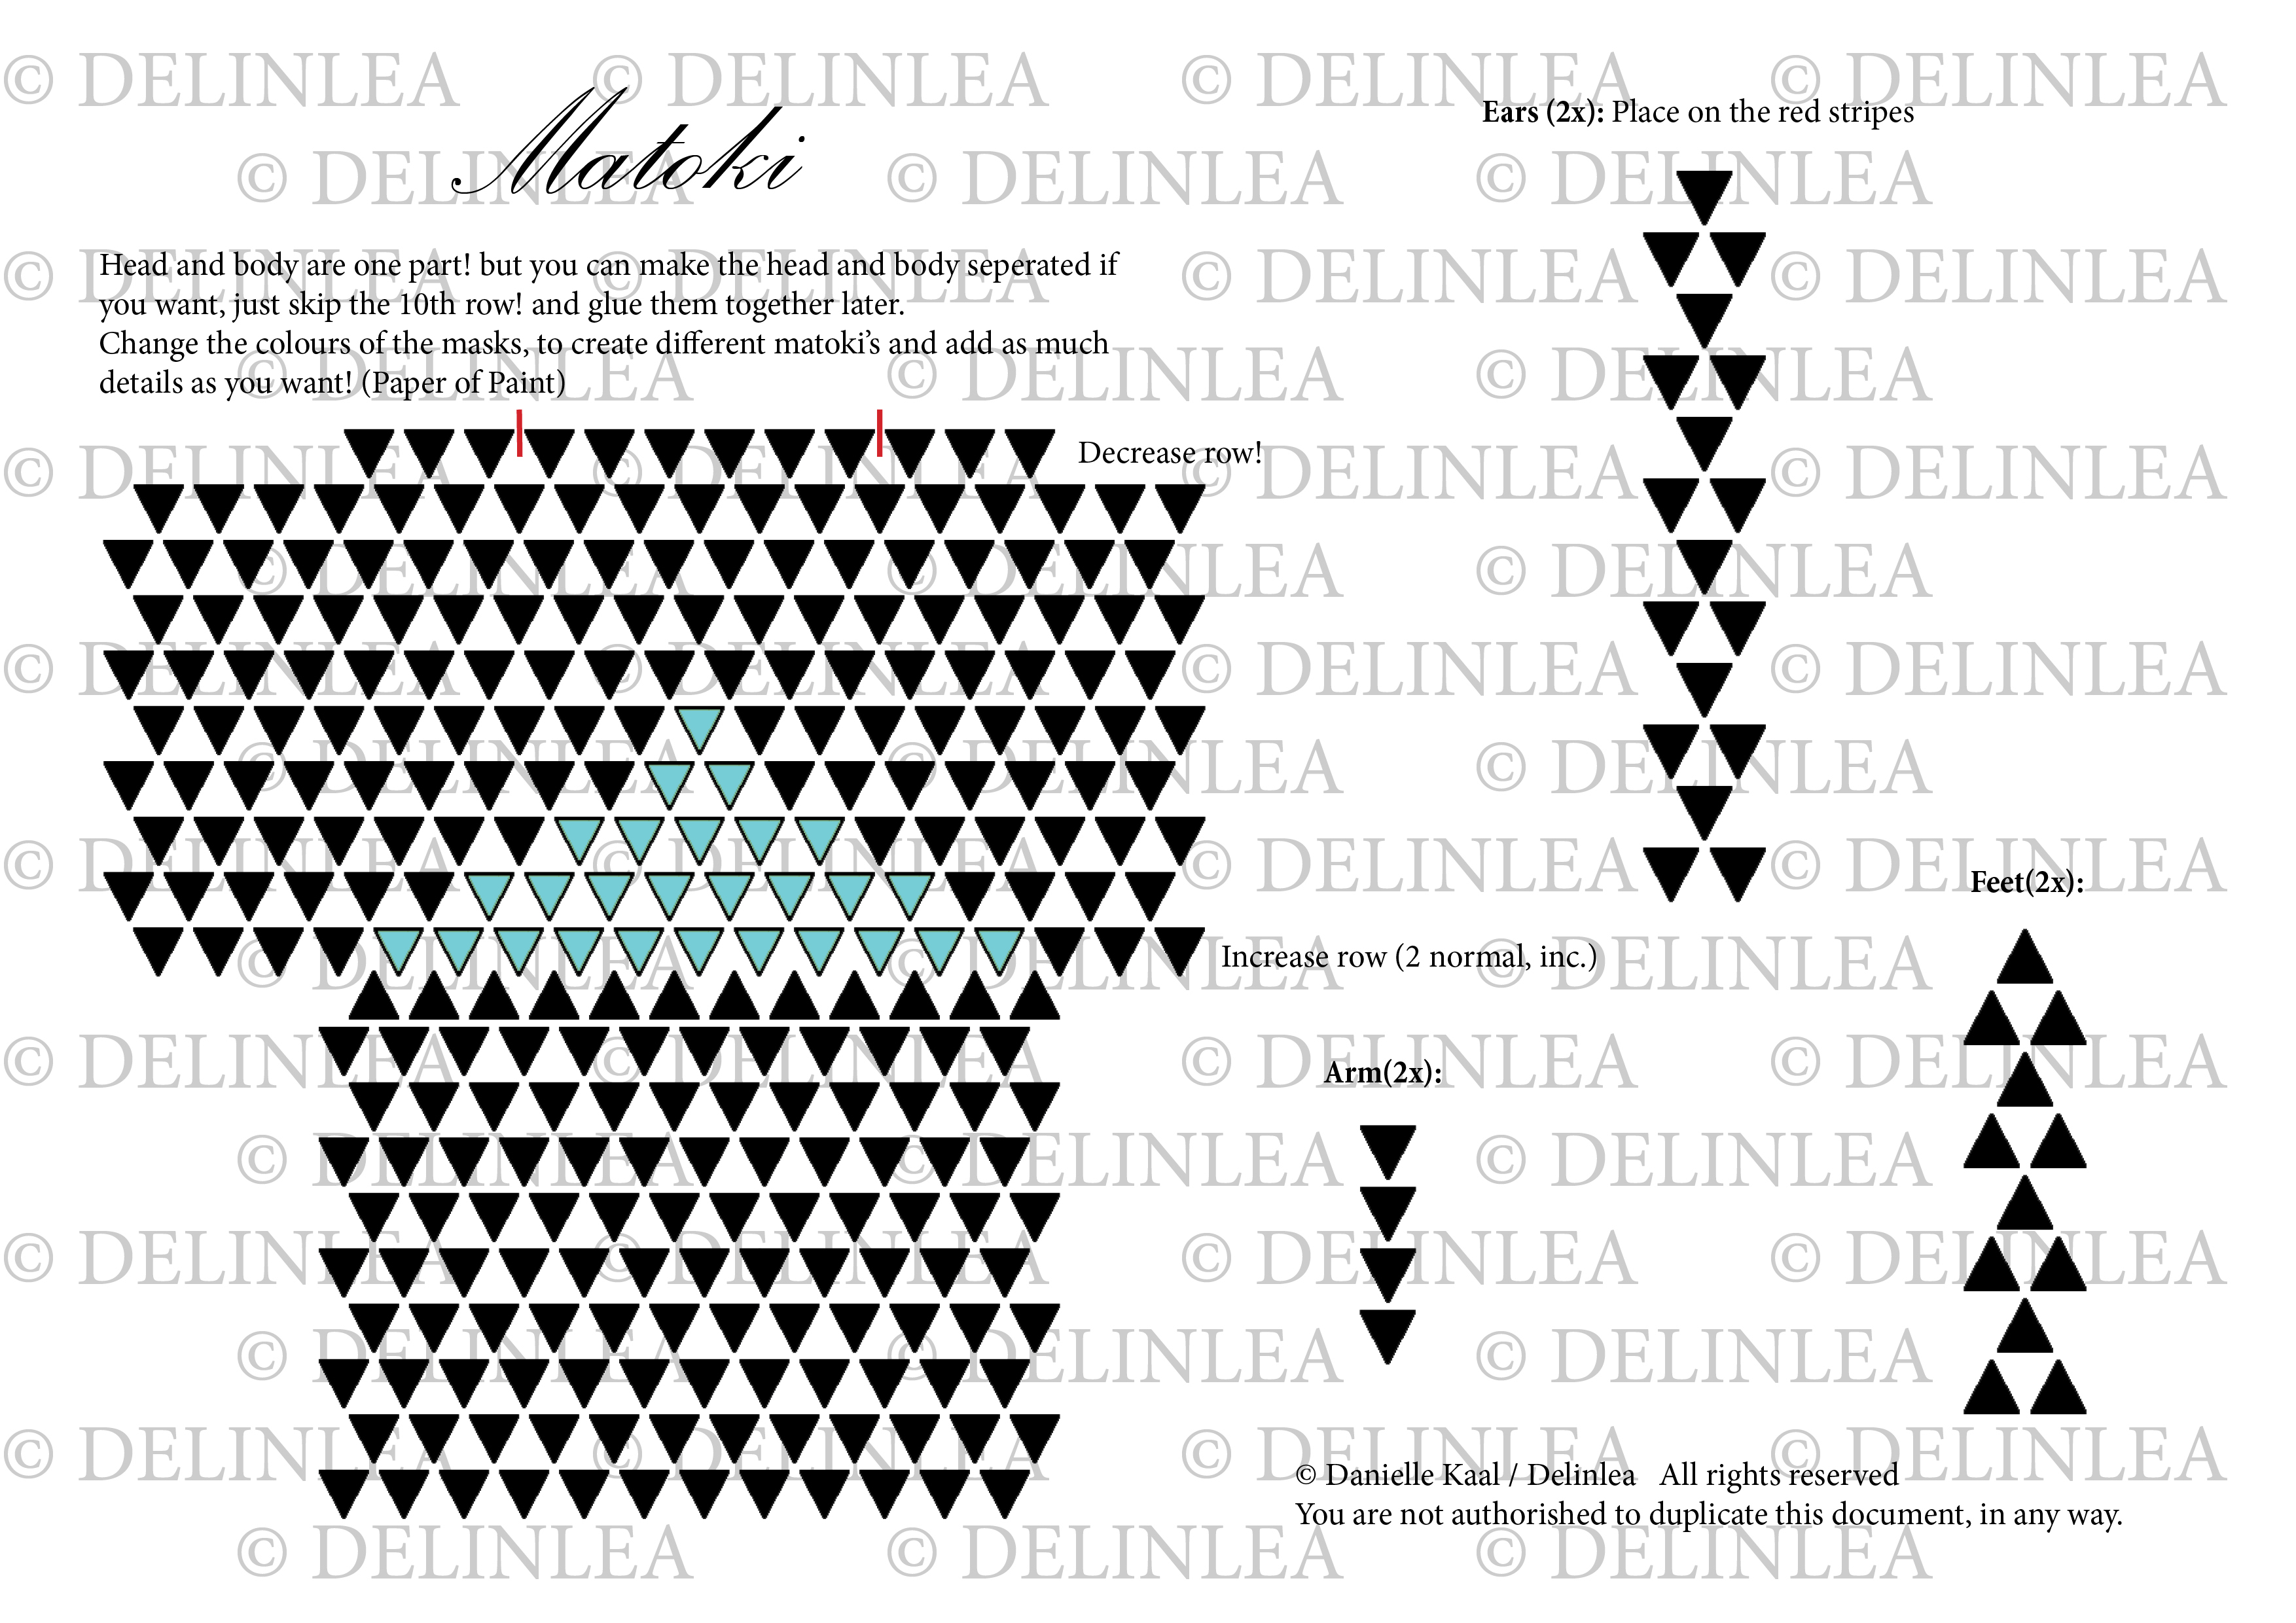
♥ 3D Origami; Matoki Diagram
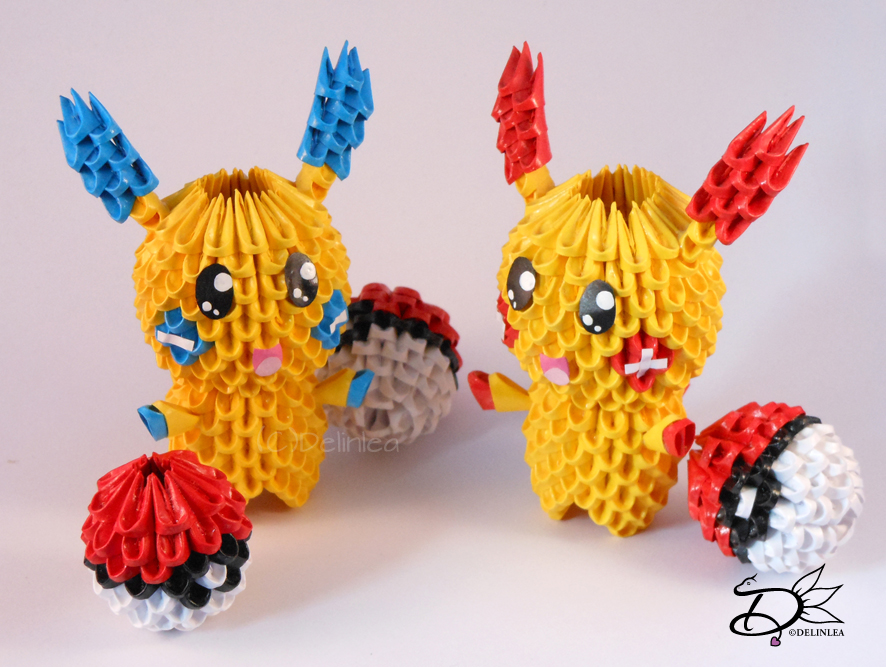
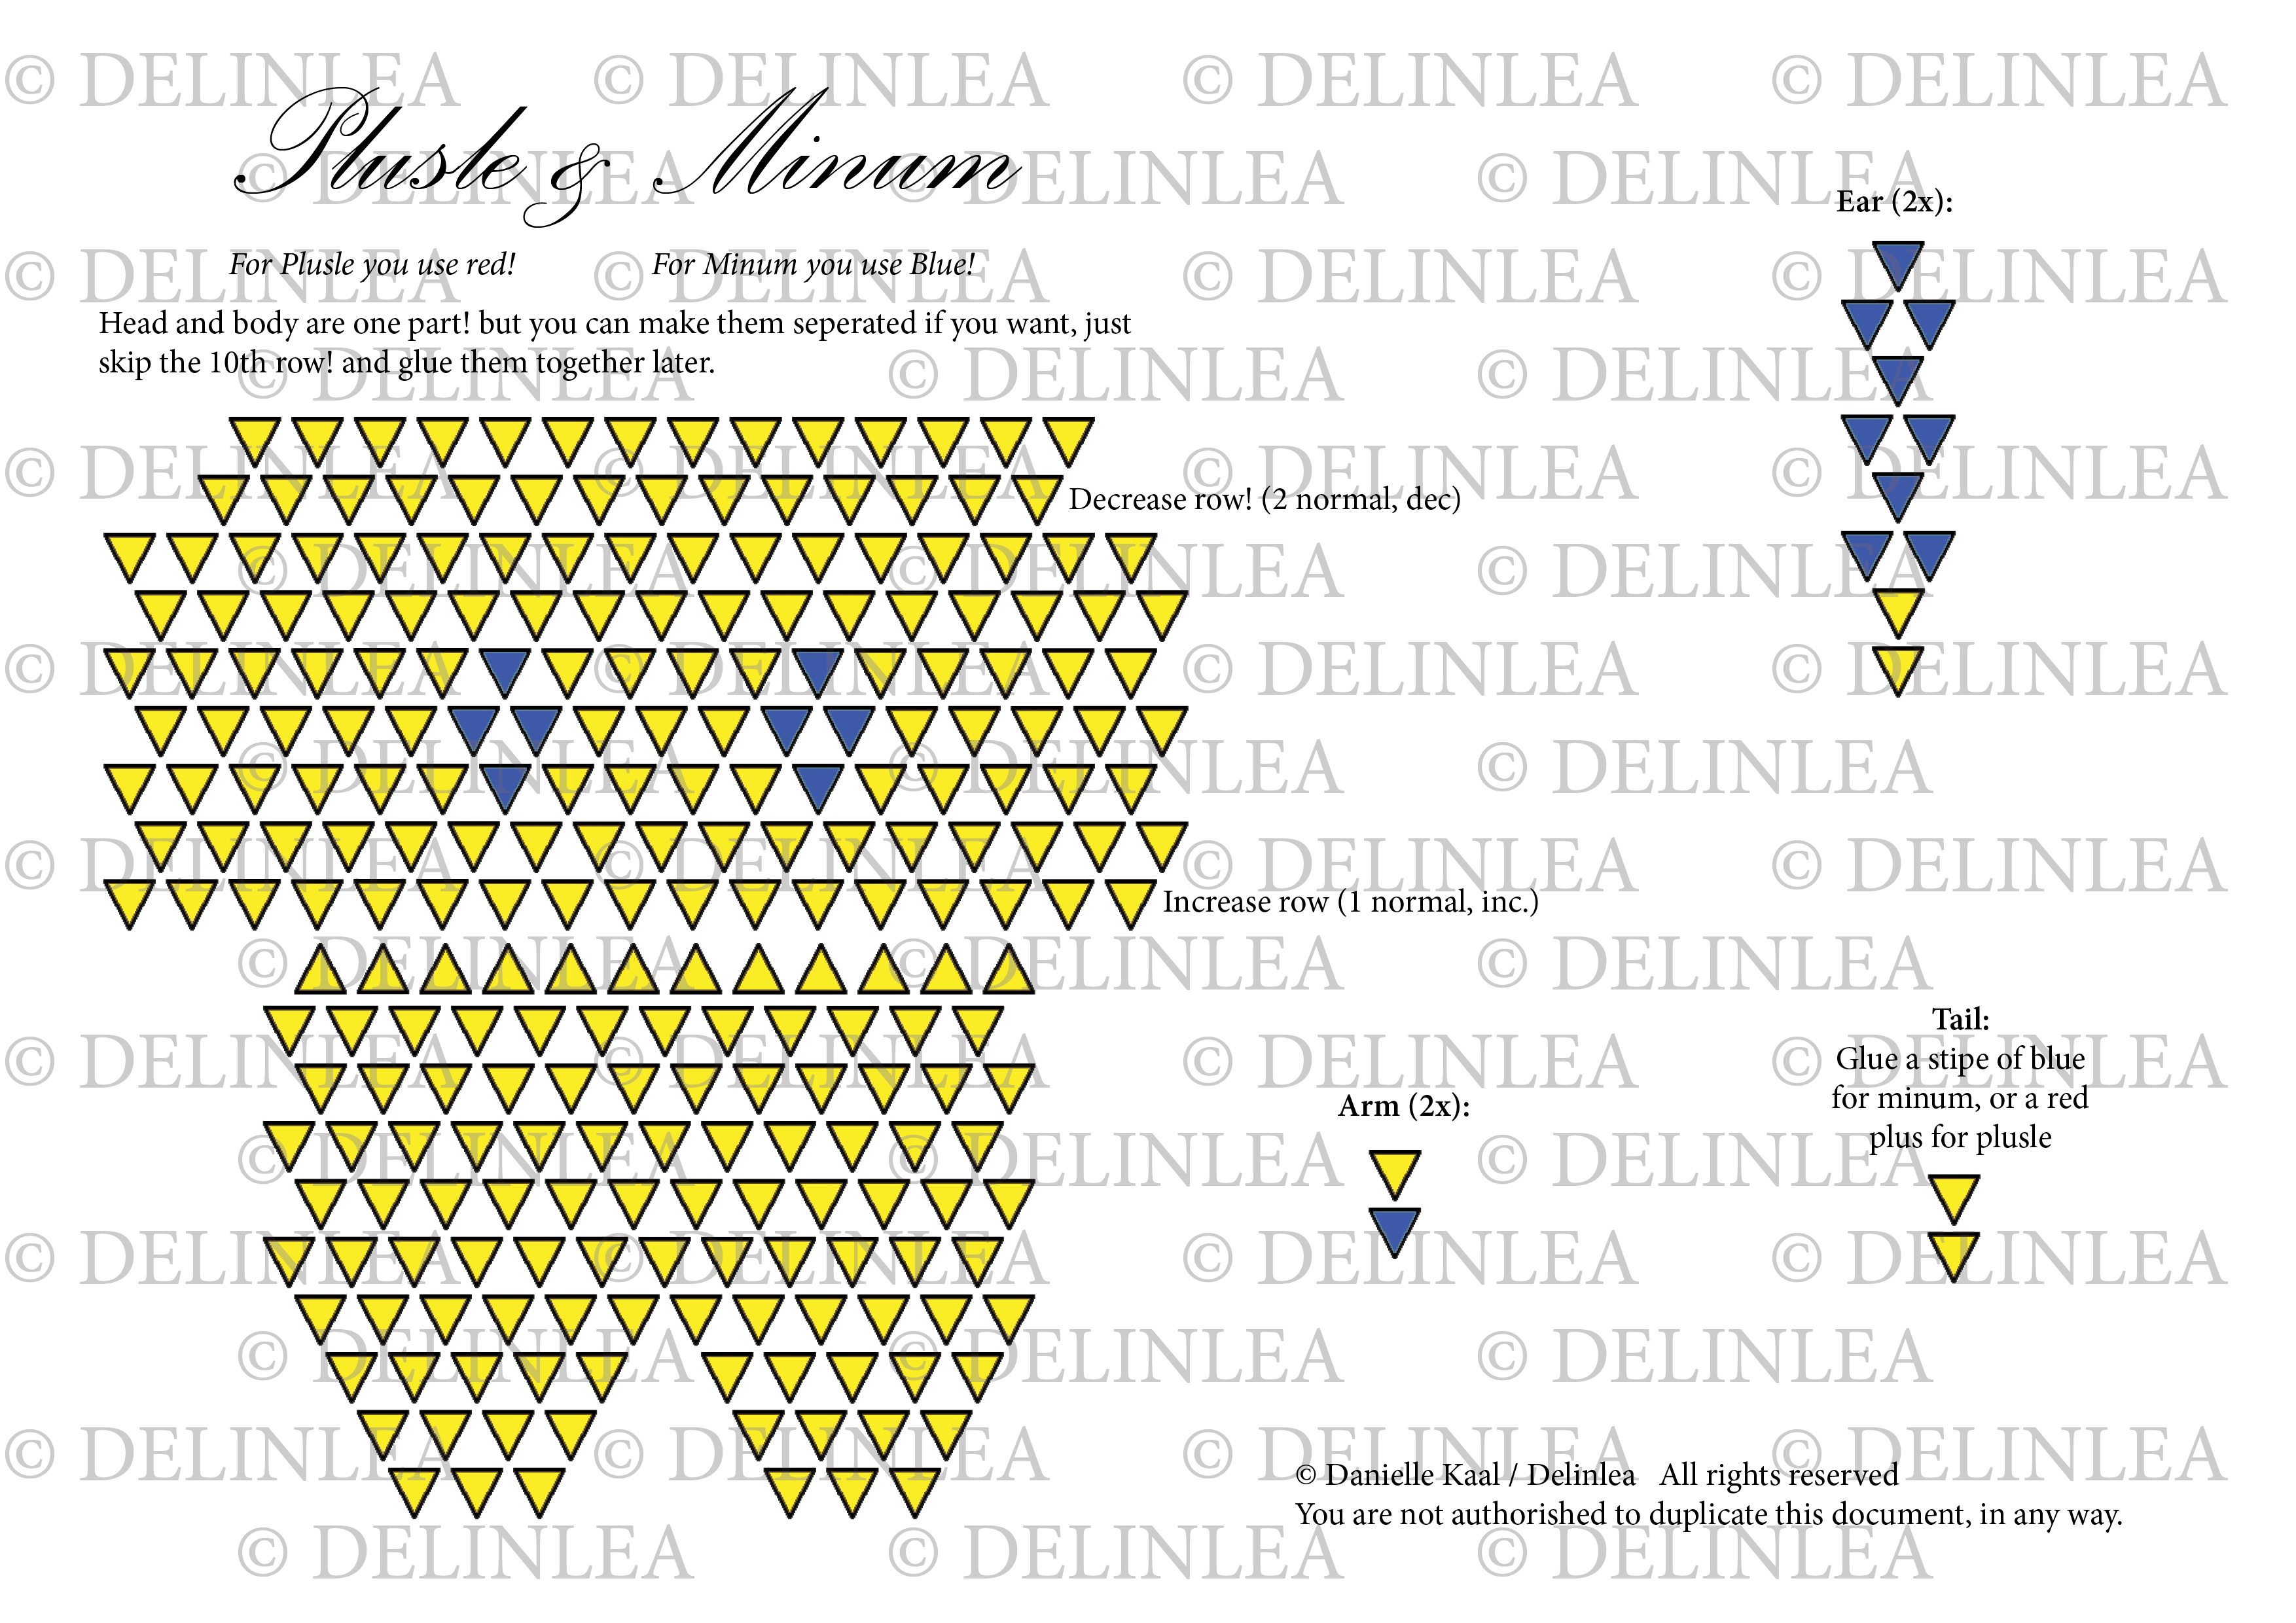
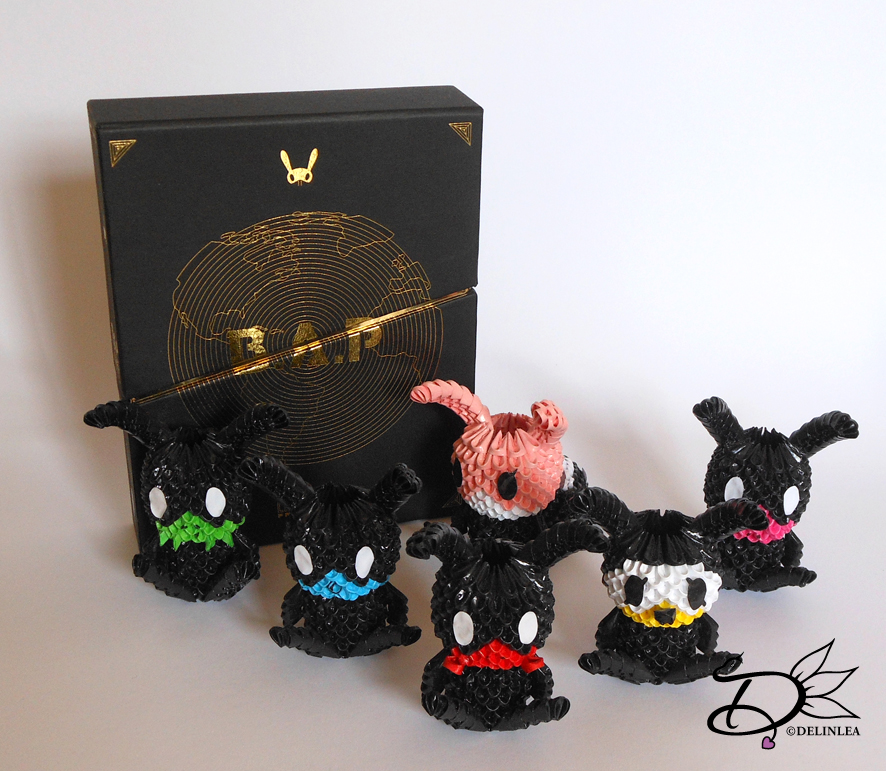
Hey Lovelies! Today no new tutorial or DIY, wel not for me at least, it’s a repost from my old website. Today I wanna give you the 3D Origami pattern of Matoki’s. These are the alien of B.A.P a Korean boyband.
I am so busy that I have barely time to breath, so I throw this one in quickly~! I hope you will enjoy it anyway! If you don’t know how you have to do 3DO, just google search it, there’s plenty of tutorials to be found out there, plenty of videos as wel.
Next week I will repost the last 3DO pattern from my old website, so I can delete that one. It has no use anymore.
After that week, I can hopefully create new content for you! Please bear with me for a while.
Love
Danielle
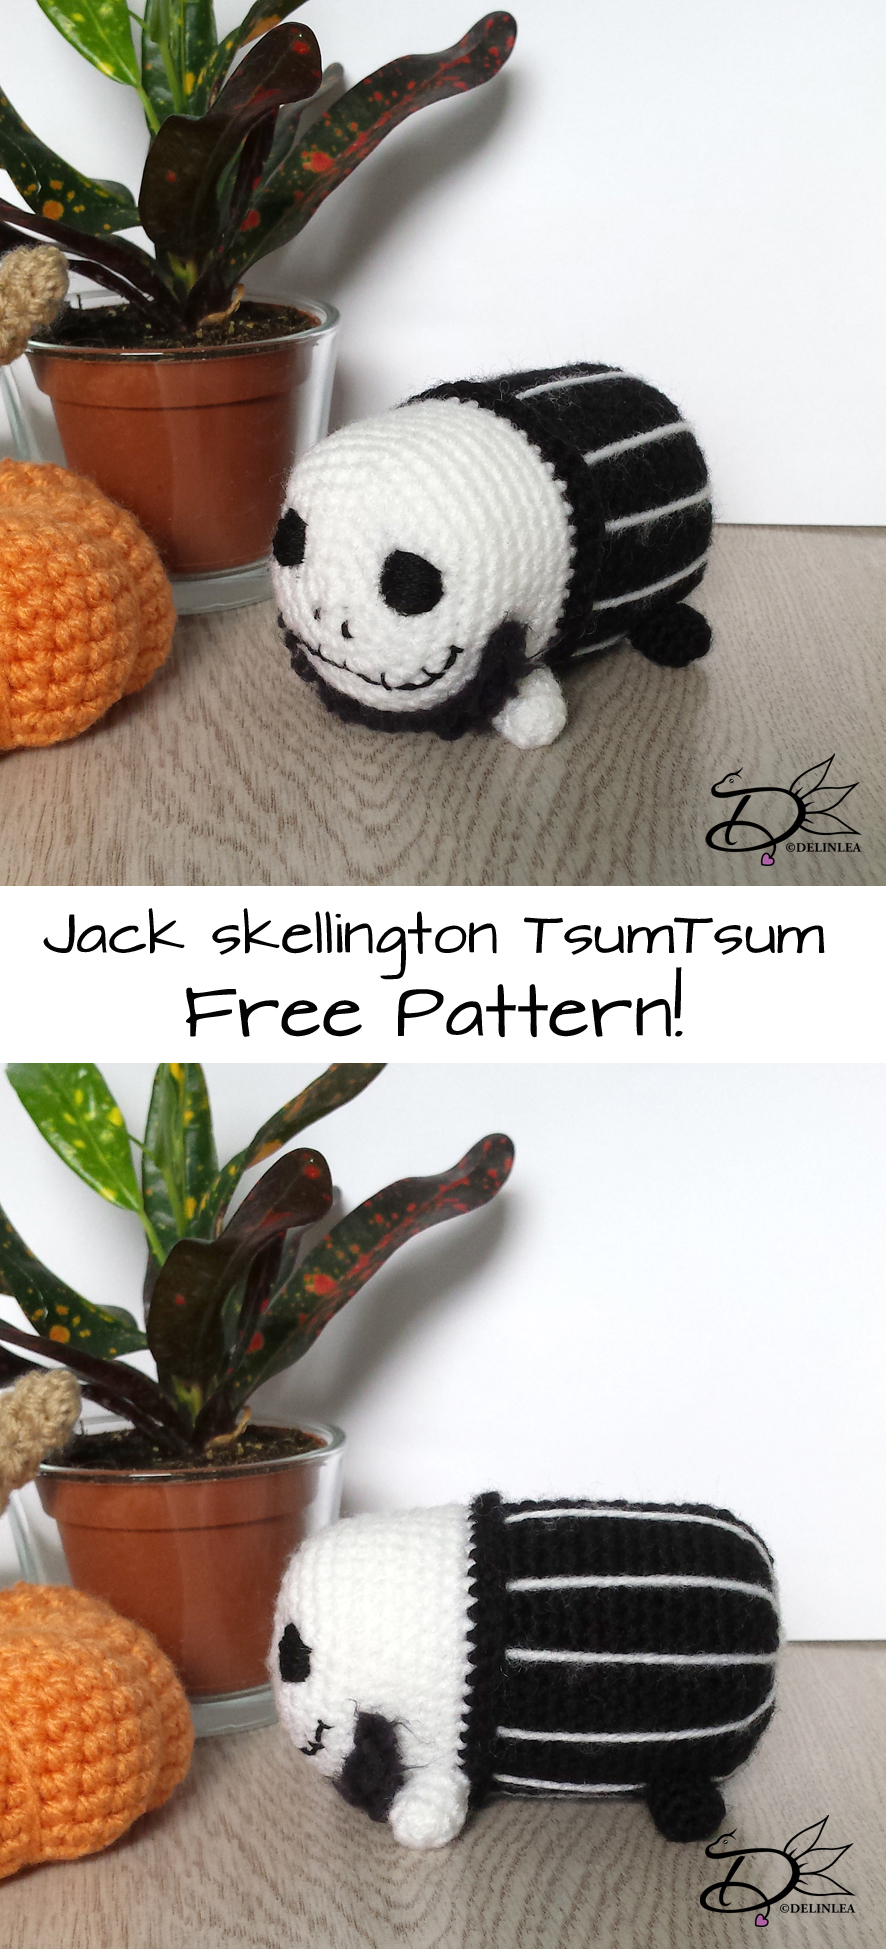
♥ Amigurumi: Jack Skellington TsumTsum
Hey Lovelies! Today I really wanted to make you another TsumTsum pattern, and since halloween is coming, I wanted something a it less cute haha xD. So today we will make a Jack Skellington Tsum! I hope you will enjoy~~!
For this DIY you will need:
♥ Yarn: in the colors Black and White.
♥ Crochet hook.
♥ Stitch marker. (optional)
♥ Fiber fill.
♥ Yarn needle.
♥ Embroidery needle with black thread or black felt.
♥ Scissors.
Stitches used (US):
SC = Single Crochet.
ST = Stitch.
Inc = Increase.
Dec = Decrease.
BL = Back Loops only.
Slst = Slip Stitch.
(…) = Repeat the space in brackets the given number of times.
[…] = Total number of stitches.
Pattern
Body
Start with the color White
1: 6SC in magic ring. [6]
2: Inc in each st around. [12]
3: (1SC, inc), 6 times. [18]
4: (2SC, inc), 6 times. [24]
5: (3SC, inc), 6 times. [30]
6: (4SC, inc), 6 times. [36]
7: (5SC, inc), 6 times. [42]
8: SC in each st around. [42]
|
14: SC in each st around. [42]
Change to Black.
15: SC in each st around. [42]
16: SC in back loops only, in each st around. [42]
17: SC in each st around. [42]
|
29: SC in each st around. [42]
30: (5SC, dec), 6 times. [36]
31: (4SC, dec), 6 times. [30]
32: (3SC, dec), 6 times. [24]
33: (2SC, dec), 6 times. [18] Stuff the body here.
34: (1SC, dec), 6 times. [12]
35: Dec around. [6]
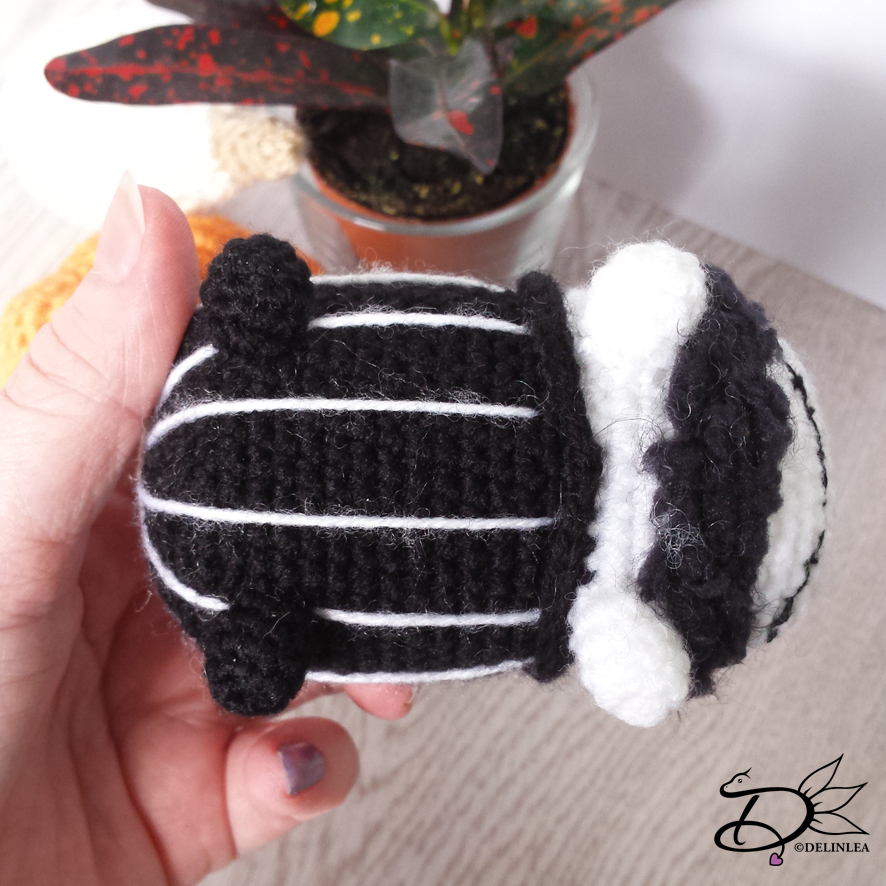
Fasten off and weave in tail. Make with White yarn some stripes on the black part, make it look like his fancy suit!
Now at row 16 you worked in the back loops only. Join now, with black in the front loops, and crochet 42SC around. [42]
Legs (4)
2 in White, 2 in Black.
1: 4SC in magic ring. [4]
2: Inc in each st around. [8]
3: SC in each st around. [8]
|
5: SC in each st around. [8]
Fasten off and leave a long tail vor sewing.
Assembling
To make sure you sew all parts in the right place, you can use some sewing pins to position them. When you are happy with the position, you can sew them on.
Sew the legs on to the bottom of the body, the front legs are pointing to the front. The back legs are pointing to the side.
For the eyes, nose and other details, you can either choose to use felt or you can embroider them on. I chose to embroider them on, cause yeah why choose the easy way haha. But which way you choose, your Tsum will be cute anyway.
With some black plushy yarn I created his beard, but you can use regular yarn for it as well. Just go around half way his face, pull the yarn through and repeat a few more times.
I hope you Enjoyed this pattern! Don’t forget to show me when you did make him~~.
Love
Danielle
♥ Suggestions!
Hey Lovelies! Today no DIY or tutorial, I have simply no time to make something for you right now. So, I wanna ask you for suggestions! I wanna know what you wanna see for tutorials or DIY on my blog, what are you interrested in etc.
I will list some of the crafts/arts I already know, but you can also suggest thing I didn’t list, I’m always eager to figure things out and share that with you. So comment down below or email me through ‘contact’.
Drawing/Painting
I love to draw and paint. I’m better at drawing tho xD. I mainly draw portraits, but I often try to draw other things as wel, such as animals or food or fantasy creatures. Want quick tutorials on how to draw something particulair?!
Crochet/Amigurumi
Ofcourse! haha I have already many Patterns on here, but you can always suggest other characters etc.
Paper/Origami
I have done 3D Origami for a very long time and made the weirdest things. I also made a real life macaw! (But a macaw is not something I will show you how to make, way to complicated!).
I just love to make things with paper, paper is one of my secret loves xD. So anything with paper you can suggest, even bookbinding.
Clay
So many cute things you can make with clay, the possebilities are endeles. It doens’t really matter if it is air dry clay or polymer clay or even home made clay. Tell me if you wanna see something with it!
Beads
I used to make a lot of 3d creatures with wire and beads, I don’t do it that often anymore, but every time I see it, I’m tempted to make something again. I use the gegenfadel technc.
Poseable Art Dolls
This is something I know how to do (not that I’m very good at it xD), but it takes a lot of time, and I’m so busy lately that I can’t seem to finish them. >_< But I can always give tips or something to create your own!
Others
There’s probably a lot more I haven’t covered now, but you can suggest anything and I will look into it!
I hope you will suggest a lot, so I learn what you would like to see more or want patterns for~~
Have a wonderful day! And I’ll go back to work now!
Love
Danielle
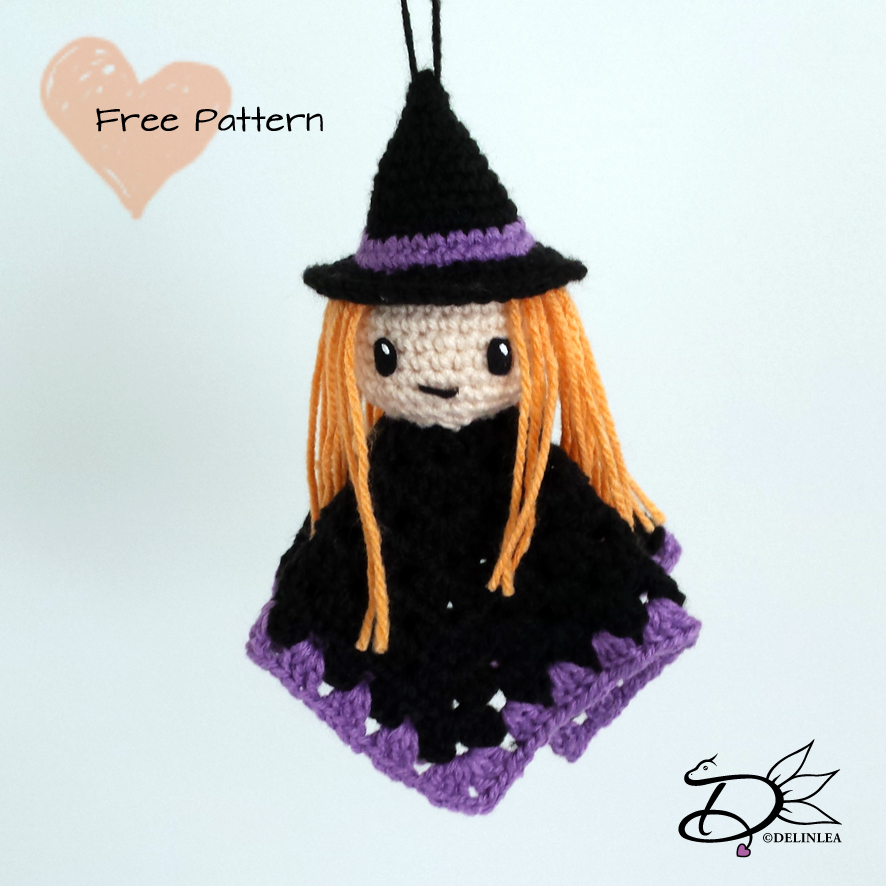
♥ Amigurumi Witch Ghost
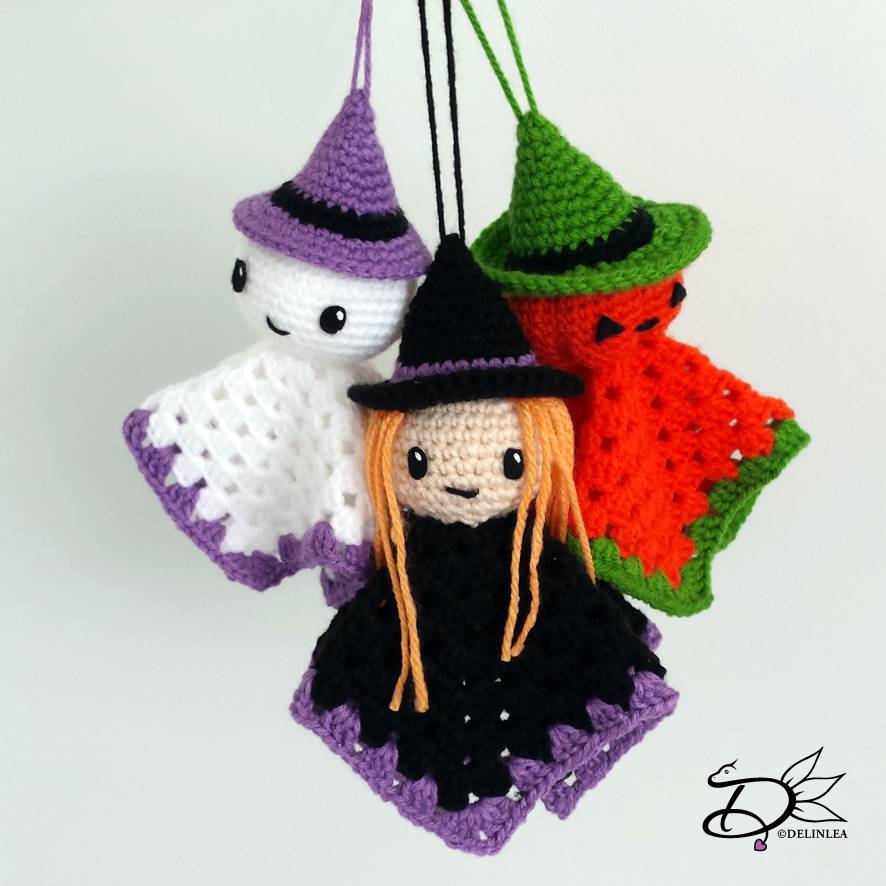
Hey Lovelies! I’m a bit late with today’s post, I know, I’m Sorry! But here it is finally~~. Today we are gonna make a Witch Ghost, the last one in the series together with the Pumpkin Ghost en the Ghost. I made it cute, obvisiously, but I think if you change up de face, it can be a scary one as well. Have fun!
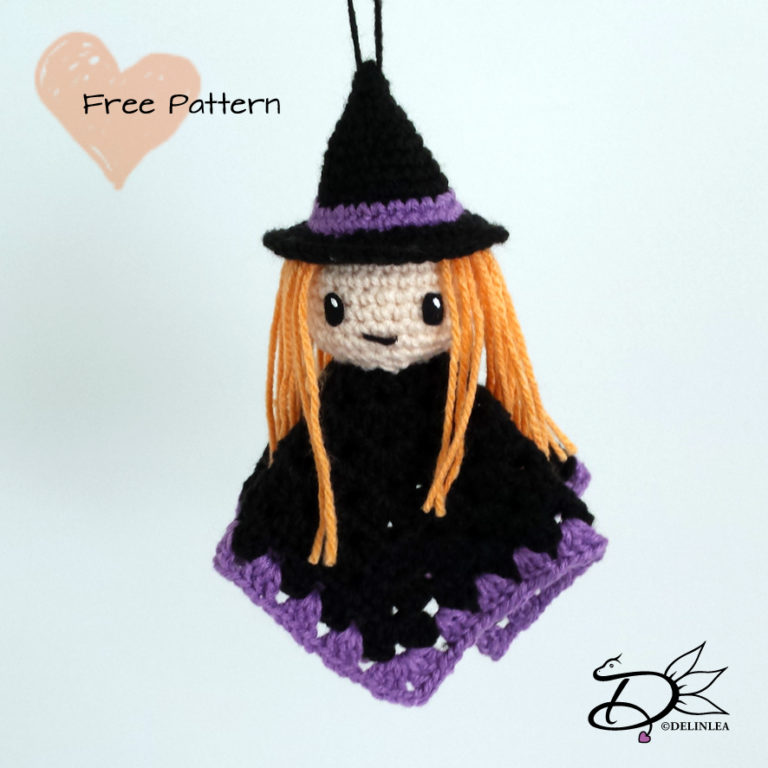
For this DIY you will need:
♥ Yarn, in Beige, Orange, Purple and Black.
♥ Crochet hook.
♥ Stitch marker.
♥ Yarn Needle.
♥ Sewing Pins. (optional)
♥ Fiber fill.
♥ Felt in Black.
♥ Scissors.
♥ Glue.
Stitches used (US):
CH = Chain.
SC = Single Crochet.
DC = Double Crochet.
ST = Stitch.
Inc = Increase.
Dec = Decrease.
Slst = Slip Stitch.
FL = Front Loop.
(…) = Repeat the space in brackets the given number of times.
[…] = Total number of stitches.
Pattern
Head
Use the color Beige.
1: 6SC in Magic Ring. [6]
2: 2SC in each st around. [12]
3: (1SC, inc) 6 times. [18]
4: (2SC, inc) 6 times. [24]
5: (3SC, inc) 6 times. [30]
6: 30SC. [30]
|
11: 30SC. [30]
12: (3SC, dec) 6 times. [24]
13: (2SC, dec) 6 times. [18]
14: (1SC, dec) 6 times. [12]
15: dec all around. [6]
Fasten off and weave in tail.
Granny Square
Start with the color Black. You start each row with 2CH, this counts as the first DC. Use SlSt after every row to go to the next ch space.
1: (3DC, CH2) 4 times in Magic Ring. [4ch space, 12DC]
2: (3DC, CH2, 3DC, CH1) 4 times. [8ch space, 24DC]
3: (3DC, CH2, (3DC, CH1) 2 times.) 4 times. [12ch space, 36DC]
4: (3DC, CH2, (3DC, CH1) 3 times.) 4 times. [16ch space, 48DC]
5: (3DC, CH2, (3DC, CH1) 4 times.) 4 times. [20ch space, 60DC]
6: (3DC, CH2, (3DC, CH1) 5 times.) 4 times. [24ch space, 72DC]
7: (3DC, CH2, (3DC, CH1) 6 times.) 4 times. [28ch space, 84DC]
8: (3DC, CH2, (3DC, CH1) 7 times.) 4 times. [32ch space, 96DC]
Change to the color Purple.
9: (3DC, CH2, (3DC, CH1) 8 times.) 4 times. [36ch space, 108DC]
Fasten off and weave in tail.
Witch hat
Start with the color Black.
1: 4SC in Magic Ring. [4]
2: (1SC, inc) 2 times. [6]
3: (1SC, inc) 3 times. [9]
4: (2SC, inc) 3 times. [12]
5: (3SC, inc) 3 times. [15]
6: (4SC, inc) 3 times. [18]
7: (5SC, inc) 3 times. [21]
8: 21SC. [21]
9: (6SC, inc) 3 times. [24]
Change to the color Black.
10: (7SC, inc) 3 times. [27]
11: (8SC, inc) 3 times. [30]
Change back to the color Purple.
12: Work in front loops only, (2SC, inc) 10 times. [40]
13: 40SC. [40]
14: 40SC. [40]
Fasten off and weave in tail.
Assembling
Sew the granny square to the head. With orange yarn, create ‘hair’ between row 5 and 6 of the head. I did just one row, and not a full circle, but you can make it however you like.
Make a loop on the witch hat and place the hat on the head, if you are happy with the look, sew it on.
Cut some eyes and mouth out of black felt en glue this on the face.
And you are done!! I hope you enjoyed this pattern. This is the last one of these series! I hope you enjoyed all 3 of them. And don’t forget to show me yours if you made it, use the #DelinleaDIY on instagram or twitter!
Love
Danielle