Delinlea - My little fantasy world
  • ♥ Home
  • ♥ About Me
  • ♥ Blogmas 2021
  • ♥ Free Patterns
    • ♥ Amigurumi; Spring/Easter
    • ♥ Amigurumi; Fall/Halloween
    • ♥ Amigurumi; Winter
    • ♥ Amigurumi Tsum Tsum
    • ♥ Amigurumi Ufufy
    • ♥ Amigurumi Others
    • ♥ Christmas Countdown 2017
    • ♥ Blogmas 2018
    • ♥ Blogmas 2020
  • ♥ Tutorials
    • ♥ Easter
    • ♥ Home Deco
    • ♥ Others
  • ♥ Drawing Lessons
  • ♥ FanFic
    • ♥ Chapter 1
    • ♥ Chapter 2
    • ♥ Chapter 3
    • ♥ Chapter 4
    • ♥ Chapter 5
    • ♥ Chapter 6
    • ♥ Chapter 7
  • ♥ Gallery
    • ♥ Crafts
    • ♥ Drawings
    • ♥ Poseable Art Dolls
  • ♥ Links
  • ♥ Contact
    • Privacy Policy

Amigurumi

♥ Chip and Dale Ufufy Amigurumi

18 juni 2020 by Delinlea Leave a Comment

Hey Lovelies! I hope you are doing well these days. I’m gonna keep the intro short today, since I am clueless what to write haha. I usually know what to write, and now I’m like blank. Oh well, some days are like that I guess. The pattern for today are Chip and Dale Ufufy! I finally made those cuties. I hope you will enjoy them and let’s go to the pattern.

Chip and Dale Ufufy

For this Pattern you’ll need:
♥ Yarn in the colors Brown (2 colors, check Chip and Dale to see what color of Brown), Light Yellow, White and Black.
♥ Bit of Fluffy White yarn.
♥ Crochet Hook. (I used a 2mm and a bigger hook for the fluff yarn).
♥ Stitch Markers.
♥ Sewing Pins
♥ Stuffing.
♥ Yarn Needle.
♥ Felt in the colors Black/Dark Brown, White and Pink.
♥ Scissors.
♥ (Fabric) Glue.

Stitches used (US Terms):
Magic Ring.
CH = Chain.
SLST = Slip Stitch.
SC = Single Crochet.
ST = Stitch.
Inc = Increase.
Dec = Decrease.
(…) = Repeat the space in brackets the given number of times.
[…] = Total number of stitches.

Pattern Chip and Dale

This pattern is made using continuous rounds, unless stated otherwise.
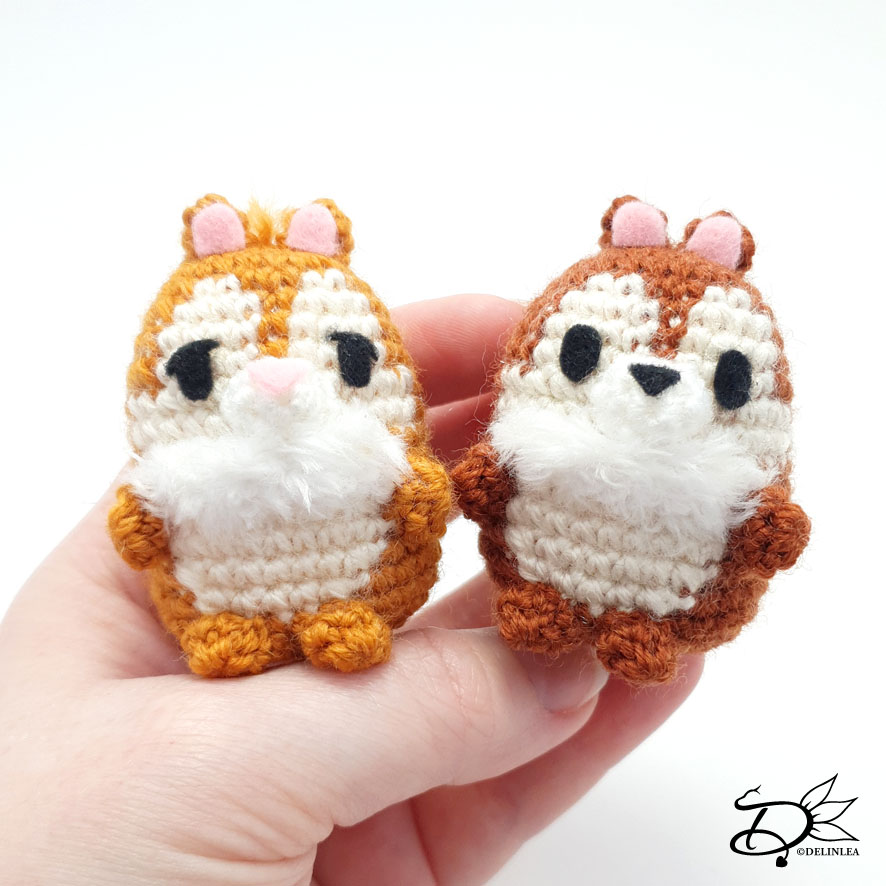
Both Chip and Dale have a different color brown, so check pictures to figure out which color you need.

Body
Start with the color Brown.

1: 6SC in a Magic Ring. [6]
2: 2SC in each st around. [12]
3: (1SC, inc) 6 times. [18]
4: (2SC, inc) 6 tines. [24]
From here on you will change colors to make the eyes etc.
5: Brown; 11SC, Light Yellow; 2SC, Brown; 2SC, Light Yellow; 2SC, Brown; 7SC. [24]
6: Brown; (3SC, inc) 2 times, 3SC, (Light Yellow, inc, 2SC, Brown; 1SC) 2 times, Brown; inc, 3SC, inc. [30]
7: Brown; 13SC, Light Yellow; 4SC, Brown; 1SC, Light Yellow; 4SC, Brown; 8SC. [30]
8: Repeat row7.
9: Brown; 11SC, Light Yellow; 13SC, Brown; 6SC. [30]
10: Repeat row9.
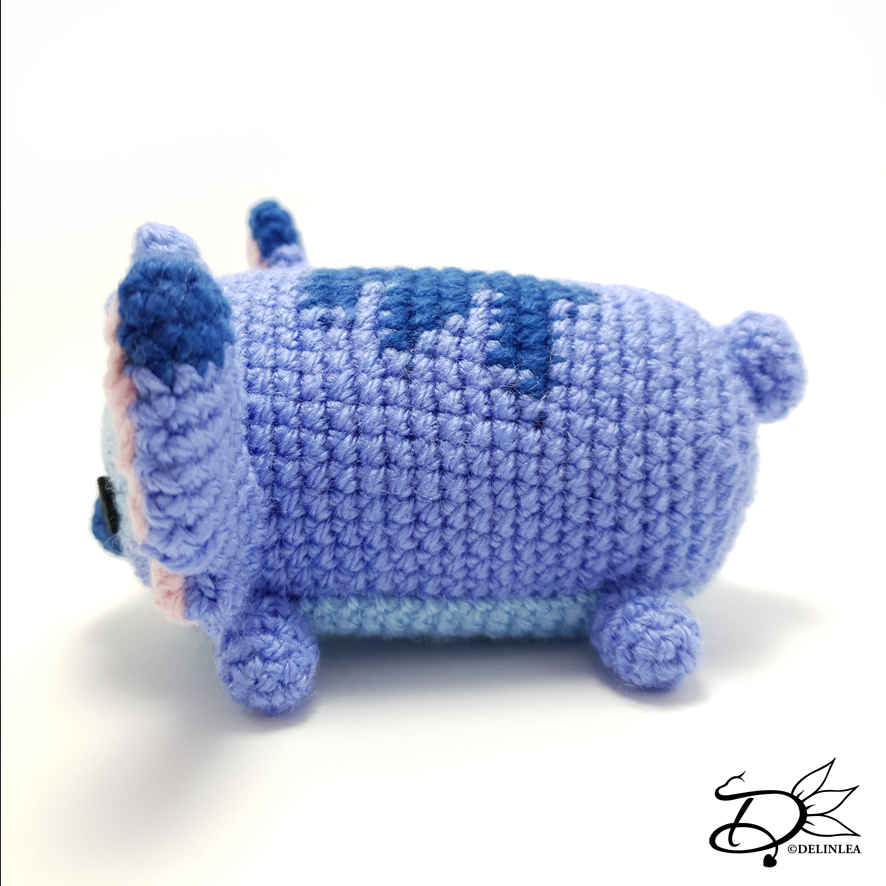
From here you will also add black to create the stripe on his back.
11: Brown; 2SC, Black; 1SC, Brown; 10SC, Light Yellow; 9SC, Brown; 8SC. [30]
12: Brown; 2SC, Black; 1SC, Brown; 10SC, Light Yellow; BL 9SC, Brown; continue normally, 8SC. [30]
13: Repeat row11.
14: Repeat row11.
15: Brown; 2SC, Black; 1SC, Brown; 9SC, inc, Light Yellow; dec, 5SC, dec, Brown; inc, 7SC. [30]
16: Brown; 2SC, Black; 1SC, Brown; 10SC, inc, Light Yellow; dec, 3SC, dec, Brown; inc, 8SC. [30]
17: Brown; 2SC, Black; 1SC, Brown, 27SC. [30]
18: (3SC, dec) 6 times. [24]
19: (2SC, dec) 6 times. [18] Stuff the body!
20: (1SC, dec) 6 times. [12]
21: (dec) 6 times. [6]
Fasten off and weave in tail.
At row12 you worked in the Back Loops only, now attach the fluffy yarn in the Front Loops, and make 9SlSt. Fasten off and weave in tail. My fluffy yarn was too long so I gave it a little trim.

Legs (Make 4)
Use the color Brown.

1: 6SC in a Magic Ring. [6]
2: 6SC. [6]
Fasten off and leave a long tail for sewing.

Snout
Use the color White.

1: 6SC in a Magic Ring. [6]
2: (1SC, inc) 3 times. [9]
Fasten off and leave a long tail for sewing.

Ears and Tail. (Make 3)
Use the color Brown for the 2 ears and White for the tail.

1: 4SC in a Magic Ring. [4]
2: (inc, 1SC) 2 times. [6]
Fasten off and leave a long tail for sewing.

Chip and Dale Ufufy

Assembling

Whenever I assemble Amigurumi, I use sewing pins to pit the piece together first, so I can all parts move around easily. When I am happy, I’ll sew them on. I recommend you do so as well!

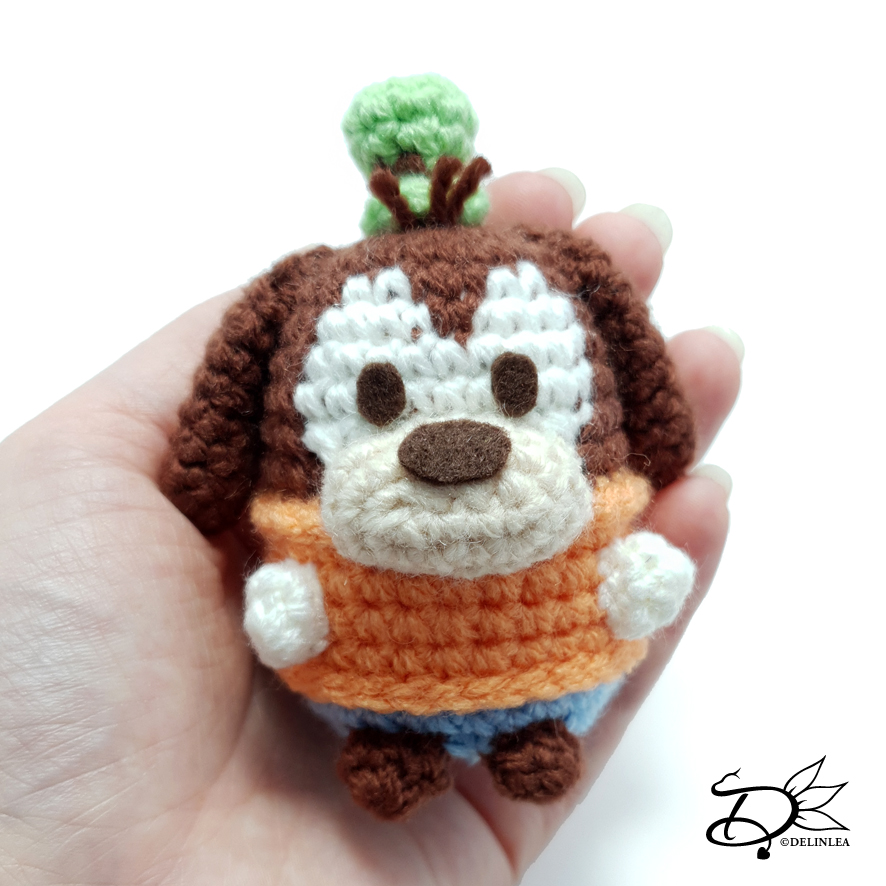
Position the snout right under the Brown stripe between his eyes and sew it on. Place the ears on top of his head, side by side, and sew them on. If you are making Dale, the tail of yarn you used to sew the ears on, weave them in to the top of his head and let them peak out, fluff them up and cut to the length you like.
For the legs, 2 go, side by side, right under his belly and the arms go on both sides of the belly.
Now go to his back, take a piece of white yarn and stitch a stripe at both sides of the black stripe. (see the pics in case you are not sure what to do) and last position his tail under the stripe and sew it on.
With felt, make some eyes, a nose, a stripe to go on his tail (if you like) and the inner ears, for dale you also make some cute little teeth. Glue those on and he’s done. (The colors for the nose for Chip and Dale are different, so make sure to put the correct color for the nose, also the eyes differ in shape.)

And Chip and Dale are created! More to add to our collection. It’s growing quite big now, but I won’t stop making them yet, way too many cute ones out there, still xD. I hope you won’t mind.

I hope you made those cuties as well and if you did, show them to me on Instagram or Twitter and use the #DelinleaDIY. Since I love to see what you make with my patterns!

Have a wonderful day and I’ll see you next week!

Love
Danielle

Posted in: Crafting, Crochet, Ufufy Tagged: Amigurumi, chip and dale, Crochet, cute, Disney, Free Pattern, haken, kawaii, Virka

♥ Ice Cream Cactus Amigurumi

4 juni 2020 by Delinlea Leave a Comment

Hey Lovelies! I can feel summer is coming this month, it starts to heat up and May was a really dry month, we need rain badly. I always struggle with coming up with DIY for summer, maybe because it’s my least favorite season of the year, more like I hate it unless it rains xD. So I decided to write down things that remind me of summer, and I had both ice cream and a cactus written down. So put those together and make ice cream cactus. I hope you will love them!

Ice Cream Cactus

For this pattern you’ll need:
♥ Yarn in Light Green and White (I used Budgetyarn.com)
Additional colors for the sprinkles on top, I used Pink, Blue and Purple.
♥ Safety Eyes, 7mm.
♥ Crochet Hook, 2,5mm.
♥ Stuffing.
♥ Stitch Markers.
♥ Yarn Needle.
♥ Sewing Pins.
♥ Soft Pastel or anything else you can create stripes on the amigurumi later.
♥ Terracotta pot, 4,5cm.

Stitches used (US Terms):
Magic Ring.
CH = Chain.
SLST = Slip Stitch.
SC = Single Crochet.
HDC = Half Double Crochet.
DC = Double Crochet.
ST = Stitch.
Inc = Increase.
Dec = Decrease.
(…) = Repeat the space in brackets the given number of times.
[…] = Total number of stitches.

Pattern Ice Cream Cactus

This pattern is made using continuous rounds, unless stated otherwise.

Body
Use the color Light Green

1: 6SC in a Magic Ring. [6]
2: 2SC in each st around. [12]
3: (1SC, inc) 6 times. [18]
4: (2SC, inc) 6 times. [24]
5: (3SC, inc) 6 times. [30]
6: 30SC. [30]
|
10: 30SC. [30]
11: (3SC, dec) 6 times. [24]
12: 24SC. [24]
|
15: 24SC. [24]
16: (2SC, dec) 6 times. [18]
17: 18SC. [18] Place the eyes between row 9 and 10, and stuff the body.
18: (1SC, dec) 6 times. [12]
19 (dec) 6 times. [6]
Fasten off and weave in tail.

Side Arm
Use the color Light Green.

1: 6SC in a Magic Ring. [6]
2: 2SC in each st around. [12]
3: 12SC. [12]
4: 12SC. [12]
5: (2SC, dec) 3 times. [9] Stuff the arm.
6: 9SC. [9]
7: (1SC, dec) 3 times. [6]
Fasten off and leave a long tail for sewing.

Cream for Body
Use the color White.

1: 6SC in a Magic Ring. [6]
2: 2SC in each st around. [12]
3: (1SC, inc) 6 times. [18]
4: (2SC, inc) 6 times. [24]
5: (3SC, inc) 6 times. [30]
6: 30SC. [30]
7: (1SC + 1HDC in the next st, 2DC in the next st, 1HDC + 1SlSt in the next st, 1SC + 1HDC in the next st, 1SlSt) 6 times. [54]
Fasten off and leave a long tail for sewing.

Cream for the Side Arm
Use the color White.

1: 6SC in a Magic Ring. [6]
2: (1SC+HDC in the next st, 1SlSt) 3 times. [9]
Fasten off and leave a long tail for sewing.

Assembling.

I always use sewing pins to place all parts first. This way you can easily move all parts around until you are happy with the outcome.

Sew the side arm to the body, place it where you like it. With the extra pieces of colored yarn create the sprinkles on both cream parts. I found it easier to it now, before sewing it to the body. After you have created the sprinkles, sew the cream parts to the body and the side arm.

With some soft pastel pencils I created some strokes on the body of the cactus to make it more cactus like. You could also leave this out or use things like watercolor or make-up.

And the Ice Cream Cactus is already done! Isn’t it perfect for summer? I love it at least and I hope you will too. If you made him, please show me on Instagram of Twitter with the #DelinleaDIY

Have a wonderful day and I’ll see you next week!

Love
Danielle

Posted in: Crafting, Crochet Tagged: Amigurumi, Crochet, cute, Free Pattern, haken, Ice Cream, kawaii, summer

♥ Stitch Tsum Tsum Amigurmi

28 mei 2020 by Delinlea 6 Comments

Hey Lovelies! I am finally writing this blog post, my laptop is a tiny bit old (Almost 7 years) and it had some troubles doing what it is suppose to do. Oh well, it’s working now, all fine xD. I just think it is time to look around for a new one, finally. (I’ve been putting that of haha). Anyway, back to the point of this blog, pattern time! It’s Tsum Tsum time today and I was asked if I could make Stitch! Such an adorable creature that was on my list for quite some time now, so I pushed him a bit forward. I hope you will enjoy him as much as I do.

Stitch Tsum Tsum

For this Pattern you’ll need:
♥ Yarn in 3 shades of Blue (Light Blue, Blue and Dark Blue) and Pink (I used Stylecraft Special DK and Budgetyarn.com)
♥ Black Felt or Yarn for the eyes.
♥ Crochet Hook. (I used a 2,5mm)
♥ Stuffing.
♥ Stitch Markers.
♥ Yarn Needle.
♥ Sewing Pins.
♥ (Fabric)Glue.  (In case you decided to go with felt).

Stitches used (US Terms):
Magic Ring.
CH = Chain.
SLST = Slip Stitch.
SC = Single Crochet.
ST = Stitch.
Inc = Increase.
Dec = Decrease.
(…) = Repeat the space in brackets the given number of times.
[…] = Total number of stitches.

Pattern Stitch

This pattern is made using continuous rounds, unless stated otherwise.

Body
Start with the color Blue.

1: 6SC in a Magic Ring. [6]
2: 2SC in each st around. [12]
3: (1SC, inc) 6 times. [18]
From here on you’ll change colors every now and then to create the eyes.
4: Blue; 3SC, Light Blue; 1SC in the same st as the last sc, 3SC, Blue; 1SC in the same st as the last sc, 2SC, inc, 3SC, Light Blue; 1SC in the same st as the last sc, 3SC, Blue; 1SC in the same st as the last sc, 2SC, inc. [24]
5: Blue; 3SC, Light Blue; inc, 3SC, inc, Blue; 3SC, inc, 2SC, Light Blue; inc, 3SC, inc, Blue; 4SC, inc. [30]
6: Blue; 4SC, Light Blue; inc, 4SC, inc, Blue; 4SC, inc, 2SC, Light Blue; inc, 4SC, inc, Blue; 6SC, inc. [36]
7: Blue; 6SC, Light Blue; 1SC in the same st as the last sc, 5SC, Blue; inc, 5SC, inc, 2SC, inc, Light Blue; 6SC, Blue; 1SC in the same st as the last sc, 8SC, inc. [42]
8: Blue; 7SC, Light Blue; 4SC, Blue; 15SC, Light Blue; 4SC, Blue; 12SC. [42]
Continue with only the Blue yarn.
9: 42SC. [42]
|
14: 42SC. [42]
From here on you’ll change colors every now and then to create the shape on his back.
15: Blue; 16SC, Dark Blue; 7SC, Blue; 19SC. [42]
16: Same as Row 15.
17: Blue; 18SC, Dark Blue; 3SC, Blue; 21SC. [42]
18: Blue; 14SC, Dark Blue; 11SC, Blue; 17SC. [42]
19: Blue; 15SC, Dark Blue; 9SC, Blue; 18SC. [42]
20: Same as Row 15.
21: Same as Row 17.
22: Same as Row 18.
23: Blue; 13SC, Dark Blue; 13SC, Blue; 16SC. [42]
24: Same as Row 17.
25: Same as Row 17.
Continue with only the Blue yarn.
26: 42SC. [42]
|
29: 42SC. [42]
30: (5SC, dec) 6 times. [36]
31: (4SC, dec) 6 times. [30]
32: (3SC, dec) 6 times. [24]
33: (2SC, dec) 6 times. [18] Stuff the body here.
34: (1SC, dec) 6 times. [12]
35: (dec) 6 times. [6]
Fasten off and weave in tail.

Belly
Use the color Light Blue.

1: CH13, insert in the second ch from hook, 11SC, 3SC in the next st, continue along the other side of the chain, 10SC, inc. [26]
2: inc, 10SC, (inc) 3 times, 10SC, (inc) 2 times. [32]
3: 1SC, inc, 10SC, (1SC, inc) 3 times, 10SC, (1SC, inc) 2 times. [38]
4: 2SC, inc, 10SC, inc, (3SC, inc) 2 times, 10SC, inc, 3SC, inc, 1SC. [44]
5: 3SC, inc, 10SC, inc, 3SC, inc, 2SC, inc, 3SC, inc, 10SC, inc, 3SC, inc, 2SC, inc. [52]
6: 4SC, inc, 10SC, inc, (4SC, inc) 3 times, 10SC, inc (4SC, inc) 2 times. [60]
7: 60SC. [60]
Fasten off and leave a long tail for sewing.

Nose
Use the color Dark Blue.

1: 6SC in a Magic Ring. [6]
2: (1SC, 3SC in the next st) 2 times, 2SC. [10]
3: 10SC. [10]
Fasten off and leave a long tail for sewing.

Hair 1
Use the color Blue.

1: 4SC in a Magic Ring. [4]
2: 4SC. [4]
Fasten off and leave a long tail for sewing.

Hair 2
Use the color Blue.

1: 5SC in a Magic Ring. [5]
2: 5SC. [5]
3: 5SC. [5]
Fasten off and leave a long tail for sewing.

Ears (Make 2)
Start with the color Dark Blue

Note before you continue, you will have a right and a left ear, read well what you need to do.

1: 6SC in a Magic Ring. [6]
2: (1SC, inc) 3 times. [9]
3: 9SC. [9]
Change to the color Blue.
4: (2SC, inc) 3 times. [12] If you make the left ear the row is as follow: (2SC, inc) 2 times, Skip 2st, inc. [10]
5: 12SC. [12] If you make the left ear the row is as follow: 8SC, Ch2, 2SC. [12]
6: 12SC. [12]
7: 12SC. [12]
8: 12SC. [12]
9: 12SC. [12]
10: 12SC. [12] If you make the right ear the row is as follow: 4SC, skip 3st, 5SC. [9]
11: 12SC. [12] If you make the right ear the row is as follow: 4SC, ch3, 5SC. [12]
12: (2SC, dec) 3 times [9]
13: (1SC, dec) 3 times. [6]
Fasten off and leave a long tail for sewing.

Inner Ears (Make 2)
Use the color Pink.

Note before you continue, you will have a right and a left ear, read well what you need to do.
Also this part is not made in continues rounds.

1: Ch3, insert in second ch from hook, 2SC, turn. [2]
2: (inc) 2 times, turn. [4]
3: 4SC, turn. [4] If you make the left inner ear the row is as follow: 3SC, Ch2, turn. [5]
4: 4SC, turn. [4] If you make the left inner ear the row is as follow: Insert in second ch, 4sc, turn. [4]
5: 4SC, turn. [4]
6: 4SC, turn. [4]
7: 4SC, turn. [4] If you make the right inner ear the row is as follow: 3SC, Ch2, turn. [5]
8: 4SC, turn. [4] If you make the right inner ear the row is as follow: Insert in second ch, 4sc, turn. [4]
9: (dec) 2 times. [2]
Fasten off and sew the inner ears to the ears.

Legs
Use the color Blue.

1: 4SC in a Magic Ring [4]
2: 2SC in each st around. [8]
3-5: SC in each st around. [8]
Fasten off and leave a long tail for sewing.

Tail
Use the color Blue.

1: 6SC in a Magic Ring. [6]
2: 2SC in each st around. [12]
3: 12SC. [12]
4: (2SC, dec) 3 times. [9]
Fasten off and leave a long tail for sewing.

Assembling

Whenever I start assembling amigurumi ’s I use sewing pins to put it together first. This way I can move parts around easily until I am happy and sew them on.

Start with sewing on his nose, just under the middle of the start of the body, in between the eyes.
Then sew on his belly, make sure to place it right, since the front part create Stitch mouth.
After the belly is on you can attach his legs, sew them there where the belly meets his body.
last also sew on his tail, hair and ears! I did the ears last so I could place them in the right spot when everything is already there.
Of course don’t forget to give him some eyes! Use either felt or embroidery to do so.

And little Stitch is born and added to our growing tsum tsum collection! I hope you had fun and I’ll see you next week! Don’t forget to show me yours on either Twitter or Instagram!

Love
Danielle

Posted in: Crafting, Crochet, Tsum Tsum Tagged: Amigurumi, Crochet, cute, Disney, Free Pattern, haken, kawaii, Stitch, Tsum Tsum

♥ Goofy Ufufy Amigurumi

21 mei 2020 by Delinlea Leave a Comment

Hey Lovelies! Do you know what time it is?! It’s new Ufufy Pattern time! I somehow never made Goofy, maybe because he’s not one of my favorite characters. But still thought I should add him to the collection. And in the end, I actually love how he turned out. let’s go to the pattern.

For this Pattern you’ll need:
♥ Yarn in Brown, White, Beige, Light Orange, Light Blue and Light Green. (I used Budgetyarn.com)
♥ Brown Felt or Yarn for the nose and eyes.
♥ Crochet Hook, 2,5mm.
♥ Stuffing.
♥ Stitch Markers.
♥ Yarn Needle.
♥ Sewing Pins.
♥ (Fabric)Glue.  (In case you decided to go with felt).

Stitches used (US Terms):
Magic Ring.
CH = Chain.
SLST = Slip Stitch.
SC = Single Crochet.
ST = Stitch.
BL = Back Loops Only.
FL = Front Loops Only.
Inc = Increase.
Dec = Decrease.
(…) = Repeat the space in brackets the given number of times.
[…] = Total number of stitches.

Pattern Goofy

This pattern is made using continuous rounds, unless stated otherwise.

Body
Start with the color brown.

1: 6SC in Magic Ring. [6]
2: 2SC in each st around. [12]
3: (1SC, inc) 6 times. [18]
4: (2SC, inc) 6 times. [24]
From here you will make color changes to create the eyes.
5: Brown; 11SC, White; 2SC, Brown; 2SC, White; 2SC, Brown; 7SC. [24]
6: Brown; (3SC, inc) 2 times, 3SC, (White; inc, 2SC, Brown; 1SC) 2 times, Brown; inc, 3SC, inc. [30]
7: Brown; 13SC, White; 9SC, Brown; 8SC. [30]
8: Brown; 13SC, White; 9SC, Brown; 8SC. [30]
9: Brown ; 12SC, inc, White; dec, 5SC, dec, Brown; inc, 7SC. [30]
10: Brown; 30SC.[40]
Change to Light Orange.
11: 30SC. [30]
12: BL, 30SC. [30]
13: 30SC. [30]
14: 30SC. [30]
Change to Light Blue.
15: BL 30SC. [30]
16: 30SC. [30]
17: 30SC. [30]
18: (3SC, dec) 6 times. [24]
19: (2SC, dec) 6 times. [18] Stuff the body
20: (1SC, dec) 6 times. [12]
21: (Dec) 6 times. [6]
Fasten off and weave in tail.
In row 12 and 15 you worked in Back Loops Only. Now, rejoin with the Light Orange yarn and make SlSt around. Fasten off and weave in tails.

Snout
Use the color Beige.

Make 5 CH.
1: Insert in second chain from hook, 3SC, 3SC in the last st, 2SC, inc. [10]
2: inc, 2SC, (inc) 3 times, 2SC, (inc) 2 times. [16]
3: 16SC. [16]
Fasten off and leave a long tail for sewing. You will have to stuff the snout, but that’s easier when it’s about half way sewn to the body.

Ears (Make 2)
Use the color Brown.

1: 6SC in Magic Ring. [6]
2: (1SC, inc) 3 times. [9]
3: 9SC. [9]
|
8: 9SC. [9]
9: (1SC, dec) 3 times. [6]
10: 6SC. [6]
Fasten off and leave a long tail for sewing. You don’t have to stuff them, just flatten.

Legs (make 4)
Make 2 in the color White and 2 in Brown.

1: 6SC in Magic Ring. [6]
2: 6SC [6]
Fasten off and leave long tail for sewing. You don’t have to stuff them, just flatten.

Hat
Start with the color Light Green.

1: 6SC in Magic Ring. [6]
2: (1SC, inc) 3 times. [9]
3: 9SC. [9]
4: (dec, 1SC) 3 times. [6]
Change to the color Brown.
5: 6SC. [6]
Change back to Light Green.
6: 6SC. [6]
7: BL, (inc, 1SC) 3 times. [9]
Fasten off and Leave a long tail for sewing. Fold the last row you crocheted, up, so your hat will get a bit more texture.

Assembling

I always use sewing pins to place all parts first. This way you can easily move all parts around until you are happy with the outcome.

First place the snout under the eyes shape, mine overlapped the white a tiny bit. Make sure to stuff the snout with some stuffing around half way sewing it on.
Now position his arms and legs, and sew those on as well. The ears go on both sides of Goofy’s head and on top of his head goes his hat. Add 3 strands of yarn just in front of his hat, those will be his hairs. I did this with a yarn needle through his body, with a knot that will be inside his body.
With a bit of felt or yarn create his eyes and nose.

That was it for the Goofy Ufufy pattern, I love how quick and easy those are to make. Although sometimes the designing progress is a bit harder, but that makes it fun to do.  

I hope you had fun, stay healthy, stay safe and I’ll see you next week with a Tsum Tsum Pattern 😉 And don’t forget to share your Goofy on Twitter or Instagram!

Love
Danielle

Posted in: Crafting, Crochet, Ufufy Tagged: Amigurumi, Crochet, cute, Disney, Free Pattern, Goofy, haken, kawaii, Ufufy

♥ BerryCat Amigurumi

7 mei 2020 by Delinlea Leave a Comment

Hey Lovelies! I saw strawberries around in the stores already, and that always gives me the feeling of Summer is near. I love strawberries and cats so I combined them xD.  Here are some adorable BerryCat! Ready to jump into the pattern?!

BerryCat

For this Pattern you’ll need:
♥ Yarn in Pink and Light Green (Or Red and Green). (I used Budgetyarn.com)
♥ Extra White or Light Yellow yarn, around 30-40cm, for the ‘seeds’.
♥ Black Felt or Yarn for the nose.
♥ Crochet Hook, 2,5mm.
♥ Stuffing.
♥ Stitch Markers.
♥ Yarn Needle.
♥ Sewing Pins.

Stitches used (US Terms):
Magic Ring.
CH = Chain.
SLST = Slip Stitch.
SC = Single Crochet.
HDC = Half Double Crochet.
DC = Double Crochet.
Bobble = For 1 Bobble Stitch you work 5 DC in one stitch, but without finishing the last loop of each DC, after you have 6 loops on your hook, yarn over and pull through all 6 loops.
ST = Stitch.
Inc = Increase.
Dec = Decrease.
(…) = Repeat the space in brackets the given number of times.
[…] = Total number of stitches.

Pattern BerryCat

Work in continues rounds, use a stitch marker to mark your first stitch of every row. This is for every part, unless stated otherwise.

Body
Use Pink colored yarn.

1: 6SC in Magic Ring. [6]
2: 2SC in each st around. [12]
3: 12SC. [12]
4: 1SC, Ch8, insert in second ch from hook, 7SlSt, continue working on the ‘base’, 2SC, inc, (Bobble, 2SC, inc) 2 times. [15]
5: 15SC. (You skip working in the ’tail’) [15]
6: (4SC, inc) 3 times. [18]
7: (5SC, inc) 3 times. [21]
8: 6SC, inc, (Bobble, 5SC, inc) 2 times. [24]
9: (7SC, inc) 3 times. [27]
10: (8SC, inc) 3 times. [30]
11: 30SC. [30]
12: 30SC. [30]
13: (3SC, dec) 6 times. [24]
14: (4SC, dec) 6 times. [18] stuff here and place the eyes between row 10 and 11, about 2cm apart.
15: (1SC, dec) 6 times. [12]
16: (dec) 6 times. [6]
Fasten off and weave in tail.

Ears (Make 2)
Use Pink colored yarn.

Ch4, insert in second Ch from hook, 1SC, 1HDC, 1DC.
Fasten off and leave a long tail for sewing.

Stem
Use the light Green colored yarn.

Ch7, insert in second Ch from hook, 6SlSt.
Fasten off and leave along tail for sewing.

Crown
Use the light Green colored yarn.

1: 6SC in Magic Ring. [6]
2: (Ch4, insert in second Ch from hook, 1SlSt, 2SC, 1SlSt in Base) 6 times.
Fasten off and leave a long tail for sewing.

Assembling

Whenever I start assembling amigurumi’s, I prefer to use sewing pins first. This way I can position and reposition all parts until I am happy with how it looks. I recommend you do so as well.

Start sewing the stem to the crown, and then the crown to the top of the strawberry.
Then position the ears and sew them on.
Last with the extra white yarn you can stitch on the ‘seeds’.  With black felt or yarn create a small nose.

That was it already for today’s pattern! I hope you liked this BerryCat! I can imagine them hanging around everywhere!

Have a wonderful day!

Love
Danielle

Posted in: Crafting, Crochet Tagged: Amigurumi, berrycat, Cat, Crochet, cute, haken, kawaii, Strawberry, summer, Virka
« Vorige 1 2 3 4 5 … 10 11 12 13 14 15 16 17 18 … 25 26 27 28 29 Volgende »

What are you looking for?!

My Socials

Ko-Fi

I love making all these free things for you, tho it would be very helpfull if you can support me on Ko-Fi! (You don’t have to tho, totally up to you!)

Ko-Fi Shop!!

In my Ko-Fi shop you can find PDF Amigurumi Patterns!! You can pay easily with PayPal.
Go to the shop here!!

Recent Blog Posts

  • ♥ Happy 2022!
  • ♥ Day 12; Lights
  • ♥ Day 11; Flower Deco
  • ♥ Day 10; Snowman
  • ♥ Day 9; Gingerbread Houses

Recent Comments

  • Delinlea op ♥ Pietje Gnome Amigurumi
  • Delinlea op ♥ Toy Story Alien TsumTsum Amigurumi
  • Delinlea op ♥ Pua Tsum Tsum Amigurumi
  • Charli op ♥ Free Pattern; CNY Mouse Amigurumi
  • Peter Pesch op ♥ Pietje Gnome Amigurumi

Categories

  • animation
  • Beadwork
  • Blogmas 2018
  • Blogmas 2020
  • Blogmas 2021
  • Books
  • Bujo
  • Christmas
  • Christmas CAL 2019
  • Christmas Countdown 2017
  • Contest
  • Crafting
  • Crochet
  • Drawing
  • Drawing Lesson
  • Easter
  • Geen categorie
  • Life
  • Miniature
  • Nail Art
  • New Year
  • Paper
  • plush
  • Pokemon
  • Poseable Art Doll
  • Recipe
  • Sewing
  • Shop Pattern
  • Sinterklaas
  • Social Media
  • Tsum Tsum
  • Ufufy

Copyright © 2025 Delinlea - My little fantasy world.

Family WordPress Theme by themehall.com