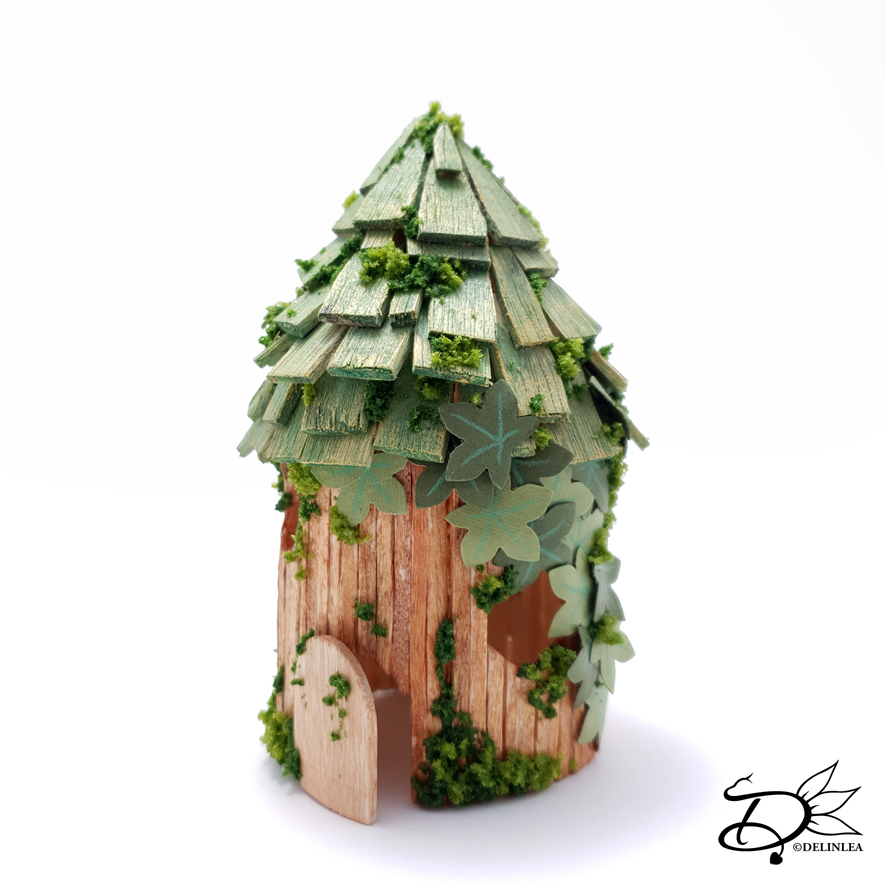
♥ Fairy House 2
Hey Lovelies! I didn’t expect to make another Fairy House for you. But I did! I thought of a round house and I kinda wanted to share with you how to make this one. The technique is quite the similar to this one I made before, so you might wanna check that post as well. I will refer to it a few times in this blog. I hope you will enjoy this one too.
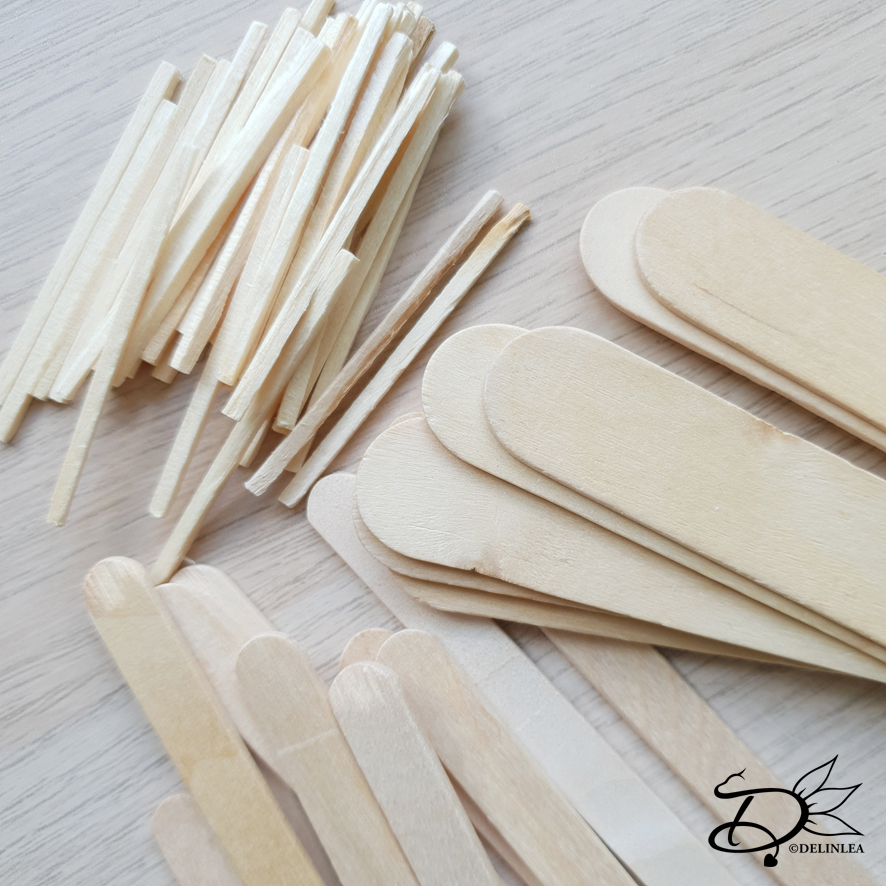
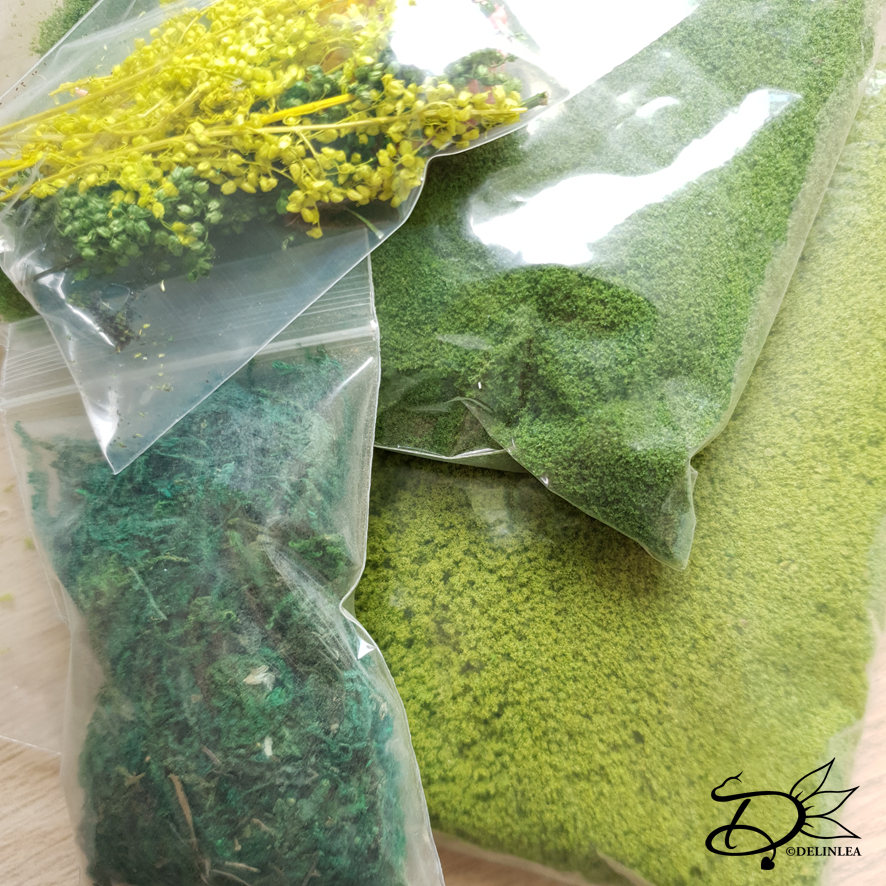
For this DIY you’ll need:
♥ Popsicle sticks.
♥ Matchsticks.
♥ Glue.
♥ Empty Toilet Paper Roll.
♥ Paint.
♥ Brushes.
♥ Scissors where you’ll be able to cute the popsicle and matchsticks with.
♥ (Masking) Tape. (Optional)
♥ Cutting Mat. (Optional)
♥ Cling Film. (Optional)
♥ Fake Moss. (Optional)
♥ Anything else you wanna decorate with. (Optional)
Tutorial Fairy House
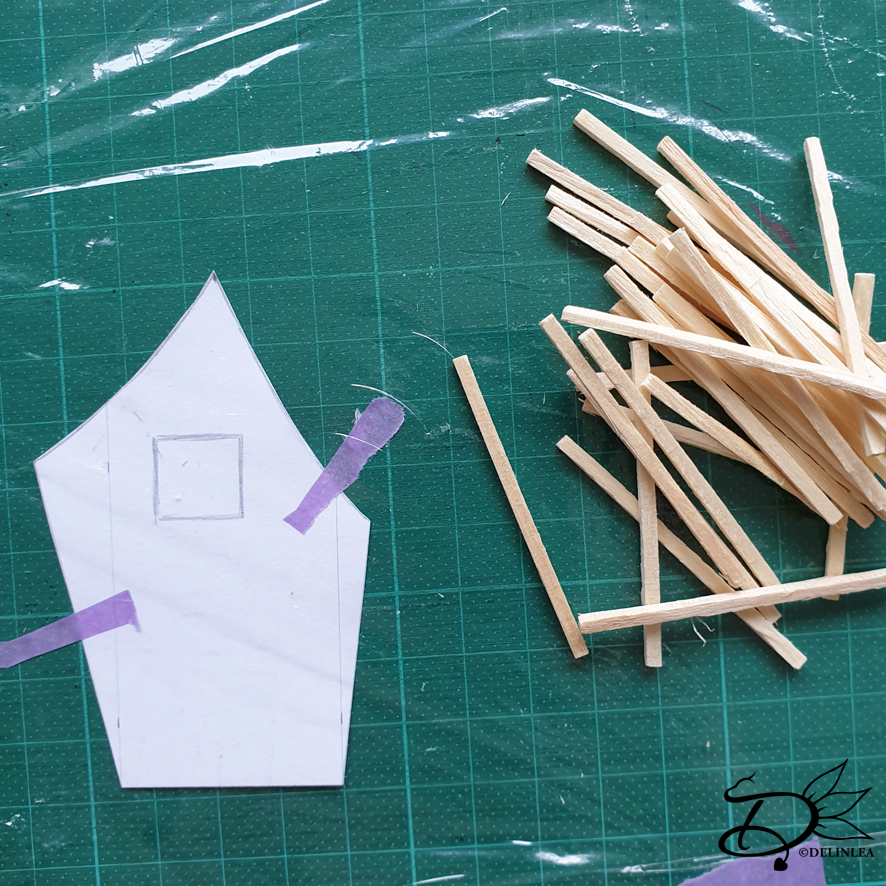
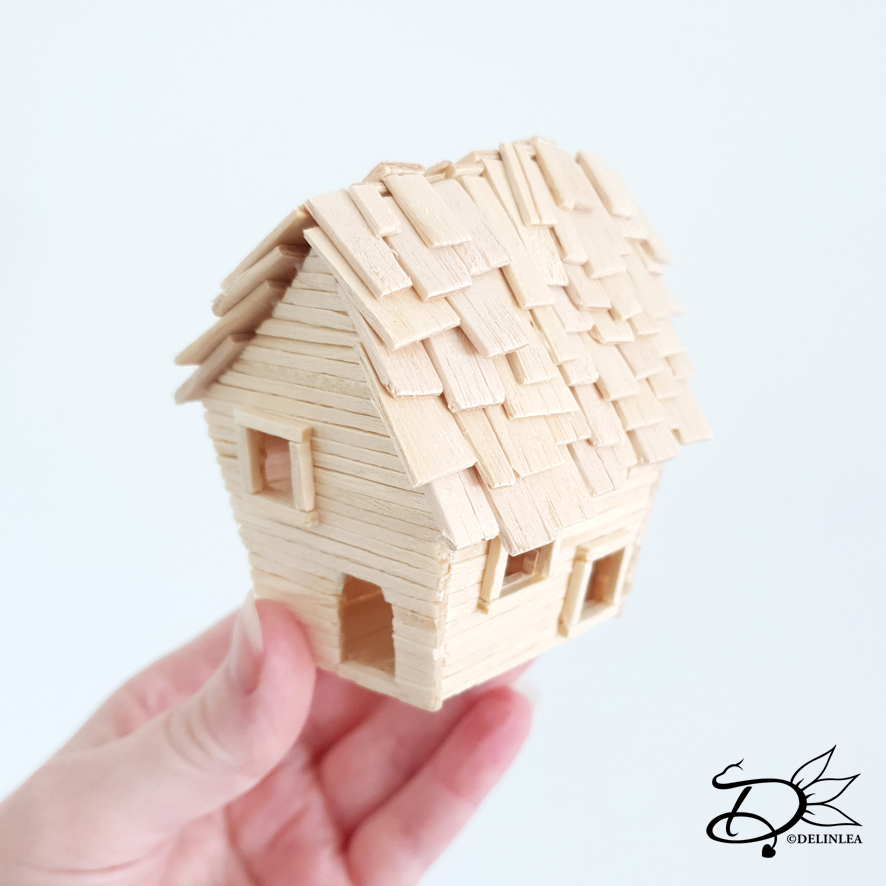
First draw a design and height (Mine is 5cm) you like for the base of the fairy house on to your Toilet Paper Roll. When you are happy, cover the roll with cling film, this is to be able to remove the house from the roll later. If you don’t you most likely will glue the house to the Toilet Paper Roll, and that’s not what you want.
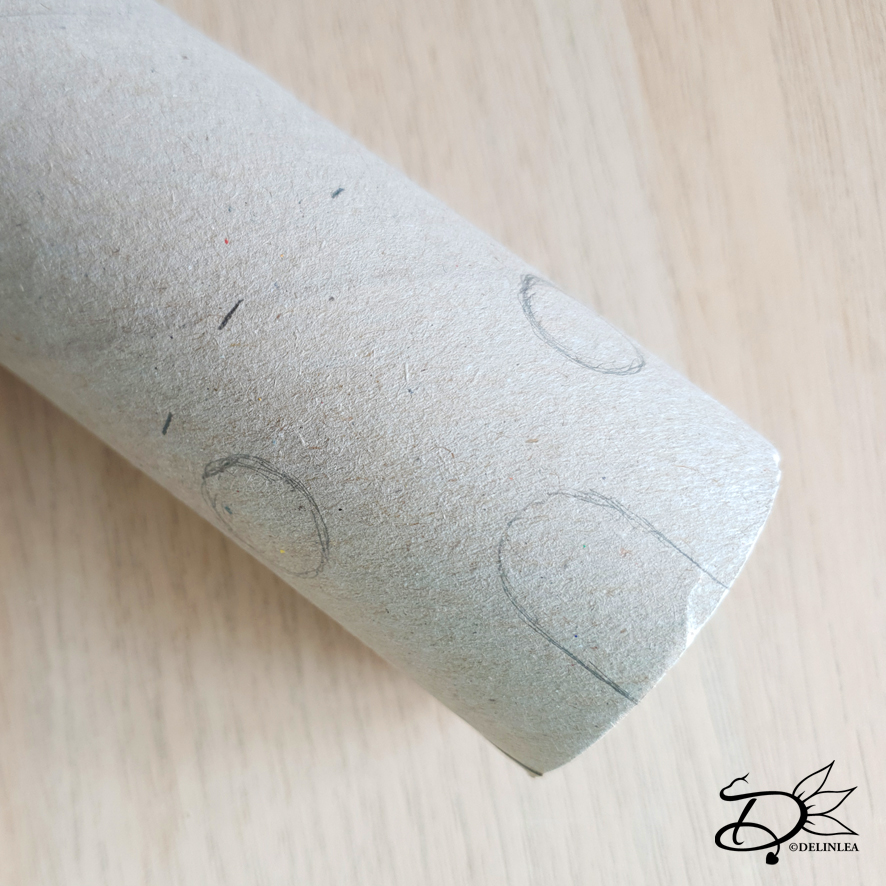
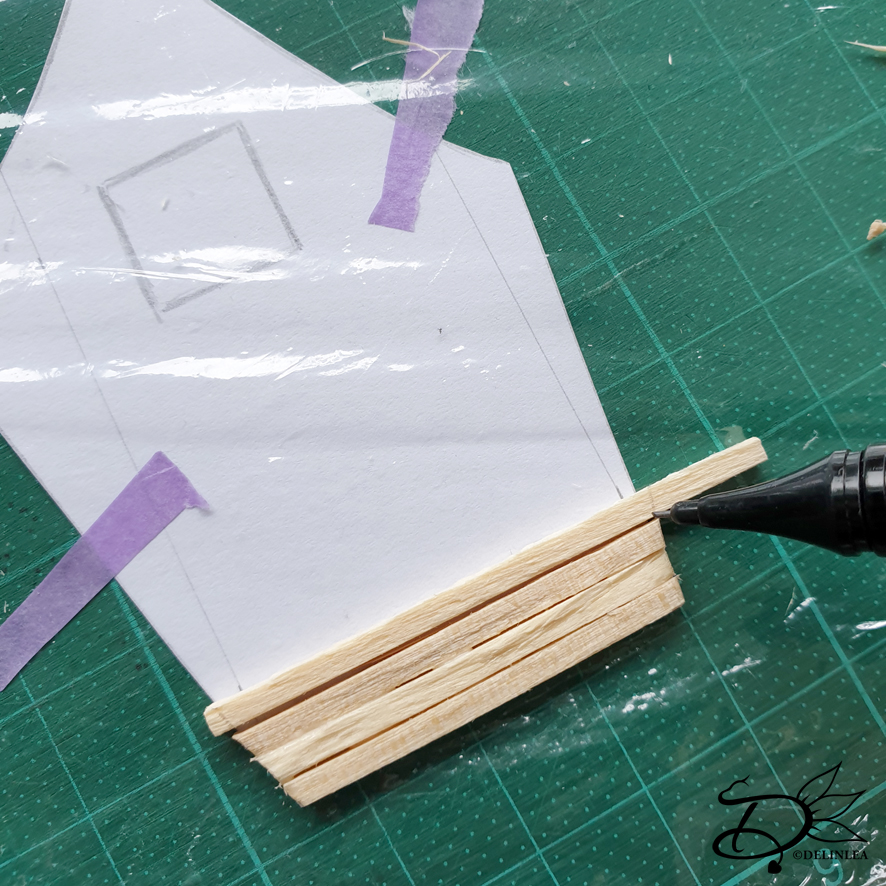
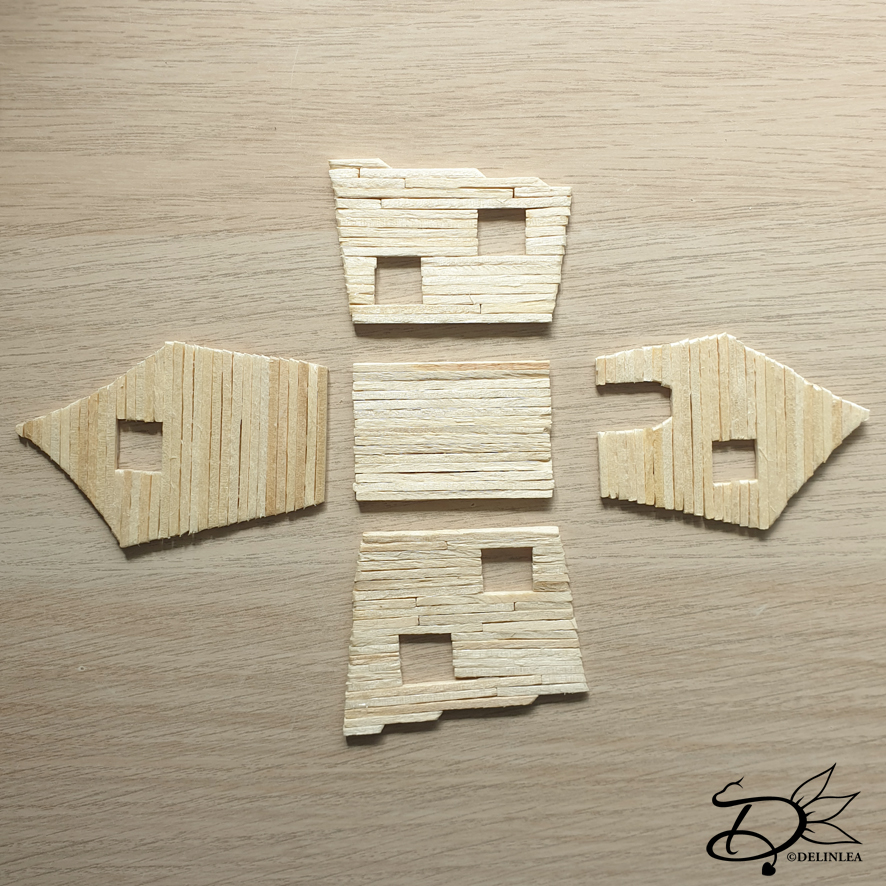
Make the base
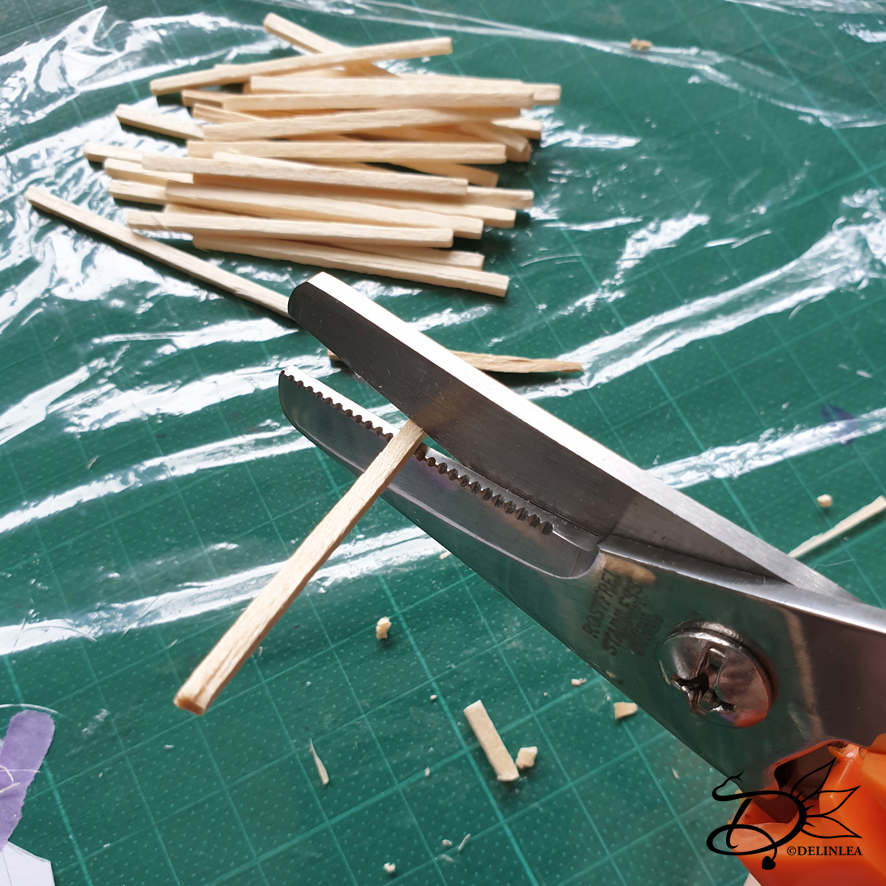
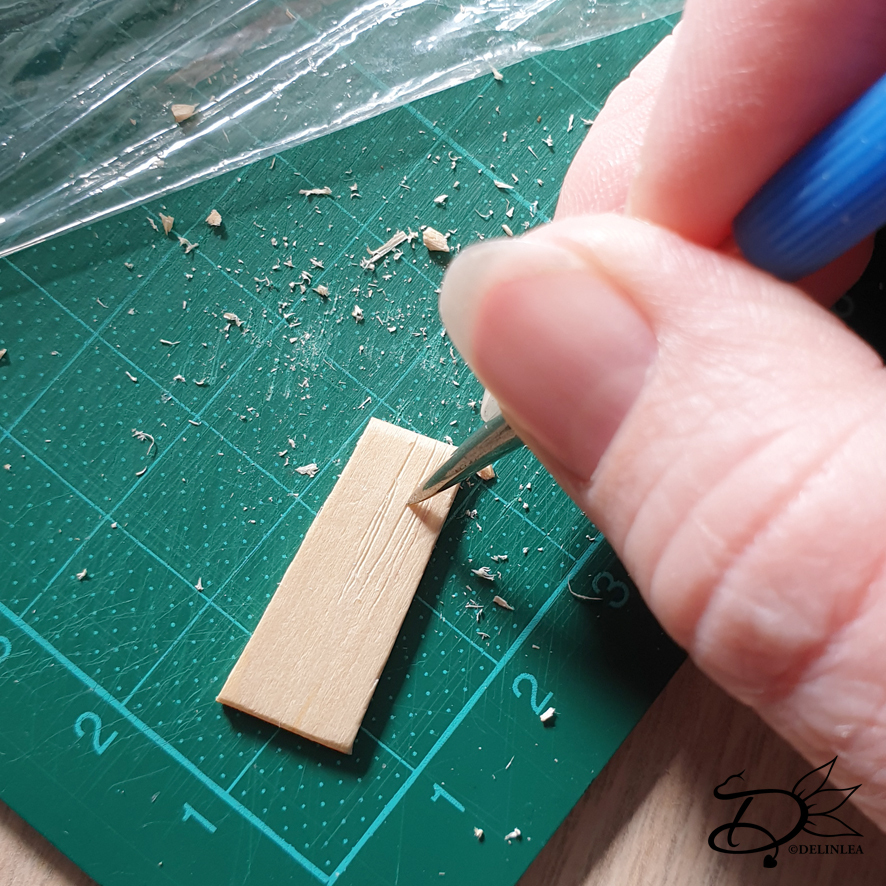
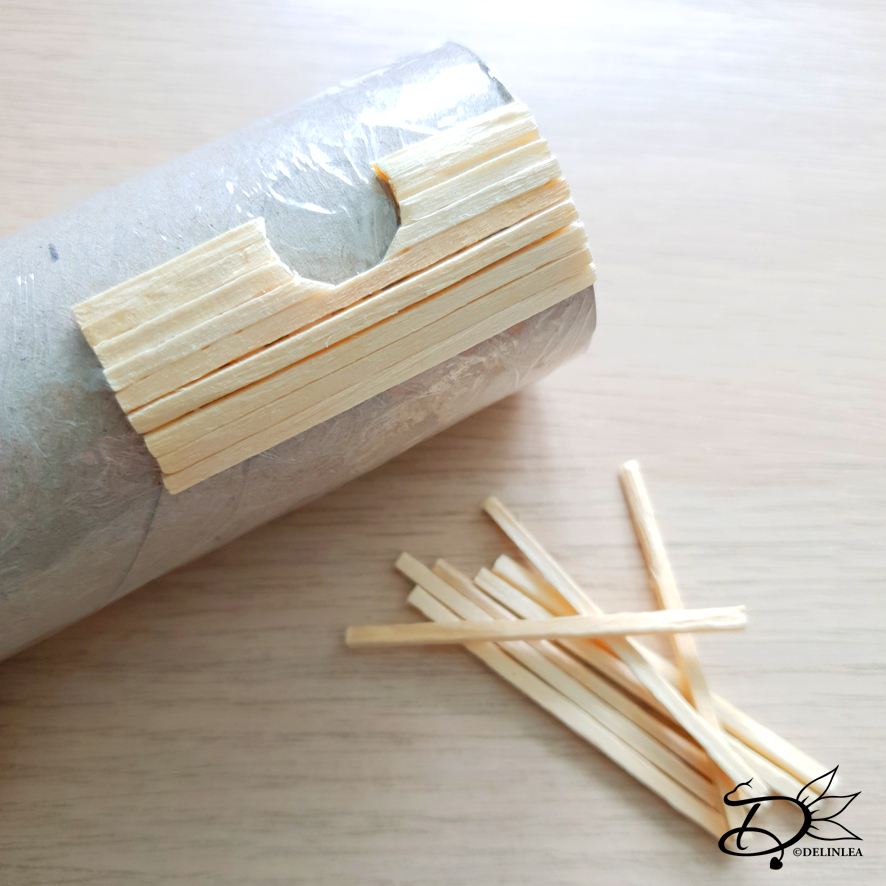
Place the sticks one by one on the design you drew on the Toilet Paper Roll. Draw a line on your stick if it’s too long and trim it down with sharp scissors. Glue them on, one by one, side by side, following the design.
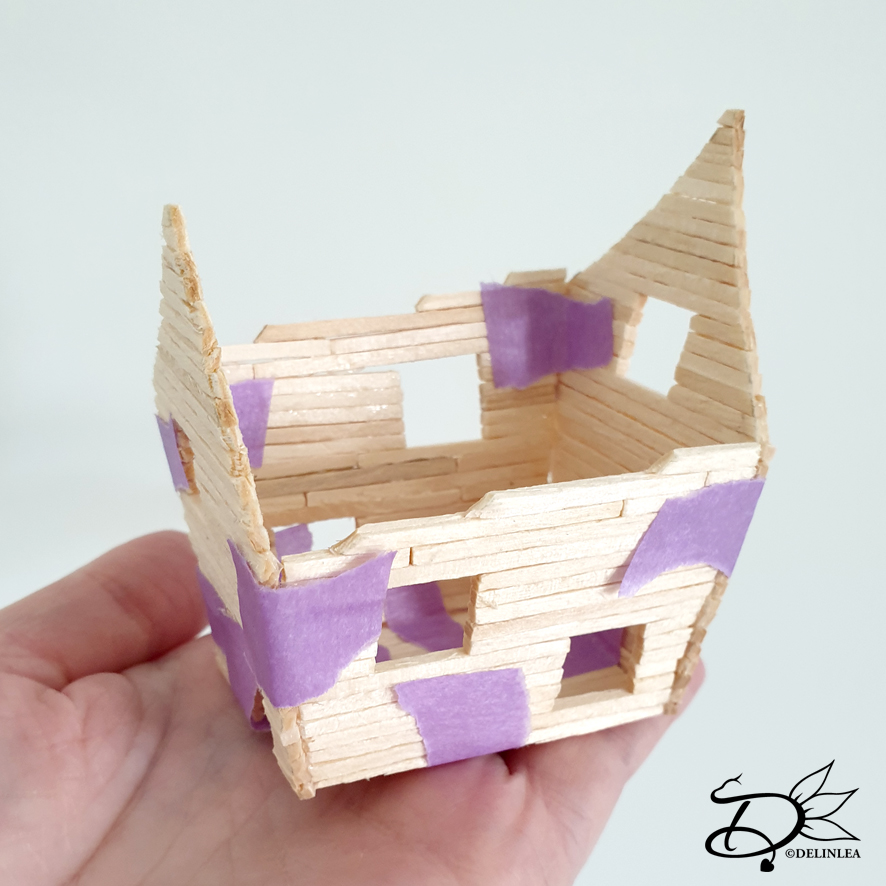
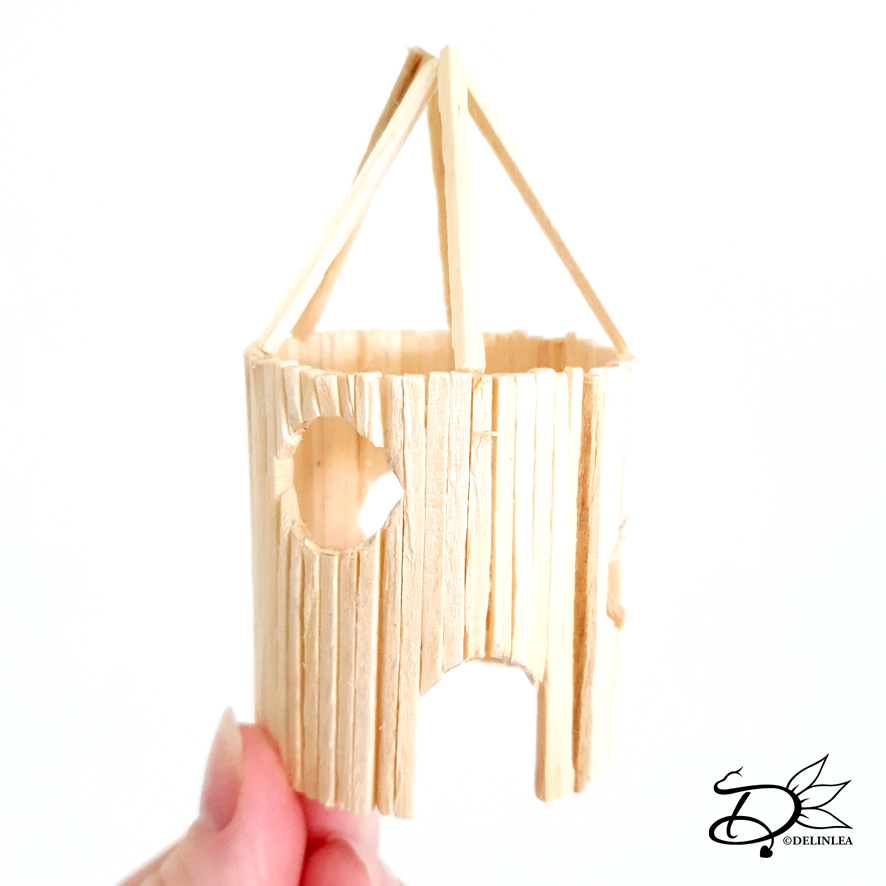
When you went all around let it dry completely. When it did remove it carefully from the Toilet Paper Roll.

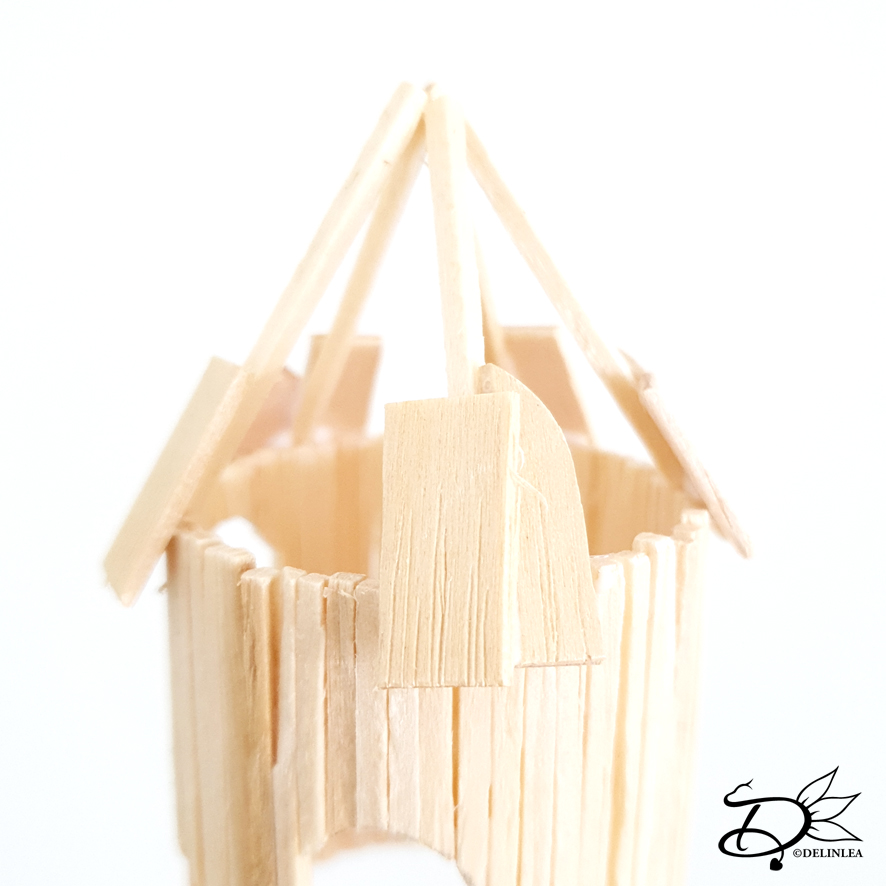
Roof
For this house I made a roof structure. I used about 5 matchsticks for this and made them 4cm long. I glued them, spread evenly, on top of the base of the house and let them all meet at the top. This can be a bit tricky to do, so maybe use some tape to keep them in place while the glue dries.
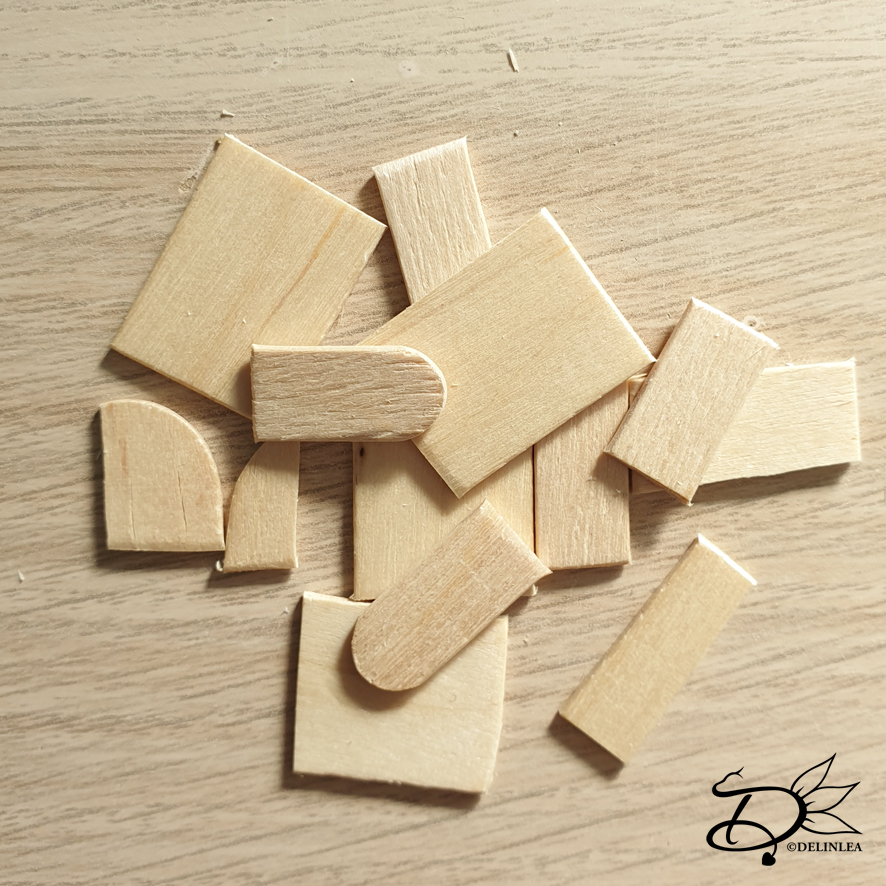
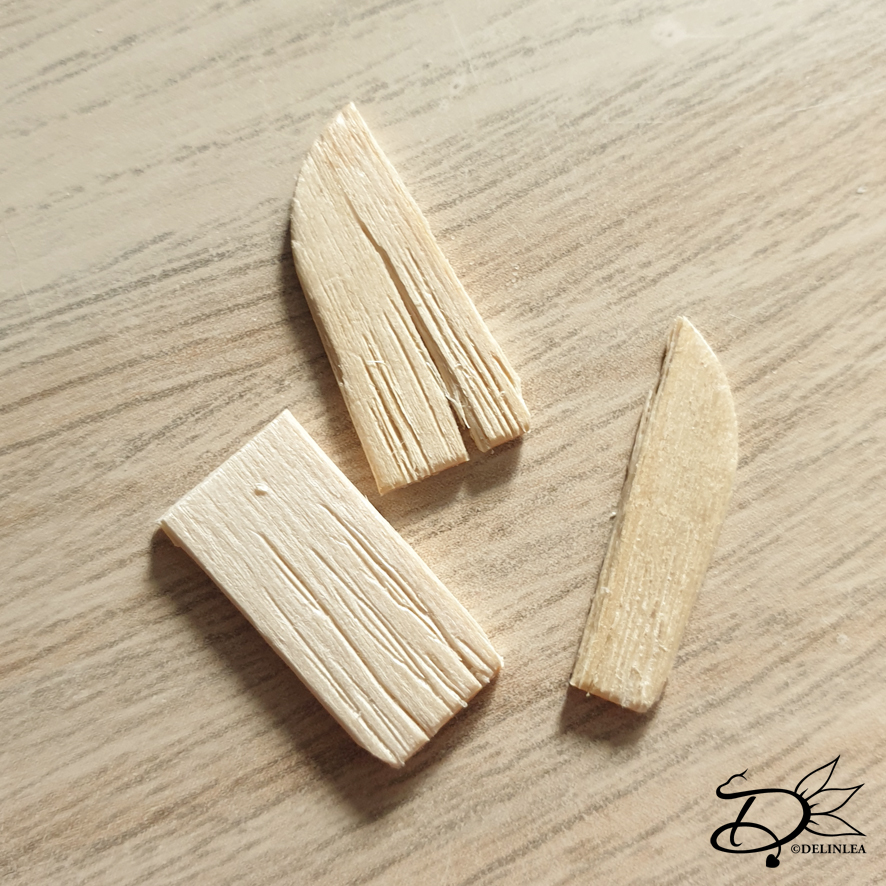
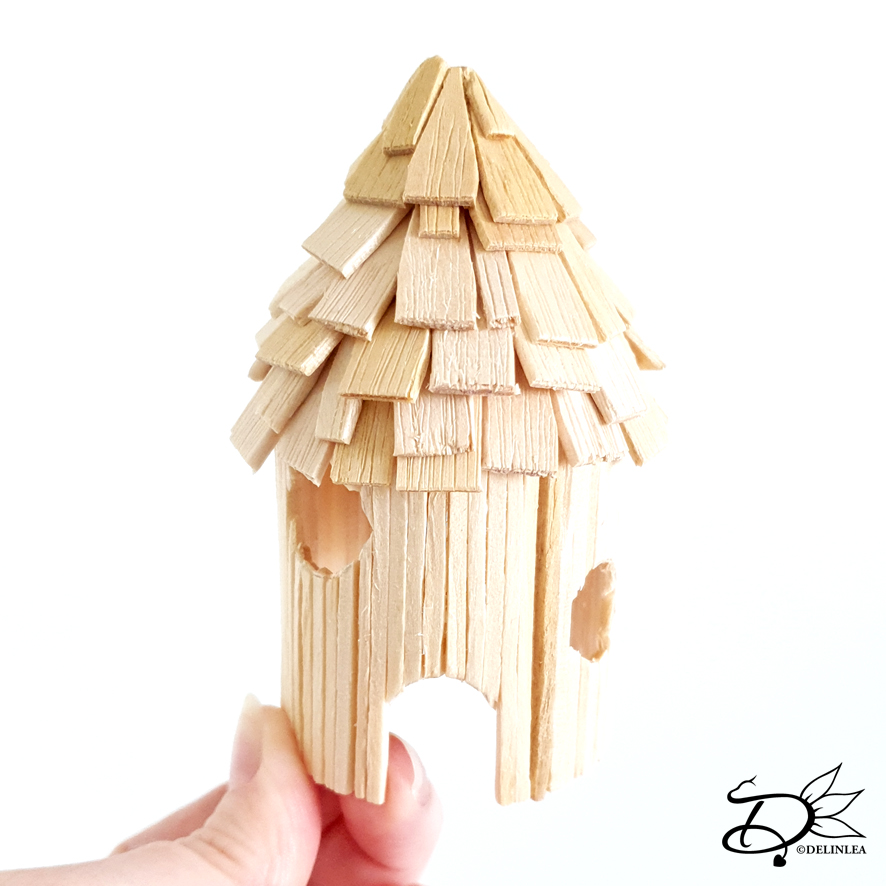
While this dries, make the roof tiles. I’ve explained how to make those in the previous post under the subtitle “roof”. The only difference might be that I made them pointier for this house, so I could create the round roof better.
When the structure for the roof is dry and you made all the tiles, it’s time to make the roof! Glue the pieces on one by one and let it dry first when you think it’s gonna collapse. And like I said in the previous post, don’t try to make it perfect, it’s more fun when it looks a bit messy and aged.
When you are done, let it all dry completely before you continue.
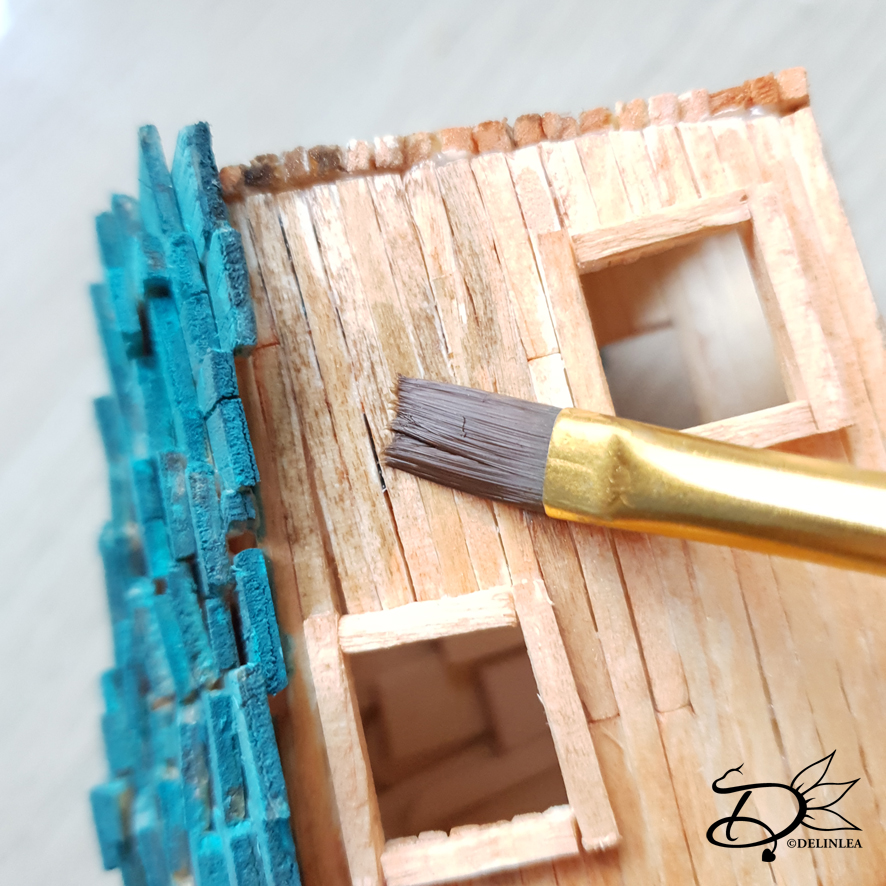
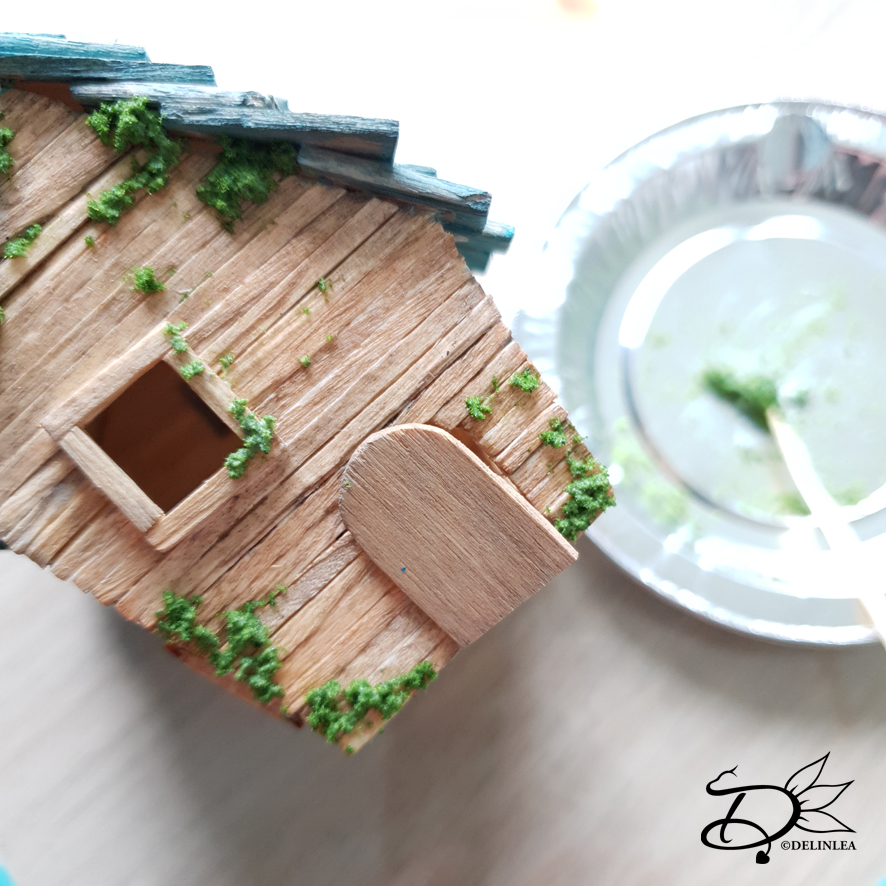
Painting and decorating
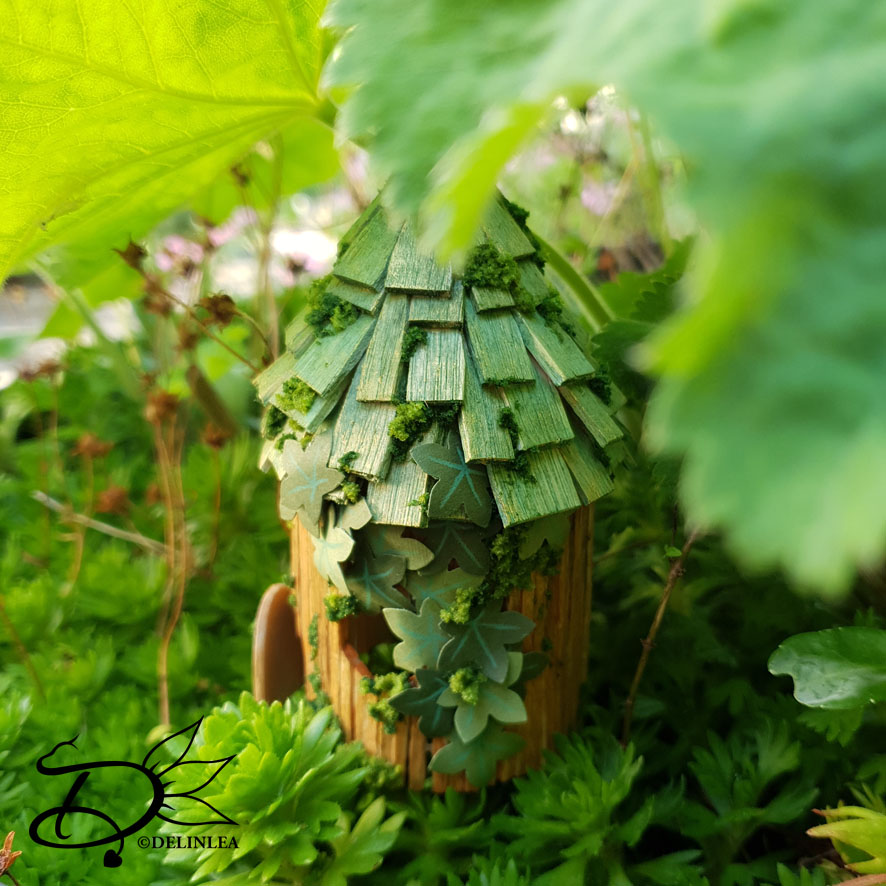
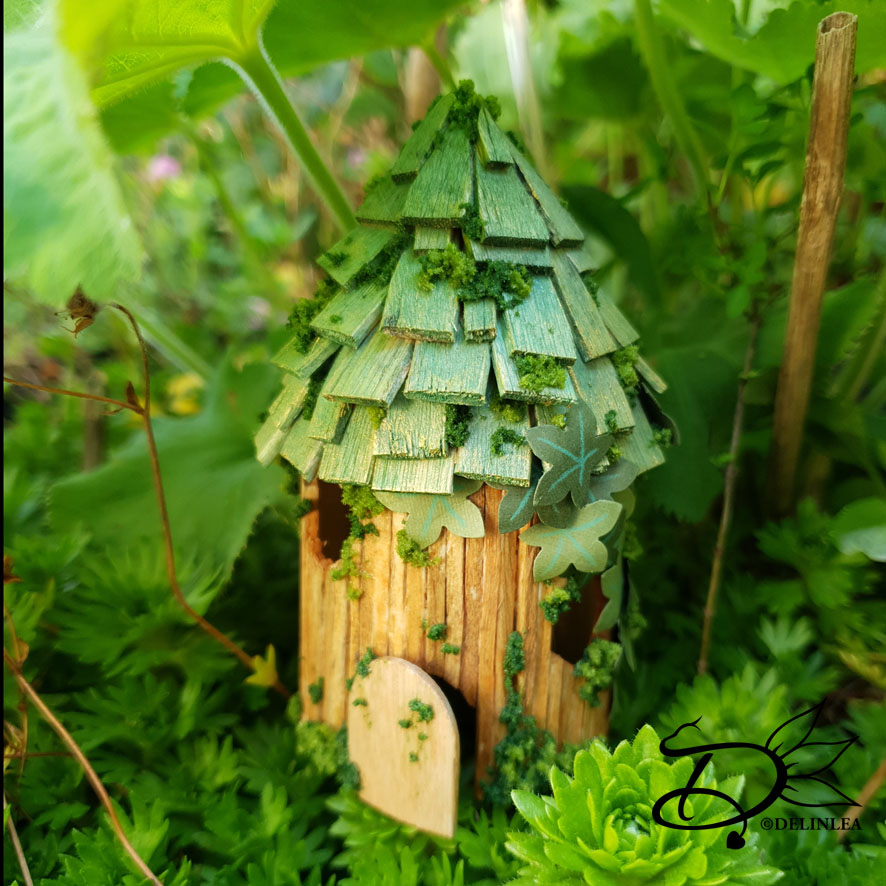
Now it’s time for the fun stuff to make it look really cute, it makes such a difference when you paint and decorate the house. I’ve explained how to do this in the other post under “Painting” and “Decorating”.
The only thing I added with this one is paper leaves that I made. And glued them on the way I thought it would look good. They are not too hard to make, just cut out the shape you like, draw on the veins and curl up the ends so they are not so flat.
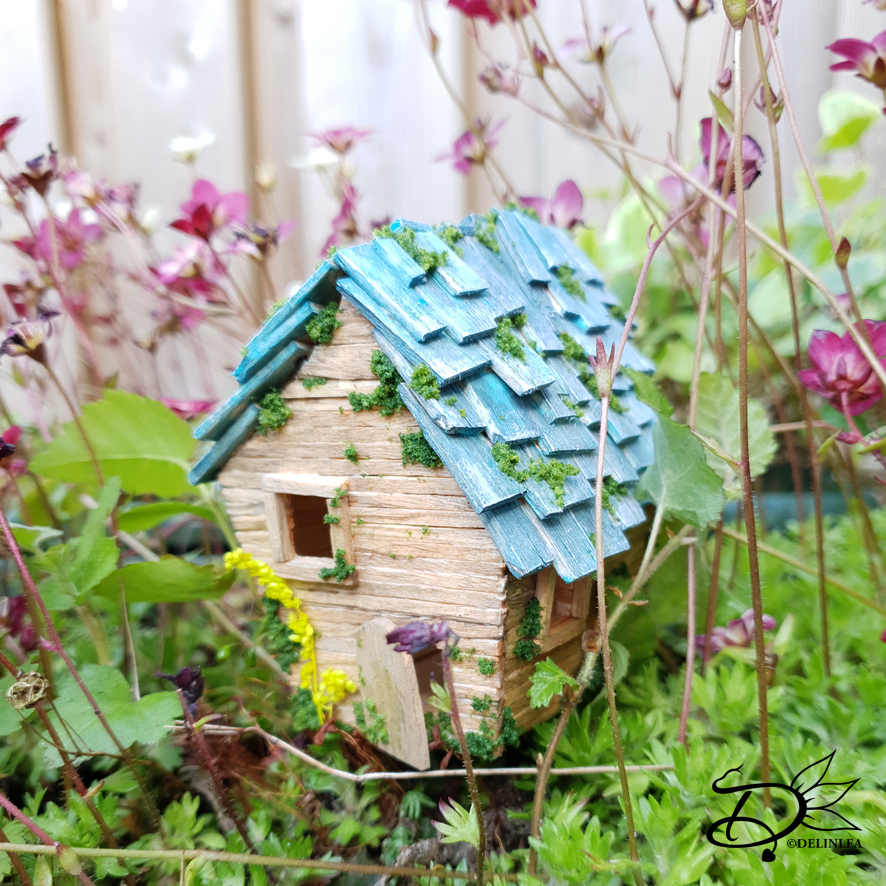
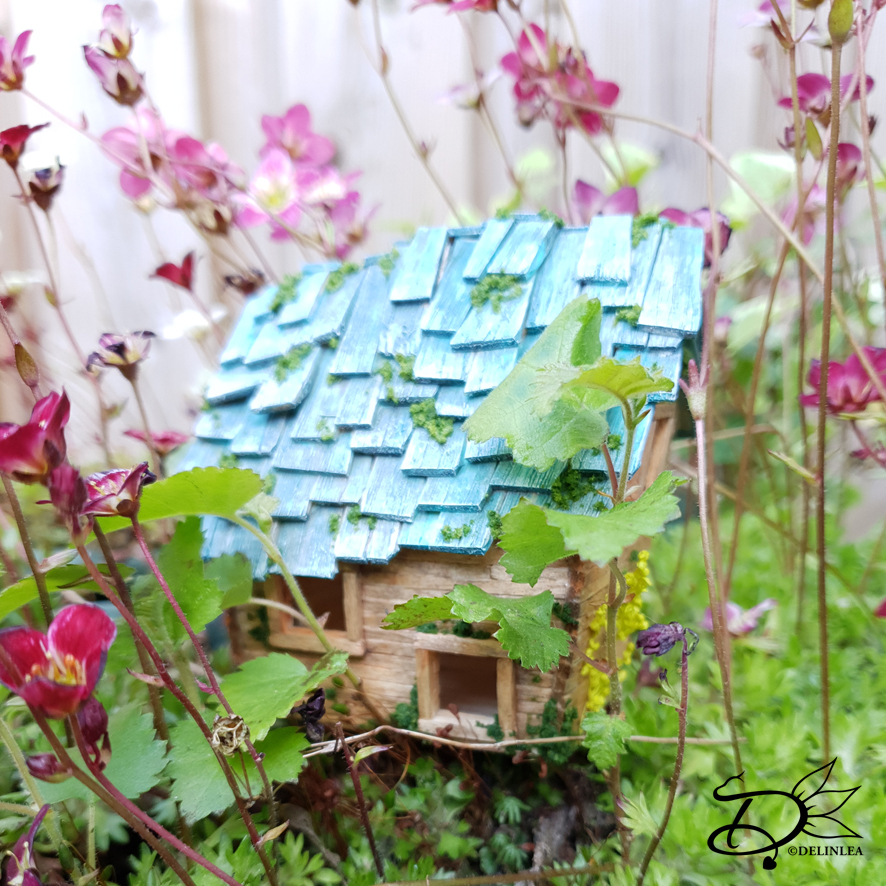
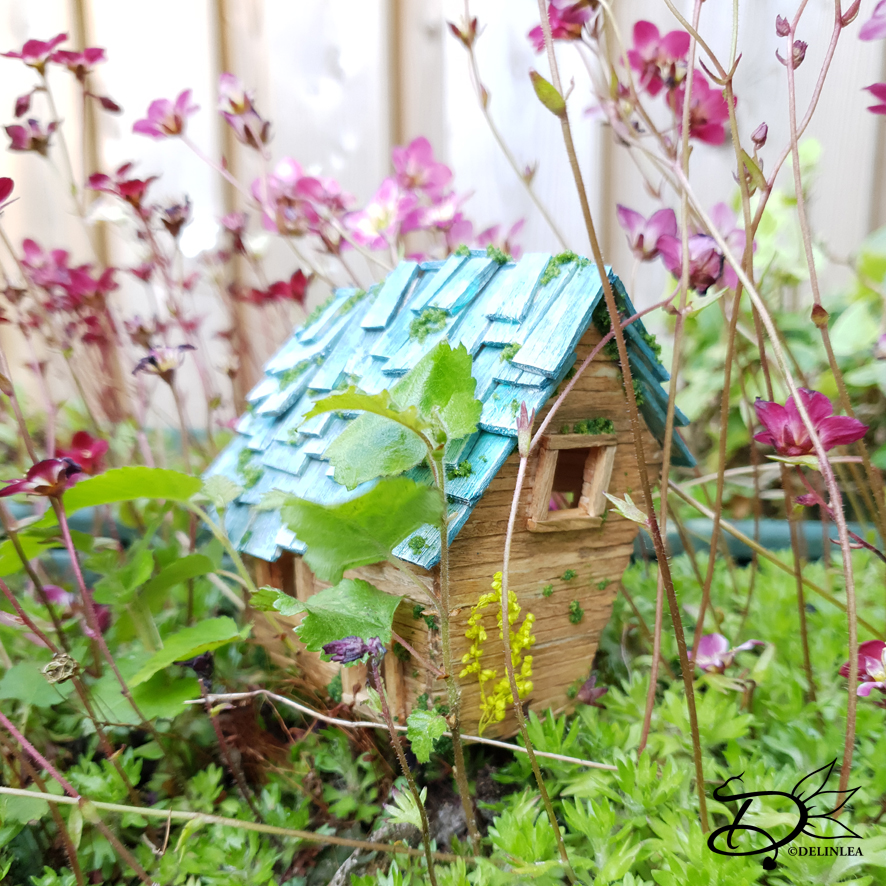
That was it already, you created a Fairy House! It’s such a fun project and I love to put them with my plants! Fairies are allowed to live with my plants haha xD. I wanted to make pics outside, but it was raining, sadly.
UPDATE; I finally could make some pics outside! <3
I hope you enjoyed today’s Fairy House craft and I’ll see you next week! Don’t forget to share your creations with me, since I love to see, on Twitter or Instagram.
Have a wonderful day!
Love
Danielle