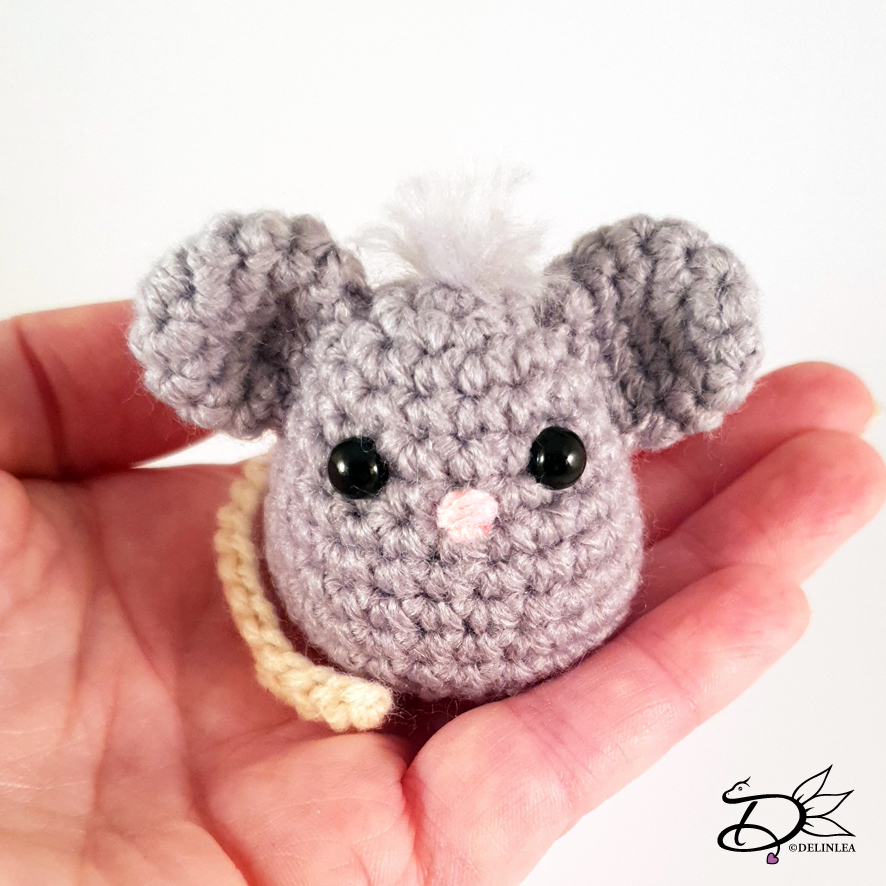
Hey Lovelies! Guess what, it’s almost Chinese New Year! Saturday the 25th to be exact. Here in my country we don’t celebrate, sad enough, only some Chinese related things will, like restaurants. I wish I could go visit one to watch the fireworks, but I don’t live near one ;;. Anyway, 2020 will be the year of the rat/mouse. So I made a little something for you to make, it’s so adorable this little mouse!
For this DIY you’ll need:
♥ DK Yarn in the colors; Beige and Grey. (I used BudgetYarn.com)
♥ Some extra Pink yarn for the nose.
♥ Crochet Hook (I used a 2,5mm hook).
♥ Safety Eyes, 5mm.
♥ Stuffing.
♥ Scissors.
♥ Sewing Pins.
♥ Yarn Needle.
Stitches used (US Terms):
Magic Ring.
CH = Chain.
SLST = Slip Stitch.
SC = Single Crochet.
ST = Stitch.
Inc = Increase.
Dec = Decrease.
(…) = Repeat the space in brackets the given number of times.
[…] = Total number of stitches.
Pattern Mouse
Work in continues rounds, use a stitch marker to mark your first stitch of every row. This is for every part, unless stated otherwise.
Body
Use Grey yarn.
Before you start, prepare 3 strands of yarn, about 6cm. Tie them together with knot and put them aside. This will be for his hair.
1: 6SC in a
Magic Yarn. [6] Before closing the magic ring, put in the 3 strands you
prepared earlier, with the knot on the inside. now close the magic ring.
2: 2SC in each st around. [12]
3: (3SC, inc) 3 times. [15]
4: (4SC, inc) 3 times. [18]
5: 18SC. [18]
6: (5SC, inc) 3 times. [21]
7: 21SC. [21]
8: (6SC, inc) 3 times. [24]
9: 24SC. [24]
|
11: 24SC. [24]
12: (2SC, dec) 6 times. [18]
13: (1SC, dec) 6 times. [12] Place the eyes between row 5 and 6, about 1cm
apart. Stuff the body firmly.
14: Dec all around. [6]
Fasten off and weave in tail.
Ears (Make2)
Use Grey yarn.
1: 6SC in a
Magic Ring. [6]
2: 2SC in each st around. [12]
3: 12SC. [12]
4: 12SC. [12]
5: (2SC, dec) 3 times. [9]
Fasten off and leave a long tail for sewing. You don’t stuff, just flatten the
ears.
Tail
Use the Beige yarn.
Chain 18 and leave a long tail for sewing.
Assembling
Whenever I start assembling Amigurumi’s I use sewing pins to put all things together first. This way I can move them around until I am happy with how it looks.
For the hairs you added when you started with the body, those 3 strands of grey yarn. Unraffle those, so they get fluffy. When you have done that, trim it to the size you like!
Make a little nose with pink yarn. After that position the ears and sew them on. Do the same for the tail. And you are already done. This is a real quick one!
I hope you liked making this little mouse! So adorable if you ask me. I might wanna make some other colors as well. And if you saw my insta stories, the body only with the eyes and hairs is very cute as well, who needs ears and a tail?! xD
Have a wonderful day and enjoy the Chinese New Year if you celebrate!
Love
Danielle


she is lovely! just perfect for keychain! thank you for sharing the pattern 🙂
She would be perfect for a keychain indeed! Thanks for the love!
Köszönöm, ez nagyon aranyos ! Örülök neki !
Thank you!
Made it wrong, but still ended up with some sort of ornament, so still good! I’ll try again once I learn actually how to read patterns, still helpful and a fun make!