
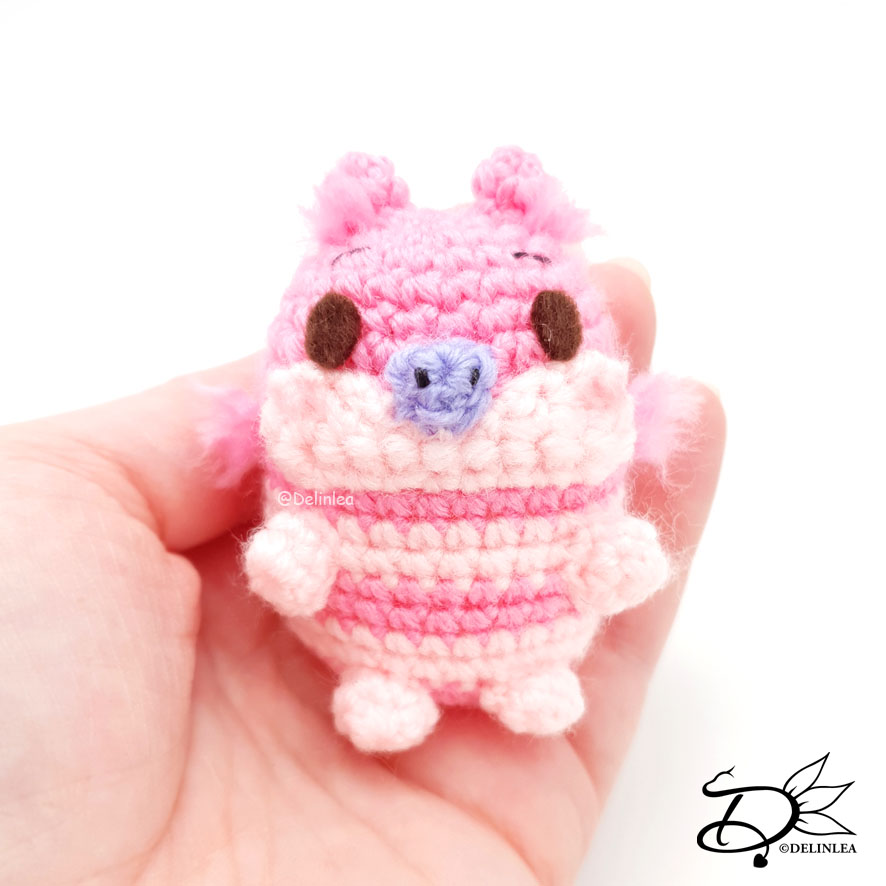
♥ Cheshire Cat Ufufy Amigurumi
Hey Lovelies! This month’s planning will be a bit different from usual. Normally I would post Ufufy and Tsum Tsum patterns at the end of the month, but this time I switch it around. I will do those at the beginning of the month so I can do some Sinterklaas blogs at the end of the month. I hope you don’t mind! So today pattern will be a Cheshire Cat Ufufy! I hope you will like this pattern, I had at least fun making him!
For this pattern you’ll need:
♥ Yarn in the colors Pink, Light Pink and Purple.
♥ Crochet hook. ( I used a 2mm)
♥ Stuffing.
♥ Yarn Needle.
♥ Sewing Pins.
♥ Stitch Marker.
♥ Dark Brown Felt.
♥ Scissors.
Stitches used (US Terms):
Magic Ring.
CH = Chain.
SLST = Slip Stitch.
FSC = Foundation Single Crochet.
SC = Single Crochet.
ST = Stitch.
Inc = Increase.
Dec = Decrease.
(…) = Repeat the space in brackets the given number of times.
[…] = Total number of stitches.
This pattern is made with continues rounds, unless stated otherwise. Use a stitch marker to mark your first/last stitch of your row.
♥ Pattern Cheshire Cat
Body
Start with the color Pink.
1: 6SC in a Magic Ring. [6]
2: 2SC in each st around. [12]
3: (1SC, inc) 6 times. [18]
4: (2SC, inc) 6 times. [24]
5: 24SC. [24]
6: 24SC. [24]
7: (3SC, inc) 6 times. [30]
8: 30SC. [30]
|
11: 30SC. [30]
Change to the color Light Pink.
12: 30SC. [30]
13: 30SC. [30]
Change to the color Pink.
14: 30SC. [30]
15: 30SC. [30]
Change to the color Light Pink.
16: 30SC. [30]
17: 30SC. [30]
Change to the color Pink.
18: (3SC, dec) 6 times. [24]
19: (2SC, dec) 6 times. [18]
20: (1SC, dec) 6 times. [12]
21: Dec around. [6]
Fasten off and weave in tail.
Snout
Use the color Light Pink.
1: 10FSC,turn. [10]
2: 1SC + 1HDC in the next st, 1HDC, 1SC, 4SlSt, 1SC, 1HDC, 1HDC + 1SC in the next st. [12]
Fasten off and leave a long tail for sewing.
Nose
Use the color Purple.
In a Magic Ring crochet; 1SC, 1HDC, 1SC, 1HDC, 1SC, SlSt in the first st.
Fasten off and leave a long tail for sewing.
Ears (Make 2)
Use the color Pink.
1: 4SC in a Magic Ring. [4]
2: (inc, 1SC) 2 times. [6]
Fasten off and leave a long tail for sewing.
Legs (Make 4)
Use the color Light Pink.
1: 6SC in a Magic Ring. [6]
2: 6SC. [6]
Fasten off and leave a long tail for sewing.
Tail
Start with the color Light Pink.
1: 6SC in a Magic Ring. [6]
2: 6SC. [6]
Change to the color Pink.
3: 6SC. [6]
4: 6SC. [6]
Change to the color Light Pink.
5: 6SC. [6]
6: 6SC. [6]
Change to the color Pink.
7: 6SC. [6]
8: 6SC. [6]
Fasten off and leave a long tail for sewing.
♥ Assembling
Whenever I start assembling Amigurumi’s, I use sewing pins first to put it together. This way I can easily move parts around until I am happy. Then I will sew it on.
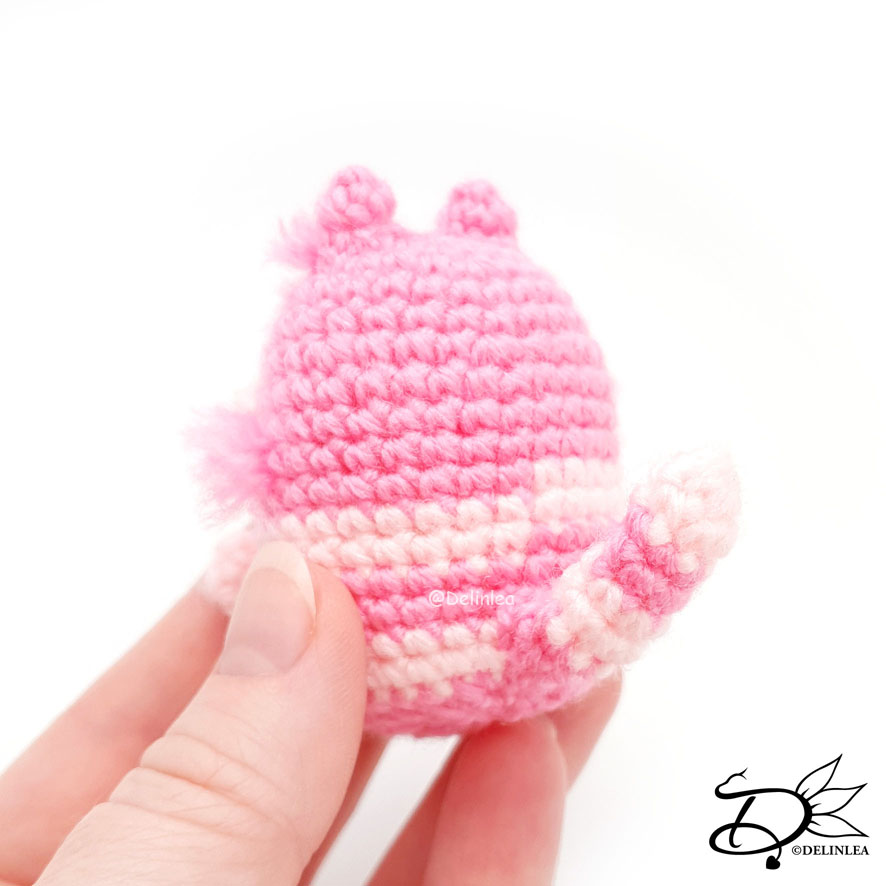
I started with sewing on the tail of the Cheshire cat first, where you can see rows switching in the back. After I positioned the legs, and sew those on as well.
Then it’s time to get the snout on, find the top light pink row of the body, then go one row up and above that one you can sew on the snout. Then attach the nose as well.
Last I’ve sewn on the ears.
Now for the fluffy bits by the ears and on his cheeks. I use strands of yarn and tied about 2 or 3 together. With a needle I’ve pulled them to the spot I wanted them to be in. Cut them to about the length you want the fluff to be. Use a needle to unraffle the yarn and brush it out to make it fluffy. Give it a final cut to the right length.
Last make his facial detail out of some felt and use a needle and thread if you prefer.
And the Cheshire Cat is all done! I hope you had fun today and were able to make this cutie. If you did, show me on Twitter and Instagram with #DelinleaDIY. I’d love to see.
Have a wonderful day and I’ll see you next week.
Love
Danielle