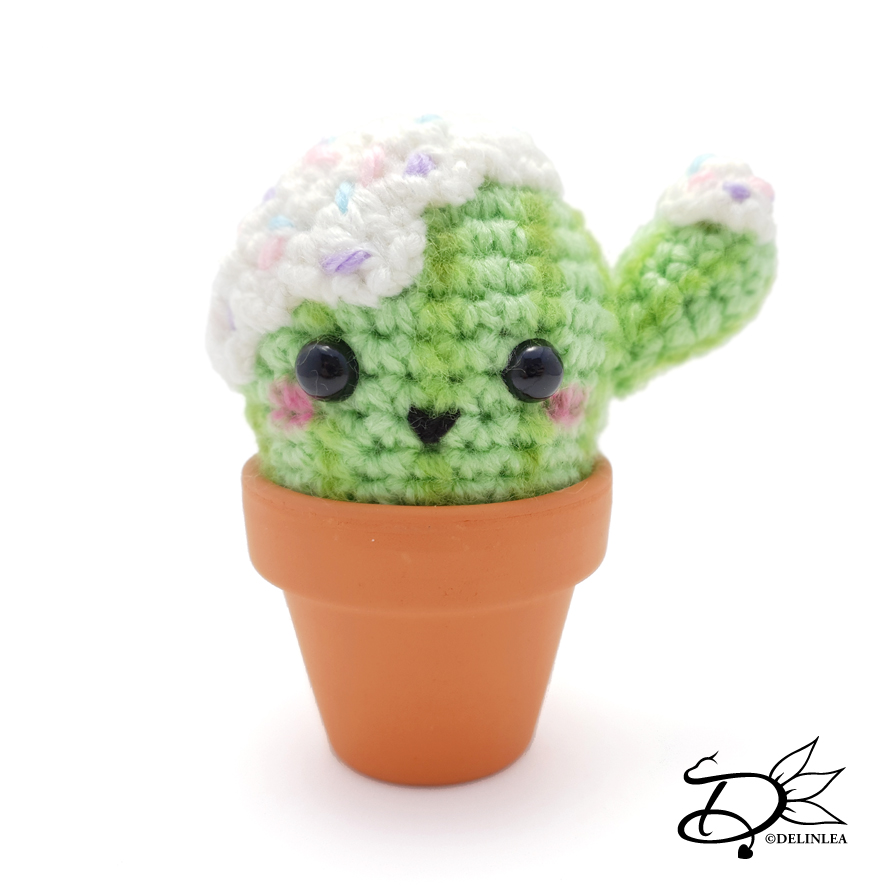
♥ Ice Cream Cactus Amigurumi
Hey Lovelies! I can feel summer is coming this month, it starts to heat up and May was a really dry month, we need rain badly. I always struggle with coming up with DIY for summer, maybe because it’s my least favorite season of the year, more like I hate it unless it rains xD. So I decided to write down things that remind me of summer, and I had both ice cream and a cactus written down. So put those together and make ice cream cactus. I hope you will love them!
For this pattern you’ll need:
♥ Yarn in Light Green and White (I used Budgetyarn.com)
Additional colors for the sprinkles on top, I used Pink, Blue and Purple.
♥ Safety Eyes, 7mm.
♥ Crochet Hook, 2,5mm.
♥ Stuffing.
♥ Stitch Markers.
♥ Yarn Needle.
♥ Sewing Pins.
♥ Soft Pastel or anything else you can create stripes on the amigurumi later.
♥ Terracotta pot, 4,5cm.
Stitches used (US Terms):
Magic Ring.
CH = Chain.
SLST = Slip Stitch.
SC = Single Crochet.
HDC = Half Double Crochet.
DC = Double Crochet.
ST = Stitch.
Inc = Increase.
Dec = Decrease.
(…) = Repeat the space in brackets the given number of times.
[…] = Total number of stitches.
Pattern Ice Cream Cactus
This pattern is made using continuous rounds, unless stated otherwise.
Body
Use the color Light Green
1: 6SC in a
Magic Ring. [6]
2: 2SC in each st around. [12]
3: (1SC, inc) 6 times. [18]
4: (2SC, inc) 6 times. [24]
5: (3SC, inc) 6 times. [30]
6: 30SC. [30]
|
10: 30SC. [30]
11: (3SC, dec) 6 times. [24]
12: 24SC. [24]
|
15: 24SC. [24]
16: (2SC, dec) 6 times. [18]
17: 18SC. [18] Place the eyes between row 9 and 10, and stuff the body.
18: (1SC, dec) 6 times. [12]
19 (dec) 6 times. [6]
Fasten off and weave in tail.
Side Arm
Use the color Light Green.
1: 6SC in a
Magic Ring. [6]
2: 2SC in each st around. [12]
3: 12SC. [12]
4: 12SC. [12]
5: (2SC, dec) 3 times. [9] Stuff the arm.
6: 9SC. [9]
7: (1SC, dec) 3 times. [6]
Fasten off and leave a long tail for sewing.
Cream for Body
Use the color White.
1: 6SC in a
Magic Ring. [6]
2: 2SC in each st around. [12]
3: (1SC, inc) 6 times. [18]
4: (2SC, inc) 6 times. [24]
5: (3SC, inc) 6 times. [30]
6: 30SC. [30]
7: (1SC + 1HDC in the next st, 2DC in the next st, 1HDC + 1SlSt in the next st,
1SC + 1HDC in the next st, 1SlSt) 6 times. [54]
Fasten off and leave a long tail for sewing.
Cream for the Side Arm
Use the color White.
1: 6SC in a
Magic Ring. [6]
2: (1SC+HDC in the next st, 1SlSt) 3 times. [9]
Fasten off and leave a long tail for sewing.
Assembling.
I always use sewing pins to place all parts first. This way you can easily move all parts around until you are happy with the outcome.
Sew the side arm to the body, place it where you like it. With the extra pieces of colored yarn create the sprinkles on both cream parts. I found it easier to it now, before sewing it to the body. After you have created the sprinkles, sew the cream parts to the body and the side arm.
With some soft pastel pencils I created some strokes on the body of the cactus to make it more cactus like. You could also leave this out or use things like watercolor or make-up.
And the Ice Cream Cactus is already done! Isn’t it perfect for summer? I love it at least and I hope you will too. If you made him, please show me on Instagram of Twitter with the #DelinleaDIY
Have a wonderful day and I’ll see you next week!
Love
Danielle


