Delinlea - My little fantasy world
  • ♥ Home
  • ♥ About Me
  • ♥ Blogmas 2021
  • ♥ Free Patterns
    • ♥ Amigurumi; Spring/Easter
    • ♥ Amigurumi; Fall/Halloween
    • ♥ Amigurumi; Winter
    • ♥ Amigurumi Tsum Tsum
    • ♥ Amigurumi Ufufy
    • ♥ Amigurumi Others
    • ♥ Christmas Countdown 2017
    • ♥ Blogmas 2018
    • ♥ Blogmas 2020
  • ♥ Tutorials
    • ♥ Easter
    • ♥ Home Deco
    • ♥ Others
  • ♥ Drawing Lessons
  • ♥ FanFic
    • ♥ Chapter 1
    • ♥ Chapter 2
    • ♥ Chapter 3
    • ♥ Chapter 4
    • ♥ Chapter 5
    • ♥ Chapter 6
    • ♥ Chapter 7
  • ♥ Gallery
    • ♥ Crafts
    • ♥ Drawings
    • ♥ Poseable Art Dolls
  • ♥ Links
  • ♥ Contact
    • Privacy Policy

Crafting

♥ DIY ATEEZ Name Tags

21 maart 2019 by Delinlea Leave a Comment

Hey Lovelies! I’m so sorry I couldn’t make a blog post last week! But I am here now, that’s the most important. Since I go to see ATEEZ in april, and making some drawings of them. I thought why not make a tutorial on how I made the name tags for the drawings. Those can be used for anything, and I bet more ATINY (fandom name) would love to create some for themself as well. Either for decoration, for any of the concerts or just for fun. Kpop fans always run out of money so if we can make something ourself, we do it! You can copy the ones from ATEEZ or come up with your own design, like I did.

For this DIY you’ll need:
♥ Paper to make a template.
♥ Anything you can use as a base for the tags, think of paper, cardstock, fabric, newspaper, etc.
♥ Anything to make letters with, you can print them out, draw/paint them, etc.
♥ Pencil.
♥ Ruler.
♥ Scissors.
♥ Safety pins or something else that can hold and attach the tag.
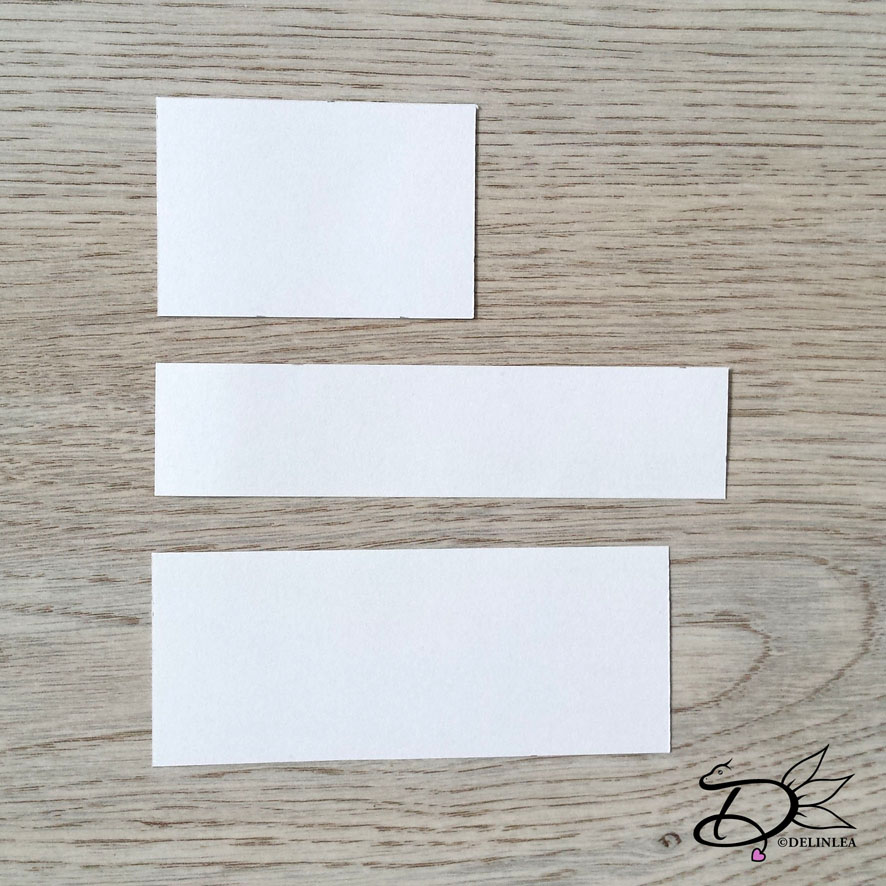
Templates

Start with making some templates for the tags. It’s easier to do this step, so you’re sure you don’t spill any materials. By deciding the sizes now, you can easily play around to see what you would like. Just draw some different sizes rectangles, longer, shorter, wider, smaller.  And maybe even play around with the shape itself. For inspiration check the Say My Name tag from ATEEZ themself.
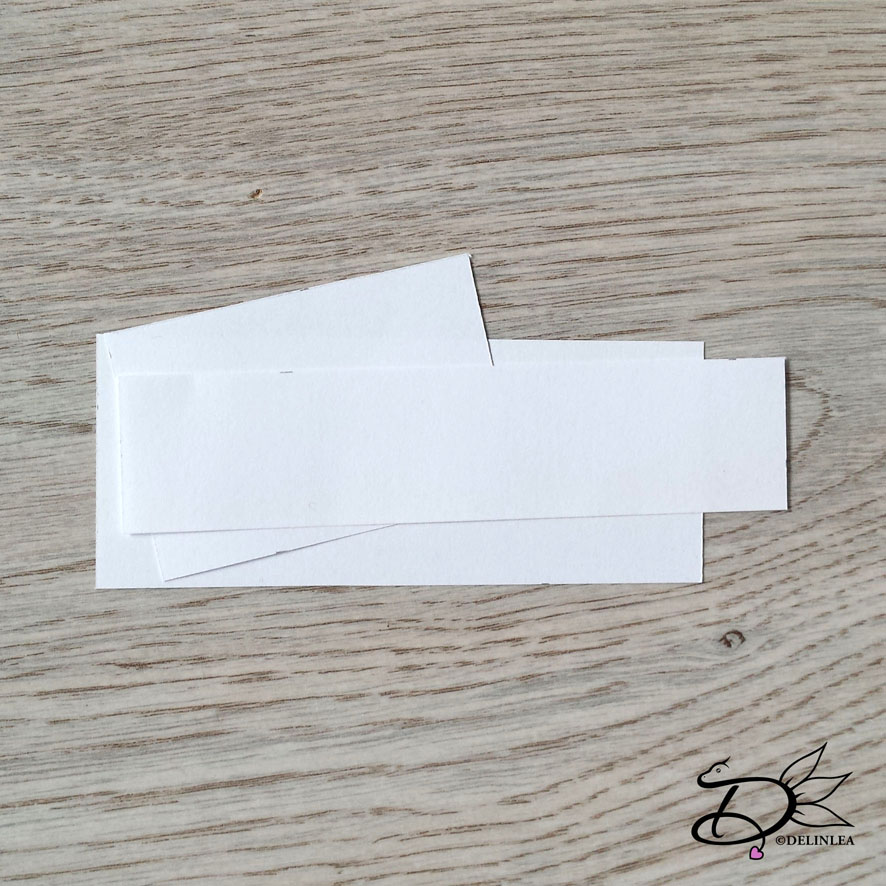
Cut those shapes out and make stacks of 2/3/more shapes. This will be the base of the tag. Ofcourse you can change later in case you might not like it.
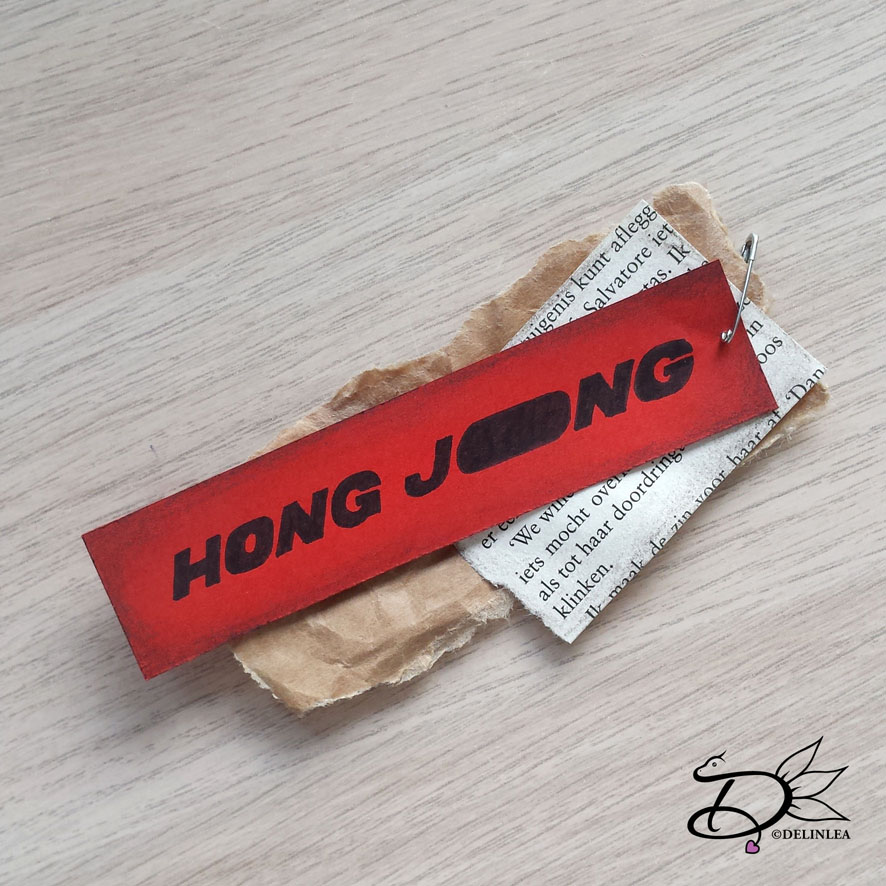
Tag Base

Now we have decided the shape of our tag. We can go decide what material you would like to use for each shape. So, for example, you decide to use fabric for one, a recycled bus ticket for the other and brown wrinkled paper. the possibilities are endless, just have fun.

Trace the template on the desired material. Now you can cut some out neatly with scissors, but you can also rip it out?! How pretty would that look like, if you do it carefully ofcourse, ripping paper can be hard haha.
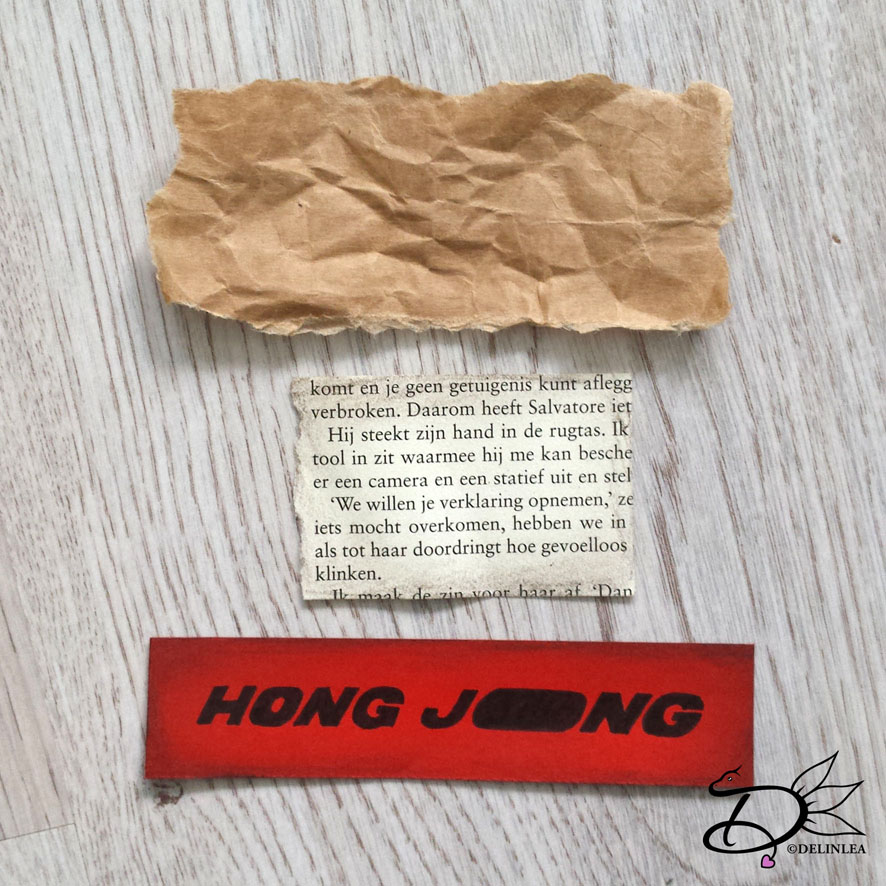
Lettering

Tags are coming along nicely, but still missing the name. What name do you want to be on the tag?! your own? ATEEZ? or their names?! Song titles? It’s up to you, I chose to write their names since it goes along on the drawing of them. Would be weird if I suddenly put on something completely not related haha.

You can do this in different ways, print out letters you want/like, cut those out and glue them on. Or you can choose to draw/paint them on, trace it, anything. It’s just what you like to do, and what you think will fit you. You can make it as hard as you want. xD

Finishing off

The only thing left to do is to keep those different tags together. You can use a safety pin, so you can also attach it to your clothes. Or what about thread, using a needle to sew it together or make a hole with a holepuncher and put the thread through there.

Ha! So many things you can do here. And I think that’s the nice thing about this, you can do what you like, and so everyone will make their own unique tags.

I hope you have an idea now how to make your own ATEEZ inspired name tags!

Have a Wonderful day everyone!

Love
Danielle

Posted in: Crafting, Geen categorie, Paper Tagged: ATEEZ, ATINY, DIY, hala hala, kpop, name tag, say my name

♥ Free Pattern; Baymax TsumTsum

7 maart 2019 by Delinlea Leave a Comment

Hey Lovelies! How are you doing these days?! I had a hard time chosing a DIY for today, I actually didn’t want to crochet, but I couldn’t come up with something else. Lately I’ve been so into drawing, that I wanna draw all day long and do nothing else. Do you have those days from time to time as well?! Now, I am wondering, if you would like to see any drawing related stuff on my blogs as well?! As in, tips or tutorials or anything in general. Let me know in the comments below or through the contact form! I’m actually wondering this for a while, so yeah better ask =P.
Anyway for today I figured to make a new tsum tsum pattern, just a simple one, since I still wanna draw at this point xD. It’s Baymax’s turn! I hope you will enjoy!

For this DIY you’ll need:
♥ Yarn in the colors;  White and Grey. (I used Zeeman Supersoft)
♥ Crochet Hook (I used a 2mm hook).
♥ Stuffing.
♥ Scissors.
♥ Sewing Pins.
♥ Yarn Needle.
♥ Felt in black.
♥ Fabric Glue. (Optional)

Stitches used (US Terms):
Magic Ring.
Ch = Chain.
SC = Single Crochet.
ST = Stitch.
Inc = Increase.
Dec = Decrease.
(…) = Repeat the space in brackets the given number of times.
[…] = Total number of stitches.

Pattern

Body
Use the color White.

1: 6SC in Magic Ring. [6]
2: 2SC in each st around. [12]
3: (1SC, inc) 6 times. [18]
4: (2SC, inc) 6 times. [24]
5: (3SC, inc) 6 times. [30]
6: (4SC, inc) 6 times. [36]
7: (5SC, inc) 6 times. [42]
8: 42SC. [42]
|
29: 42SC. [42]
30: (5SC, dec) 6 times. [36]
31: (4SC, dec) 6 times. [30]
32: (3SC, dec) 6 times. [24]
33: (2SC, dec) 6 times. [18] Make sure to stuff the body around here.
34: (1SC, dec) 6 times. [12]
35: dec all around. [6]
Fasten off and weave in the tail.

Legs (Make 4)
Use for 2 legs the color white and for the other 2 the color grey.

1: 4SC in magic ring. [4]
2: Inc in each st around. [8]
3: SC in each st around. [8]
|
5: SC in each st around. [8]
Fasten off and leave a long tail for sewing.

Sides of the body (Make 2)
Use the color grey.

1: Ch 6, insert in second ch from hook, 4SC, 3SC in the next st, 3SC, inc. [12]
2: inc, 3SC, (inc) 3 times, 3SC, (inc) 2 times. [18]
Fasten off and leave a long tail for sewing.

Assembling

For assembling I always use pins first to place all the parts, this way I can easily move them around until I am happy with how it looks!
First place the legs, the 2 white in front, slightly forward. The greys are at the back, facing outward, sew them on.
Now sew on the sides of the body. Use the pics as reference.
For the face, I used some black felt. Simply cut out the design you want for the face and then glue it on.
There is also this little mark on his chest where his ‘heart’ is, you can choose to cut this out of felt or do some embroidery or leave it out (Like I did). Just what you think is the easiest for you!

And your Baymax is done! Cute and easy, but I love him! And another one to our collection! If you want to see a certain tsum I haven’t made a pattern for yet. Let me know and maybe thay creature will be next!

Have a wonderful day!

Love
Danielle

Posted in: Crafting, Crochet, Tsum Tsum Tagged: Amigurumi, baymax, Crochet, Disney, Free Pattern, haken, Tsum Tsum

♥ Free Pattern; Tulpje

28 februari 2019 by Delinlea 5 Comments

Hey Lovelies! How are you doing?! I’m pretty good because I am going to see ATEEZ in Amsterdam! YAY! I’m so glad I managed to get a VIP ticket, april 12 it’s going to happen! Woop Woop. I’m gonna do a project, hopefully, but I’ll gonna tell you more about that later on. Now back to today’s post! I was clueless what to make for today, so I asked my friend if she had an idea and she instantly replied Tulips! I obvisously, don’t like the make just the thing so my brain made something up with that. Meet Tulpje! Isn’t she adorable?!

For this DIY you’ll need:
♥ Yarn in the colors;  Pink and Green. (I used Zeeman Supersoft)
♥ Crochet Hook (I used a 2mm hook).
♥ Stuffing.
♥ Scissors.
♥ Sewing Pins.
♥ Yarn Needle.
♥ Safety eyes, 6mm.
♥ Tiny piece of black yarn for the mouth.

Stitches used (US Terms):
Magic Ring.
Ch = Chain.
SC = Single Crochet.
HDC = Half Double Crochet.
DC = Double Crochet.
TR = Treble Crochet.
ST = Stitch.
Inc = Increase.
Dec = Decrease.
(…) = Repeat the space in brackets the given number of times.
[…] = Total number of stitches.

Pattern

Base of the Flower.
Use the color Pink.

1: 6SC in Magic Ring. [6]
2: Inc in each st around. [12]
3: 12SC. [12]
4: (1SC, inc) 6 times. [18]
5: 18SC. [18]
6: 18SC. [18]
7: (2SC, inc) 6 times. [24]
8: 24SC. [24]
|
13: 24SC. [24]
14: (2SC, dec) 6 times. [18] Make sure to stuff here.
15: (1SC, dec) 6 times. [12]
16: Dec all around. [6]
Fasten off and weave in tail.

Petals  (make 3)
Use the color Pink.

1: 6SC in Magic Ring. [6]
2: (1SC, inc) 3 times. [9]
3: (2SC, inc) 3 times. [12]
4: 12SC. [12]
5: (3SC, inc) 3 times. [15]
6: (4SC, inc) 3 times. [18]
7: (2SC, inc) 6 times. [24]
8: 24SC. [24]
|
14: 24SC. [24]
15: (2SC, dec) 6 times. [18]
16: (1SC, dec) 6 times. [12]
Fasten off and leave a long tail for sewing. You don’t stuff these, just make them flat.
At 2 petals you have to place a safety eye, between row 11 and 12.

Body
Use the color green.

1: 6SC in Magic Ring. [6]
2: Inc in each st around. [12]
3: (1SC, inc) 6 times. [18]
4: (2SC, inc) 6 times. [24]
5: (3SC, inc) 6 times. [30]
6: 30SC. [30]
|
11: 30SC. [30]
12: (3SC, dec) 6 times. [24]
13: 24SC. [24]
14: 24SC. [24]
15: (2SC, dec) 6 times. [18]
16: 18SC. [18]
Fasten off and leave a long tail for sewing. Stuff the body as well.

Legs (Make 2)
Use the color green.

1: 6SC in Magic Ring. [6]
2: Inc in each st around. [12]
3: 12SC. [12]
Fasten off and leave a long tail for sewing.

Arms (Make 2)
Use the color Green.

Ch10, insert in second ch from hook, 1SC, 1HDC, 3DC, 4TR.
Fasten off and leave a long tail for sewing.

Assembling

To assemble anything in crochet I always use sewing pins to position all parts first, this way you can easily move things around until you are happy. The you can sew it on.
Start with the base part of the flower, around it you will put the petals. Sew them tot he base at the bottom, and along the sides where the petals meet each other.
Then sew the body to the flower. And add his legs and arms.
Last, sew on a mouth and you are done!

I hope you enjoyed this pattern! I can imagine a whole bunch together, how cute would that be in all different colors and such, aww *_*. I deffinitely wanna make some more when I have time! I would love to see yours when you made one or a few!

Have a wonderful day!

Love
Danielle

Posted in: Crafting, Crochet Tagged: Amigurumi, Crochet, cute, Free Pattern, kawaii, tulips, Tulpje

♥ Free Pattern; Amigurumi Cat Bulb

21 februari 2019 by Delinlea Leave a Comment

Hey Lovelies! Was the weather as beautiful as it was here the past few days?! It was so nice and sunny and cold, I love it! I prefer this weather over hot sunny weather. I just love cold weather, don’t judge me haha. Right now, it’s cloudy while I am writing this, but the past few days really got me into spring feelings. So, I thought it’s a good idea to make something springy! I think this cat bulb turned out adorable, I hope you think so as well. Ready to dive into this Amigurumi pattern?!

For this DIY you’ll need:
♥ Yarn in the colors; Light Brown, Brown, Green and Cream. (I used StyleCraft Special DK in the colors; Camel, Walnut, Spring Green and Cream)
♥ Crochet Hook (I used a 2,5mm hook).
♥ Stuffing.
♥ Scissors.
♥ Sewing Pins.
♥ Yarn Needle.
♥ Safety eyes, 5mm. (Optional

Stitches used (US Terms):
Magic Ring.
Ch = Chain.
SLST = Slip Stitch.
SC = Single Crochet.
HDC = Half Double Crochet.
ST = Stitch.
Inc = Increase.
Dec = Decrease.
(…) = Repeat the space in brackets the given number of times.
[…] = Total number of stitches.

Pattern

Leaves (Make 2)
Use the color Green

1: 6SC in Magic Ring. [6]
2: (1SC, inc) 3 times. [9]
3: 9SC. [9]
|
5: 9SC. [9]
6: (1SC, dec) 3 times. [6]
7: 6SC. [6]
Fasten off and leave a long tail for sewing.

Stem
Use the color Green.

1: 6SC in Magic Ring. [6]
2: 6SC. [6]
|
11: 6SC. [6]
Fasten off and weave in tail.

Bulb
Use the color Light Brown.

1: 6SC in Magic Ring. [6]
2: Inc in each st around. [12]
3: (1SC, inc) 6 times. [18]
4: (2SC, inc) 6 times. [24]
5: (3SC, inc) 6 times. [30]
6: (4SC, inc) 6 times. [36]
7: 36SC. [36]
|
10: 36SC. [36]
11: (4SC, dec) 6 times. [30]
12: 30SC. [30]
Between row 11 and 12 you will add the eyes, about 2,5cm apart. It’s also a good time to add the roots with cream to the bottom of the bulb, I attached 4 strands, and peeled those apart, so it looks a bit more like roots.
13: 30SC. [30]
14: (3SC, dec) 6 times. [24]
15: 24SC. [24]
16: (2SC, dec) 6 times. [18]
17: 18SC. [18]
18: (1SC, dec) 6 times. [12]
19: 1SC, 4HDC, 1SC, SLST. [7]
Fasten off and leave a long tail for sewing.

Arms (make 2)
Use the color Light Brown.

1: 6SC in Magic Ring. [6]
2: 6SC. [6]
Fasten off and leave a long tail for sewing.

Legs (make 2)
Use the colors Light Brown and Brown. (one each)

1: 6SC in Magic Ring. [6]
2: Inc in each st around. [12]
3: 12SC. [12]

Ears (make 2)
Use the colors Light Brown and Brown. (one each)

1: 4SC in Magic Ring. [4]
2: (1SC, inc) 2 times. [6]
3: (2SC, inc) 2 times. [8]
4: (3SC, inc) 2 times. [10]
Fasten off and leave a long tail for sewing.

Assembling

Sew the 2 leaves to the stem, at the point you started the stem.
With Sewing pins, it’s easier to see where you wanna place all the parts. With pinning them down to the place you wanna have the legs for example, you can see if it looks good. If not, you can easily replace them. What you can’t do easily when you already sew them on.
If you are happy with how your Cat Bulb looks, you can sew on all parts.
Lastly add the plant to the blub, insert it in the hole of the bulb and sew it on.  I used the yarn tail from the blub, I thought this was easier, but do what feels good for you.
Don’t forget to make a nose, you can embroider it on or use felt. With some soft pastel I added some pink to the cheecks, maybe you wanna do that as well, just apply it with a brush.

I hope you enjoyed this Cat Bulb Pattern! And if so, show me yours on social media, love to see it!
Have a wonderful day everyone!

Love
Danielle

Posted in: Crafting, Crochet Tagged: Amigurumi, bulb, Cat, Crochet, cute, Free Pattern, kawaii, spring

♥ Free Pattern; Succulent Heart

14 februari 2019 by Delinlea Leave a Comment

Hey Lovelies! Happy Valentines Day!! Ha, I wanted to say Happy V-Day! But, then… I only could think of that it was Taehyung’s/V’s Birthday haha. My ARMY (BTS Fandom name) mind creeped out. So let’s keep it Happy Valentines Day!
Today I made something to crochet for you, a Succulent heart. I know I am late posting this, but I had a hard time finishing it. I’m sorry for that. But the day hasn’t passed yet! Anyway,  It’s a free pattern for you to enjoy. I didn’t make it too sweet, didn’t felt like it this year, this way you can easily use it as a home deco piece!

For this DIY you’ll need:
♥ Grey Yarn*. (I used Zeeman Luxery Yarn with a 5,5mm hook.)
♥ Green Yarn*. (I used Zeeman SuperSoft with a 2mm hook.)
♥ Crochet Hook.
♥ Stuffing.
♥ Scissors.
♥ Yarn Needle.
♥ Sewing Pins.
♥ Soft Pastel. (optional)

*The Grey yarn should be about 2 a 3 times ticker as the yarn you will use for the plants.

Stitches used (US Terms):
Magic Ring.
Ch = Chain.
SC = Single Crochet.
Inc = Increase.
Dec = Decrease.
(…) = Repeat the space in brackets the given number of times.
[…] = Total number of stitches.

Pattern

Heart (Make 2)
Use the gray Yarn.

1: Ch4, insert in second chain from hook, 3SC, Turn. [3]
2: Ch1, inc, 1SC, inc, Turn. [5]
3: Ch1, inc, 3SC, inc, Turn. [7]
4: Ch1, inc, 5SC, inc, Turn. [9]
5: Ch1, inc, 7SC, inc, Turn. [11]
6: Ch1, inc, 9SC, inc, Turn. [13]
7: Ch1, inc, 11SC, inc, Turn. [15]
8: Ch1, inc, 13SC, inc, Turn. [17]
9: Ch1, inc, 15SC, inc, Turn. [19]
10: Ch1, 19SC, Turn. [19]
|
16: Ch1, 19SC, Turn. [19]
17: Ch1, Dec, 5SC, Dec, Turn. [7]
18: Ch1, 7SC, Turn. [7]
19: Ch1, Dec, 3SC, Dec, Turn. [5]
20: Ch1, 5SC, Turn. [5]
21: Ch1, Dec, 1SC, Dec. [3]

Repeat row 17 to 21 for the other half of the heart shape.
When you are done, make another one. These 2 you will crochet together with Single Crochet (SC). Don’t forget to stuff the heart lightly before entirely closing up. Work away all your tails and make a nice loop to hang the heart at, at the top.

Succulent
Use the Green Yarn.

Small leave (Make 6)

1: 6SC in magic ring. [6]
2: 6SC. [6]
3: 1SC, Inc. [9]
4: 9SC. [9]
5: 9SC. [9]
6: 1SC, Dec. [6]
Fasten off and leave a long tail for sewing.

Big Leave (make 6)

1: 6SC in magic ring. [6]
2: 6SC. [6]
3: 1SC, Inc. [9]
4: 2SC, Inc. [12]
5: 12SC. [12]
|
8: 12 SC. [12]
9: 2SC, Dec. [9]
Fasten off and leave a long tail for sewing.

Assemble the Succulent starting from the small leaves. So you work your way from inside out. You only have the sew the bottom of the leaves together. Make sure you spread them evenly. With some Soft Pastel you can give your succulent a bit more dimension. Just add it with a brush to the edges.

I also added some string of pearls succulent. Which I made a pattern for somewhere last year. You can find it here: Link

Assembling

Now you have your heart and succulents done, you can arrange them how you would like. I just placed them on with some sewing pins until I was happy, and sewed them on.

And you are done! Now you can give it to someone you love of just give it as a present to yourself! It’s good to treat yourself from time to time as well!

Have a wonderful Valentines Day!

Love
Danielle

Posted in: Crafting, Crochet Tagged: Amigurumi, Crochet, haken, heart, succulent, Valentine
« Vorige 1 2 3 4 5 … 25 26 27 28 29 30 31 32 33 … 40 41 42 43 44 Volgende »

What are you looking for?!

My Socials

Ko-Fi

I love making all these free things for you, tho it would be very helpfull if you can support me on Ko-Fi! (You don’t have to tho, totally up to you!)

Ko-Fi Shop!!

In my Ko-Fi shop you can find PDF Amigurumi Patterns!! You can pay easily with PayPal.
Go to the shop here!!

Recent Blog Posts

  • ♥ Happy 2022!
  • ♥ Day 12; Lights
  • ♥ Day 11; Flower Deco
  • ♥ Day 10; Snowman
  • ♥ Day 9; Gingerbread Houses

Recent Comments

  • Delinlea op ♥ Pietje Gnome Amigurumi
  • Delinlea op ♥ Toy Story Alien TsumTsum Amigurumi
  • Delinlea op ♥ Pua Tsum Tsum Amigurumi
  • Charli op ♥ Free Pattern; CNY Mouse Amigurumi
  • Peter Pesch op ♥ Pietje Gnome Amigurumi

Categories

  • animation
  • Beadwork
  • Blogmas 2018
  • Blogmas 2020
  • Blogmas 2021
  • Books
  • Bujo
  • Christmas
  • Christmas CAL 2019
  • Christmas Countdown 2017
  • Contest
  • Crafting
  • Crochet
  • Drawing
  • Drawing Lesson
  • Easter
  • Geen categorie
  • Life
  • Miniature
  • Nail Art
  • New Year
  • Paper
  • plush
  • Pokemon
  • Poseable Art Doll
  • Recipe
  • Sewing
  • Shop Pattern
  • Sinterklaas
  • Social Media
  • Tsum Tsum
  • Ufufy

Copyright © 2025 Delinlea - My little fantasy world.

Family WordPress Theme by themehall.com