Delinlea - My little fantasy world
  • ♥ Home
  • ♥ About Me
  • ♥ Blogmas 2021
  • ♥ Free Patterns
    • ♥ Amigurumi; Spring/Easter
    • ♥ Amigurumi; Fall/Halloween
    • ♥ Amigurumi; Winter
    • ♥ Amigurumi Tsum Tsum
    • ♥ Amigurumi Ufufy
    • ♥ Amigurumi Others
    • ♥ Christmas Countdown 2017
    • ♥ Blogmas 2018
    • ♥ Blogmas 2020
  • ♥ Tutorials
    • ♥ Easter
    • ♥ Home Deco
    • ♥ Others
  • ♥ Drawing Lessons
  • ♥ FanFic
    • ♥ Chapter 1
    • ♥ Chapter 2
    • ♥ Chapter 3
    • ♥ Chapter 4
    • ♥ Chapter 5
    • ♥ Chapter 6
    • ♥ Chapter 7
  • ♥ Gallery
    • ♥ Crafts
    • ♥ Drawings
    • ♥ Poseable Art Dolls
  • ♥ Links
  • ♥ Contact

DIY

♥ Tutorial; Clay Snow Dragon

16 januari 2020 by Delinlea Leave a Comment

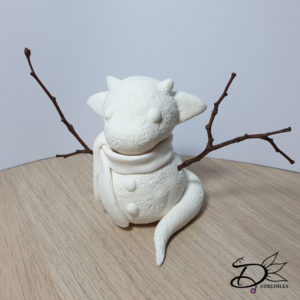
Hey Lovelies! How are you doing?! I am sad it’s still raining and storming outside, no snow for me. I keep imagining how much snow all the rain would have been xD. Anyway I am still in winter mode, so I have made this adorable snow dragon out of clay. Just a little sculpture to have around and lift up the winter spirit. It’s perfect to use clay around this time of year.
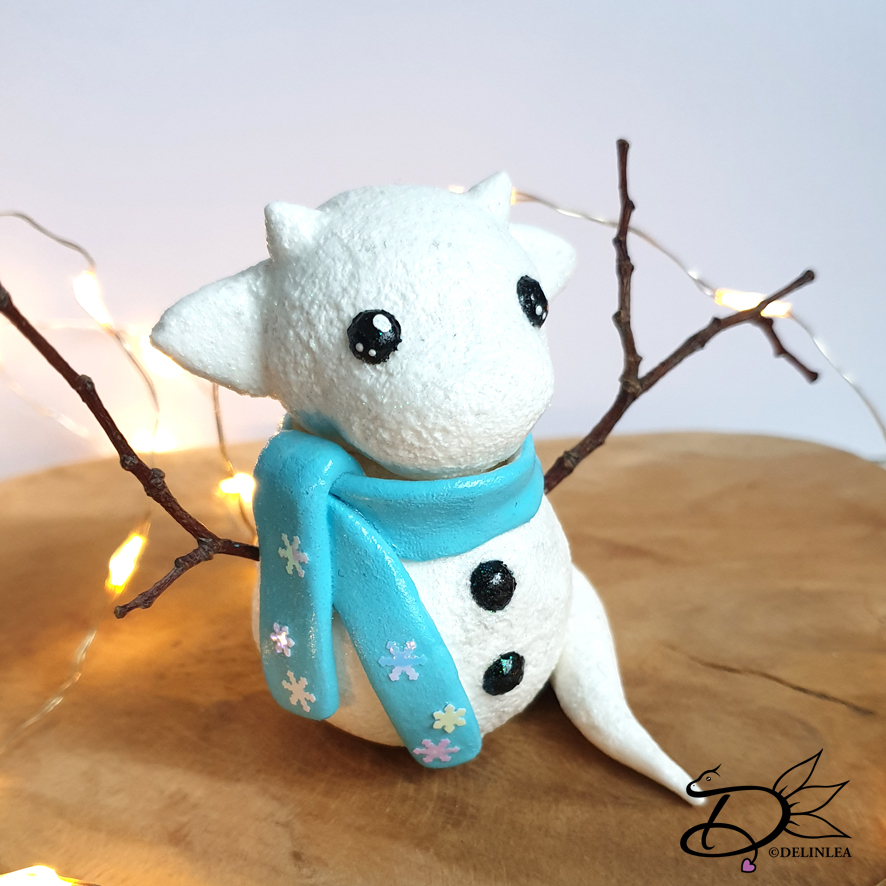
Clay Snow Dragon

For this DIY you’ll need:
♥ Aluminum Foil.
♥ Air Dry Clay.
♥ Skewer.
♥ Some Rough Brush or Tooth Brush for Clay Purposes.
♥ Water and/or Glue.
♥ Some Branches.
♥ Clay tools.
♥ Acrylic Paint.
♥ Varnish.
♥ Brush.
♥ Glitter/nailart deco. (optional)

Tutorial

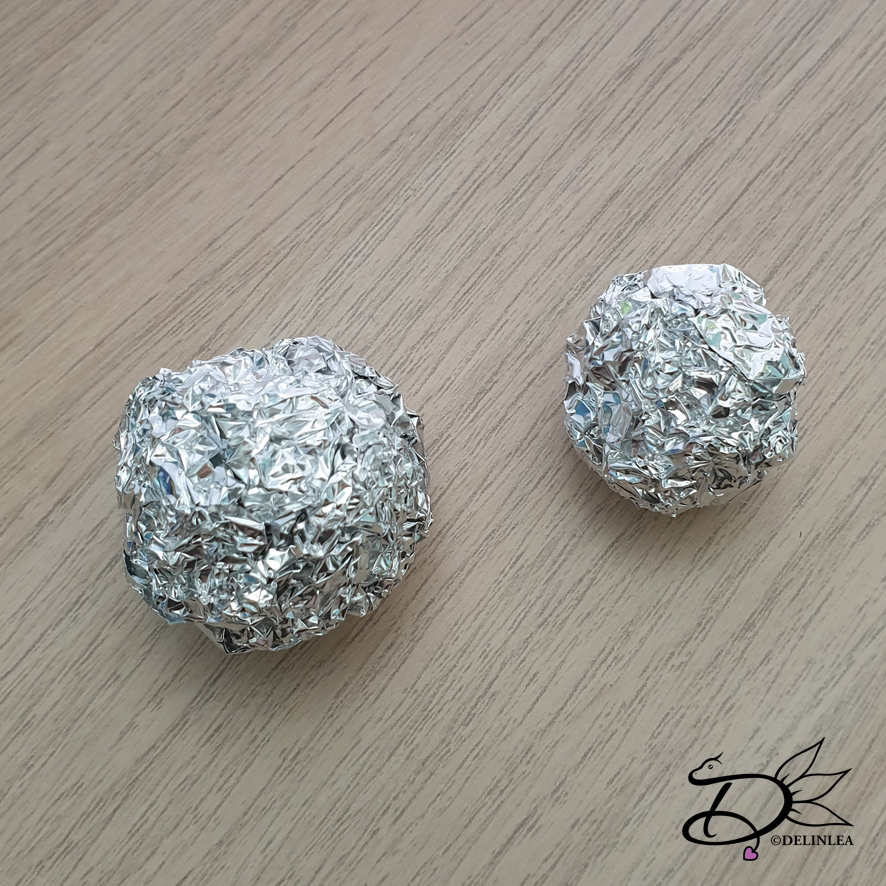
Make 2 balls out of aluminum foil. One about 3,5cm and the other about 2cm.

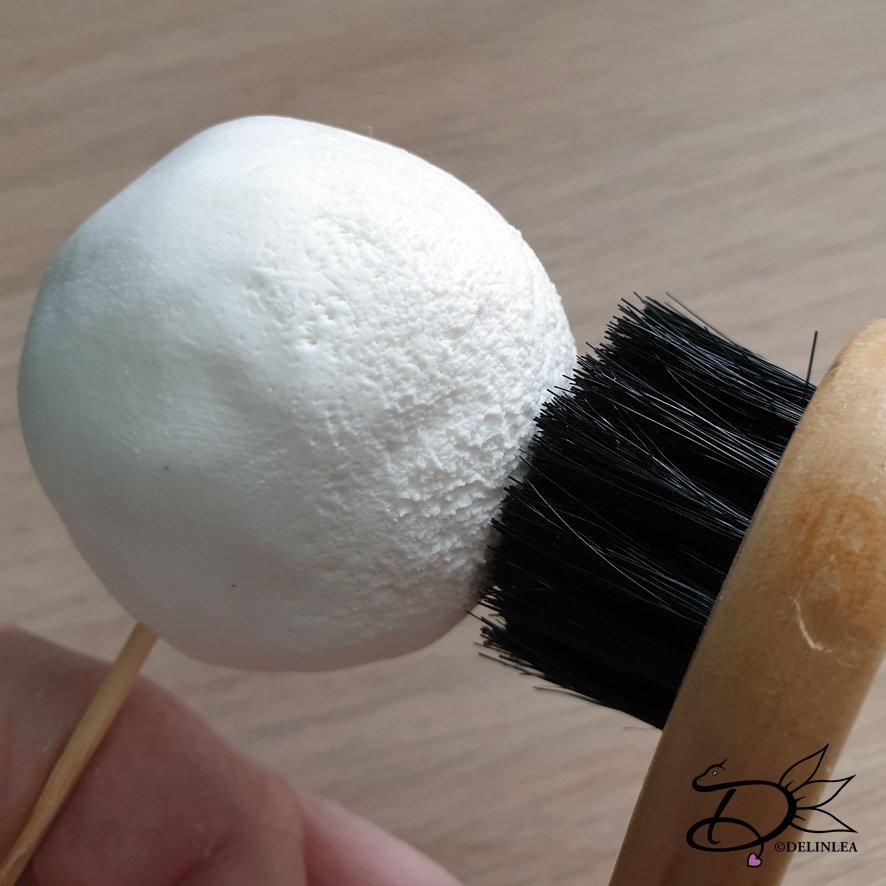
Prick the skewer in the large ball, this makes it easier to hold. Cover it entirely with clay, about 1cm thick. It doesn’t have to be perfectly smooth. If you ever made a snowman with real snow, you know that’s almost impossible the get a perfectly smooth ball xD. When it’s covered, texture the clay using the rough brush or toothbrush. If that’s done, put it upside down with the skewer straight up and let it dry before you continue. Usually with air dry clay, this doesn’t take too long, although it depends on the clay!

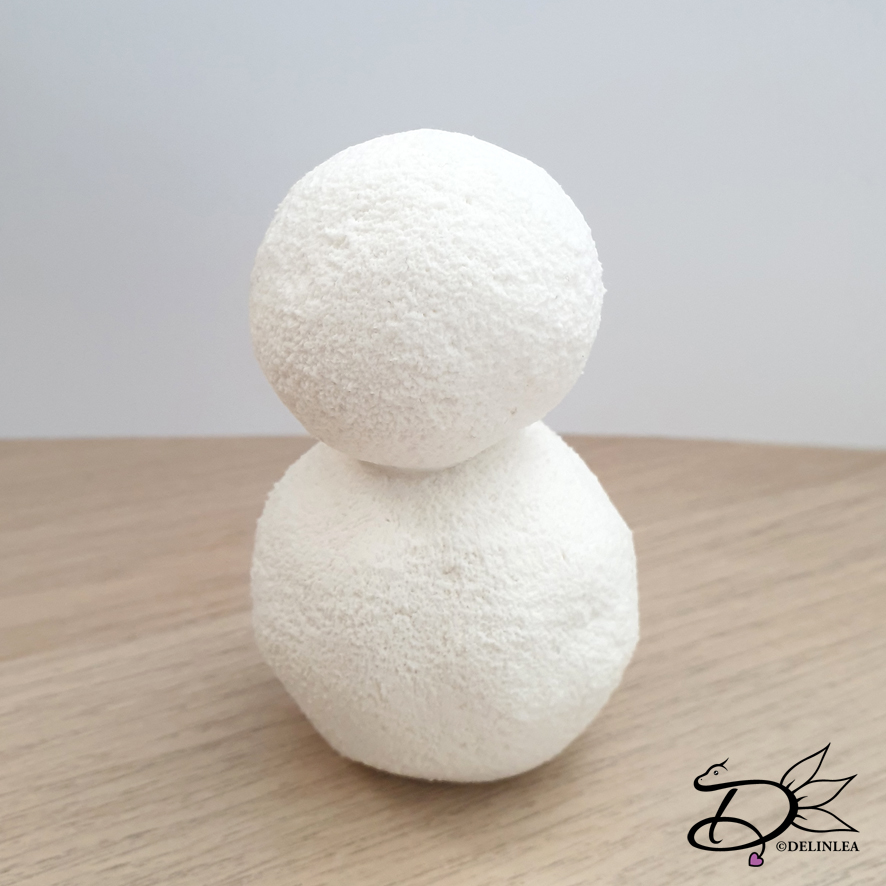
When the large ball is as good as dry, do the same for the small one, but don’t let it dry. Cut the skewer smaller and pull out the one of the large one. Add a bit of glue around the hole of the large ball and slide in the skewer of the small one. if you left any marks where you hold it, make sure to texture it again.

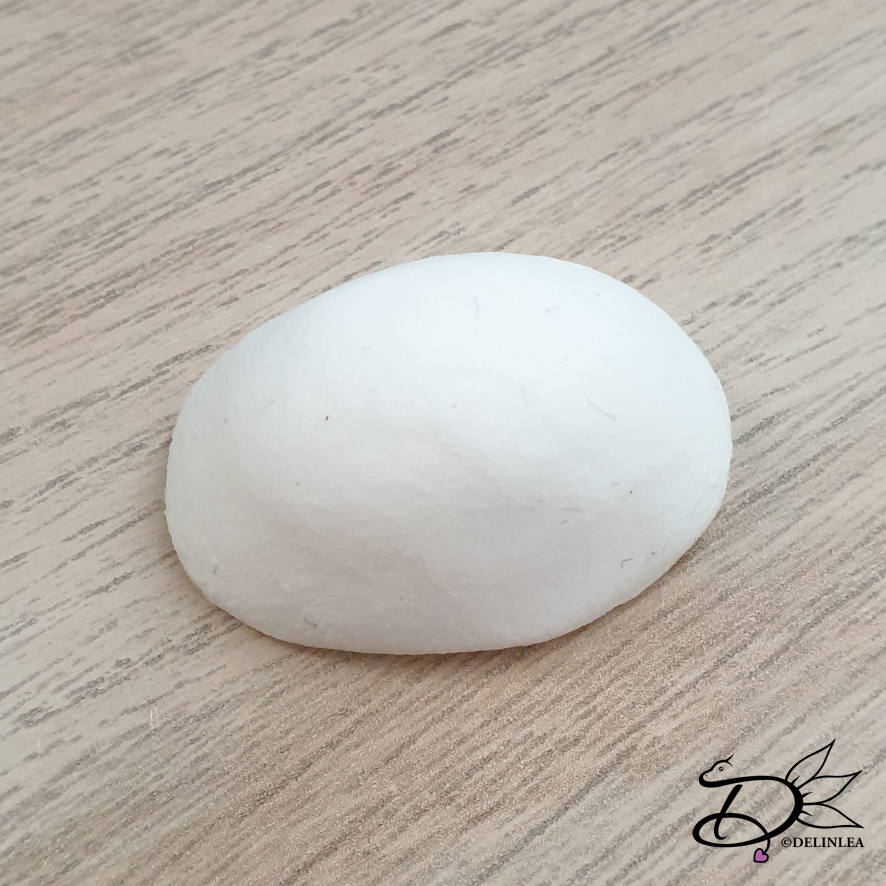
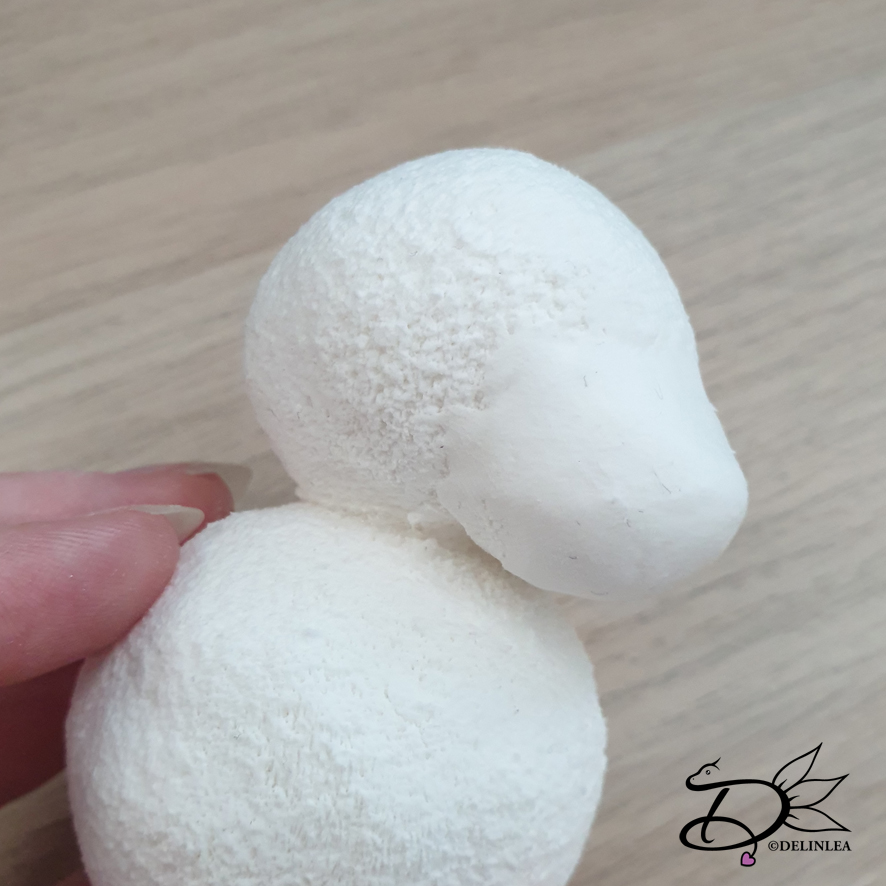
Take a bit of clay, a ball around 2cm and make a oval shape of it. Put it on a flat surface and flatten the side/edges towards the flat surface. (Not sure how to explain this well, check the pics). This will be his beak. If the clay of the small ball is still wet then you can use water to put both parts together, if not use a bit of glue. Try to smooth out the edges , doesn’t have to be perfect. Don’t forget to texture it!

Horns

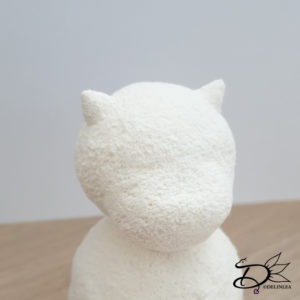
Make two balls out of clay, approx  0,5cm each. Make a pine cone shape of both balls. Glue those to the head where you like them. try to smooth out the edges and texture those as well.
From here I let it completely dry before I continued.

Tail

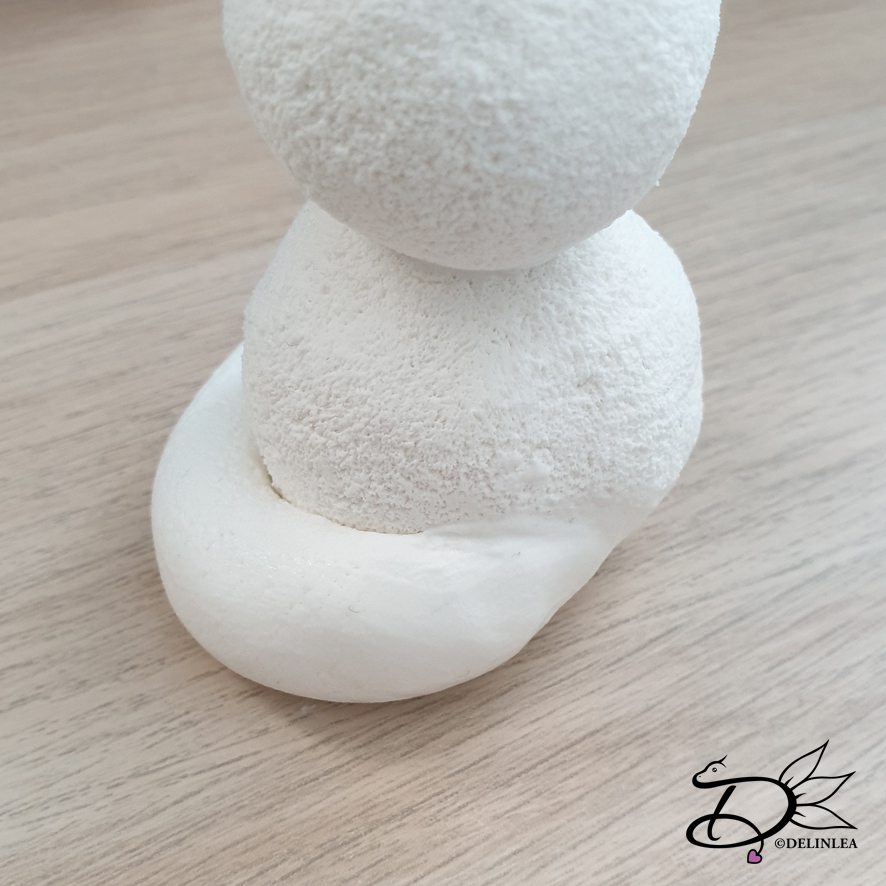
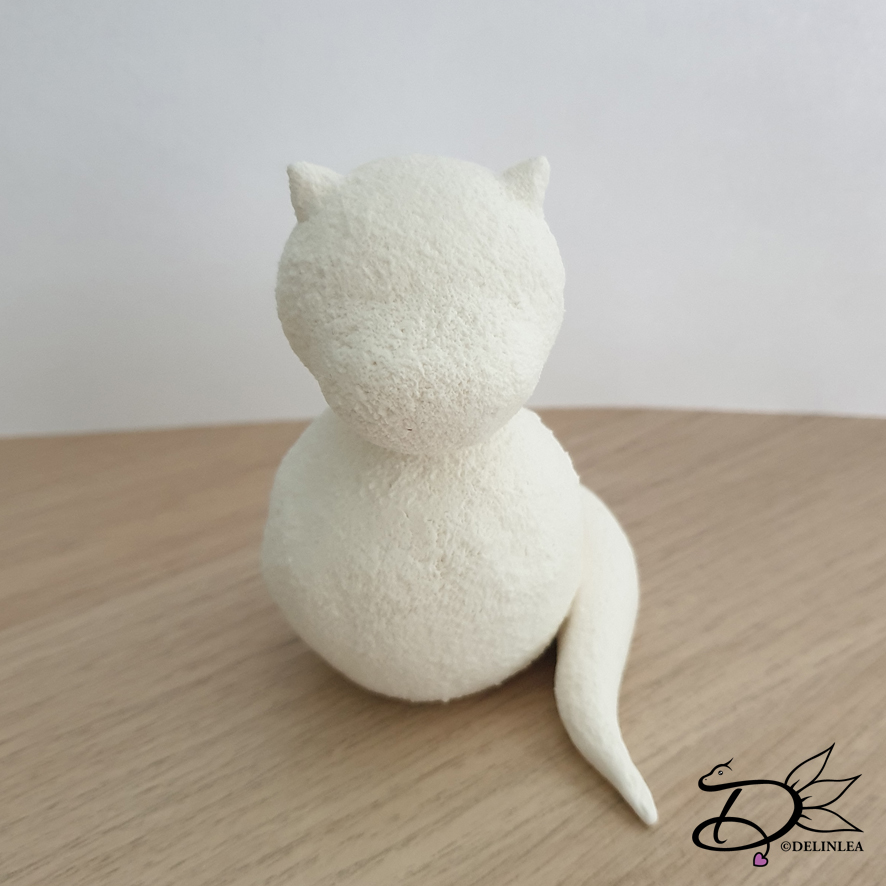
Make a long cone shape that you wanna use for the tail. At the widest part you wanna slice a part of with a knife to be able to apply it to the body easily. Texture the tail too.

Shawl

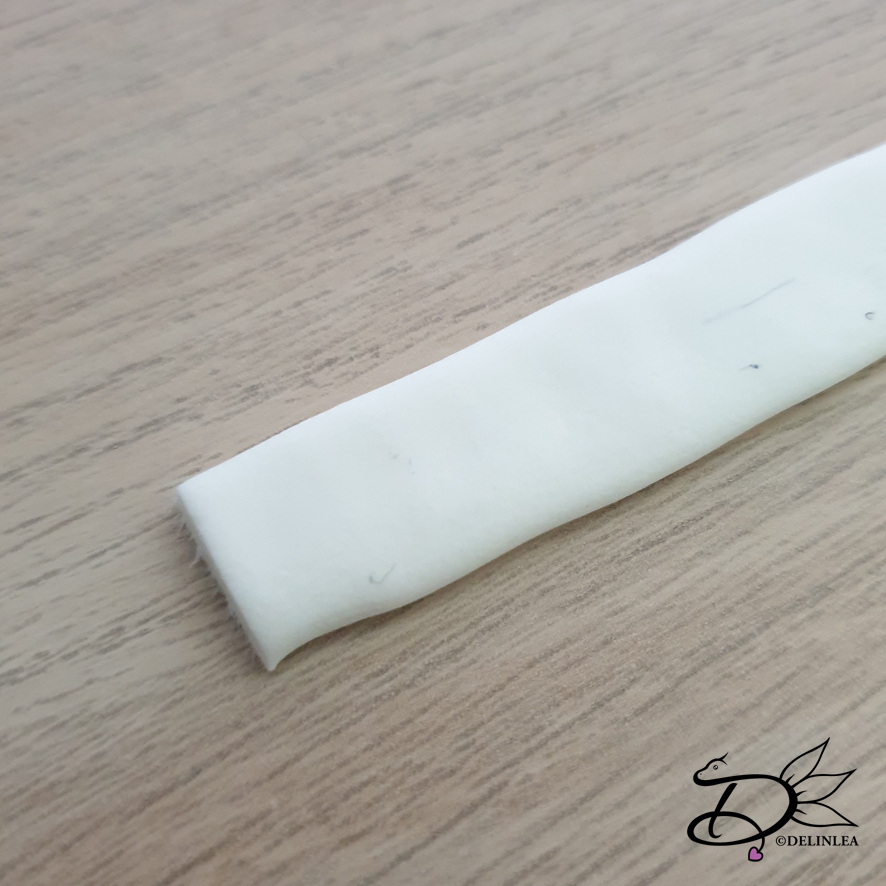
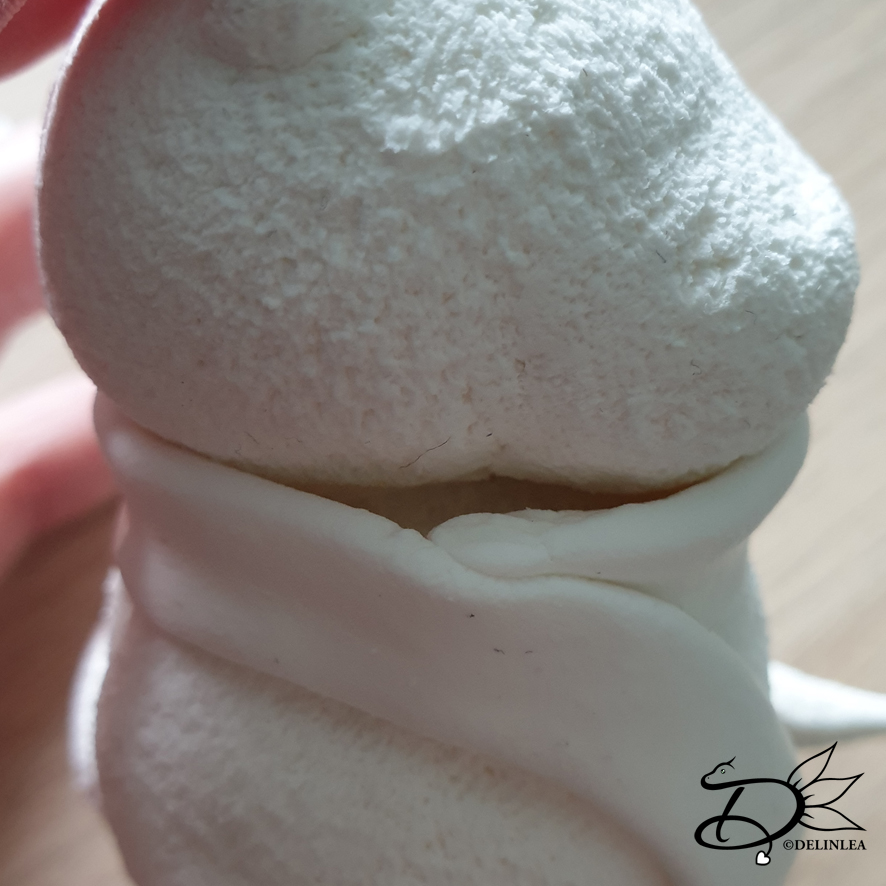
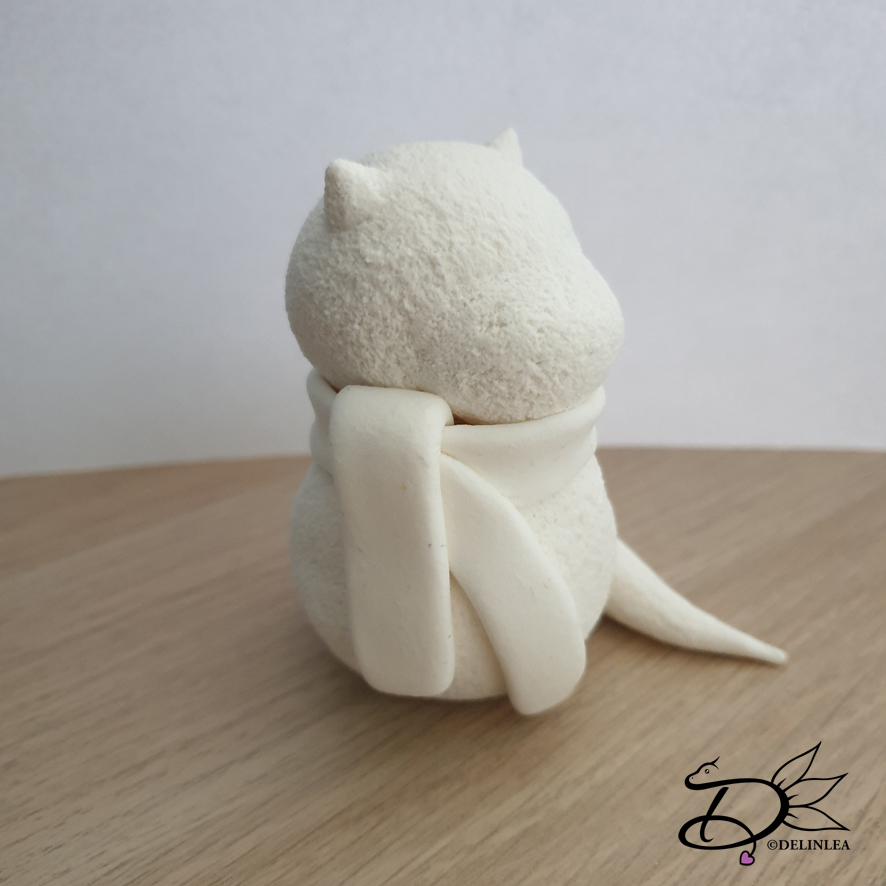
Make a long snake of clay, and flatten it a bit. Wrap about 10 to 15 cm around his neck (depends on your work), like shown in the picture. Make sure to use a bit of glue/water, cause air dry clay won’t stick to dry air dry clay.
Now make a little gap where the clay starts to overlap. In here you will add another piece of the flatten snake you made. Cut off about 4 to 5cm of the snake and flatten one side of it a bit more, this will make it easier to slide in the gap. If you have done that, add it carefully in the gap and fold the remaining part down. Make sure to use glue here as well.

Ears

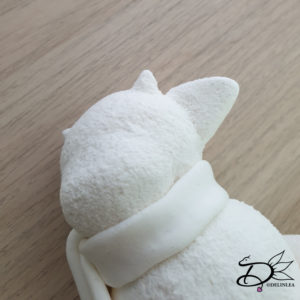
Make 2 balls of about 1cm each and shape those into a flat-ish triangle. Apply those to the head and make sure to texture those as well.

Arms

Poke a hole with something sharp on the place where you want the arms to go. Cut pieces of a branch to the size you like and put those in the holes you just made.

Eyes and Buttons

With little pieces of clay make the eyes and buttons on the snow dragon. Make sure to leave those smooth so they could look like little stones stuck into the snow.

Painting

Last paint the parts you like to paint. I painted the scarf light blue and the eyes/buttons black. Further I left everything white. You can varnish the snow dragon if you like. I added some glitter to the varnish for that little extra. If you have ever seen snow, you know it sparkles. So so pretty! *-*

I hope you liked this little tutorial how to make a snow dragon out of clay! Show me if you made one as well, I’d love to see! Have a wonderful day!

Love
Danielle

Posted in: Crafting Tagged: clay, crafting, cute, DIY, Dragon, kawaii, snow, winter

♥ DIY; Jute Gift Bags

29 november 2019 by Delinlea Leave a Comment

Hey Lovelies! I am so sorry that I am late with uploading, but stuff with my cat came up and then I couldn’t access my website, great. But as you can see I can access my website again and upload stuff! Today I wanted to show you how you can make those cute jute gift bags! Or use them as docoration. It’s fun and easy to make, so I hope you will like them as well.

For this DIY you’ll need:
♥ Brown fabric or real Jute.
♥  (Fabric) Scissors.
♥ Pencil or Trick Marker.
♥ Ruler.
♥ Sewing Pins.
♥ Iron. (Optional)
♥ Sewing Machine. (Optional, you can do it by hand as well).
For decorating:
♥ Paper or anything else you can make a stencil of, like wrapping foil that’s self-adhesive.
♥ X-acto knive.
♥ Acrylic Paint. (Optional)
♥ Brush. (Optional)

Tutorial

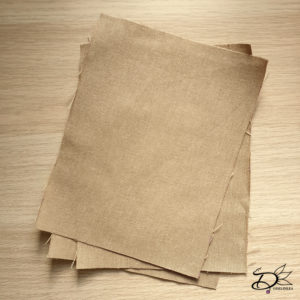
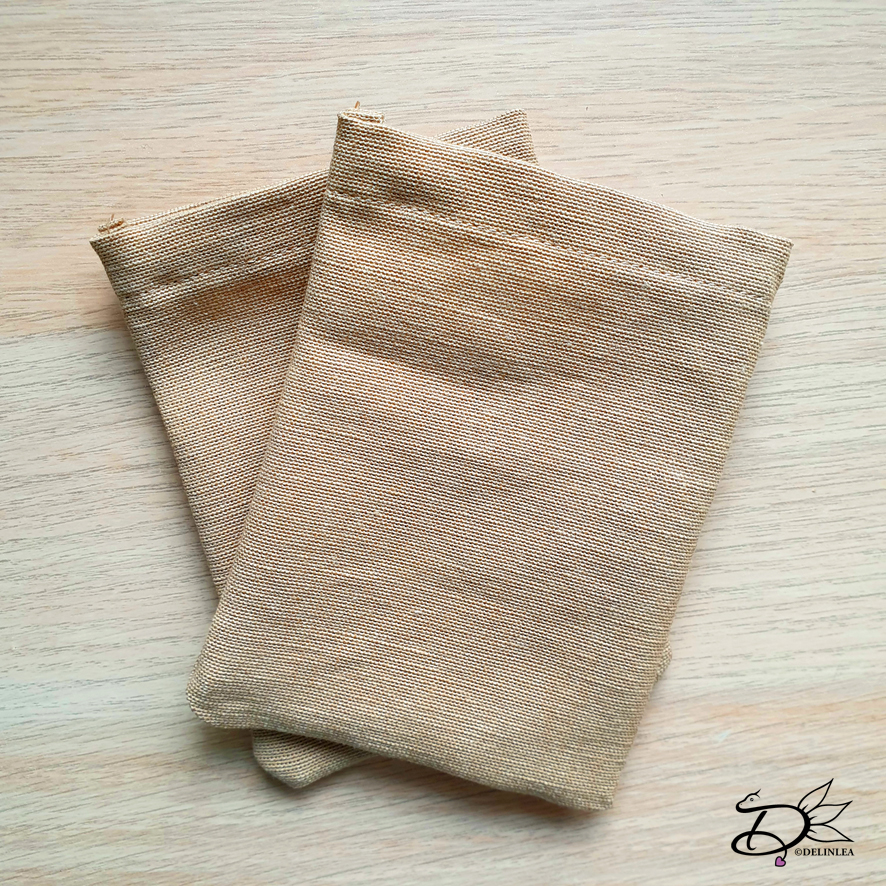
From the brown fabric, cut out a rectangle of 21 by 16cm. Make as many as you want, but for one bag, you need one rectangle. If your fabric is really wrinkly, like mine was, you might wanna iron it.

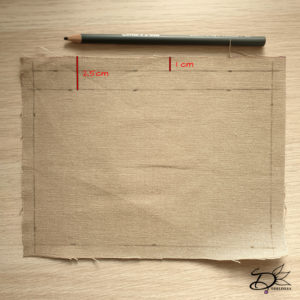
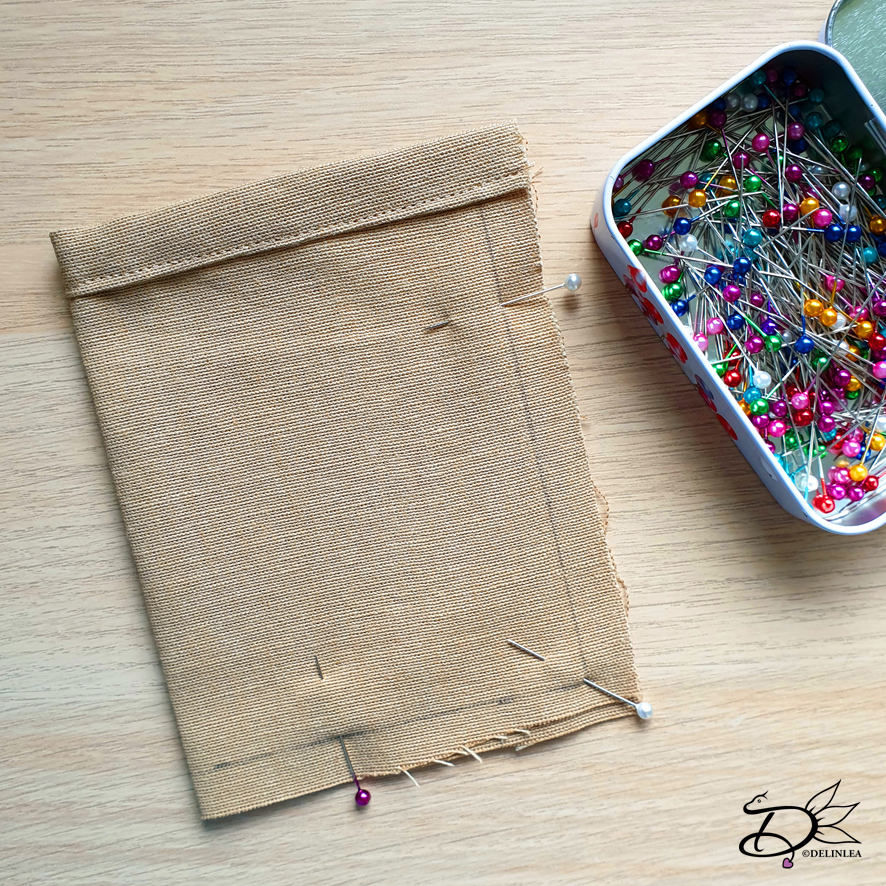
Along all sides of the rectangle, measure 1cm along the edge, this will be your seam allowance. On one of the widest sides, draw also a line that’s 2,5 cm from the edge. (see picture)

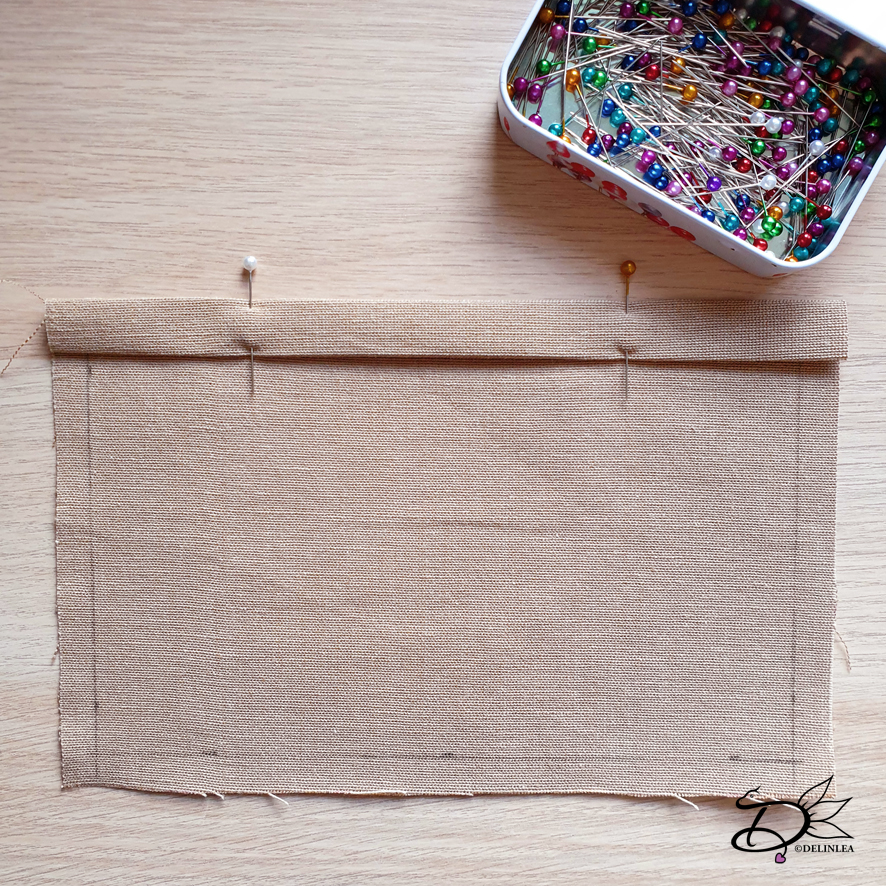
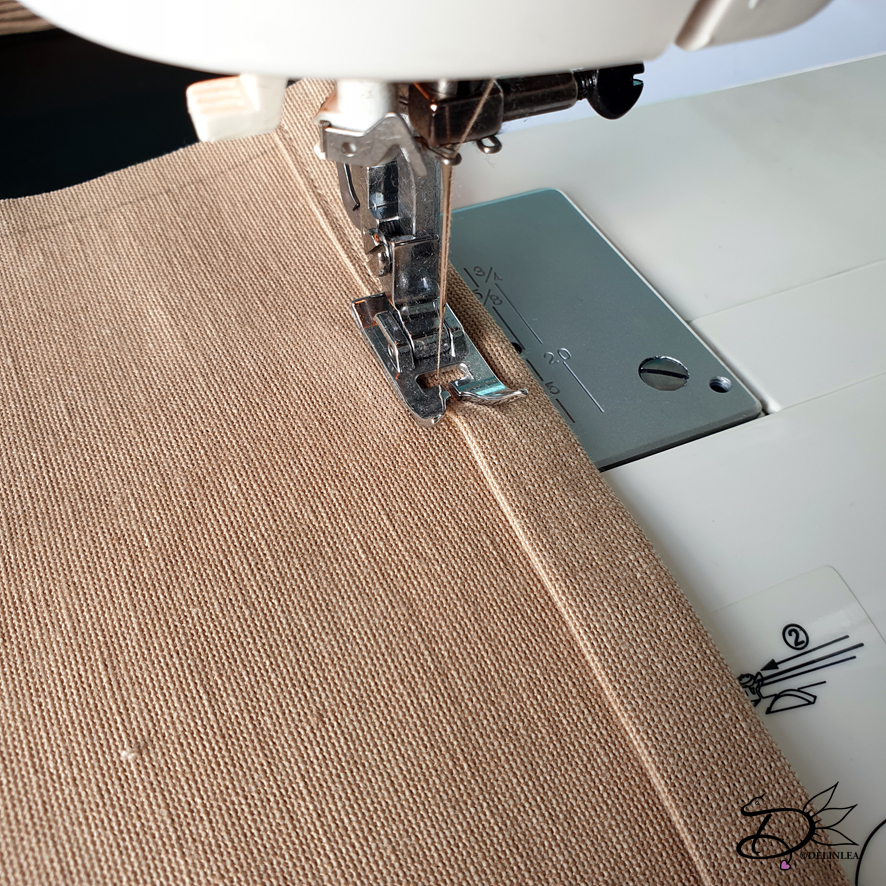
Fold both lines in on the side with the 2 lines. Pin those down and sew it close.

The side you’ve just sewn close, fold in half, the good side facing inward. Use sewing pins to keep it in place. Sew along the 2 sides that should be closed as well. As I used cotton fabric, the sides will raffle a bit, so I used a zigzag stitch as well to prevent this from happening.
If you have a lot of fabric left over around the edge, you might wanna trim it a bit. Just so it won’t get bulky once you turn it inside out.

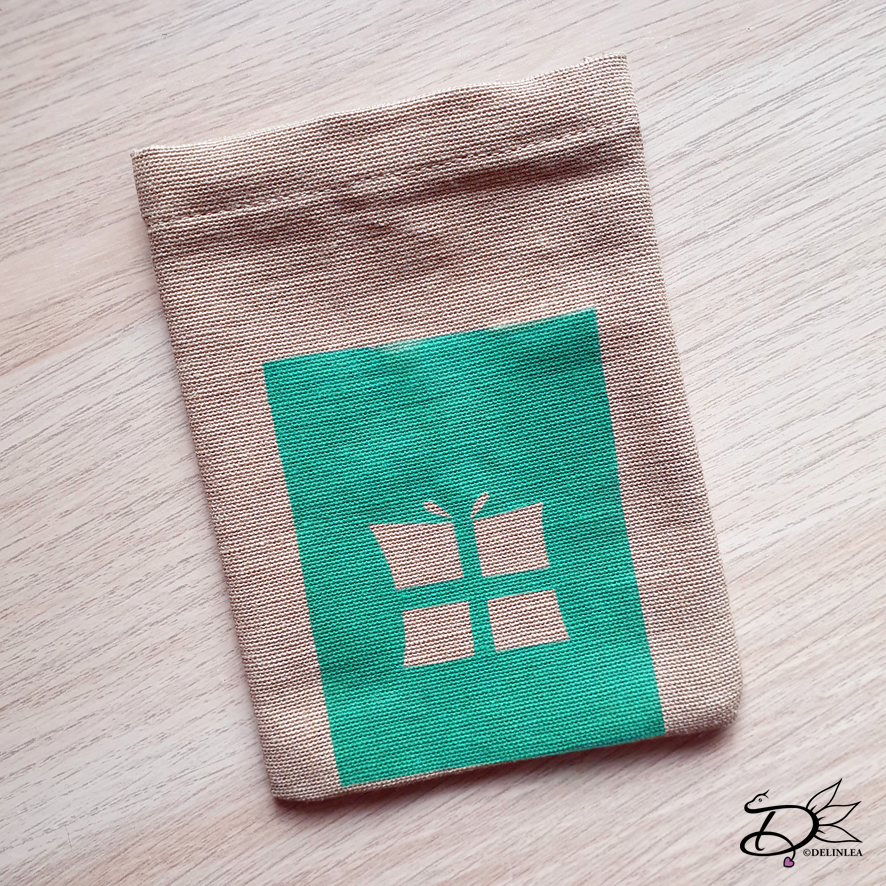
When you are done sewing, turn your bag inside out. The bag is done now, but you can choose to decorate it.

Decorating

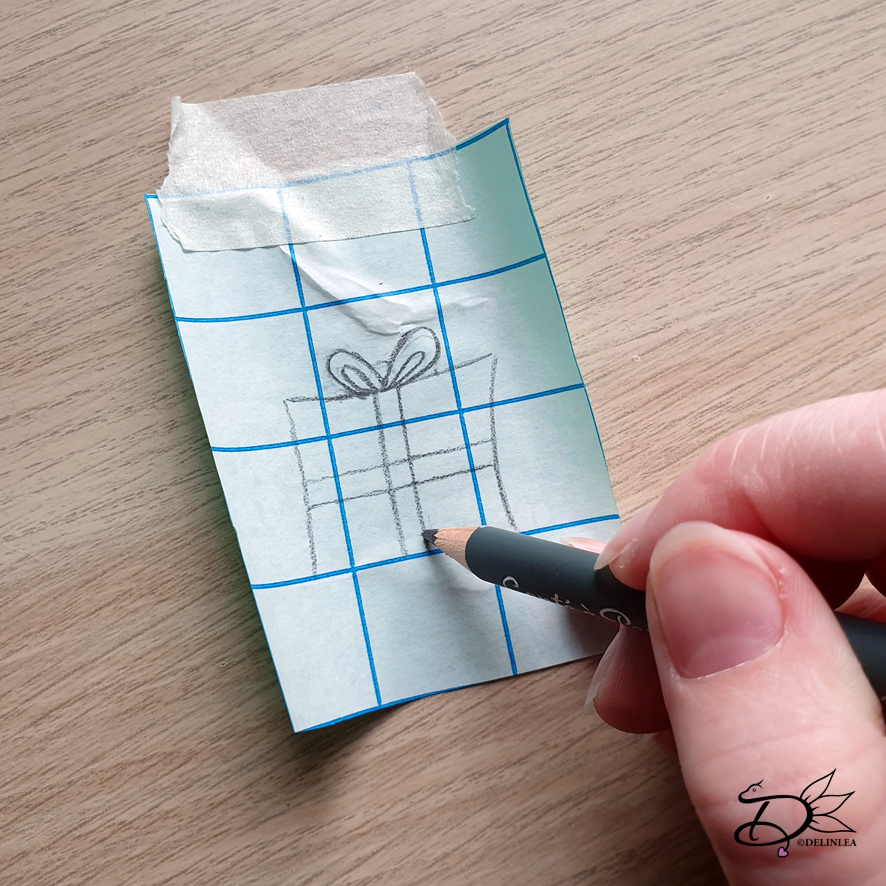
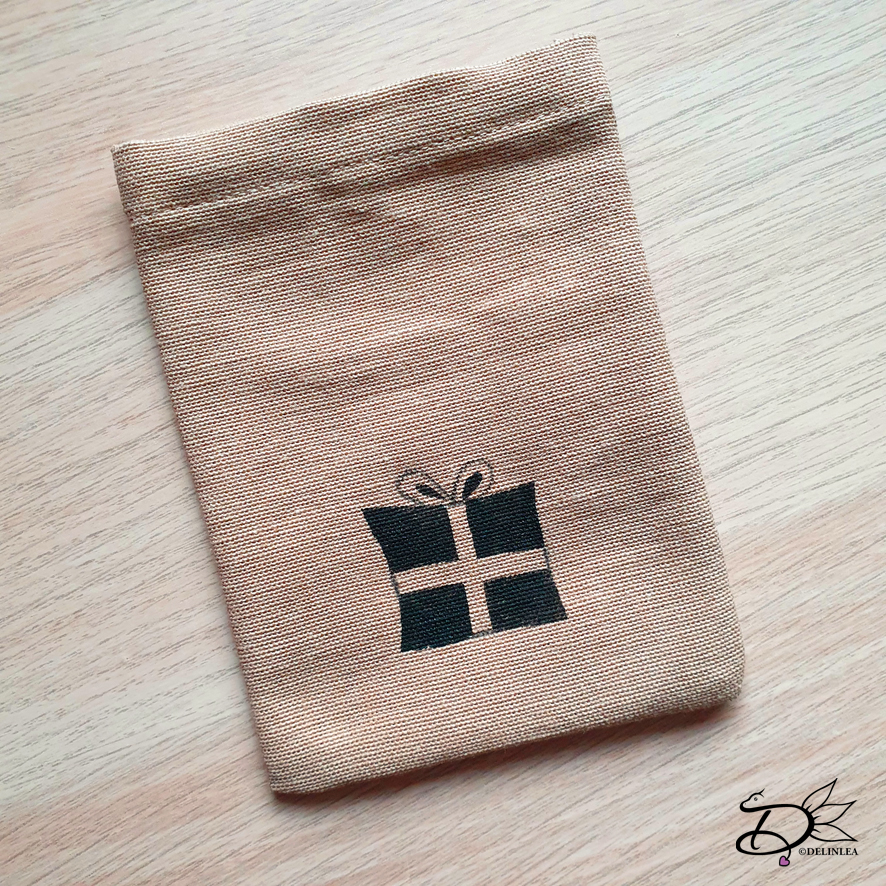
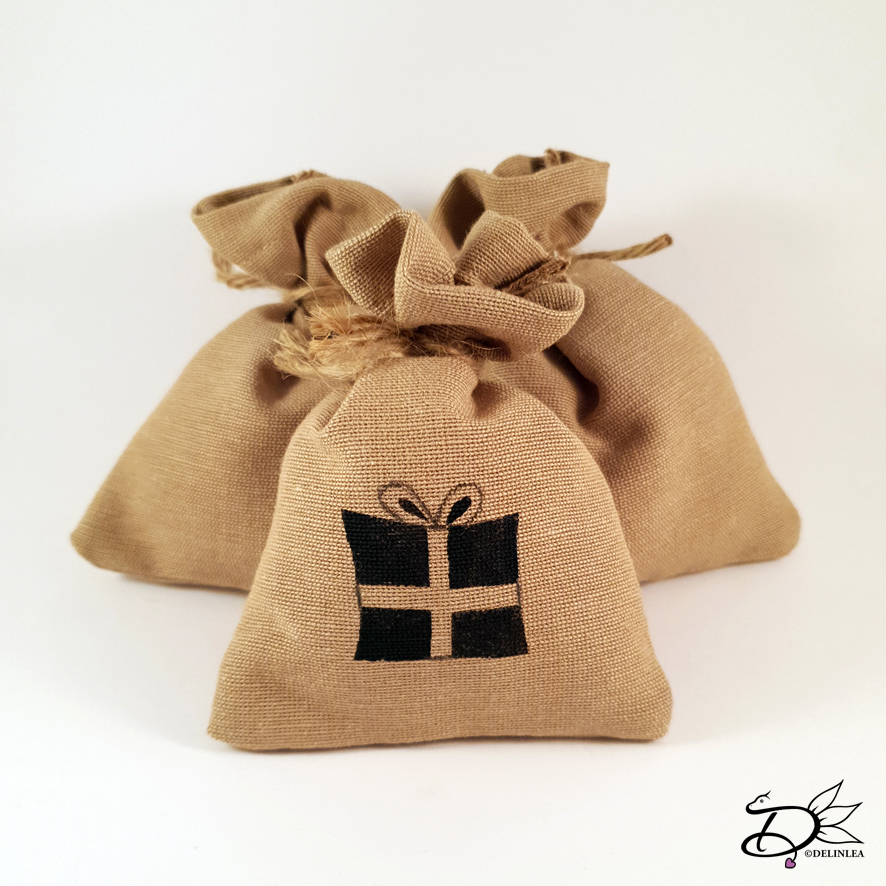
I chose to decorate some of the bags I made, either for Sinterklaas or Christmas. I searched for silhouettes on google to make a stencil of. I traced those onto paper/wrapping foil and cut those out with a x-acto knive.  Make sure that you won’t make the stencil too big, you wanna close the bag as well, without losing the image.

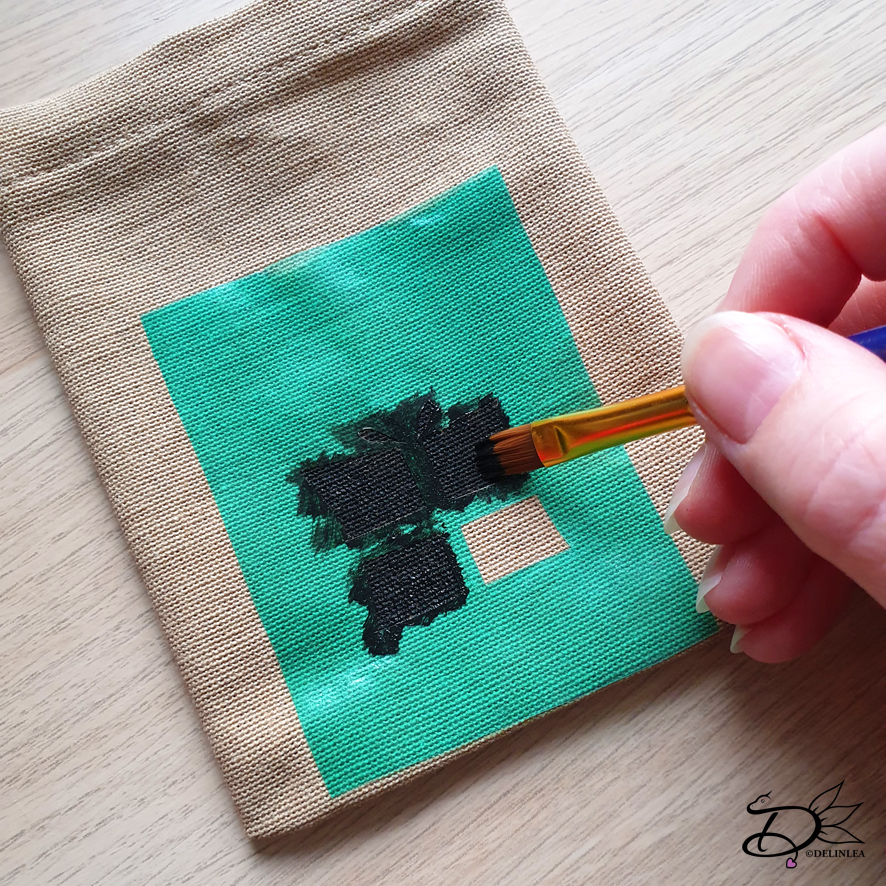
Position your stencil on your bag and apply the acrylic paint with a brush. I’d prefer to you a dapping motion, to prevent the paint to go under the stencil. When done, remove the stencil and let dry!

When you wanna wash your bags in the future, heat set the paint for about 4-5min with an Iron. But this is optional.

Finishing off.

With a piece of thread/yarn, about 15cm, close up the bag. I wrapped it twice and tied a knot.

I hope you like those small jute bags, just something cute to decorate your house with, use as gift bags or maybe even make your advent calendar with it. How cute will that look?! Show me what you will do with them! I’d love to see.

Love
Danielle

Posted in: Christmas, Crafting, Sinterklaas Tagged: advent calendar, bags, Christmas, DIY, gift, jute, sewing, sinterklaas

♥ Sinterklaas Lucky Charms

21 november 2019 by Delinlea Leave a Comment

Hey Lovelies! Sinterklaas is back in town xD! You excited?! Haha me not so much, but I like to get crafty around this time of year. *Sigh I wish my family would do something called ‘surprises’, but we don’t. Oh well, I’ll buy something nice for myself then! If you do live in a country where they have Sinterklaas, how do you celebrate it?
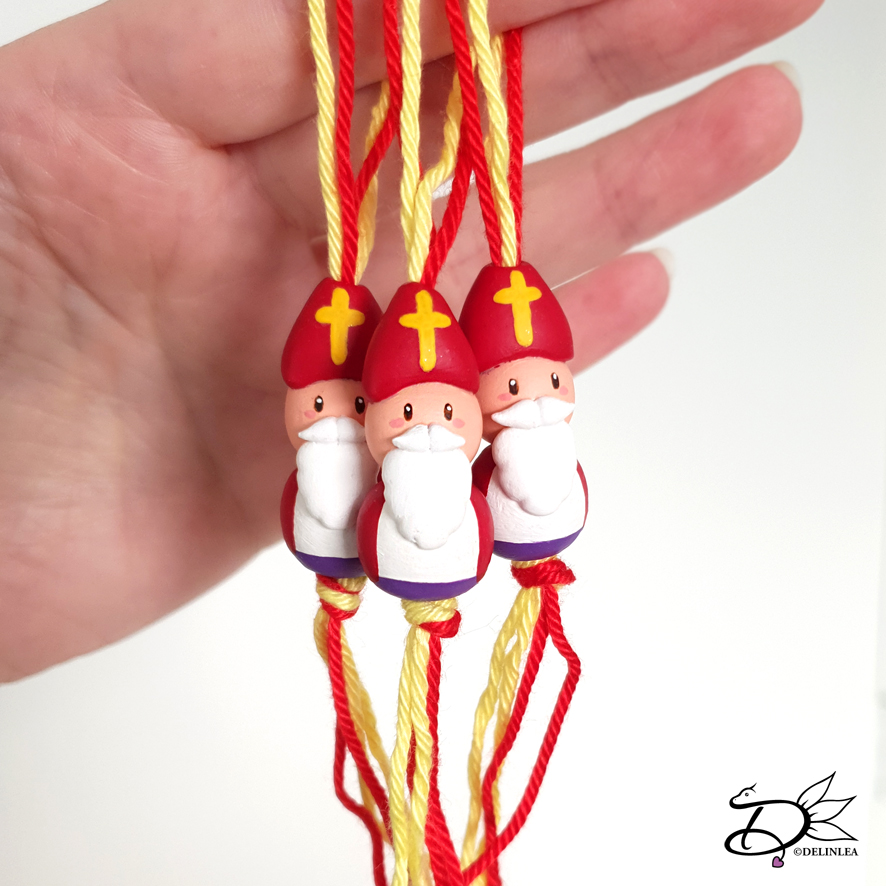
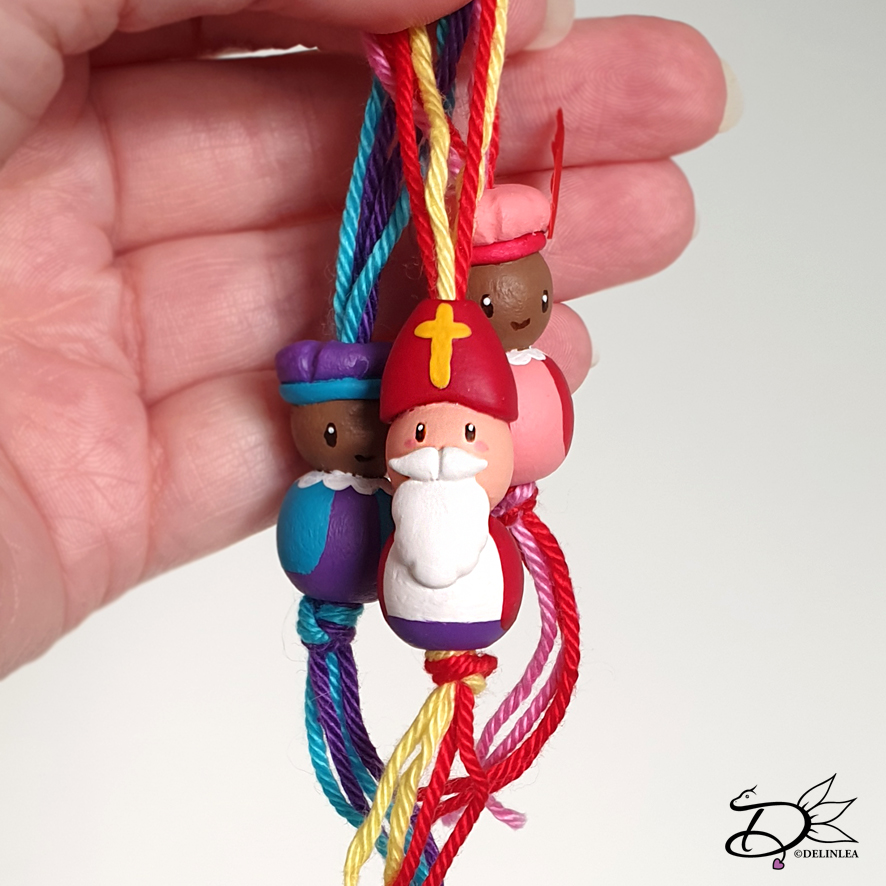
Okay, back to the crafty part of this blog. Last year I made those Pietjes lucky charms! Do you remember? This year I had to add Sinterklaas lucky charms, as promised. I just like making those charms I believe~ hehe.

Sinterklaas Luck Charms

For this DIY you’ll need:
♥ Wooden beads in 2 sizes. (you can make them as big as you want)
♥ Air Dry Clay.
♥ PVA Glue.
♥ Skewer or Toothpick.
♥ Acrylic paints in colors of choice.
♥ Paintbrush.
♥ Matching pieces of thread, to the paint.
♥ Varnish (optional).
♥ Scissors.

Tutorial

Glue the 2 wooden beads together, make sure to line up the holes. Let those dry before you continue.

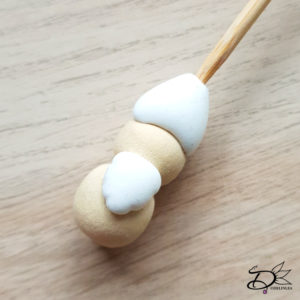
From a bit of clay, make a triangle for his ‘mijter’ and place this, with some glue, on top of the small bead.

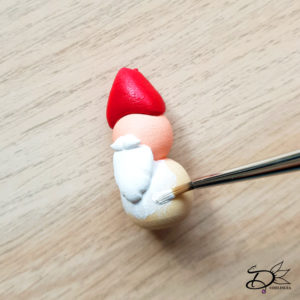
Make another triangle of clay, a bit smaller for his beard. Place those, with some glue as well, on his head/body, were the beard is suppose to be xD. With the skewer of toothpick, make a few indences to give it a bit more shape.

With the skewer or toothpick, poke a hole though the ‘mijter’. This is so you can add the threads through later.

Make a moustache out of clay, it’s a bit fiddly, but I am sure you can do it! Glue it on and shape it until you like it. Make sure to let everything dry first.

Painting

Now for the fun part, painting!! Let’s give those buddies some color! You can paint them however you want, of course. But I kept them sorta traditional. It is possible that you need several layers of paint for good coverage. When you are finished, you can varnish it, if you want.

Lastly, add 2 pieces of thread (about 30cm) through the body. Make sure to have a loop at the top and tie a knot at the bottom.

And it’s completely done! I hope you enjoyed this little tutorial for Sinterklaas Lucky Charms!
Have a wonderful day, stay warm, stay healthy!

Love
Danielle

Posted in: Crafting, Sinterklaas Tagged: clay, cute, DIY, gelukspoppetjes, Lucky Charm, sinterklaas, Tutorial

♥ DIY; Tie Dye Bleach Jeans

4 april 2019 by Delinlea 2 Comments

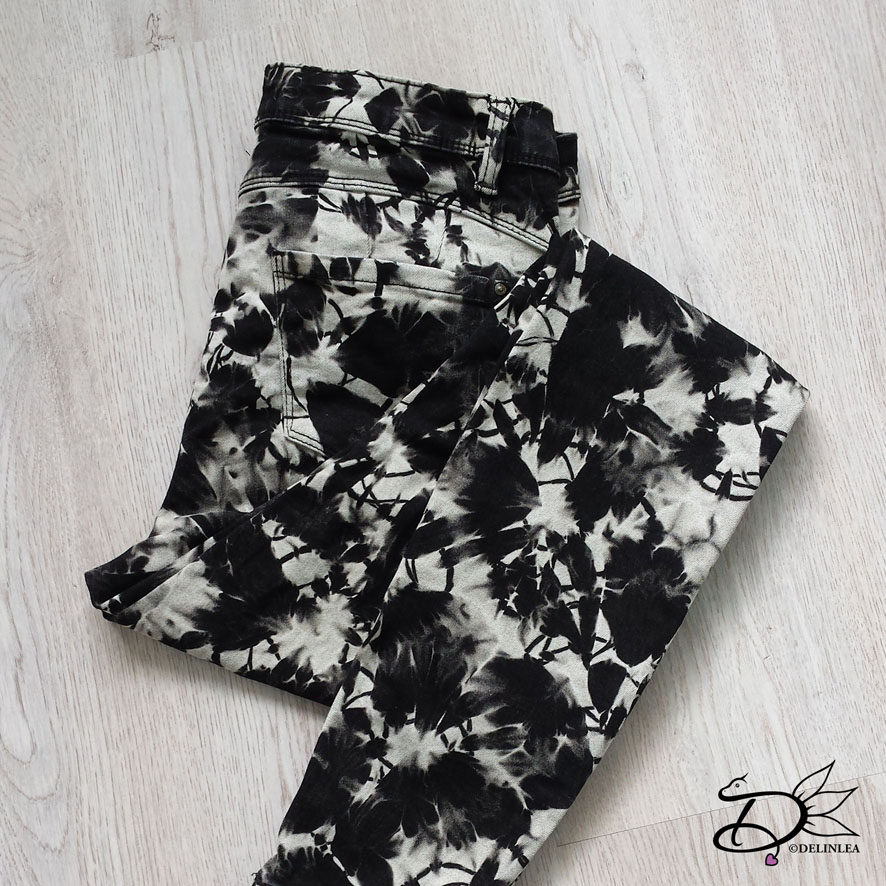
Hey Lovelies! I always love to change up cloths when I buy basic stuff. But I am usually to lazy to do them  or to show it to you xD. For today I thought, why not show you how to bleach some jeans, tie dye style. It’s a quick and easy change you can do yourself. I have done this a few times before. It’s cheap, tho you can buy those type of jeans yourself as wel, but that less fun and you probably spend more money on them. This DIY only involves some patience as well, so just that you know, bleach needs time to do it’s job xD.

For this DIY you’ll need.
♥ (Black) Jeans of your liking.
♥ Rubber Bands.
♥ Bleach.
♥ Water.
♥ Bucket that’s large enough to put your jeans, water and bleach in. Or you can use your sink.
♥ (Large) spoon.
♥ Scissors.
♥ Sink to rince your jeans well, this will be the place to remove the rubber bands.
♥ Washing Machine.

Warning! Bleach can affect your skin, eyes and airway. Make sure you are in a well ventilated area when you start working with bleach. Also wear gloves and some old cloths in case the bleach splatters around.

Rubber Bands

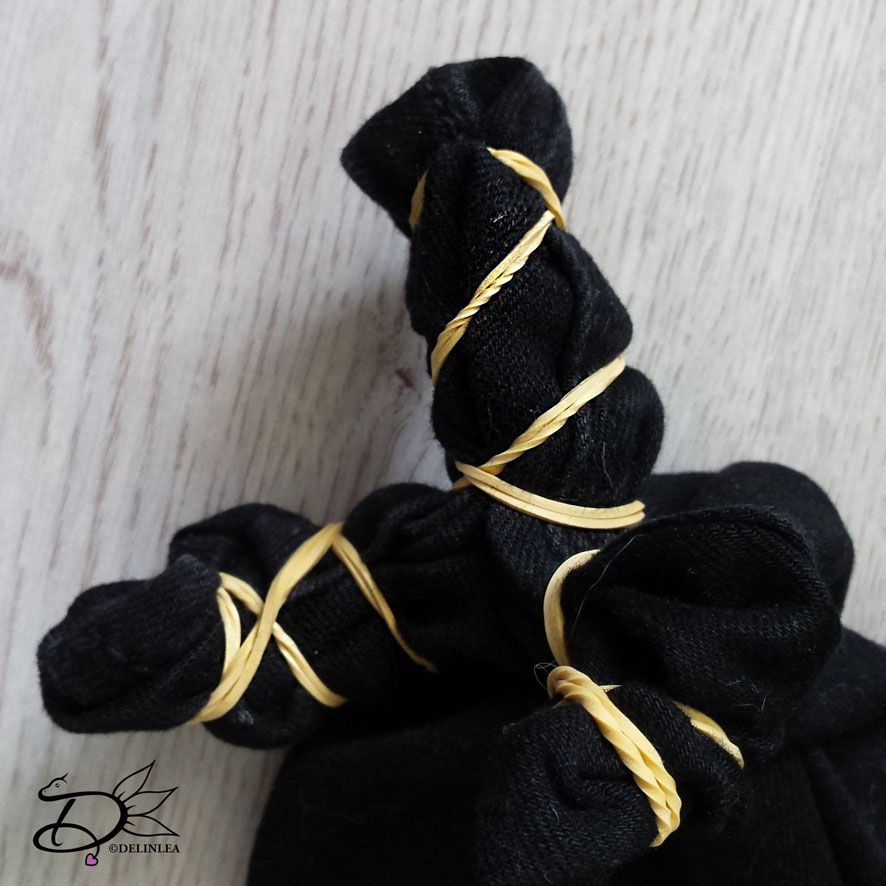
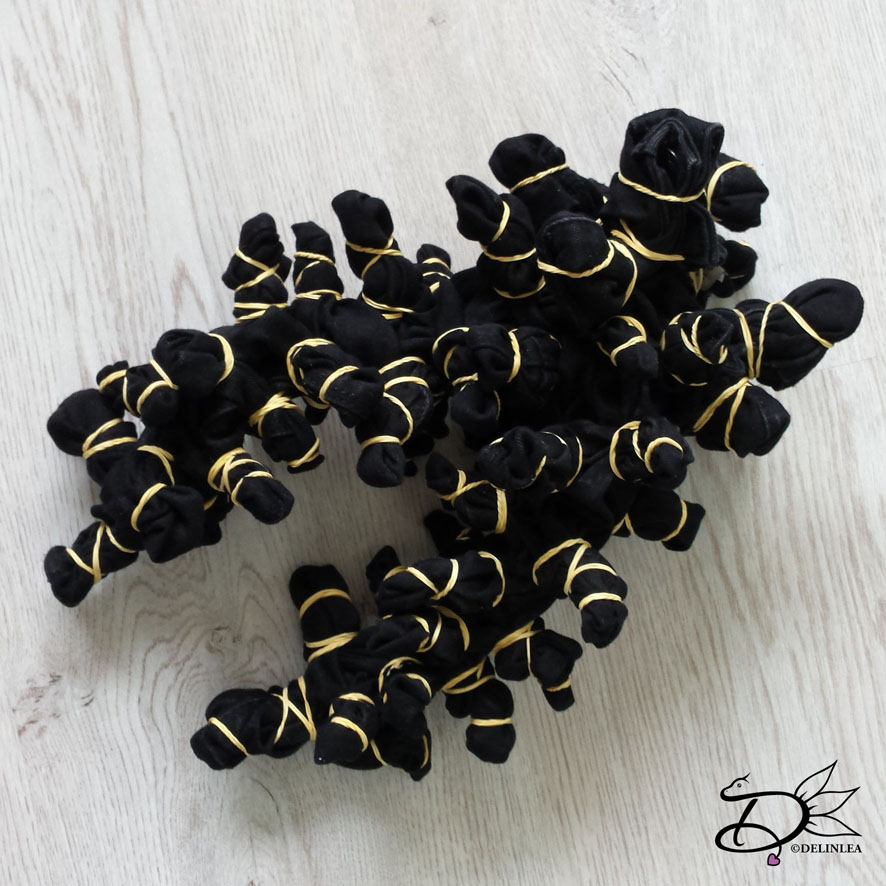
The first step is to add the rubber bands to your jeans.  You can do this in many ways. But I like to grap a piece of jeans and wrap the band several times around it, but not at one spot. As I show in the pictures. Do this for the whole thing! There’s not a wrong or right way to do this, just go for it.

Bleaching

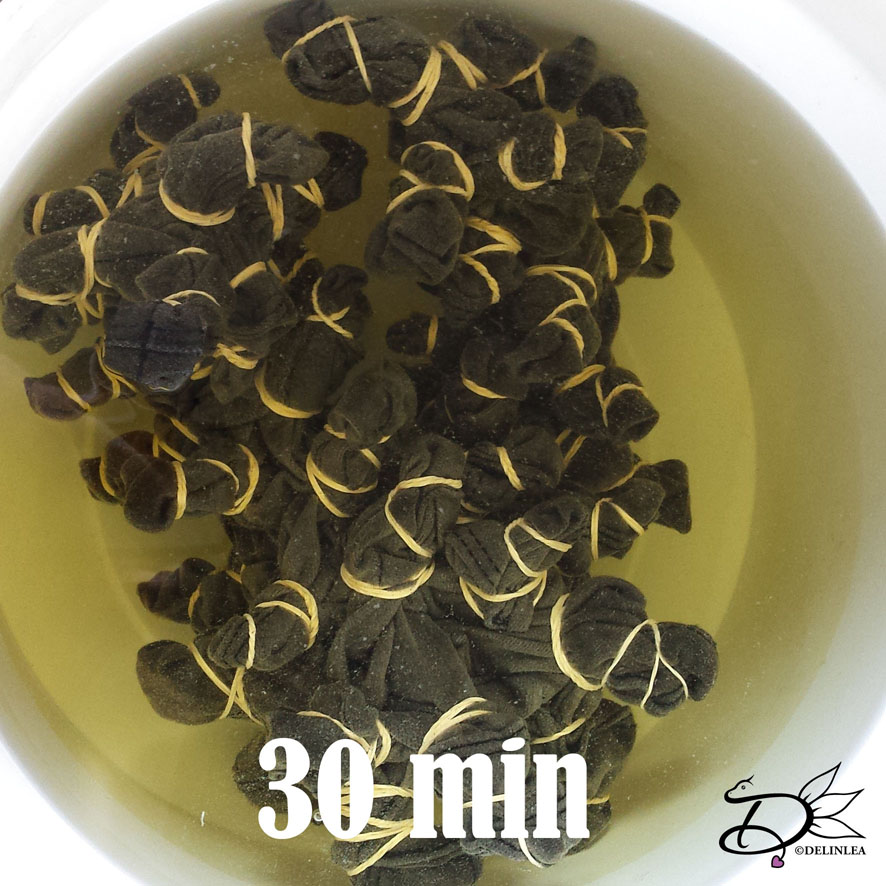
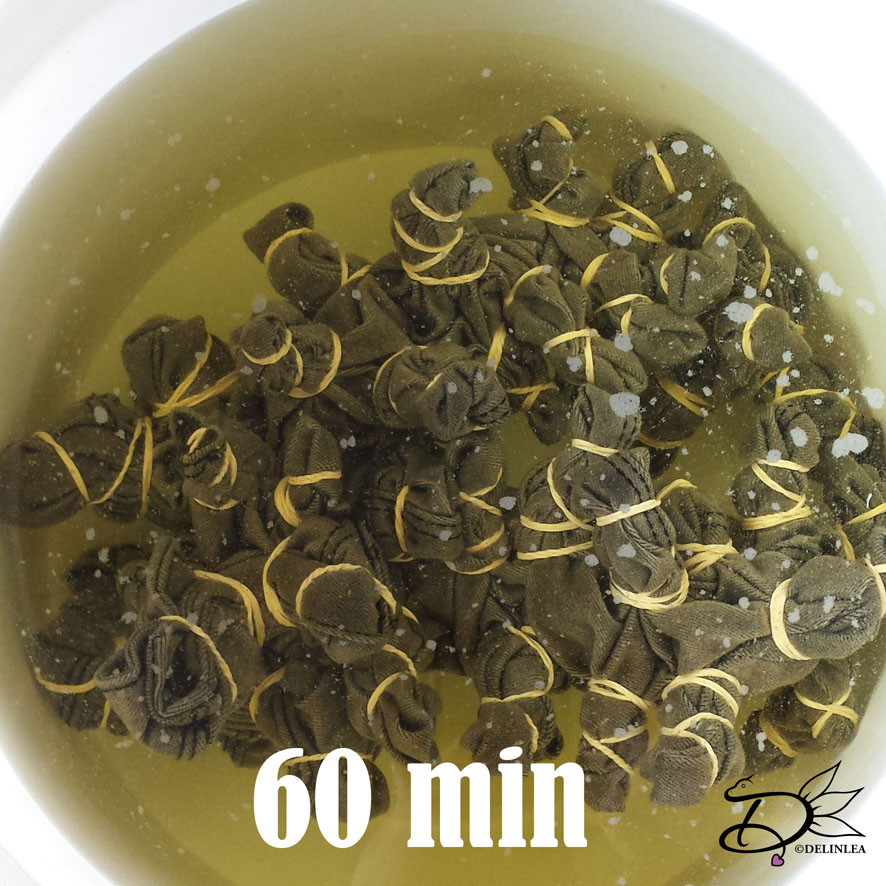
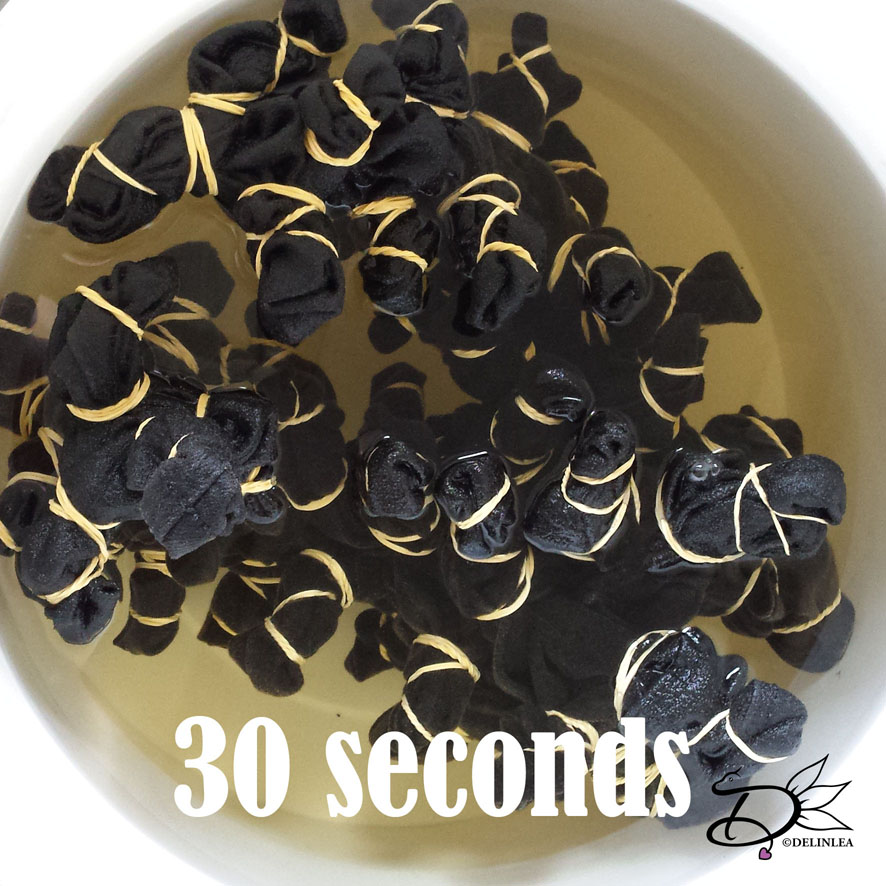
Time for the bleaching part, please make sure to do this carfully! Fill up your bucket or sink with some hot water, then add the bleach (about 2 parts water, 1 part bleach), it doens’t matter if it’s a bit more or less, as long as it does it’s job. Keep in mind that you still have to put your jeans in there as well, so don’t overfill.

If your bleach water is ready, put in your jeans. Let it sit for about 30min, up to 90min. When the jeans are in there, you wanna make sure to twist it around every now and then, this is where the spoon comes in. I would NOT recomment you doing this with bare hands! You can see the water change color now, this is good, that means the bleach is doing it’s thing! The jeans should be completely under water, if that’s not the case, because it’s floating, put something heafy on it.

Note: after washing your jeans, the color will wash out even more, so it will lighten up after it’s washed and dried.

Removing the rubber bands and rinsing.

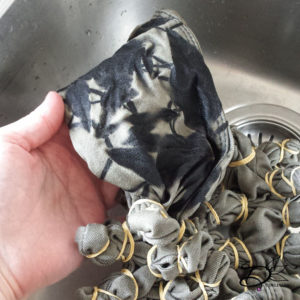
When the jeans are ready, it’s time to take it out of the bleach water. I usually rinse the whole thing out first (as far as possible) and then remove the rubber bands. Removing the bands can be pretty time consuming and annoying. Scissors will help a lot with this but becareful you won’t cut into your jeans. When all the rubber bands are removed rince out again.

Washing

As soon as all the rubber bands are removed, put your jeans in the washing machine. Just wash it as you would do regularly. BUT don’t put other stuff with it, since there’s still bleach residue left in the jeans, those need to be washed out first. When it’s done, let it dry and enjoy your new, unique pair of jeans!

I hope you enjoyed this DIY and so you will try it yourself! It’s fun! Oh! And a small tip, if you used black jeans like I did, try some color dye to color the white parts! Imagine the white spots to be hot pink or green!

Have a beautiful day!

Love
Danielle
Posted in: Crafting Tagged: alternating, bleach, clothes, DIY, jeans

♥ DIY ATEEZ Name Tags

21 maart 2019 by Delinlea Leave a Comment

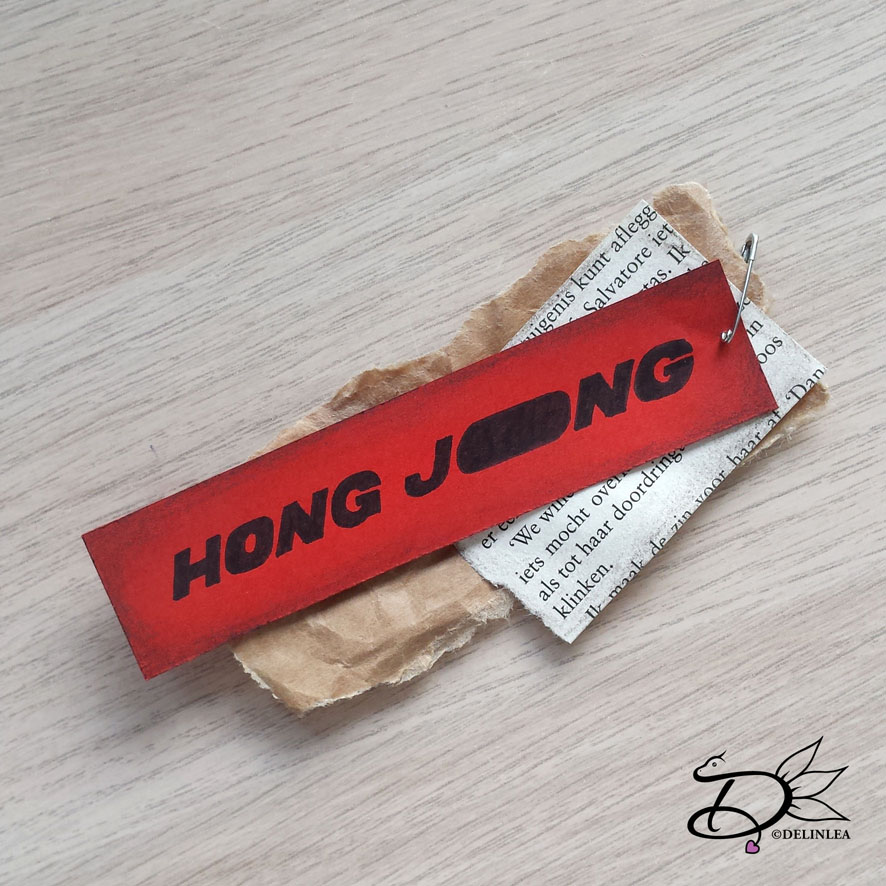
Hey Lovelies! I’m so sorry I couldn’t make a blog post last week! But I am here now, that’s the most important. Since I go to see ATEEZ in april, and making some drawings of them. I thought why not make a tutorial on how I made the name tags for the drawings. Those can be used for anything, and I bet more ATINY (fandom name) would love to create some for themself as well. Either for decoration, for any of the concerts or just for fun. Kpop fans always run out of money so if we can make something ourself, we do it! You can copy the ones from ATEEZ or come up with your own design, like I did.

For this DIY you’ll need:
♥ Paper to make a template.
♥ Anything you can use as a base for the tags, think of paper, cardstock, fabric, newspaper, etc.
♥ Anything to make letters with, you can print them out, draw/paint them, etc.
♥ Pencil.
♥ Ruler.
♥ Scissors.
♥ Safety pins or something else that can hold and attach the tag.

Templates

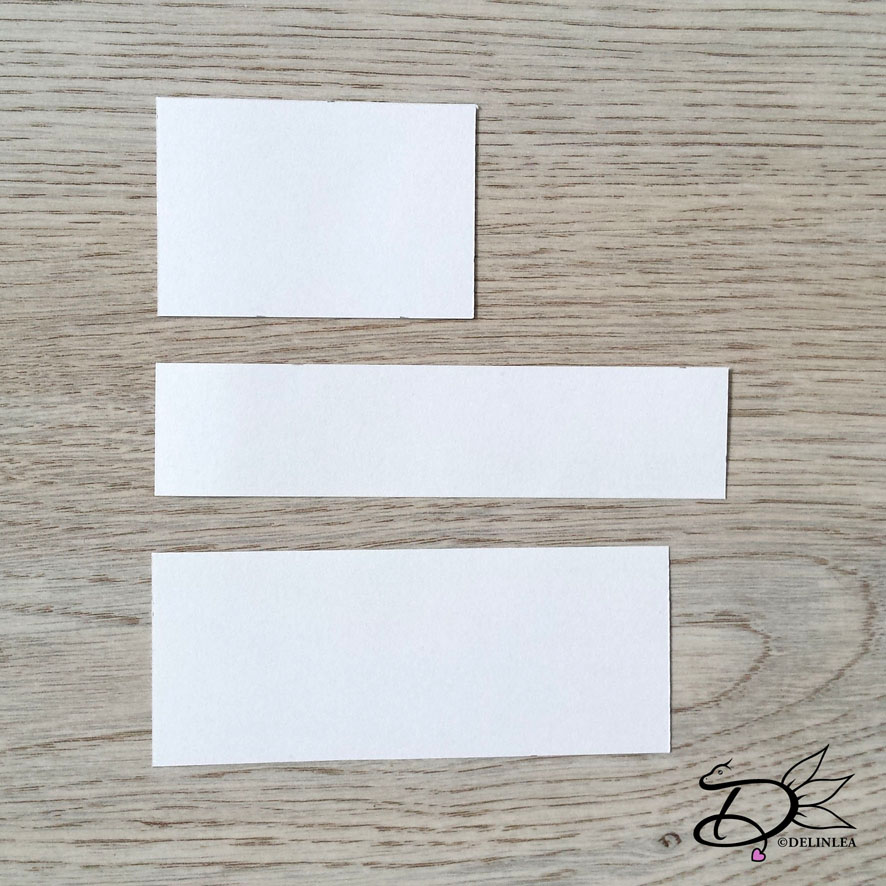
Start with making some templates for the tags. It’s easier to do this step, so you’re sure you don’t spill any materials. By deciding the sizes now, you can easily play around to see what you would like. Just draw some different sizes rectangles, longer, shorter, wider, smaller.  And maybe even play around with the shape itself. For inspiration check the Say My Name tag from ATEEZ themself.
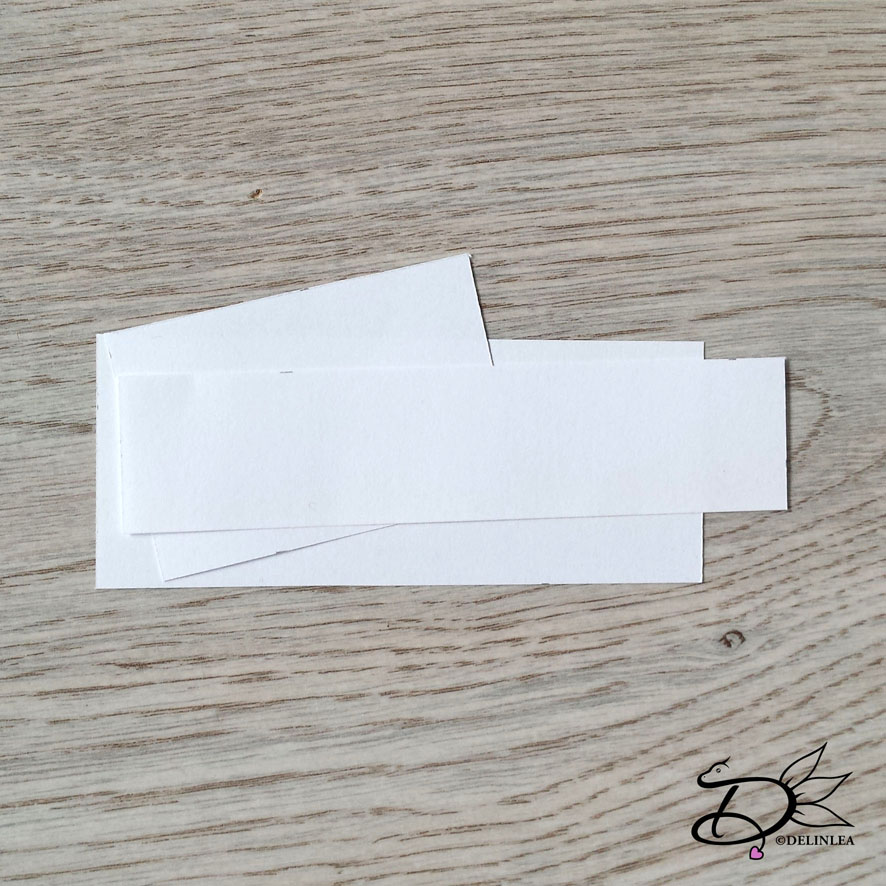
Cut those shapes out and make stacks of 2/3/more shapes. This will be the base of the tag. Ofcourse you can change later in case you might not like it.

Tag Base

Now we have decided the shape of our tag. We can go decide what material you would like to use for each shape. So, for example, you decide to use fabric for one, a recycled bus ticket for the other and brown wrinkled paper. the possibilities are endless, just have fun.

Trace the template on the desired material. Now you can cut some out neatly with scissors, but you can also rip it out?! How pretty would that look like, if you do it carefully ofcourse, ripping paper can be hard haha.

Lettering

Tags are coming along nicely, but still missing the name. What name do you want to be on the tag?! your own? ATEEZ? or their names?! Song titles? It’s up to you, I chose to write their names since it goes along on the drawing of them. Would be weird if I suddenly put on something completely not related haha.

You can do this in different ways, print out letters you want/like, cut those out and glue them on. Or you can choose to draw/paint them on, trace it, anything. It’s just what you like to do, and what you think will fit you. You can make it as hard as you want. xD

Finishing off

The only thing left to do is to keep those different tags together. You can use a safety pin, so you can also attach it to your clothes. Or what about thread, using a needle to sew it together or make a hole with a holepuncher and put the thread through there.

Ha! So many things you can do here. And I think that’s the nice thing about this, you can do what you like, and so everyone will make their own unique tags.

I hope you have an idea now how to make your own ATEEZ inspired name tags!

Have a Wonderful day everyone!

Love
Danielle
Posted in: Crafting, Geen categorie, Paper Tagged: ATEEZ, ATINY, DIY, hala hala, kpop, name tag, say my name
« Vorige 1 2 3 4 5 6 7 8 9 … 13 14 15 16 17 Volgende »

What are you looking for?!

My Socials

Ko-Fi

I love making all these free things for you, tho it would be very helpfull if you can support me on Ko-Fi! (You don’t have to tho, totally up to you!)

Ko-Fi Shop!!

In my Ko-Fi shop you can find PDF Amigurumi Patterns!! You can pay easily with PayPal.
Go to the shop here!!

Recent Blog Posts

  • ♥ Happy 2022!
  • ♥ Day 12; Lights
  • ♥ Day 11; Flower Deco
  • ♥ Day 10; Snowman
  • ♥ Day 9; Gingerbread Houses

Recent Comments

  • Liane Van der Donck op ♥ Amigurumi Ghost
  • Kimberly Spear op ♥ Free Pattern; Amigurumi Shiber
  • Delinlea op ♥ Pua Tsum Tsum Amigurumi
  • Marfermar op ♥ Free Pattern; Easter Bunny
  • mary op ♥ Pua Tsum Tsum Amigurumi

Categories

  • animation
  • Beadwork
  • Blogmas 2018
  • Blogmas 2020
  • Blogmas 2021
  • Books
  • Bujo
  • Christmas
  • Christmas CAL 2019
  • Christmas Countdown 2017
  • Contest
  • Crafting
  • Crochet
  • Drawing
  • Drawing Lesson
  • Easter
  • Geen categorie
  • Life
  • Miniature
  • Nail Art
  • New Year
  • Paper
  • plush
  • Pokemon
  • Poseable Art Doll
  • Recipe
  • Sewing
  • Shop Pattern
  • Sinterklaas
  • Social Media
  • Tsum Tsum
  • Ufufy

Copyright © 2023 Delinlea - My little fantasy world.

Family WordPress Theme by themehall.com