Hey
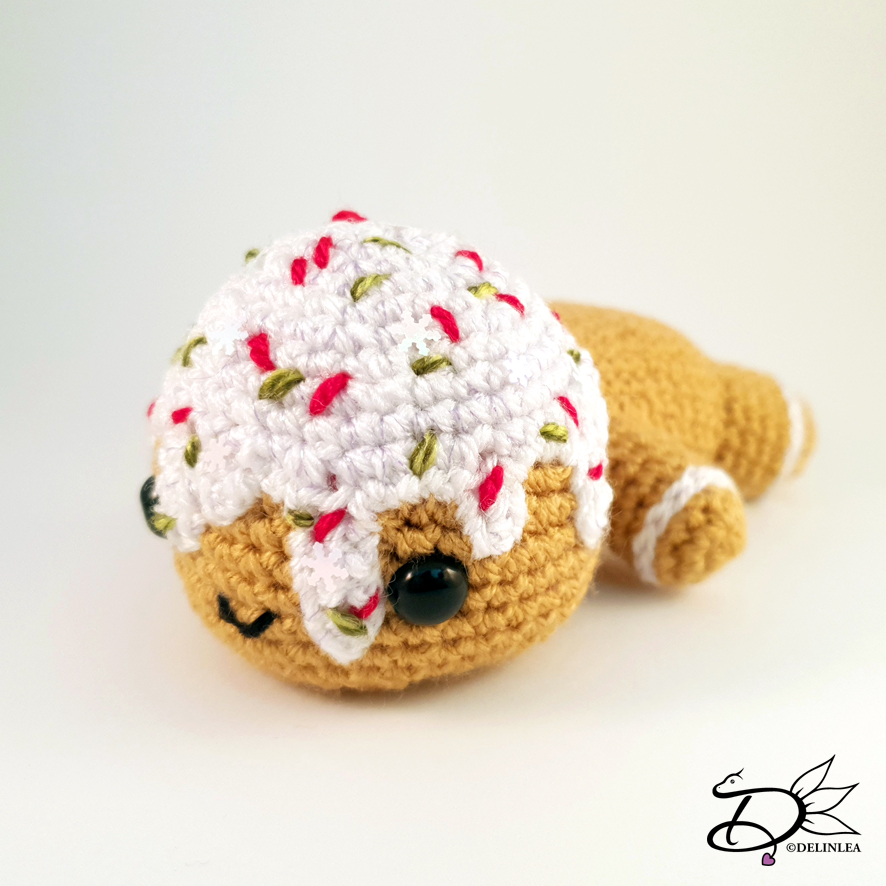
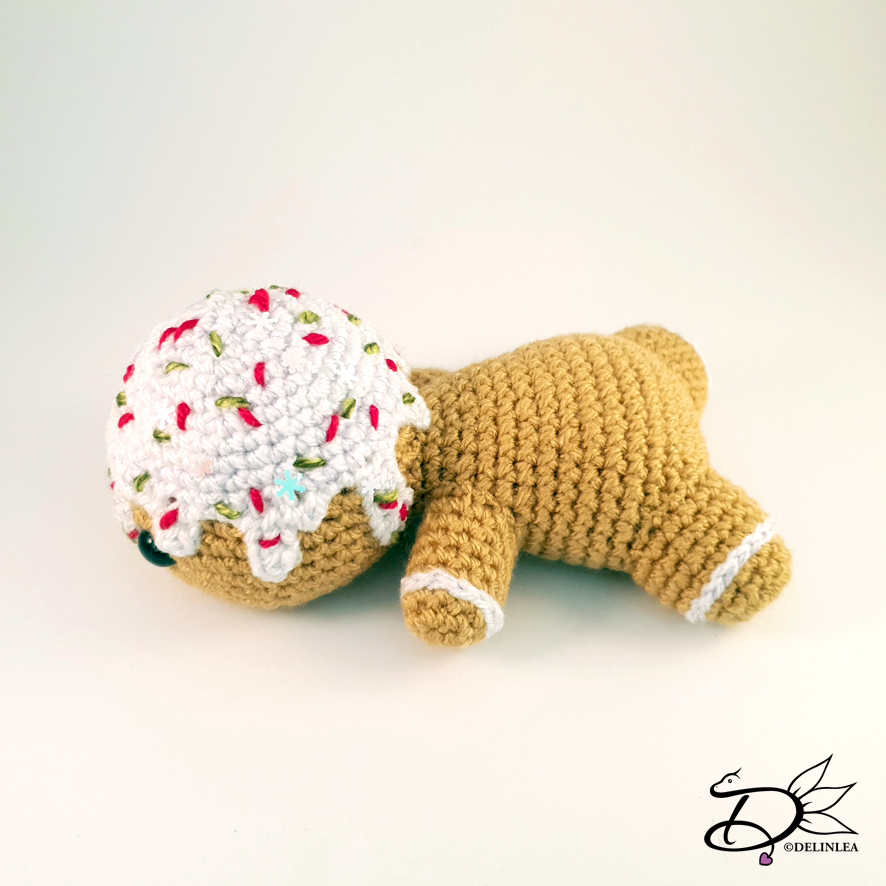
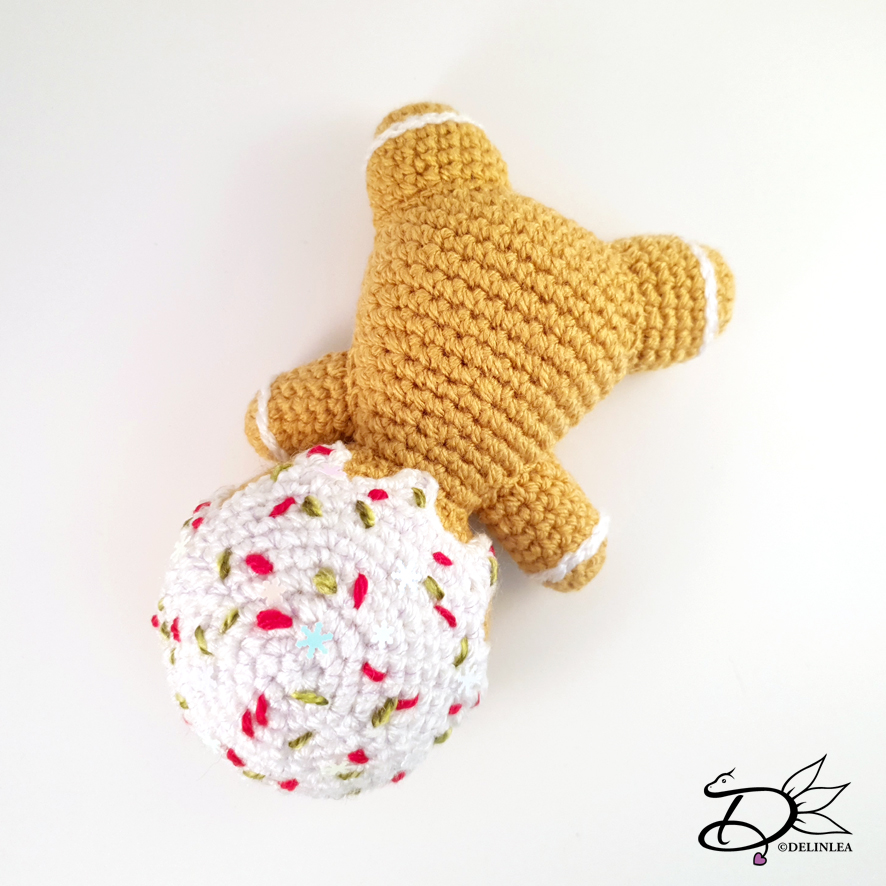
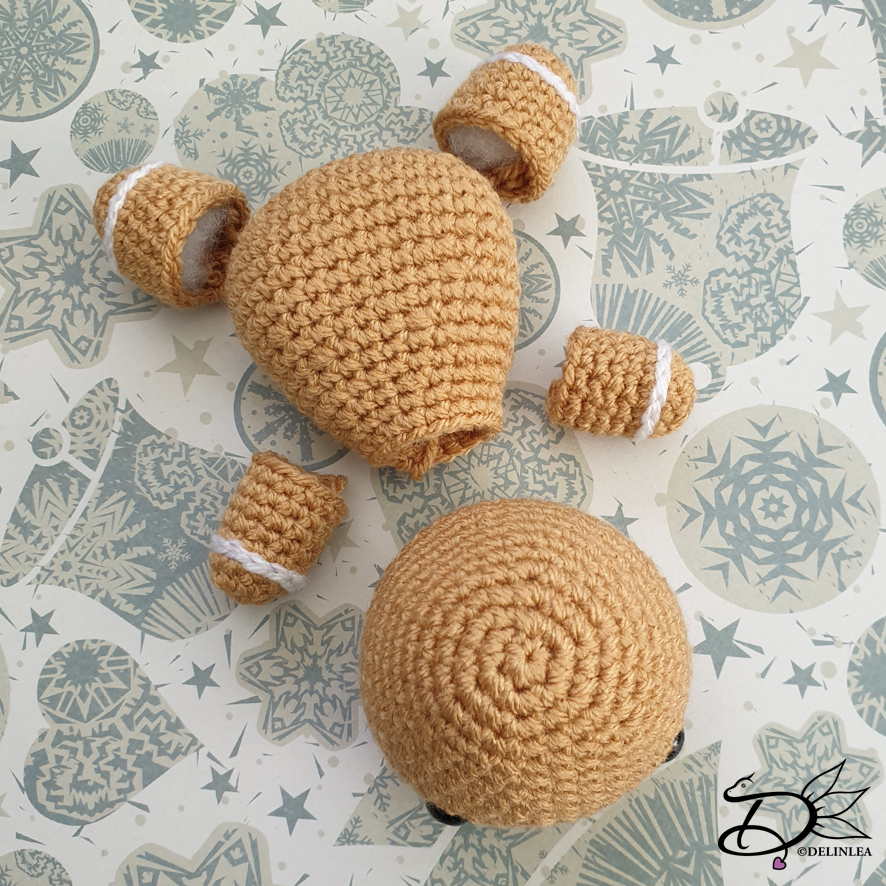
Lovelies! It’s time for part two! Let’s make that adorable Gingerbread Man that
is chilling under the Christmas Tree, well, I am not too sure how comfortable
that is, actually xD.
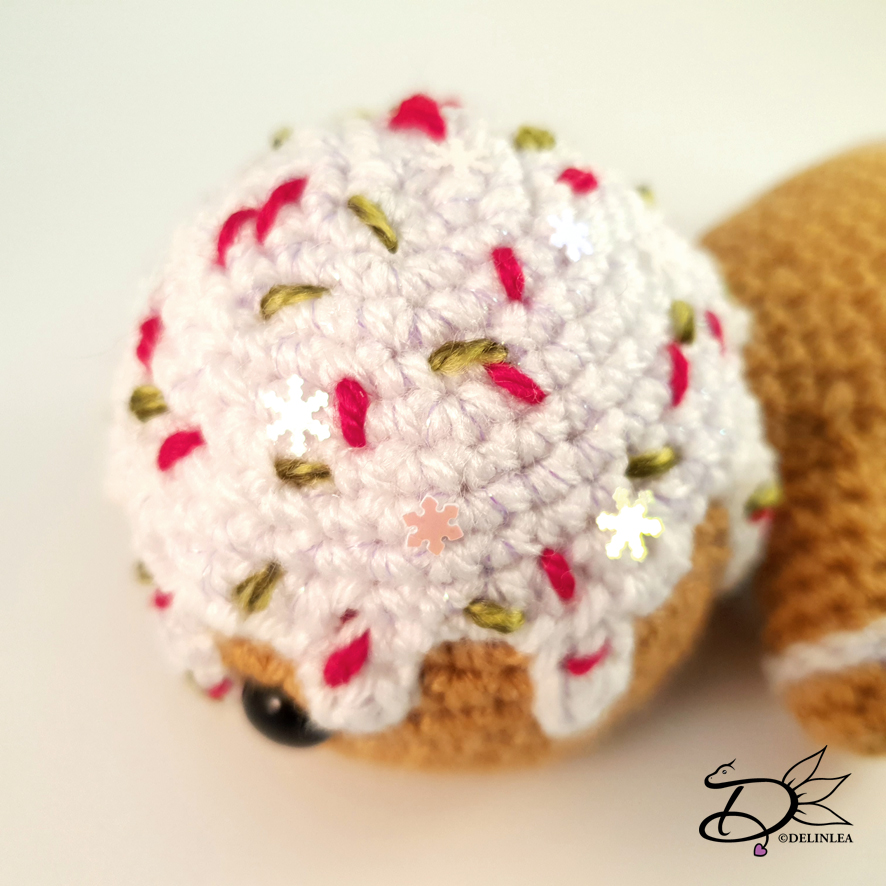
For this pattern you’ll need: ♥ Yarn in the colors, White and Light Brown. (I used StyleCraft Special in the colors Camel and White) ♥ Crochet hook 2,5 or 3 mm. ♥ Stuffing. ♥ Pair of Safety Eyes. (1cm) ♥ Stitch Marker. ♥ Sewing Pins. ♥ Yarn Needle. ♥ Metallic Thread. (Optional) ♥ Things to decorate the ‘icing’ with, like green and read thread, nail art deco, etc.
Stitches used (US Terms): Magic Ring. CH = Chain. SLST = Slip Stitch. SC = Single Crochet. Surface Crochet. ST = Stitch. Inc = Increase. Dec = Decrease. (…) = Repeat the space in brackets the given number of times. […] = Total number of stitches.
Pattern
Edit: This pattern is now deleted, I will let you know when it is up in etsy!
The second part, Gingerbread Man, is now done as well, I hope you like how your Gingerbread Man has turned out!? I think it’s cute. Next week we already go to the last part of this CAL =( the decoration! See you then.
Hey Lovelies!
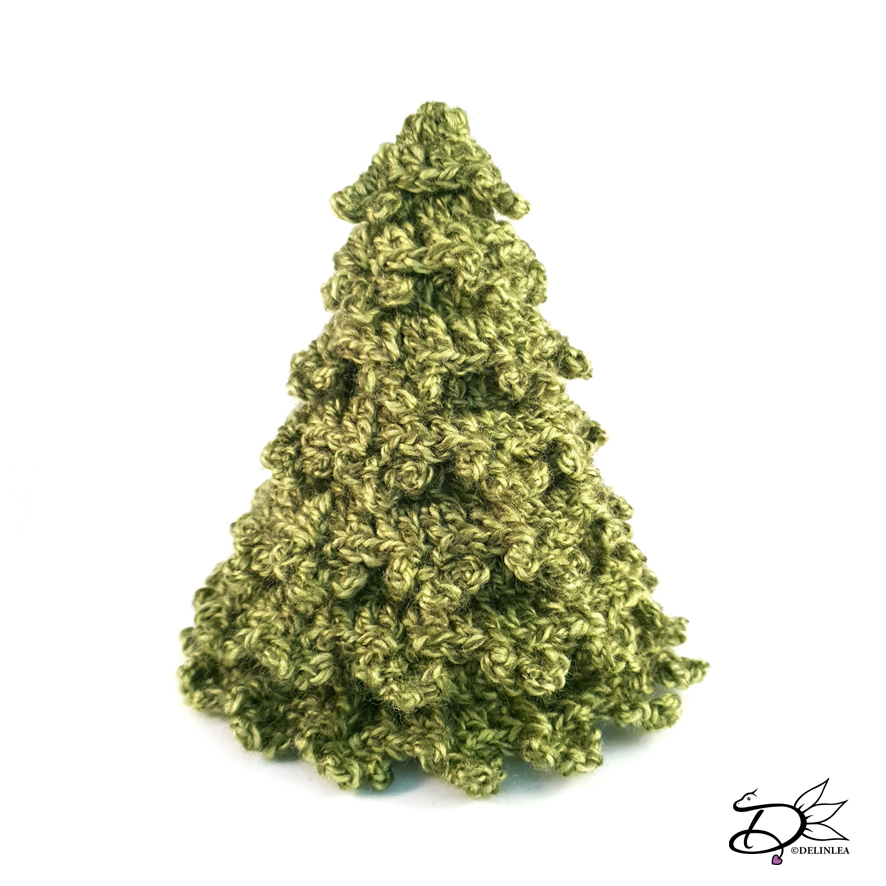
It’s here! The first part of the Christmas CAL 2019, I hope you are ready! First
we are gonna make the Christmas tree. Not that hard to make, but read
carefully, at some rows you have to work in back loops only, if you forget
this, you won’t be able to make the branches. I guess, you don’t wanna start
over haha.
For this pattern you’ll need: ♥ Green yarn. (I used Greengage from StyleCraft Special) ♥ Crochet hook 2,5 or 3 mm. ♥ Stuffing. ♥ Stitch Marker. ♥ Yarn Needle.
Stitches used (US Terms): Magic Ring. CH = Chain. SLST = Slip Stitch. SC = Single Crochet. DC = Double Crochet Picot = Chain 4 and make a SLST in the 3rd loop of the first chain. ST = Stitch. Inc = Increase. Dec = Decrease. BL = Back Loops. FL = Front Loops. (…) = Repeat the space in brackets the given number of times. […] = Total number of stitches.
Pattern
Edit: This pattern is now deleted, I will let you know when it is up in etsy!
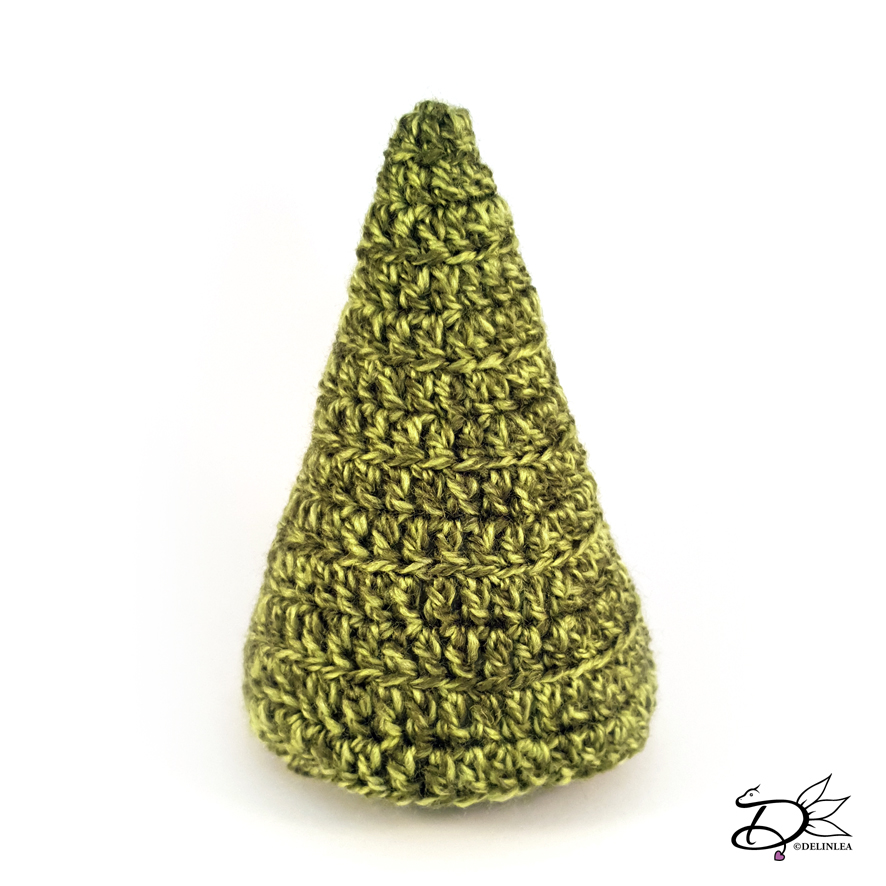
This is how the tree looks, before you add the branches.
I hope you had fun making the tree. If something is unclear, let me know, I’ll always try to help out. Next week we are going to make the Gingerbread Man! So cute!
Hey
Lovelies! Such a odd day for me to post something, but I wanted to tell you
something. This year I won’t do Blogmas like the last 2 years. I wanted to do
something different and give myself also some peace. So from dec 5th, on
Thursday, as usual, I will start a CAL. If you don’t know what a CAL is, it’s
short for Crochet A Long.
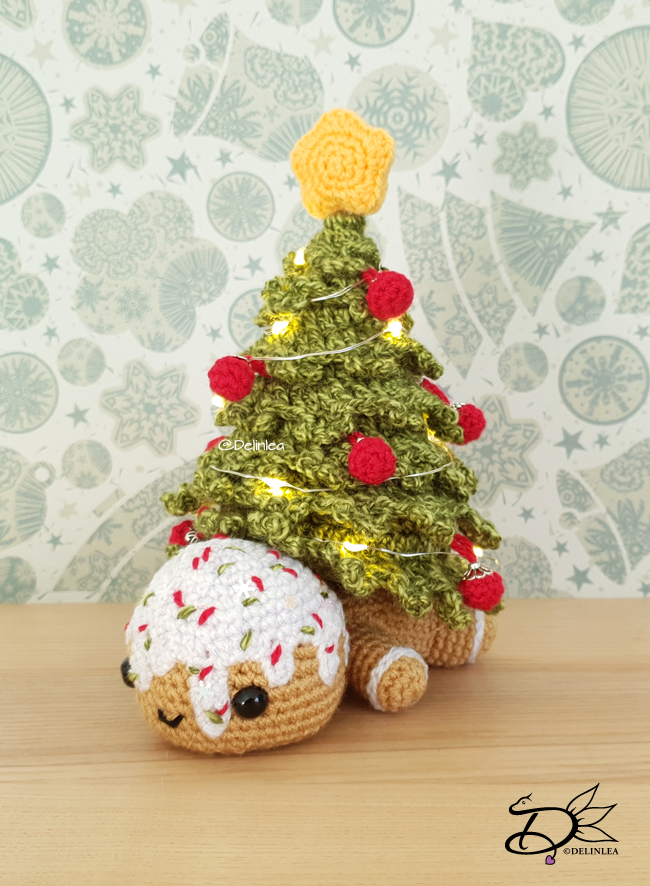
I’ve made
this adorable Gingerbread Man with a
Christmas Tree on his back, including some ornaments. Do you like it? I hope
you will, and join me on this exciting adventure.
I will
split the pattern up in 3. The first week you will get the pattern for the
Christmas Tree, the second week the Gingerbread Man and the third week the
ornaments.
I will keep doing this on Thursdays, just like you are used to. (The dates are,
5, 12 and 19 December)
Make sure
to catch the pattern while you can, and crochet with me and hopefully many
others. I am quite excited to do this, I hope you will enjoy! The pattern will
be only available during December, after or during the month I will make sure
to post it on Etsy or Ravelry or both. Have to see what will work for me .
Hey
Lovelies! I am so sorry that I am late with uploading, but stuff with my cat
came up and then I couldn’t access my website, great. But as you can see I can
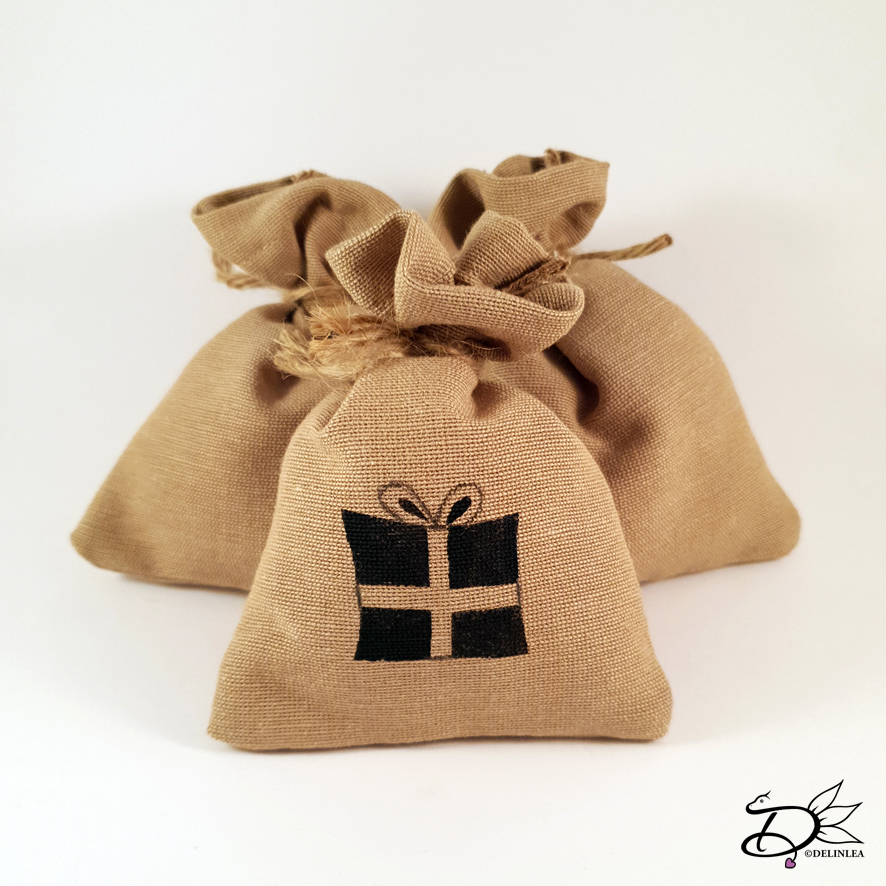
access my website again and upload stuff! Today I wanted to show you how you
can make those cute jute gift bags! Or use them as docoration. It’s fun and
easy to make, so I hope you will like them as well.
For this DIY you’ll need: ♥ Brown fabric or real Jute. ♥ (Fabric) Scissors. ♥ Pencil or Trick Marker. ♥ Ruler. ♥ Sewing Pins. ♥ Iron. (Optional) ♥ Sewing Machine. (Optional, you can do it by hand as well). For decorating: ♥ Paper or anything else you can make a stencil of, like wrapping foil that’s self-adhesive. ♥ X-acto knive. ♥ Acrylic Paint. (Optional) ♥ Brush. (Optional)
Tutorial
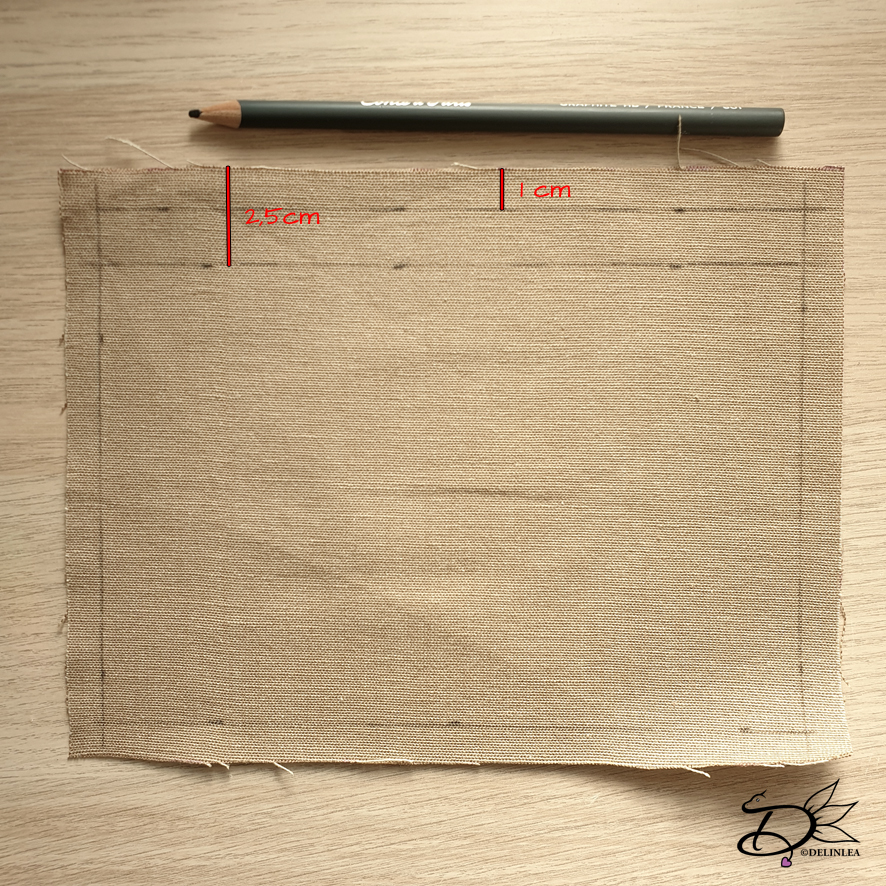
From the
brown fabric, cut out a rectangle of 21 by 16cm. Make as many as you want, but
for one bag, you need one rectangle. If your fabric is really wrinkly, like
mine was, you might wanna iron it.
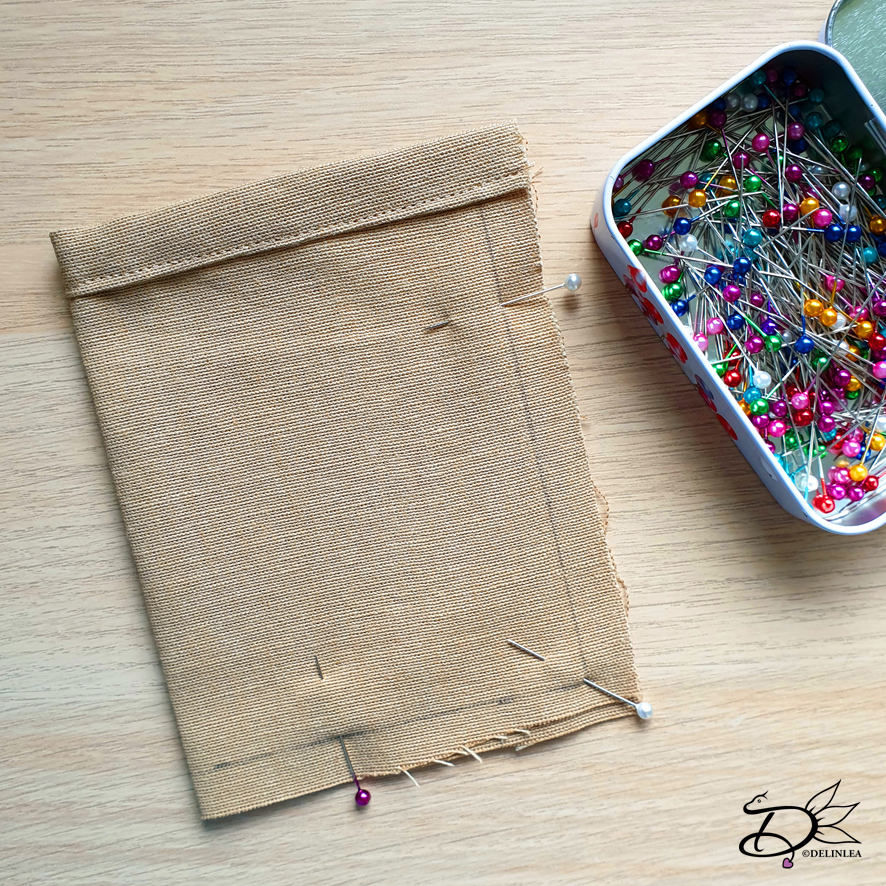
Along all
sides of the rectangle, measure 1cm along the edge, this will be your seam
allowance. On one of the widest sides, draw also a line that’s 2,5 cm from the
edge. (see picture)
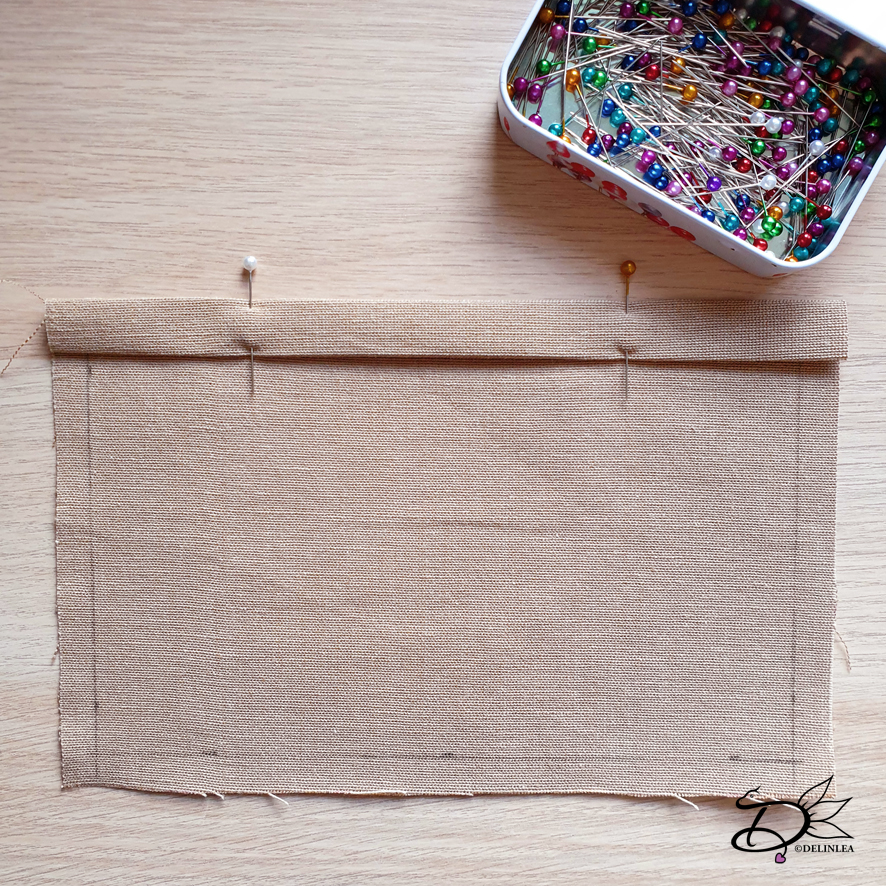
Fold both
lines in on the side with the 2 lines. Pin those down and sew it close.
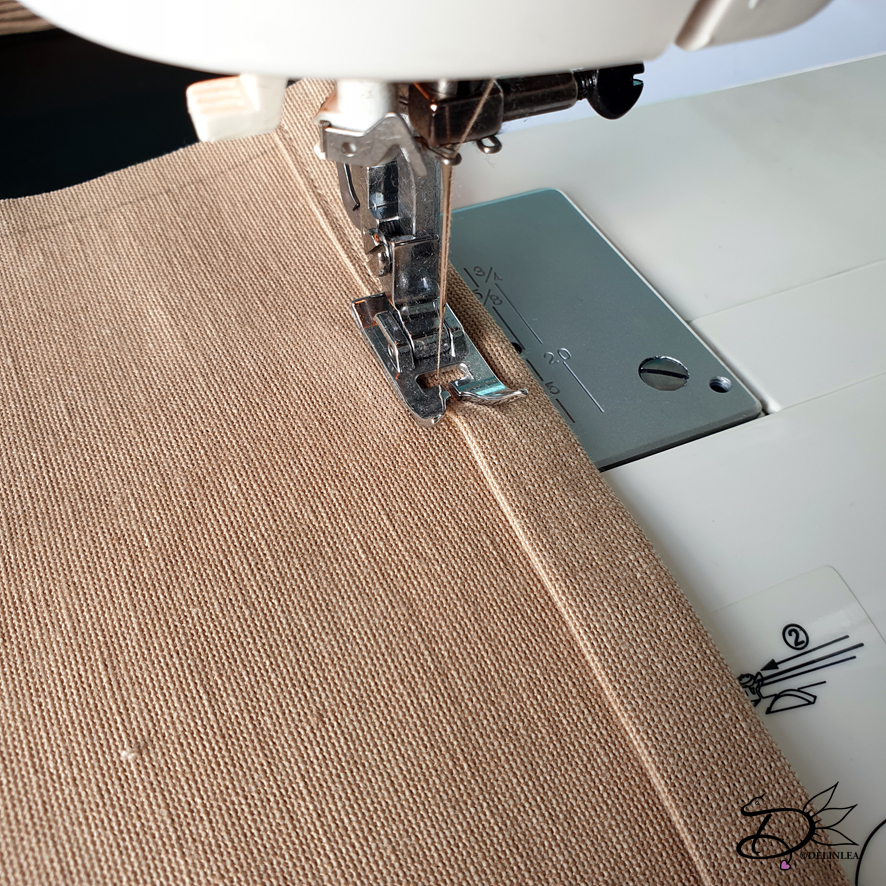
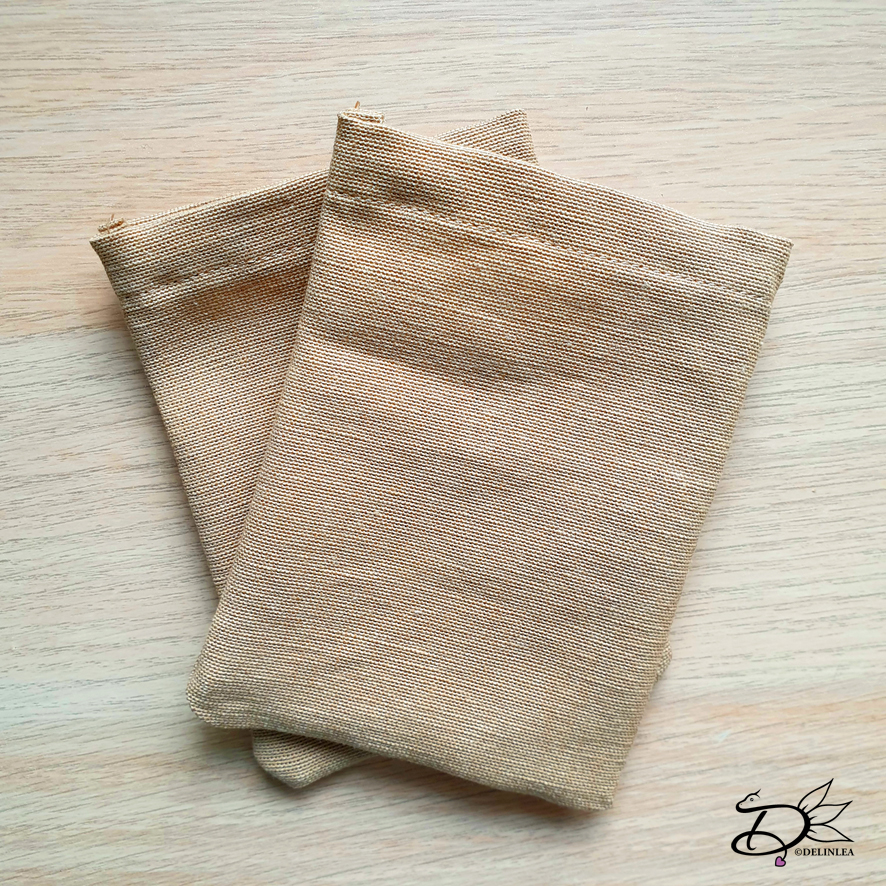
The side
you’ve just sewn close, fold in half, the good side facing inward. Use sewing
pins to keep it in place. Sew along the 2 sides that should be closed as well.
As I used cotton fabric, the sides will raffle a bit, so I used a zigzag stitch
as well to prevent this from happening.
If you have a lot of fabric left over around the edge, you might wanna trim it
a bit. Just so it won’t get bulky once you turn it inside out.
When you
are done sewing, turn your bag inside out. The bag is done now, but you can
choose to decorate it.
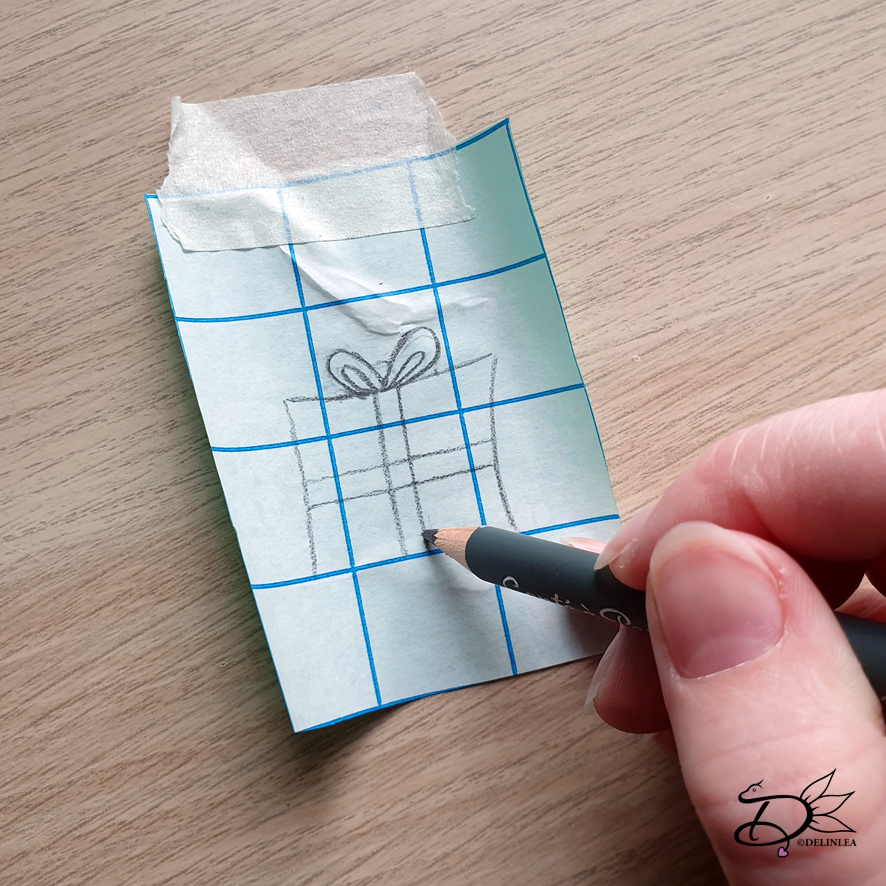
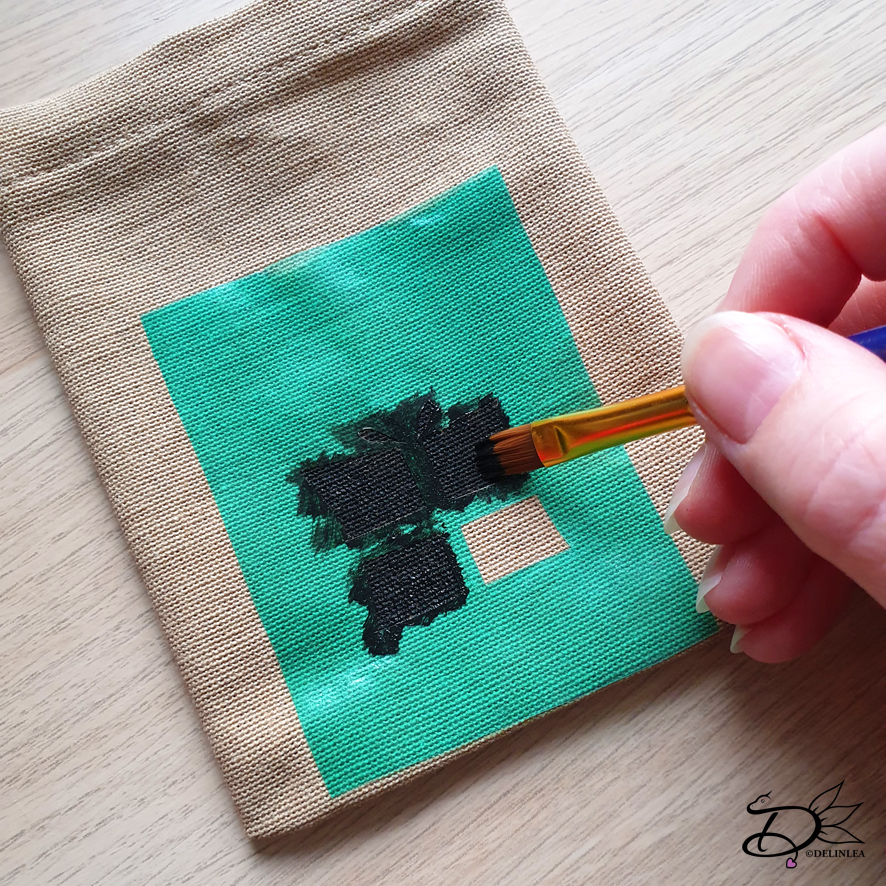
Decorating
I chose to decorate some of the bags I made, either for Sinterklaas or Christmas. I searched for silhouettes on google to make a stencil of. I traced those onto paper/wrapping foil and cut those out with a x-acto knive. Make sure that you won’t make the stencil too big, you wanna close the bag as well, without losing the image.
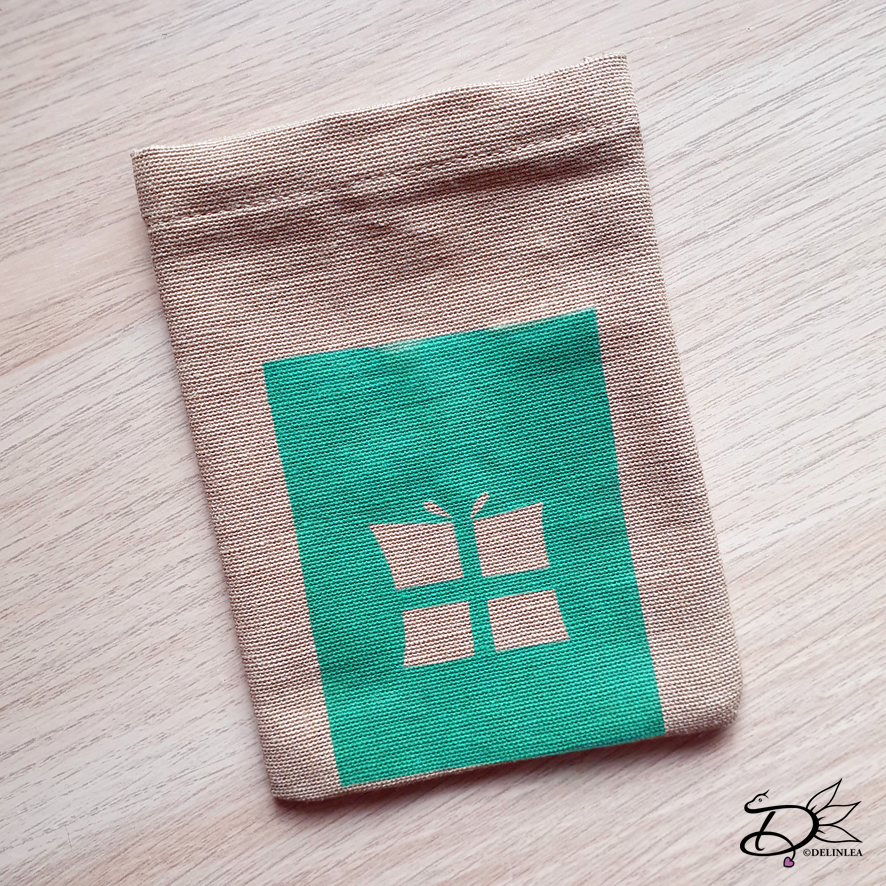
Position
your stencil on your bag and apply the acrylic paint with a brush. I’d prefer
to you a dapping motion, to prevent the paint to go under the stencil. When
done, remove the stencil and let dry!
When you
wanna wash your bags in the future, heat set the paint for about 4-5min with an
Iron. But this is optional.
Finishing
off.
With a piece
of thread/yarn, about 15cm, close up the bag. I wrapped it twice and tied a
knot.
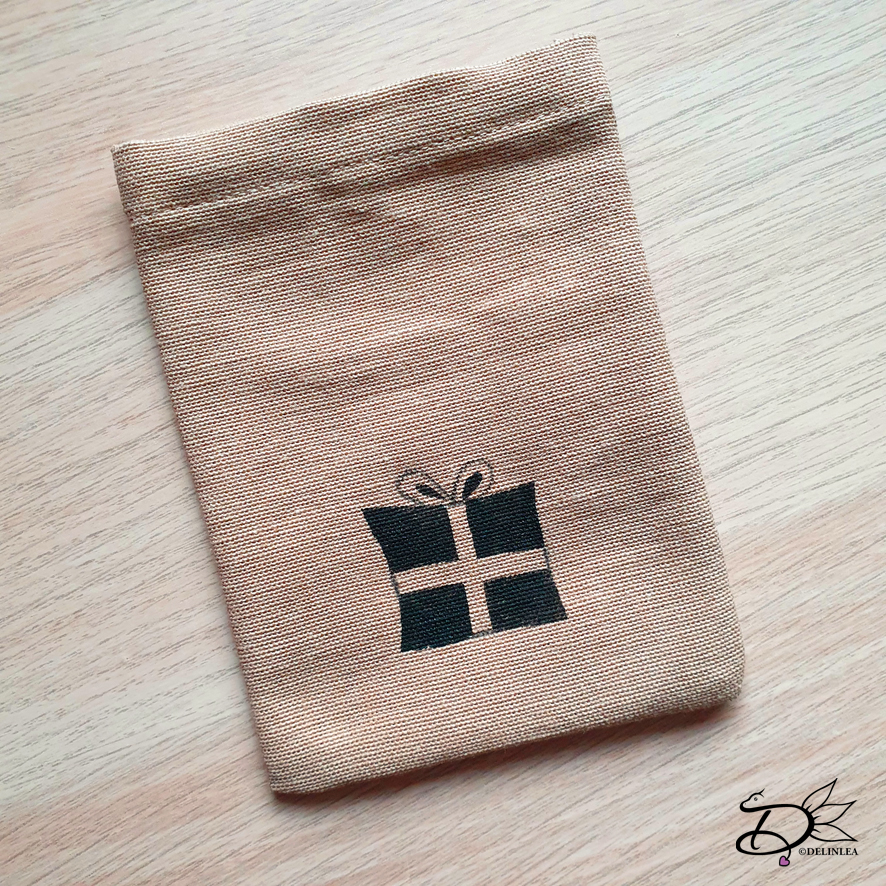
I hope you like those small jute bags, just something cute to decorate your house with, use as gift bags or maybe even make your advent calendar with it. How cute will that look?! Show me what you will do with them! I’d love to see.
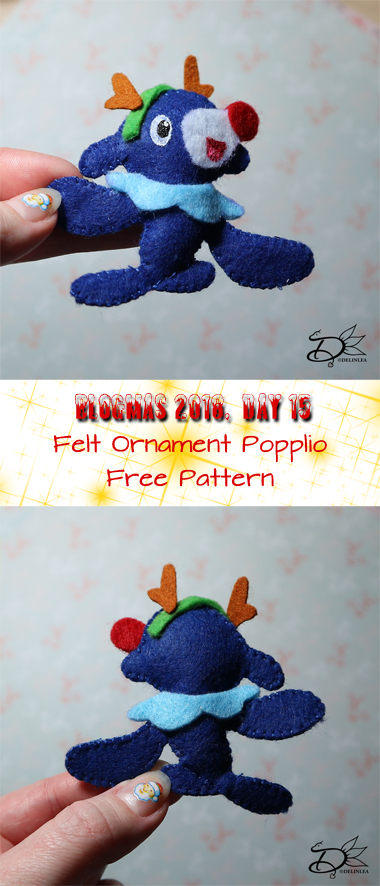
Hey Lovelies! It’s Day 15 of Blogmas, and on this very moment, when this blog get released, I will know who won the ‘HaakSTER’ Competition! I am so nervous! Oh gosh, I have no clue what’s going to happen, I will keep you updated! Anyway, for today I planned another felt ornament! It’s popplio’s turn! He got his cute antlers out!
For this DIY you’ll need: ♥ Felt in the colors Dark Blue, Blue, White,Red, Green and Brown ♥ Sewing thread in matching colors to the felt. ♥ Sewing Needle. ♥ Trick Marker or anything else where you can copy the pattern with onto your felt. ♥ Pattern. ♥ Scissors. ♥ Stuffing. ♥ Fabric Glue. (optional) ♥ Acryllic Paint in white, black and Red(optional)
DIY
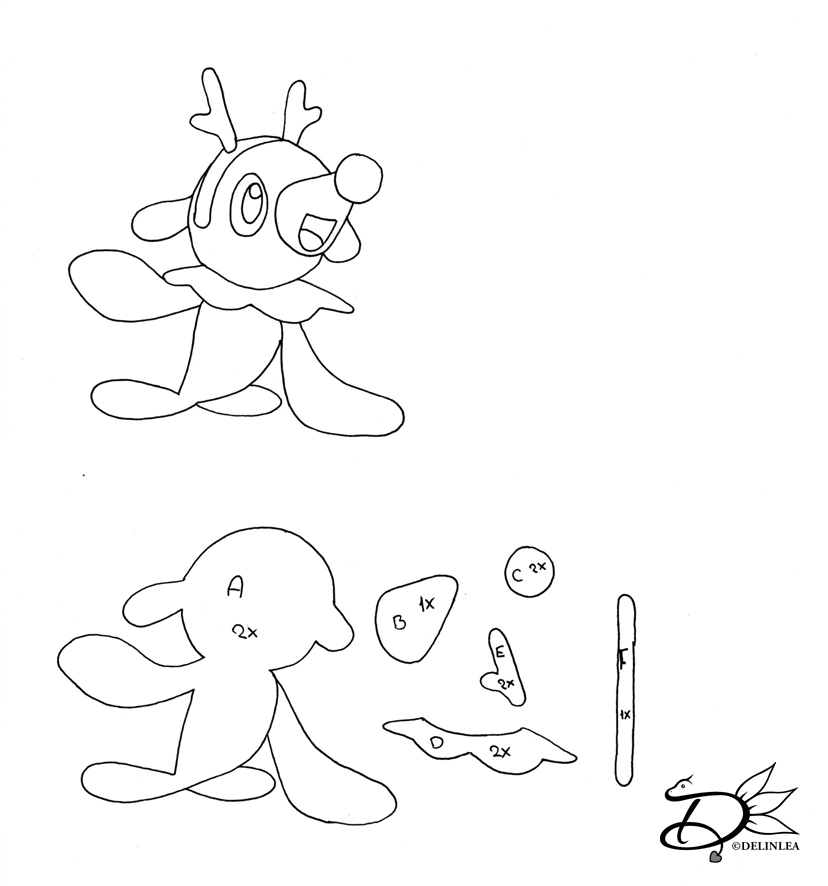
First off all, download the pattern HERE! And print it out (or draw it from your screen). The good thing is, you can make it as big as you want! Then cut out all the pieces. On every piece is stated how many times you need to cut it out of felt.
Copy all part to the felt with a trick marker. Cut part A out of Dark Blue felt, Part B out of White, Part C out of Red, Part D out of Blue felt, Part E out of Brown felt and Part F out of Green felt.
Now sew parts A together with a Blanket stitch. I started by the head, when I finished that part I stuffed it. Continued the body and legs. The flippers you don’t have to stuff, just the body itself. For 2 parts a line is drawn through by the body, this you will stitch with arunning stitch, just to give Popplio a little bit more dimension.
The rest of the parts I glued on. I went for the easy way cause I was in a rush. But you can also choose to sew them on.
For the eyes and mouth, I painted them on, but you can choose to make them out of felt as well. Do what suits best for you!
And that was it! Quick but cute! I hope you like it anyway, and give him some love by making him as well, share it with #DelinleaBlogmas2018DIY or #DelinleaDIY